Operate live
Once setup is ready, staff manages the active list, handles entries, sends notifications, and recovers mistakes in real time.
The live Waitlist app is where staff manages people during daily operations. This guide covers signing in, the live list, entry states, notifications, the Status Screen, kiosk mode, and remote self check-in.
1. Before daily use
Before staff can use the Waitlist app, a location manager must configure the location in Dashboard: active service plan with billing, at least one guestlist with one active area, hours of operation, transmitters if using pagers, and the Form Designer fields. The Waitlist app reads that configuration in real time — changes in Dashboard take effect immediately.
Accounts, billing, locations, users, guestlists, areas, forms, hours, SMS, transmitters, and staff pager profiles are all configured before live operation.
Once setup is ready, staff manages the active list, handles entries, sends notifications, and recovers mistakes in real time.
Approved integrations can create or update waitlist entries through the API. Staff handles the resulting entries in the same live workspace.
2. Sign in
Staff sign in to the Waitlist app with the email and password registered for them in Dashboard. This sign-in is separate from Dashboard and is designed for shared devices that stay at the location.
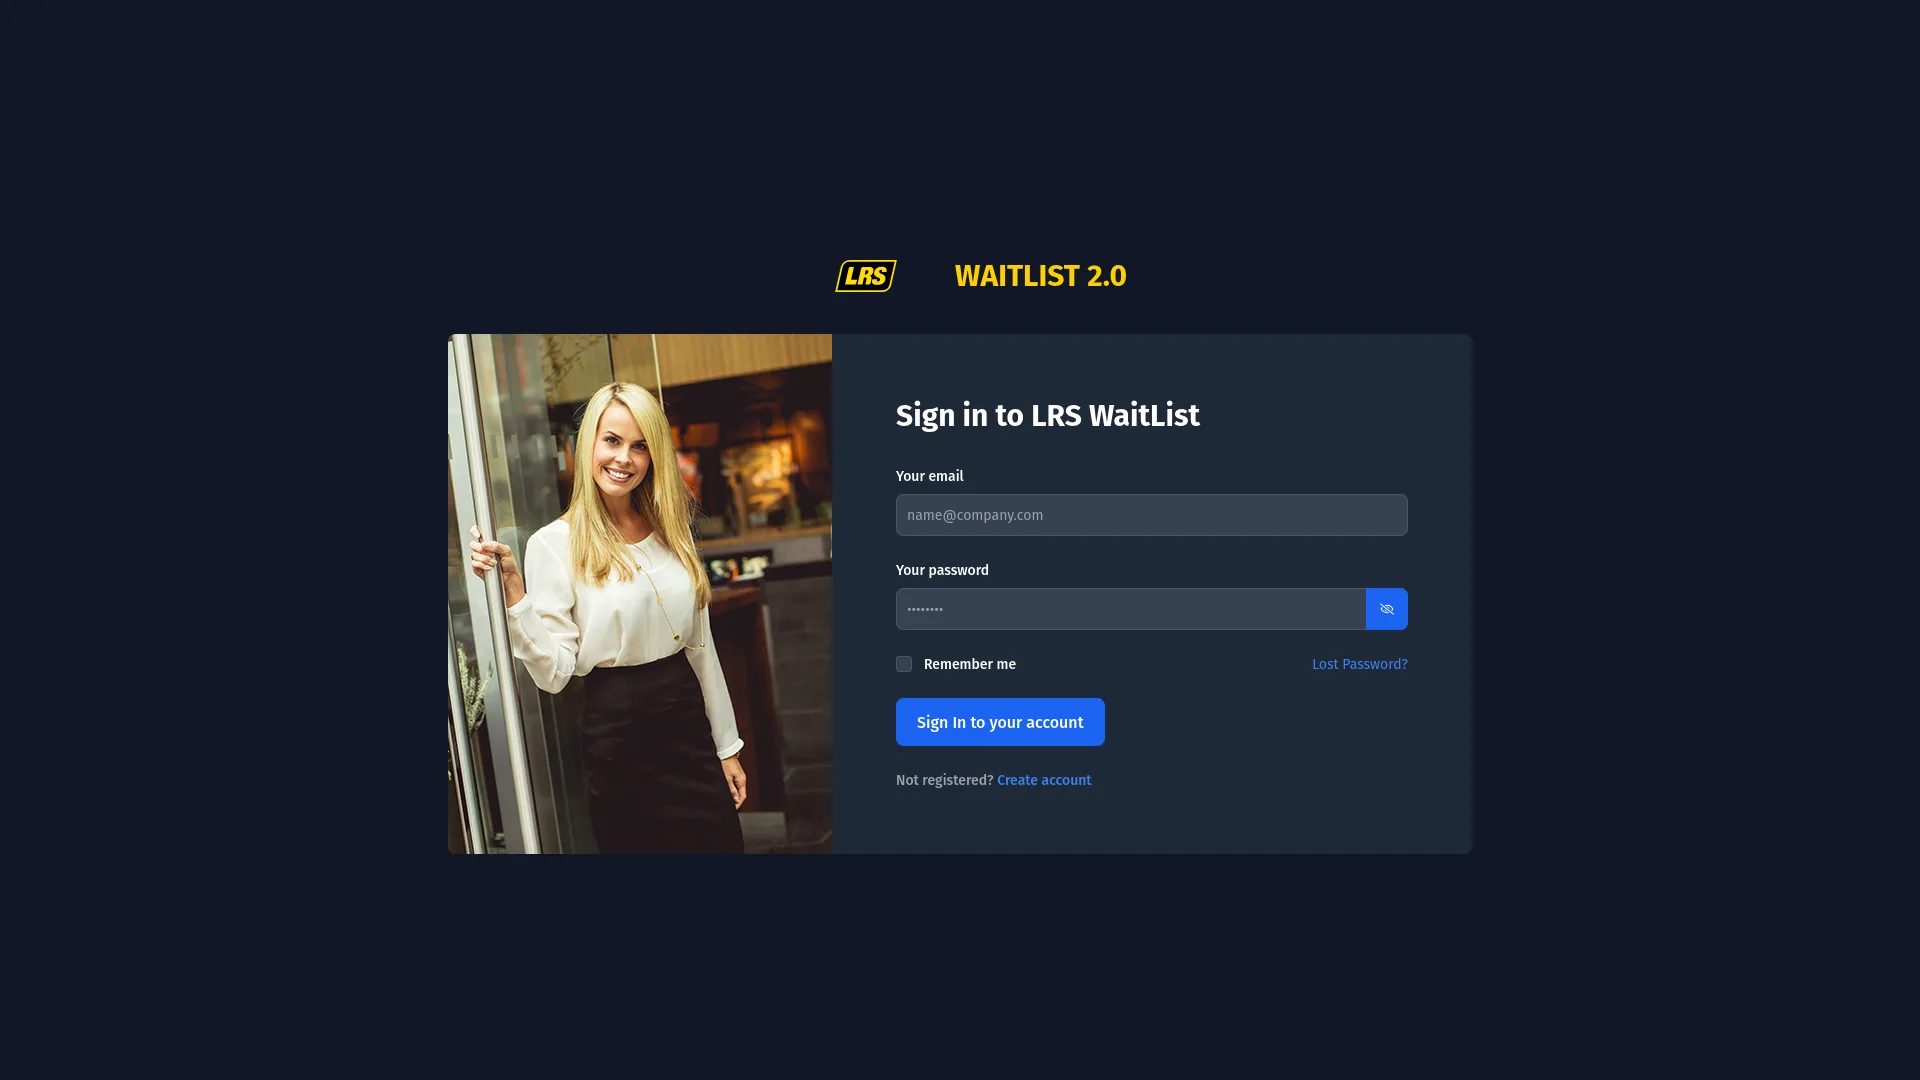
The Lost Password link sends a reset email to the address on file — useful when a team member forgets their password mid-shift. The Waitlist screen lock (configured on the location's Profile tab in Dashboard) is a lighter alternative to signing out: it locks the screen after a configurable idle period and requires only the lock password to resume, without a full sign-in cycle.
3. Entry methods
There are three ways an entry can appear on the live list. Staff walk-ins are added directly by a team member. Kiosk entries and remote self check-ins arrive as Pending and require staff to send a wait time before the guest is fully checked in.
| Entry method | What happens |
|---|---|
| Staff walk-in | Staff selects the location, waitlist, and area, fills the staff-visible form, and saves. The entry appears immediately as active and Waiting. |
| Kiosk | Staff launches kiosk from the Dashboard guestlist page. Visitors fill the on-site kiosk form. The entry appears as Pending until staff sends an estimated wait time. |
| Remote self check-in | The visitor follows the remote check-in link, fills the form on their device, and submits. The entry appears as Pending until staff sends an estimated wait time. |
| Entry method | Required setup |
|---|---|
| Staff walk-in | Active location, active guestlist, at least one active area, and at least one field visible in the staff add/edit form. |
| Kiosk | Kiosk Area selected in Dashboard, kiosk launched from the Dashboard guestlist page (not directly from a URL), kiosk-visible fields on the form, and operation hours currently open. |
| Remote self check-in | Self Check-in Area selected in Dashboard, Remote Check-in hours enabled for today and currently open, remote-visible fields on the form, and an SMS plan (to send the wait time link after check-in). |
4. Daily operation
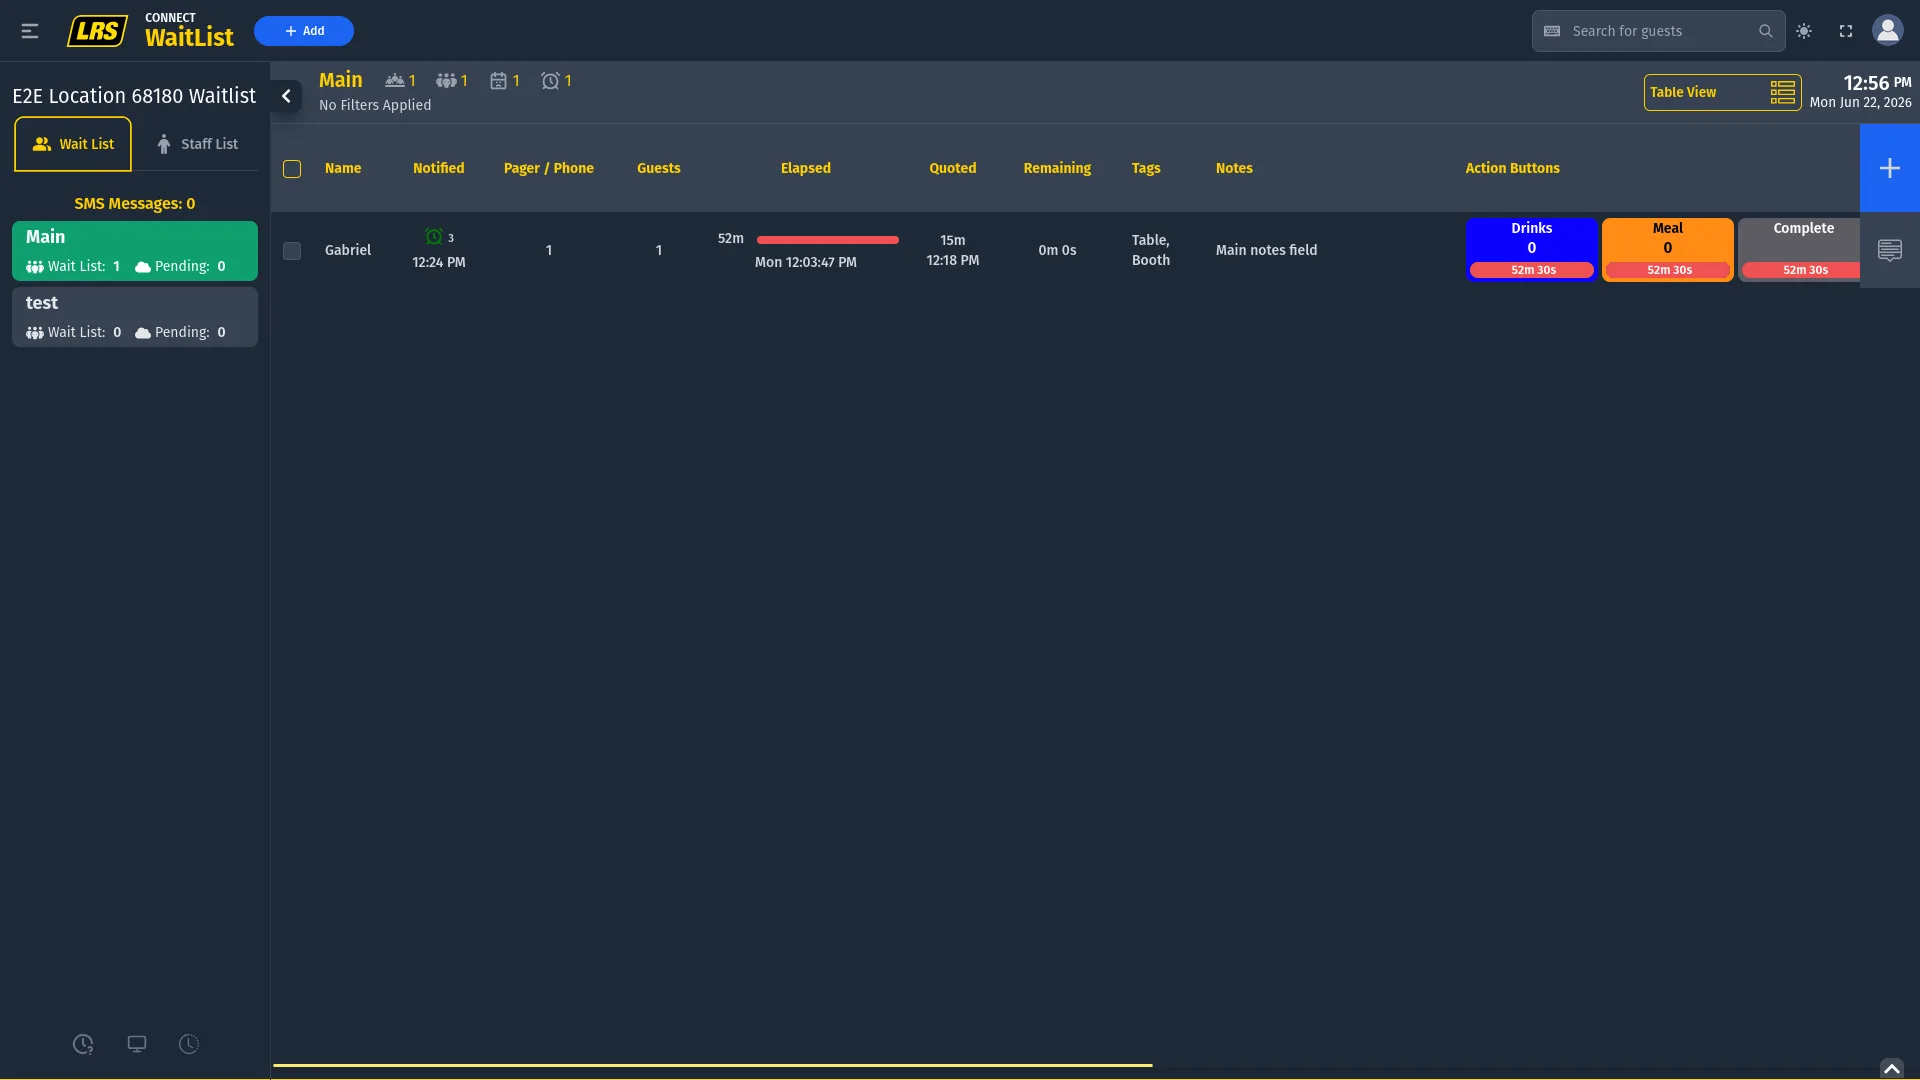
The Wait List tab is the default view when the app opens. The left sidebar shows the selected location, all available areas with their live entry counts, the SMS Messages counter, and two display shortcuts at the bottom. The main panel shows the active entries for the selected area.
The sidebar appears on the left of every screen in the Waitlist app and is the primary navigation surface during daily operation. The table below describes each element visible in the sidebar when a waitlist is active.
| Sidebar element | What it shows |
|---|---|
| Location name | Shown at the top of the sidebar. Confirms which location is active. Click the collapse arrow to hide the sidebar and expand the list. |
| Area rows | Each waitlist area appears as a row. The selected area is highlighted in green. Clicking another row switches the active list. |
| Wait List: N | Total count of all entries currently in that area across all states — Waiting, Pending, Notified, Received Wait Time, and Restored. |
| Pending: N | Count of entries that arrived via kiosk or remote check-in and have not yet received an estimated wait time. |
| SMS Messages: N | Running total of SMS messages sent from this location today. |
| Status Screen icon (monitor) | Left icon at the bottom of the sidebar. Opens the display-only Status Screen. |
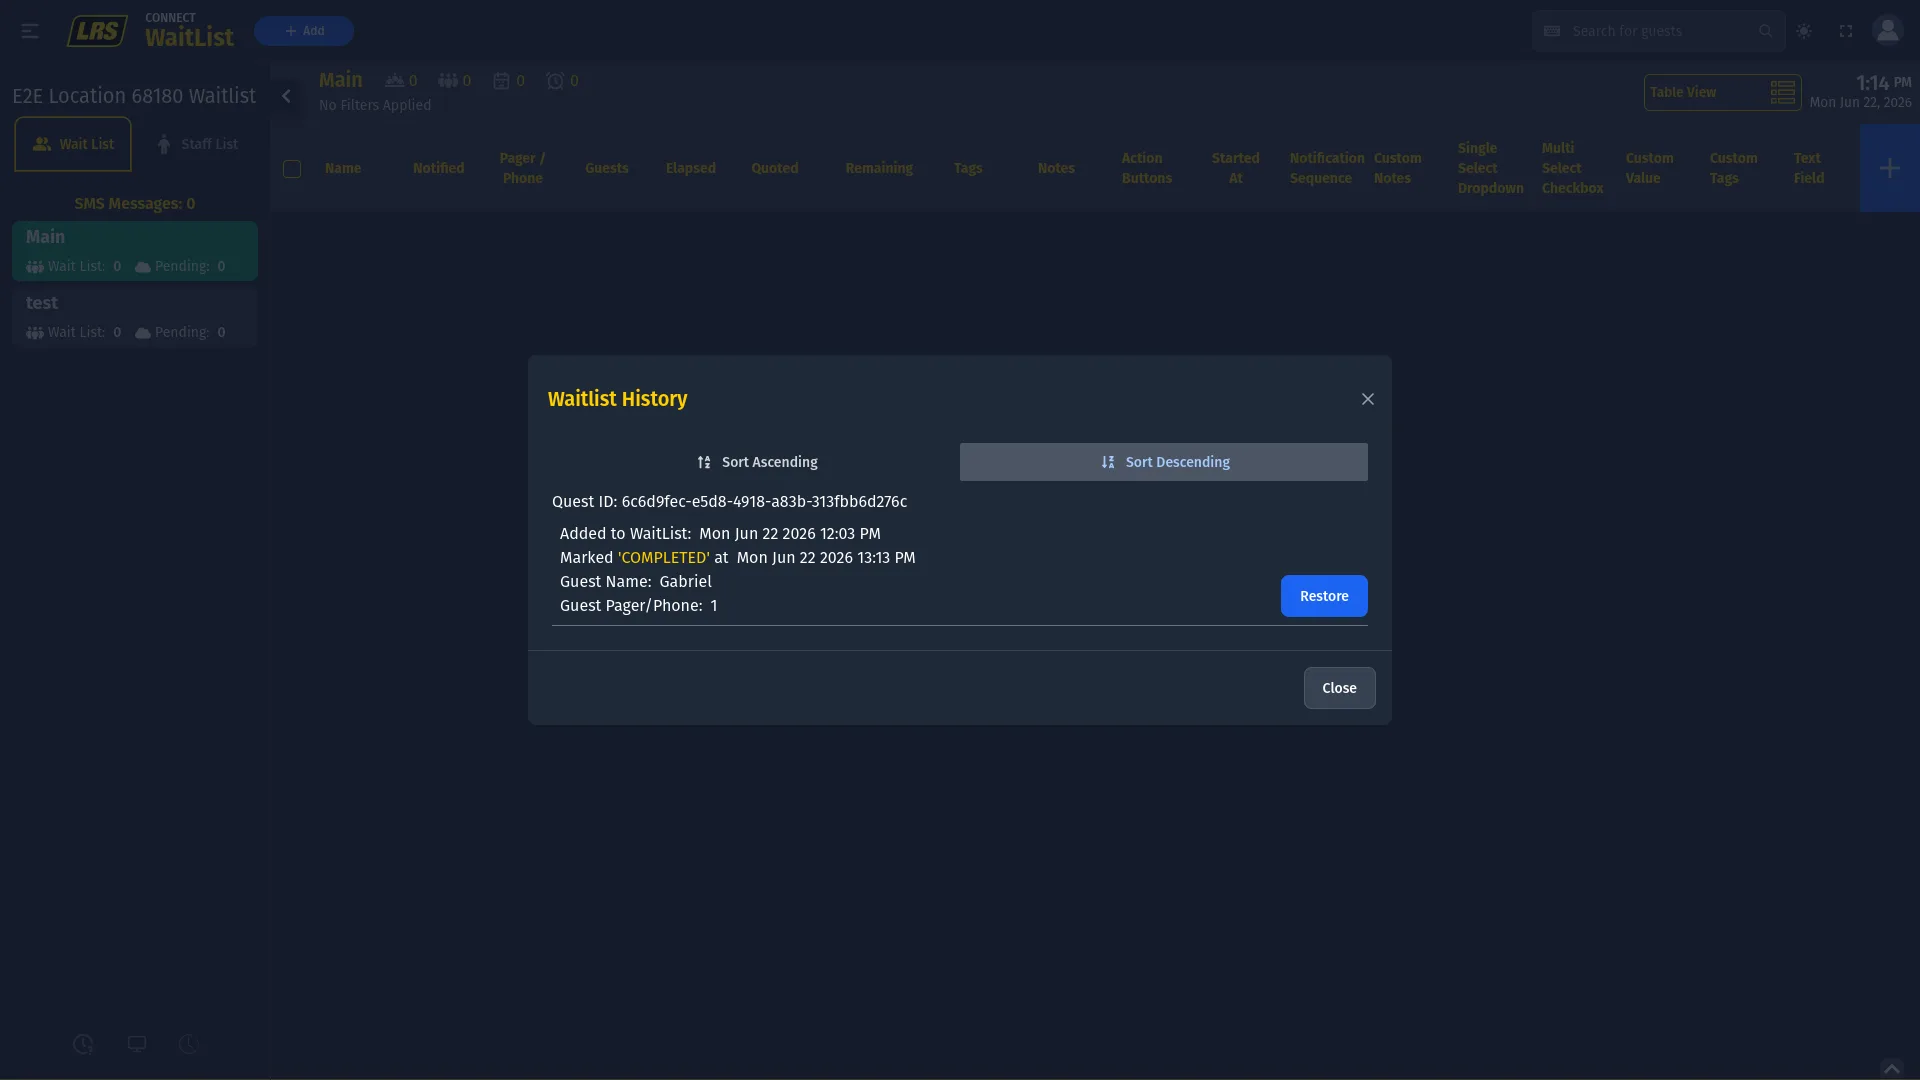
| History icon (clock) | Right icon at the bottom of the sidebar. Opens the Waitlist History modal showing entries from the last 24 hours. |
The top bar of the live list gives staff fast access to the most common actions — adding entries, searching, filtering, and switching views. The controls below are available at all times while an area is selected.
| Control | How to use it |
|---|---|
| + Add | Opens the Add Guest modal for the currently selected area. |
| Search | Full-text search across entry names, contact values, tags, selected dropdown options, and action button labels. |
| Filter icons (header) | Four preset filter icons sit in the list header, each showing a live count for that category. Clicking an icon toggles that filter on or off. Multiple icon filters can be active at once and combine with funnel panel filters and column sorts. Active filters appear as dismissible badges in the area header bar. |
| Table view | The default and most information-dense view. Required when Action Buttons are active. The view selector in the top right switches between Table, Card, and Mini Card. |
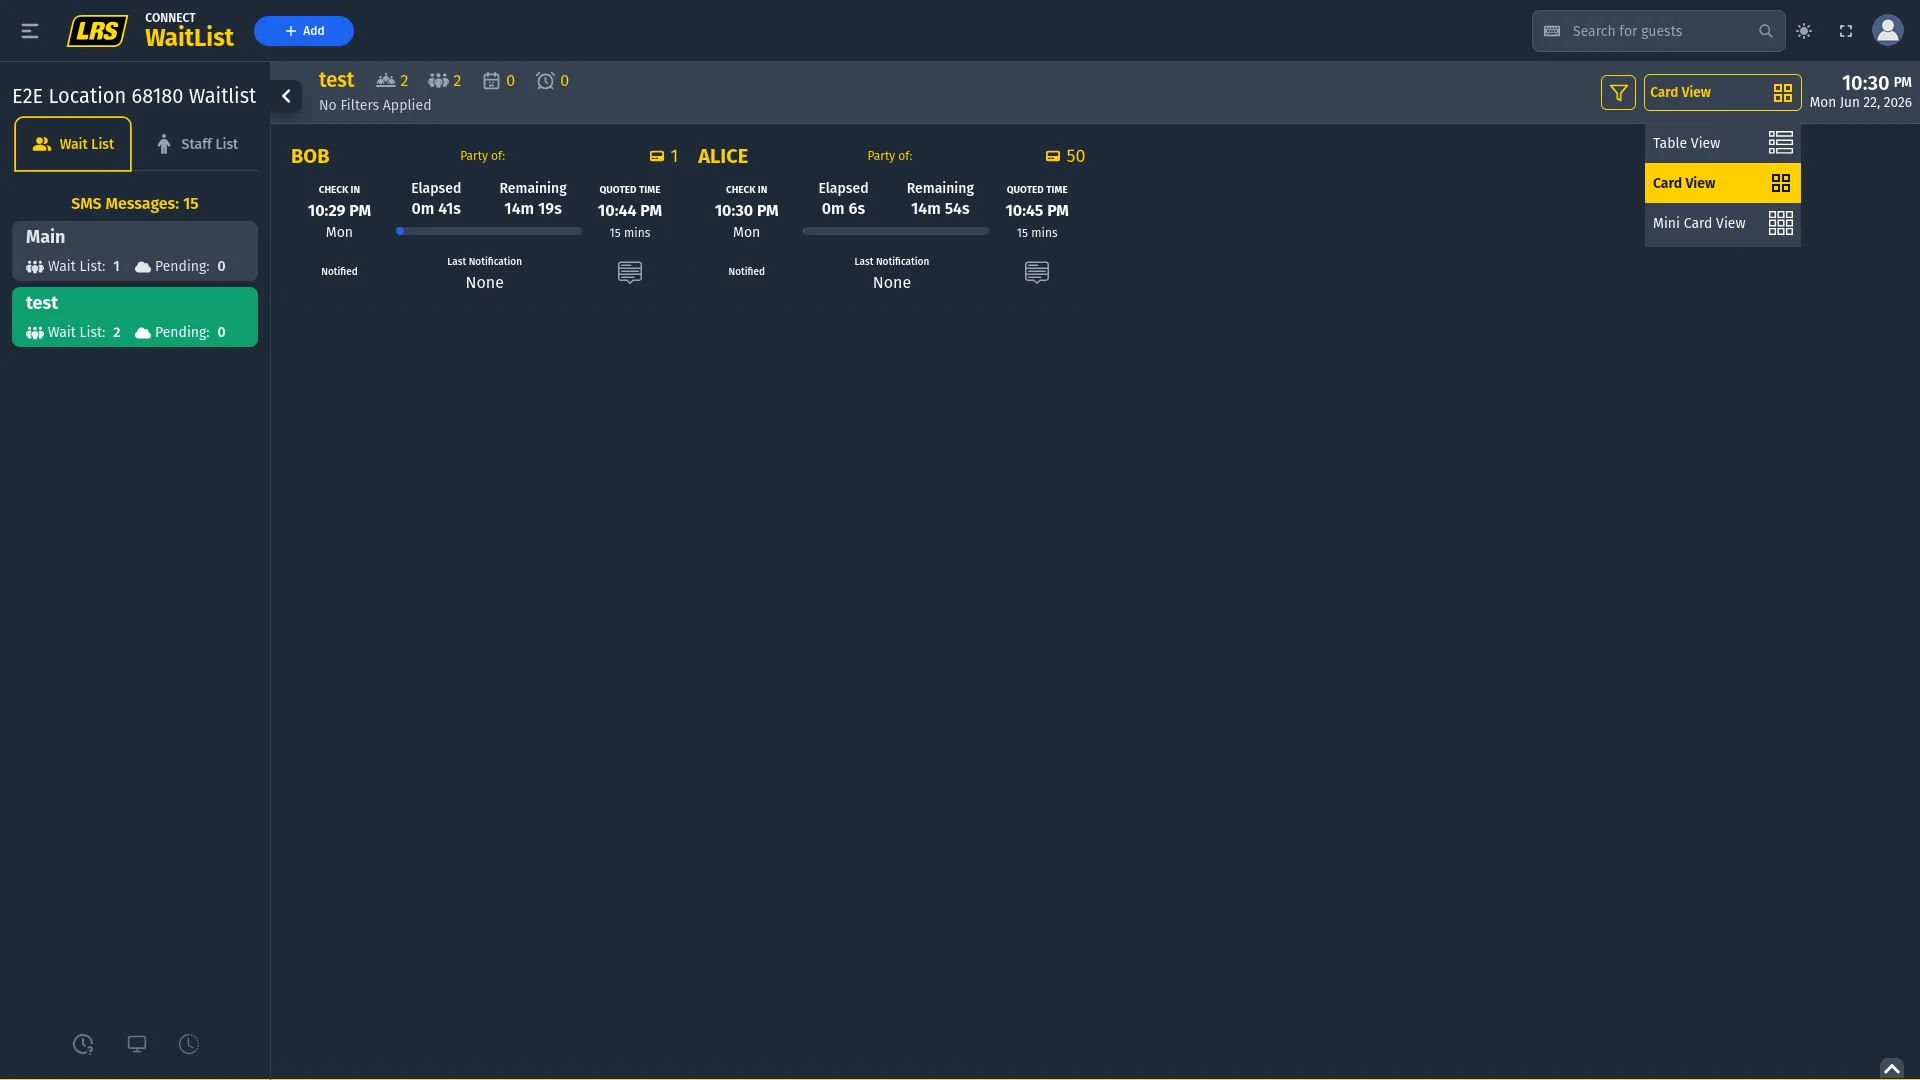
| Card / Mini Card views | Available on areas without active Action Buttons. Each entry becomes a card with larger touch targets. Mini Card is more compact for high-volume lists. Both show the same timing fields; neither shows Action Button timers. |
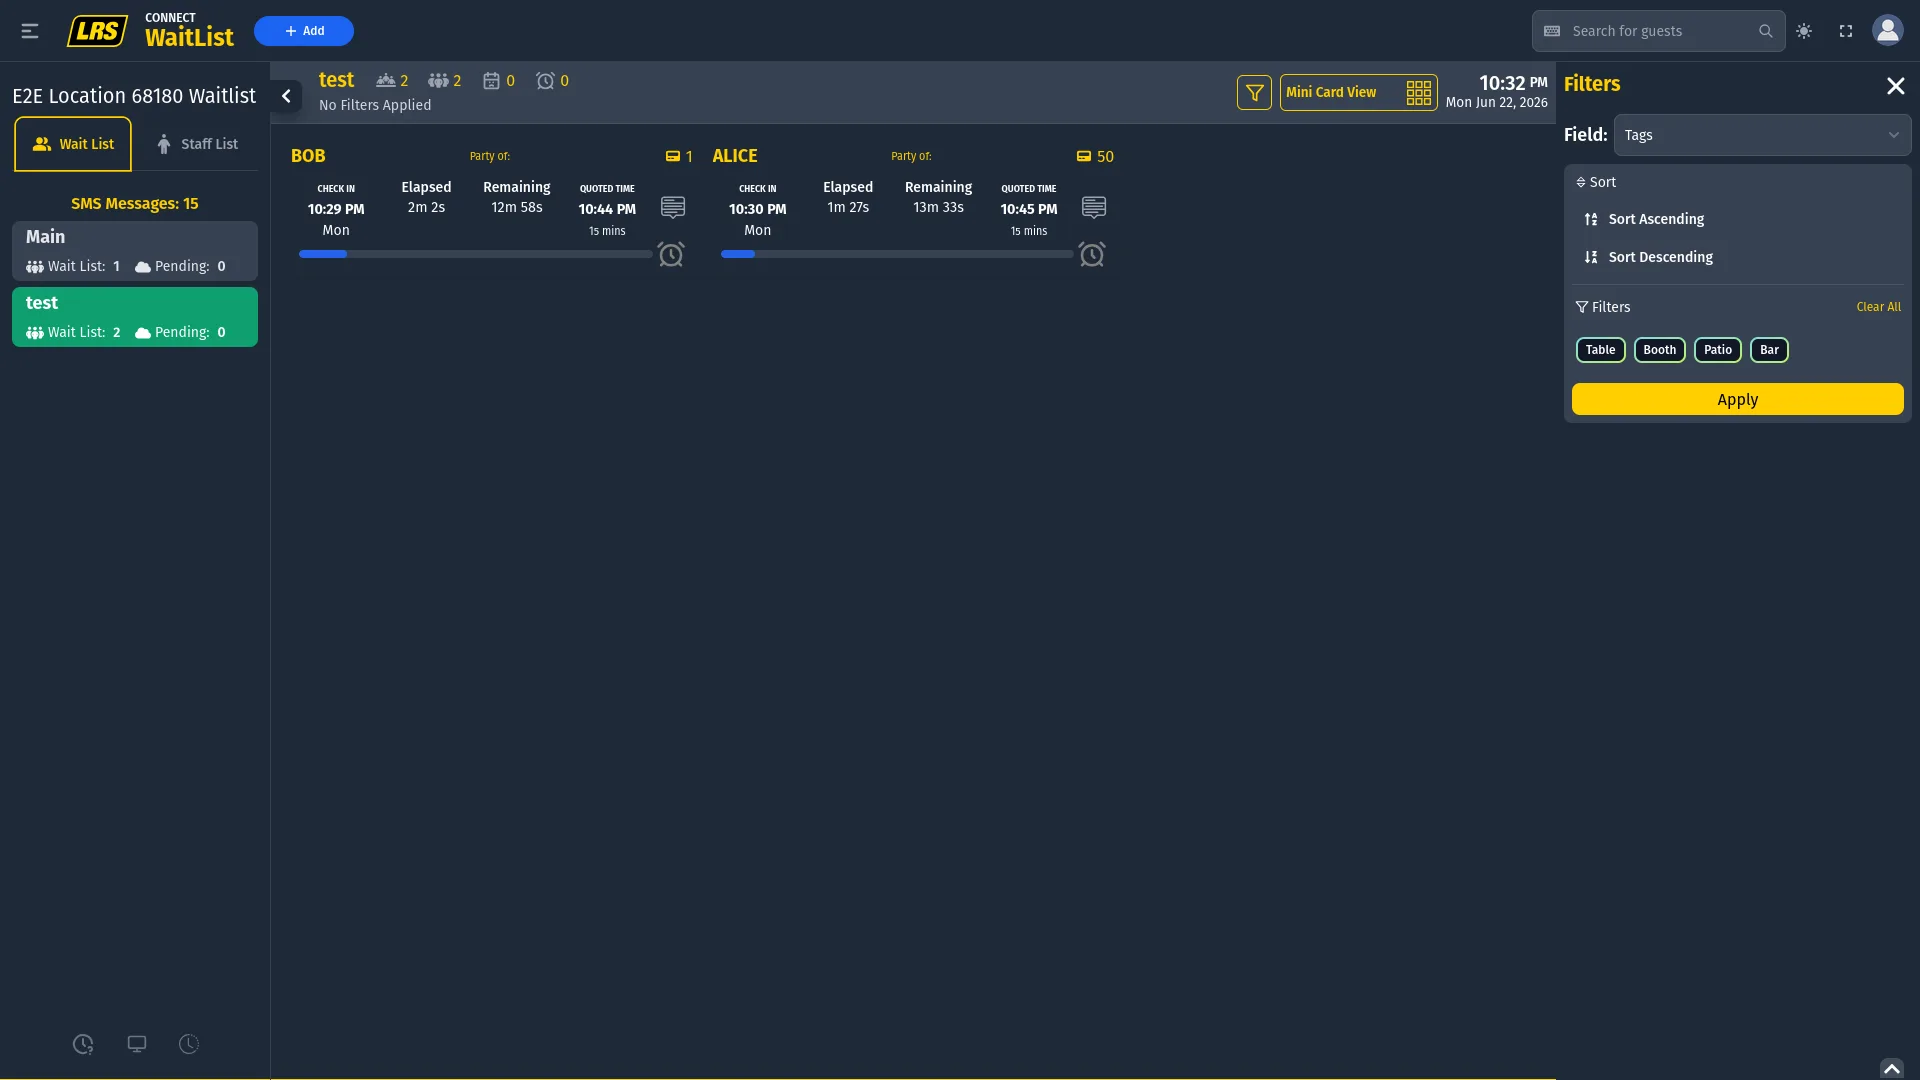
| Funnel (filter icon) | Available in Card View and Mini Card View only. Opens the Filters panel on the right side. Select a field, choose values to match, set sort direction, and tap Apply. Active filters show as dismissible badges in the area header. |
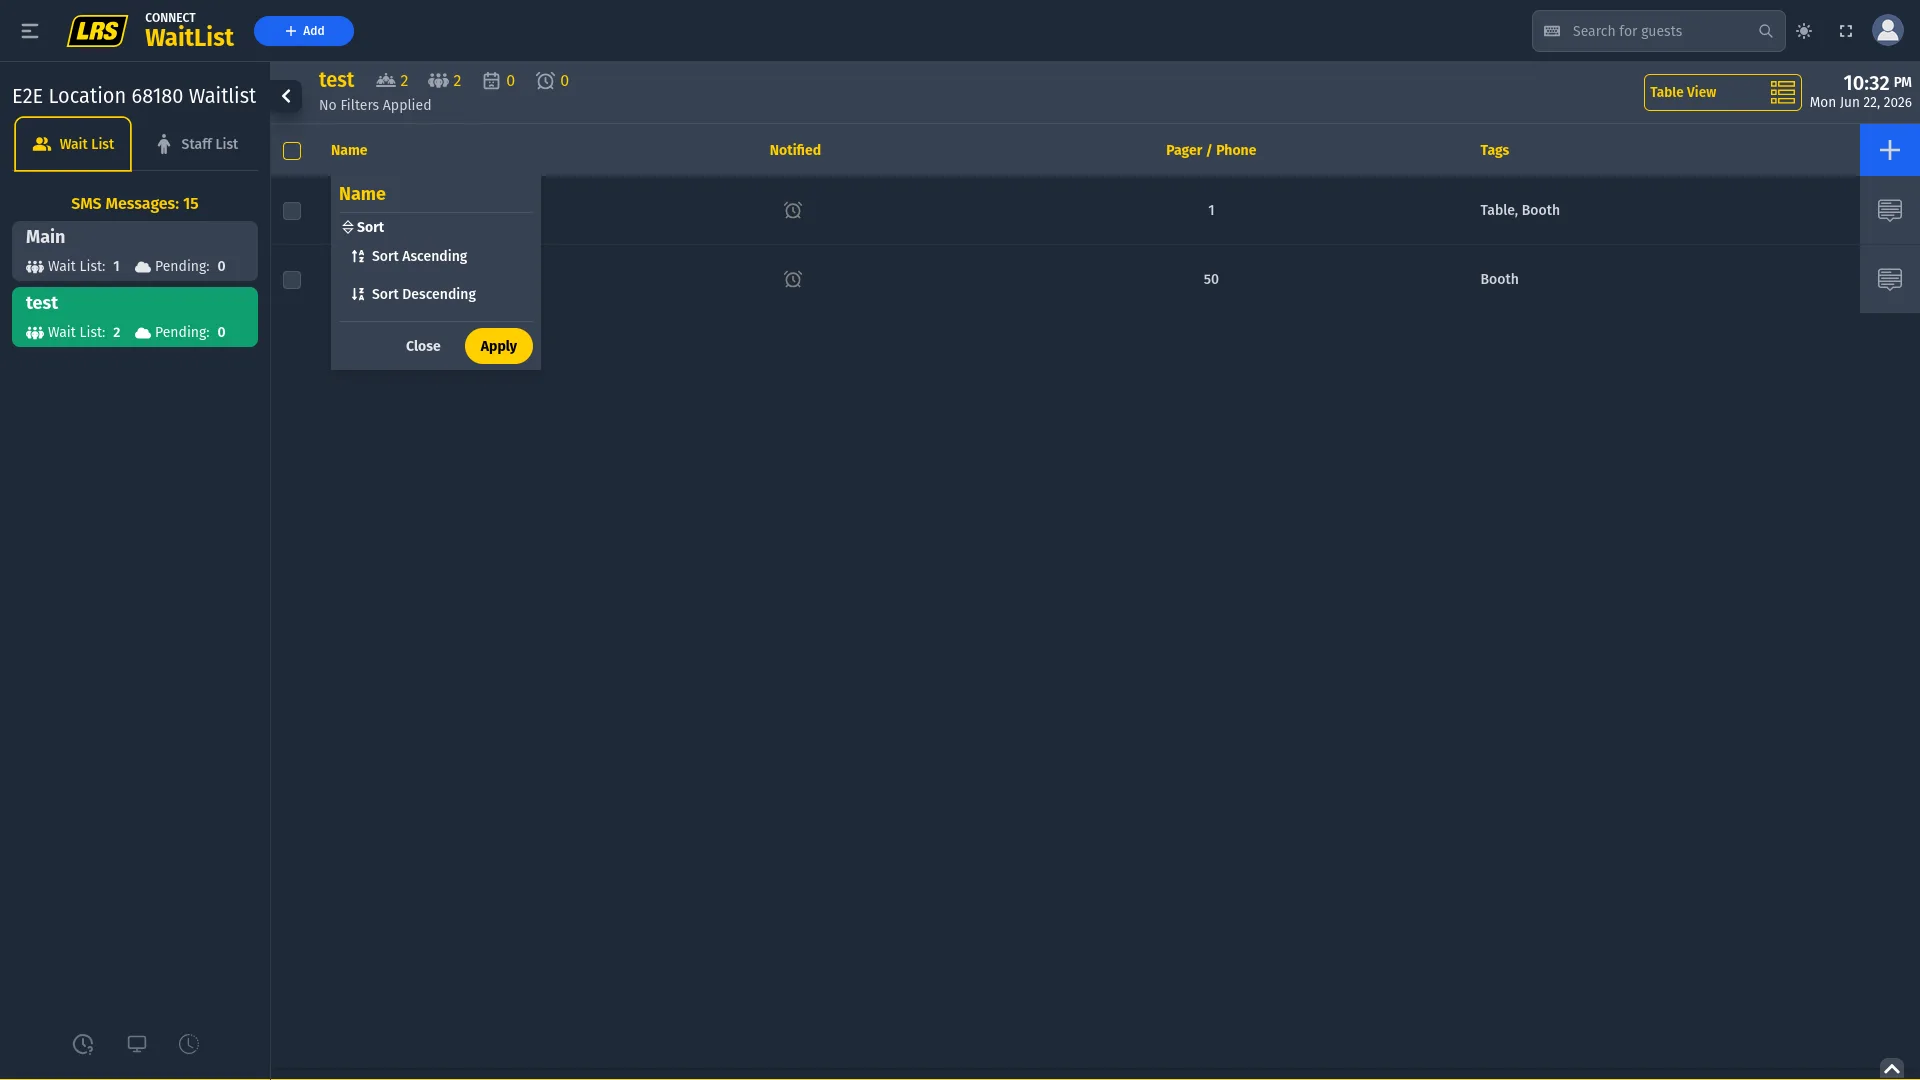
| Column sort/filter | Available in Table View only. Click any column header to open a per-column popup. All columns offer sort ascending/descending. Columns with discrete values also show filterable chips — for example, the Notified column shows Notified, Not Notified, and Notified More Than Twice. |
| Active filter bar | When sort or filter constraints are active, a summary bar appears below the area name. Each constraint has its own CLEAR link so individual filters can be removed without resetting everything. |
| Action panel | Click any entry row to open the action panel on the right. The available actions change depending on the entry's current state. |
| Drag to move | Drag an entry row to a different area in the left sidebar to move it without opening the action panel. |
The view selector in the top right switches between Table View, Card View, and Mini Card View. Table View is required when the area has active Action Buttons — it is the only layout that shows the countdown timers and the Complete button. Card View and Mini Card View are available on all other areas and give each entry more visual breathing room.
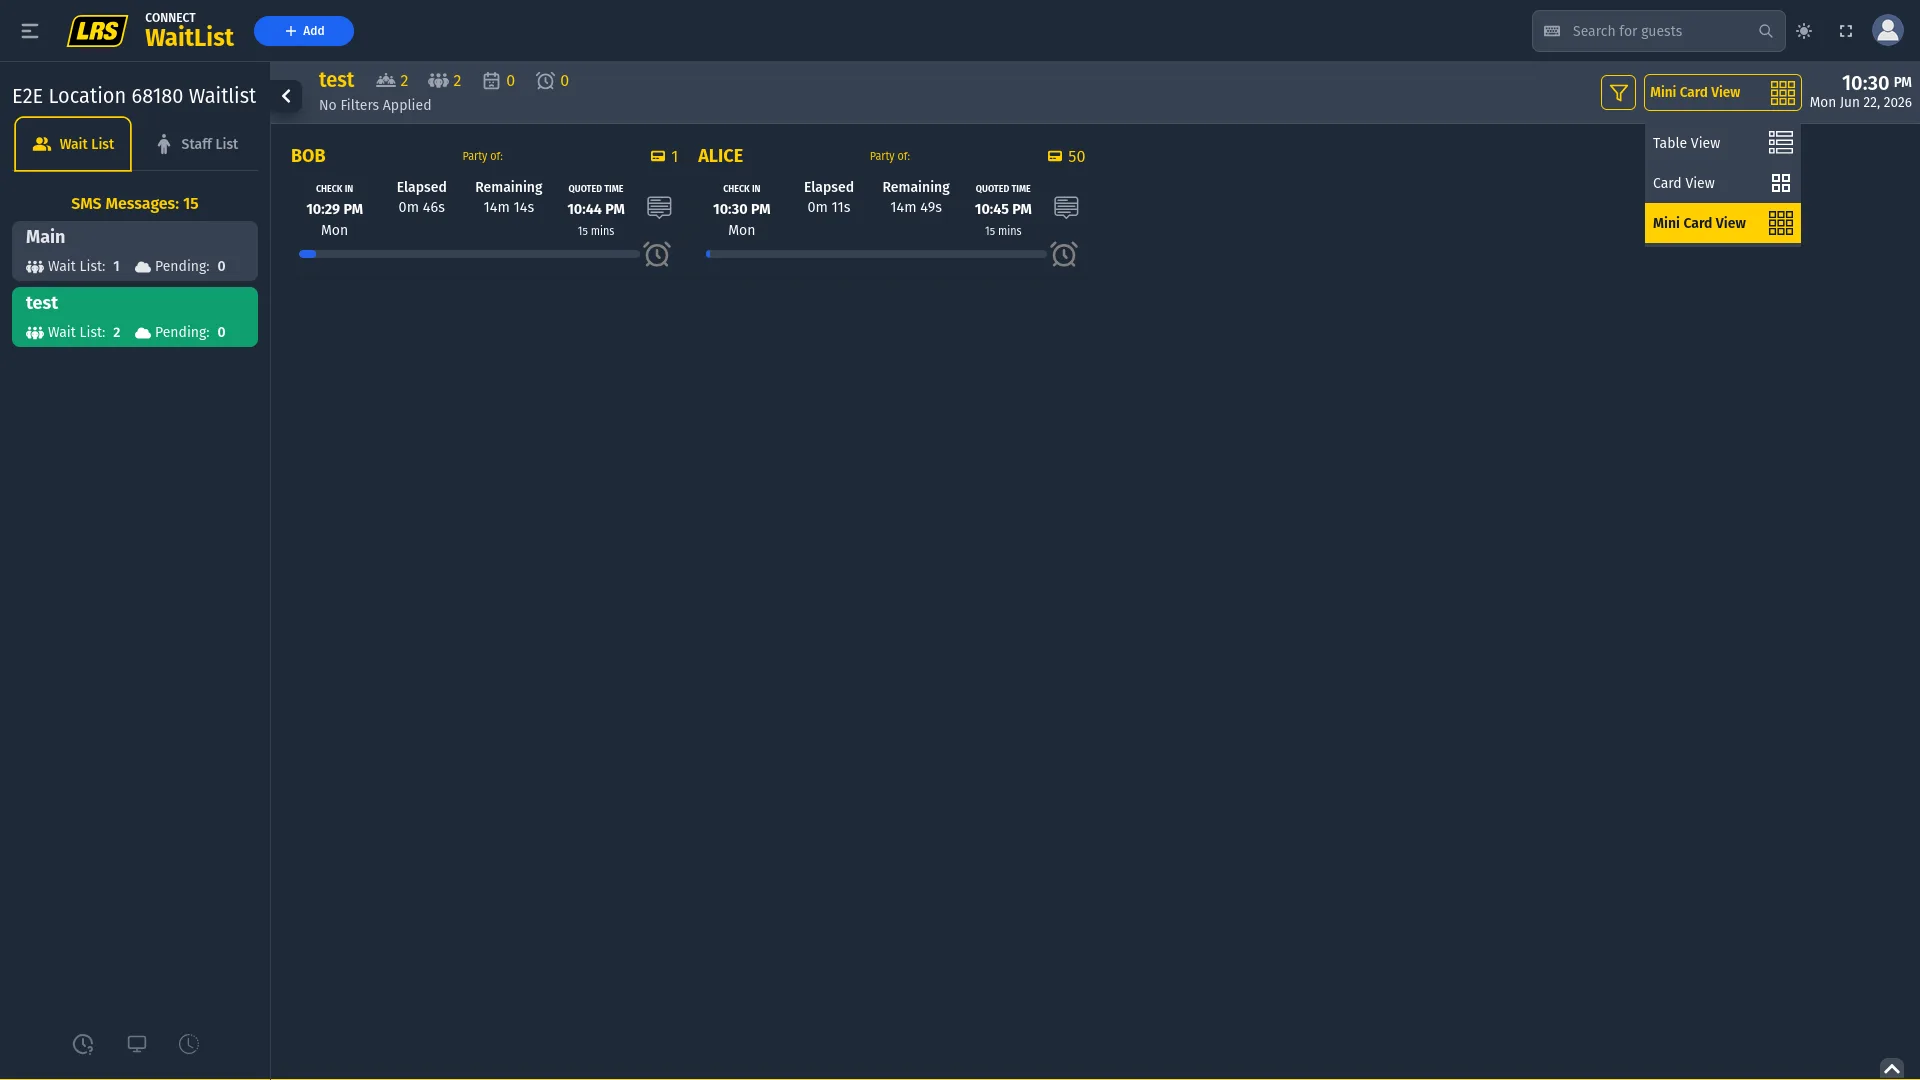
There are two ways to narrow the live list, and each is available in a different view. In Card View and Mini Card View, the funnel icon opens the Filters panel — a field-aware sidebar that lets staff pick a field, select matching values as chips, and apply a sort direction all at once. In Table View, clicking any column header opens a per-column popup with sort options; columns with discrete values also show filterable chips specific to that column.
When any sort or filter is active, the area header shows a summary bar with one badge per active constraint and a CLEAR link for each. Removing a constraint updates the list immediately without affecting any other active filters.

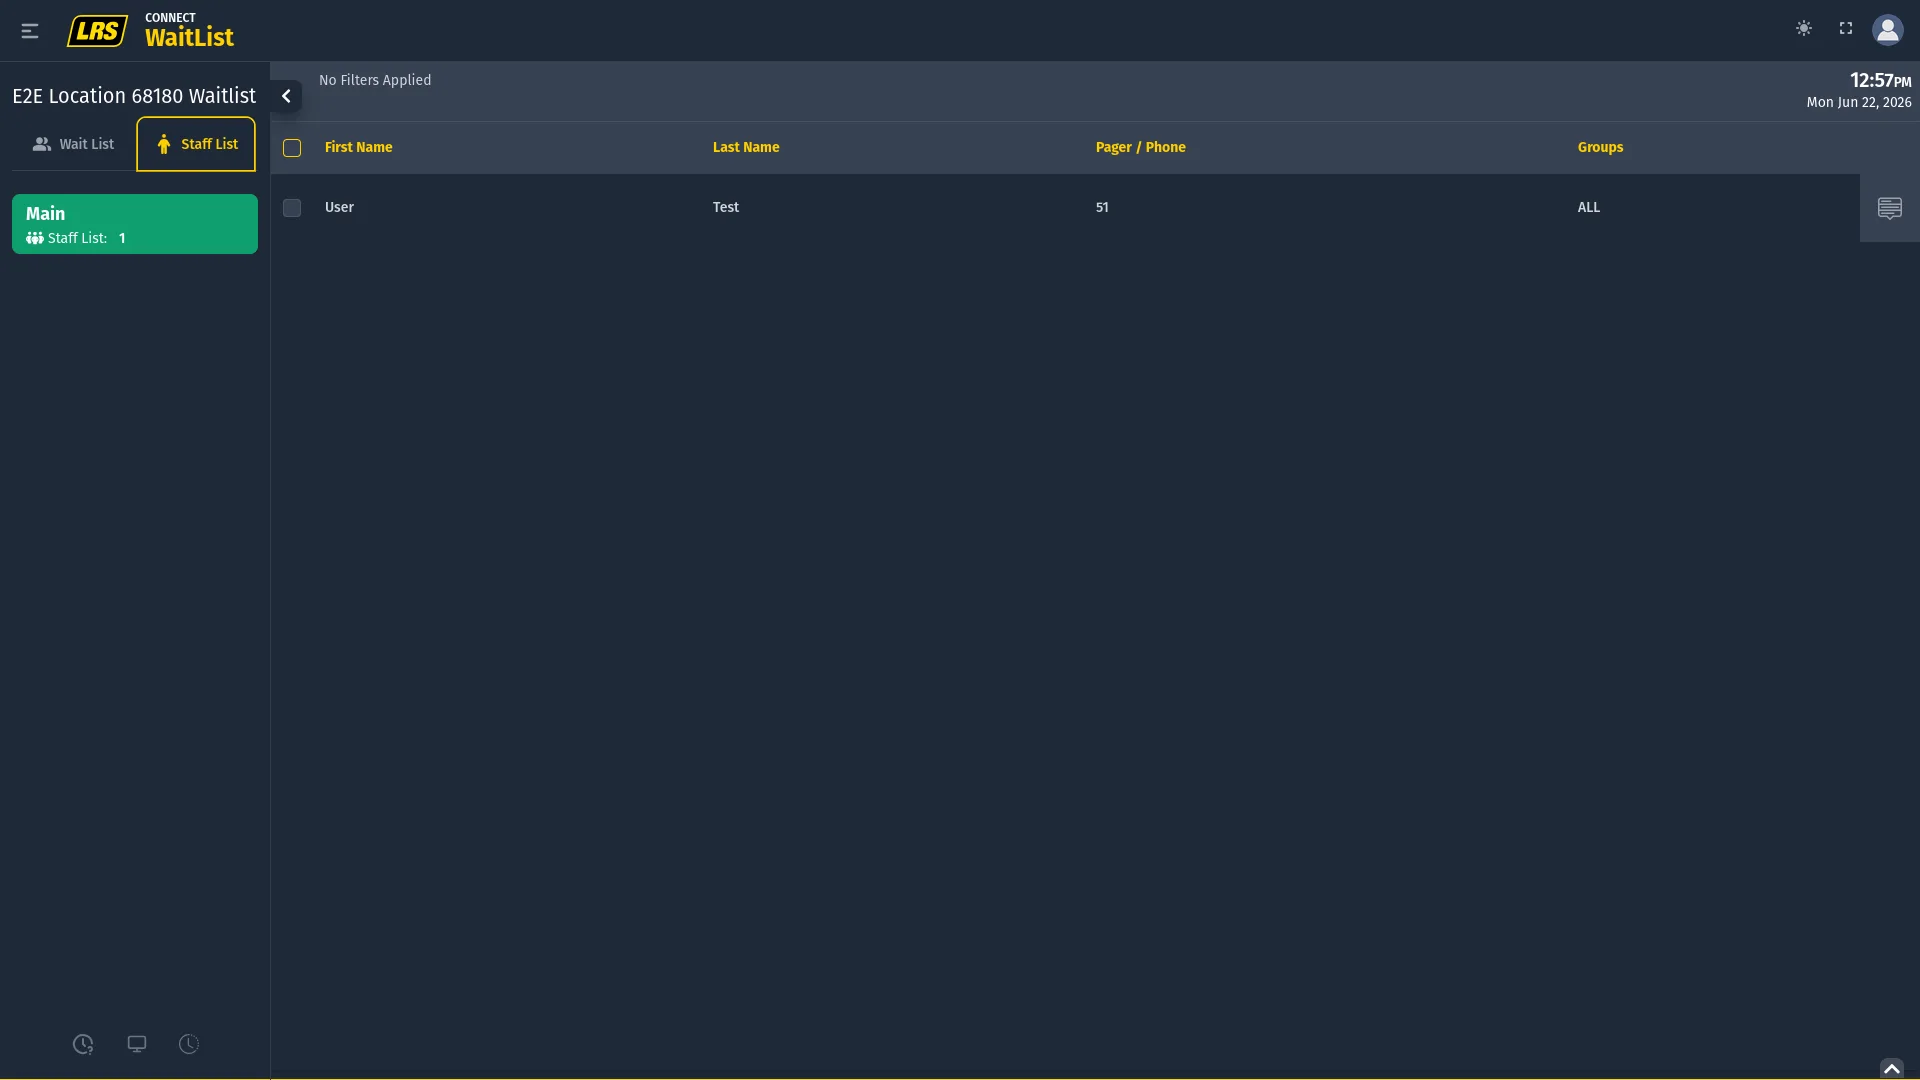
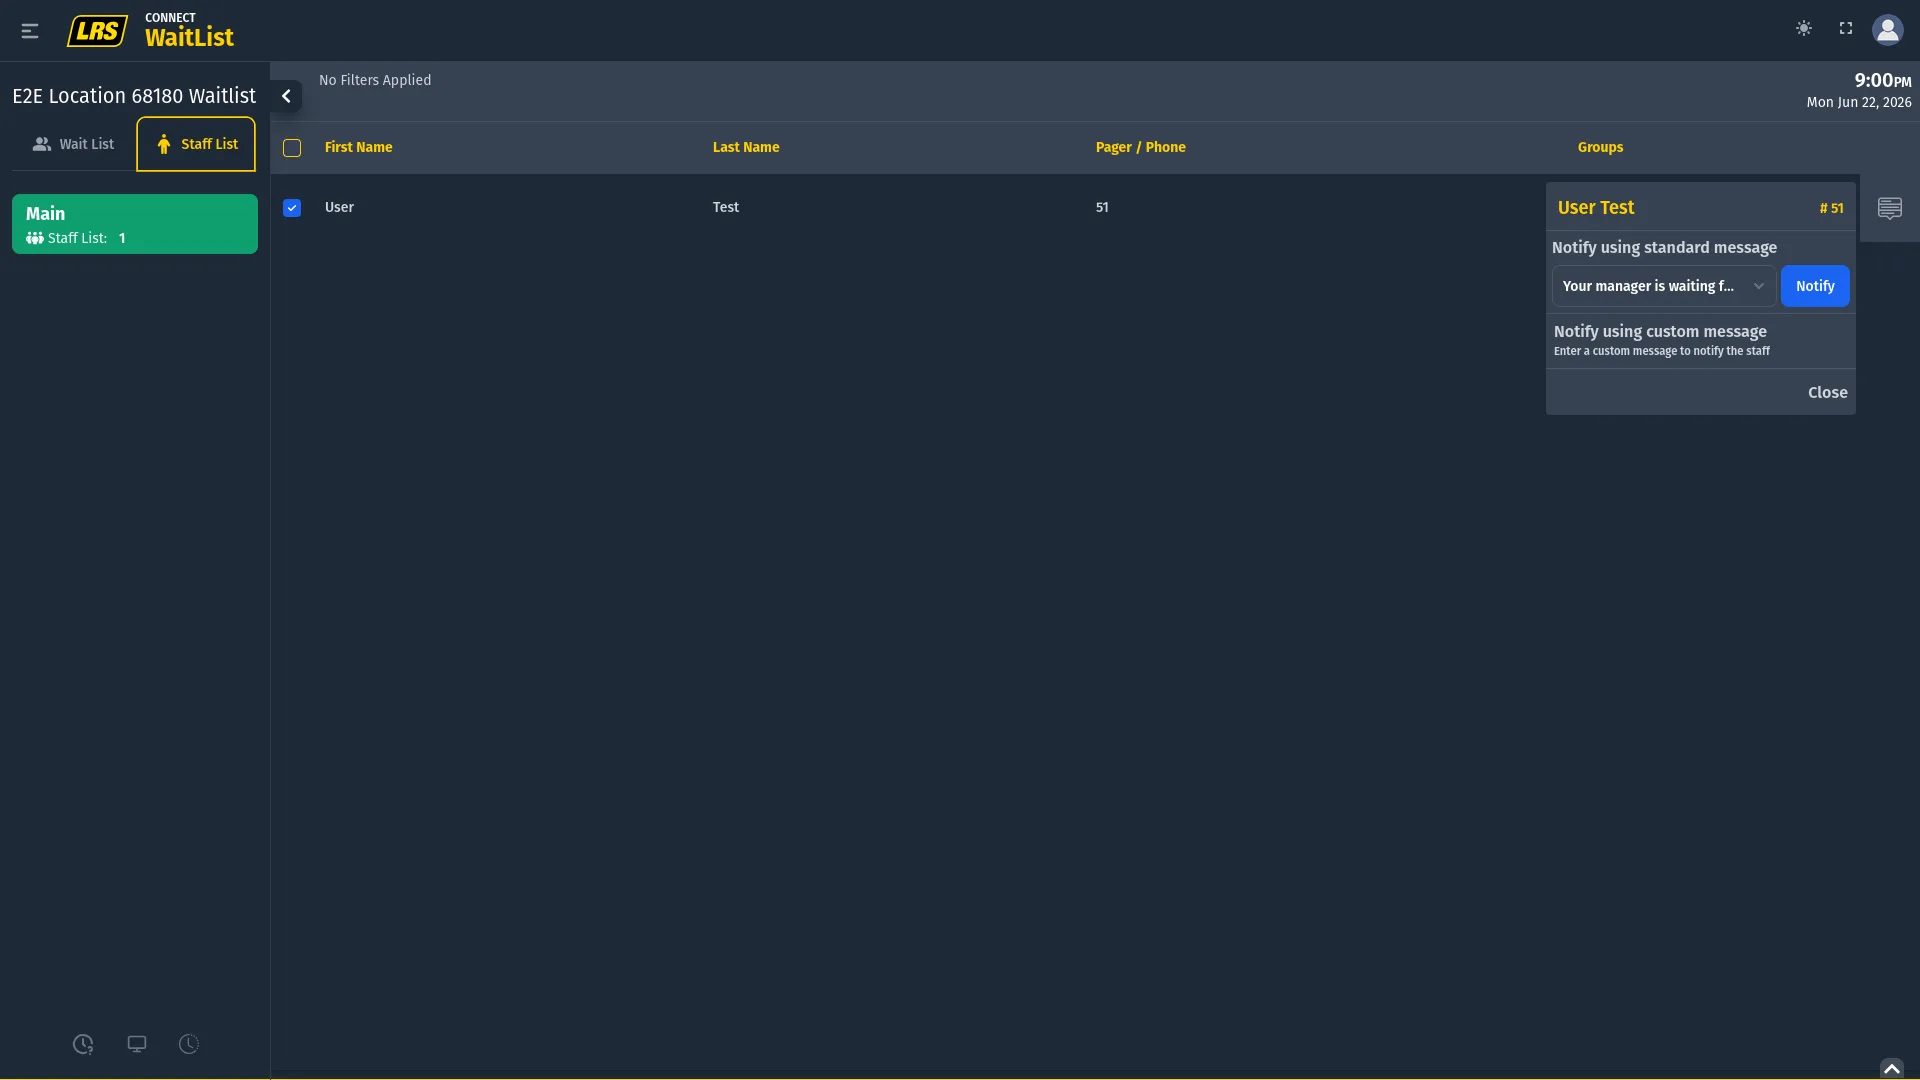
Switching to the Staff List tab shows the pager profiles registered for this location in Dashboard. These profiles are separate from Dashboard login accounts — they represent the physical pager devices team members carry and the groups they belong to. Groups control who receives Notification Tasks alerts: a task targeting the "Manager" group only notifies staff members assigned to that group.
To notify multiple staff at once, check the boxes next to their rows and tap the Notify option that appears. The bulk composer shows a character counter, an SMS count, and the full recipient list before sending.
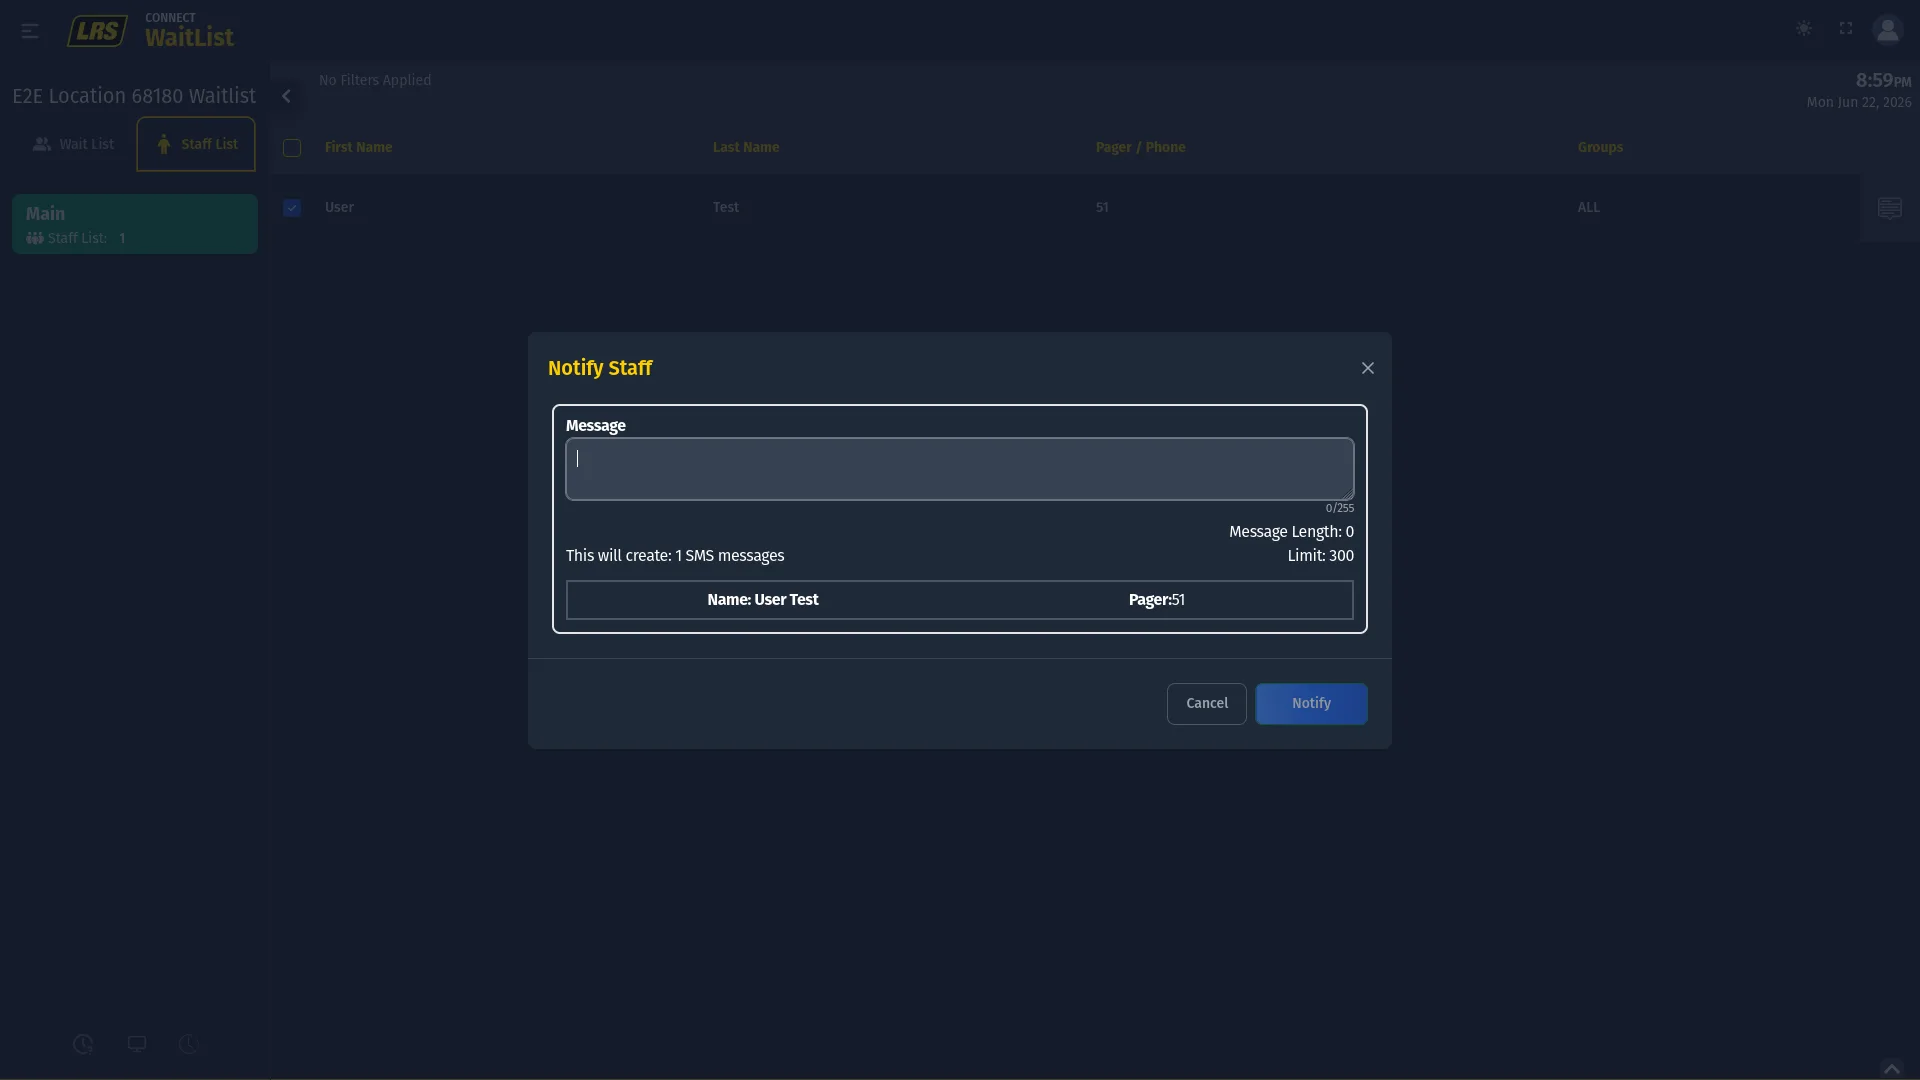
Clicking directly on a staff row opens a quick individual notification panel. The standard message dropdown shows saved templates from Dashboard. The custom message option below it is always available for a one-off message, regardless of the area's notification settings.
5. Waitlist entries
Every entry goes through the same set of operations — add, edit, move, complete, remove, and restore. The action panel is the access point for all of them: clicking an entry row opens it on the right, and the available options change based on the entry's current state.
| Action | How it works |
|---|---|
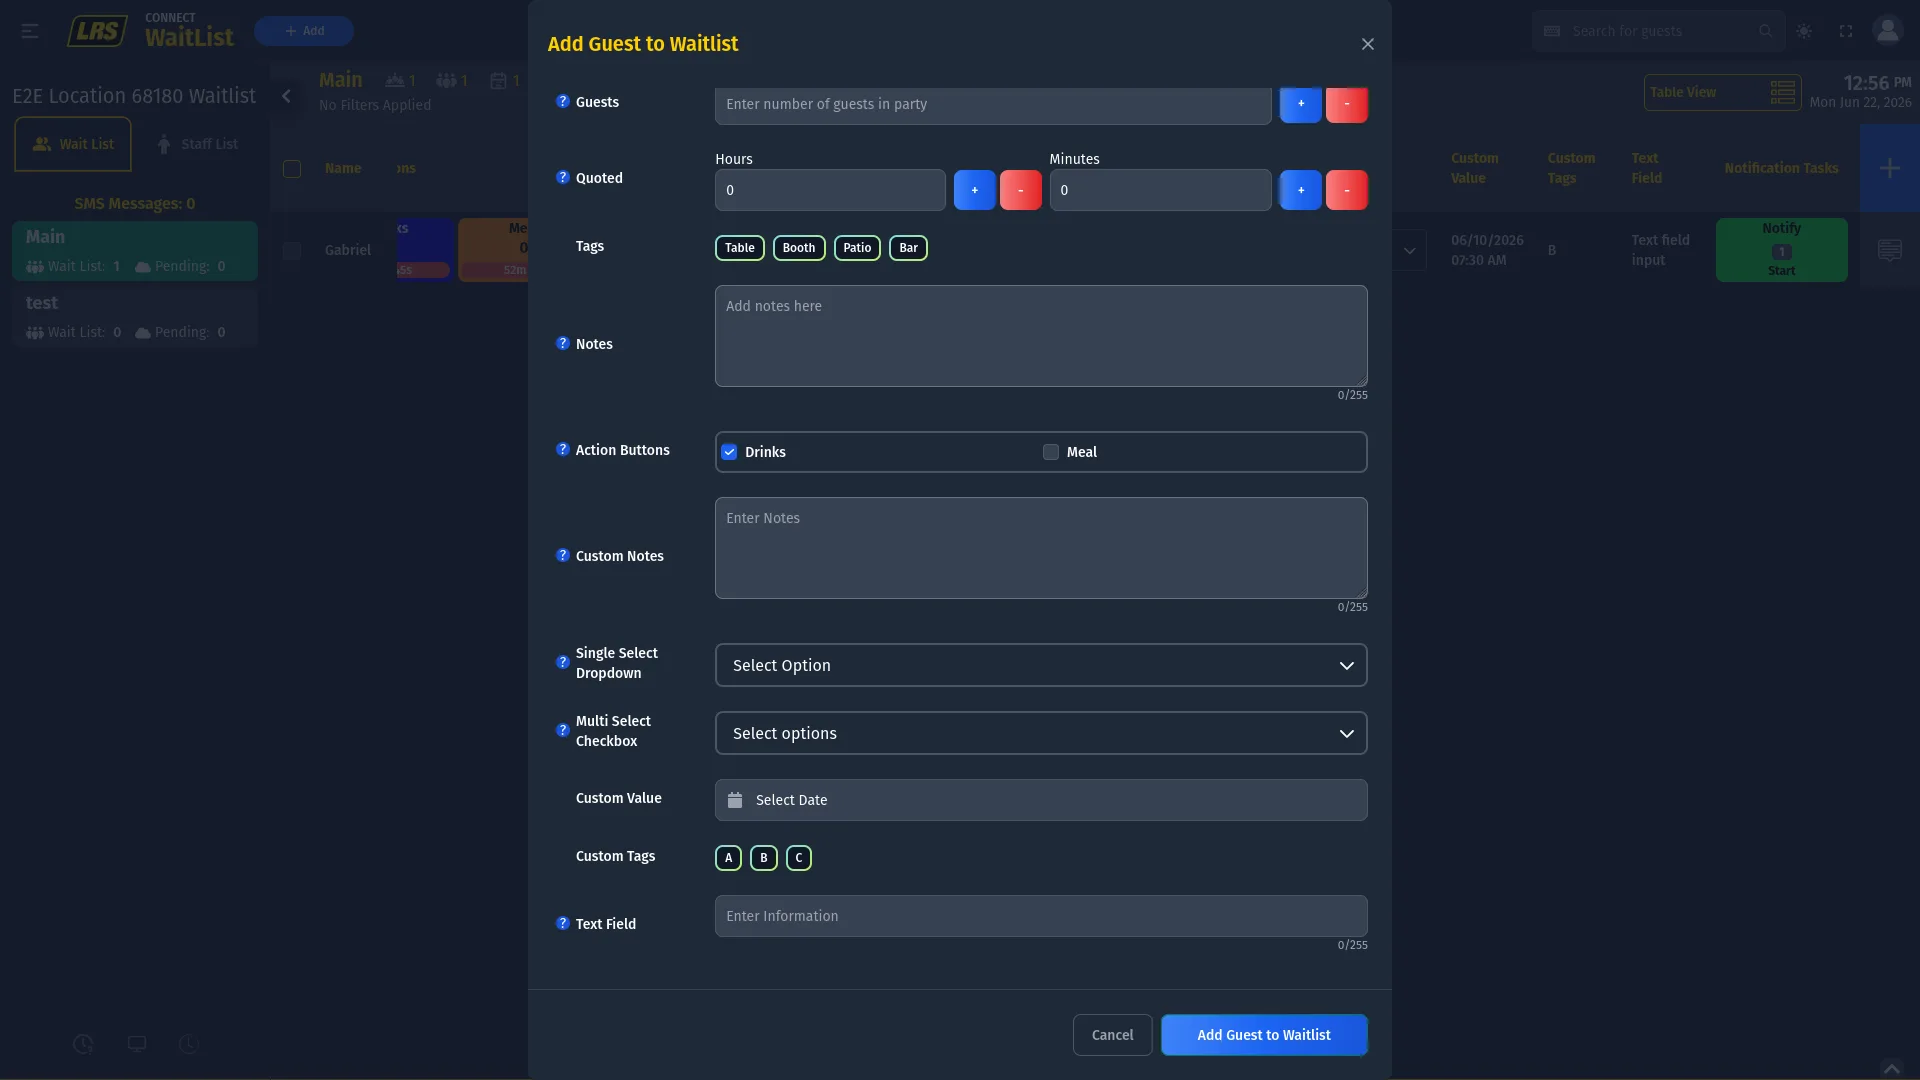
| Add | Click + Add, confirm the correct area is selected in the sidebar, fill the staff-visible form, and click Add Guest to Waitlist. |
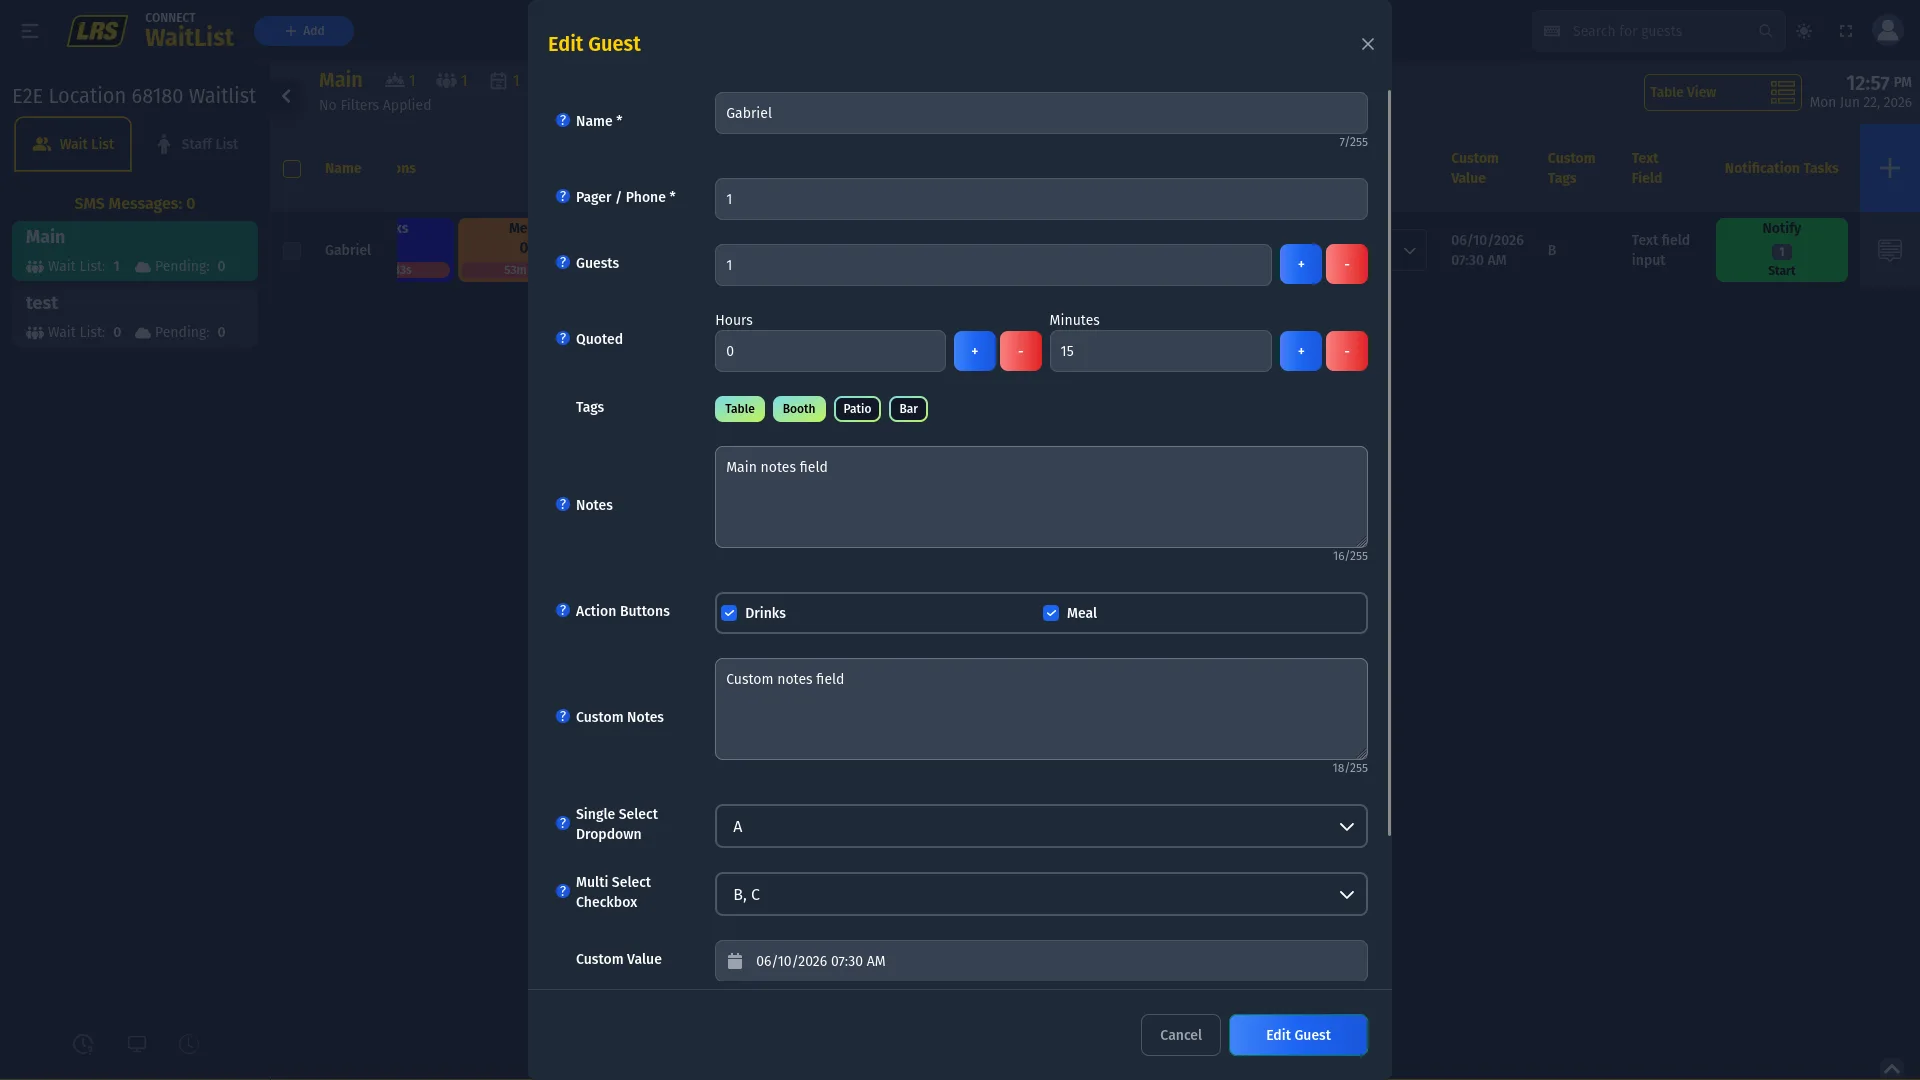
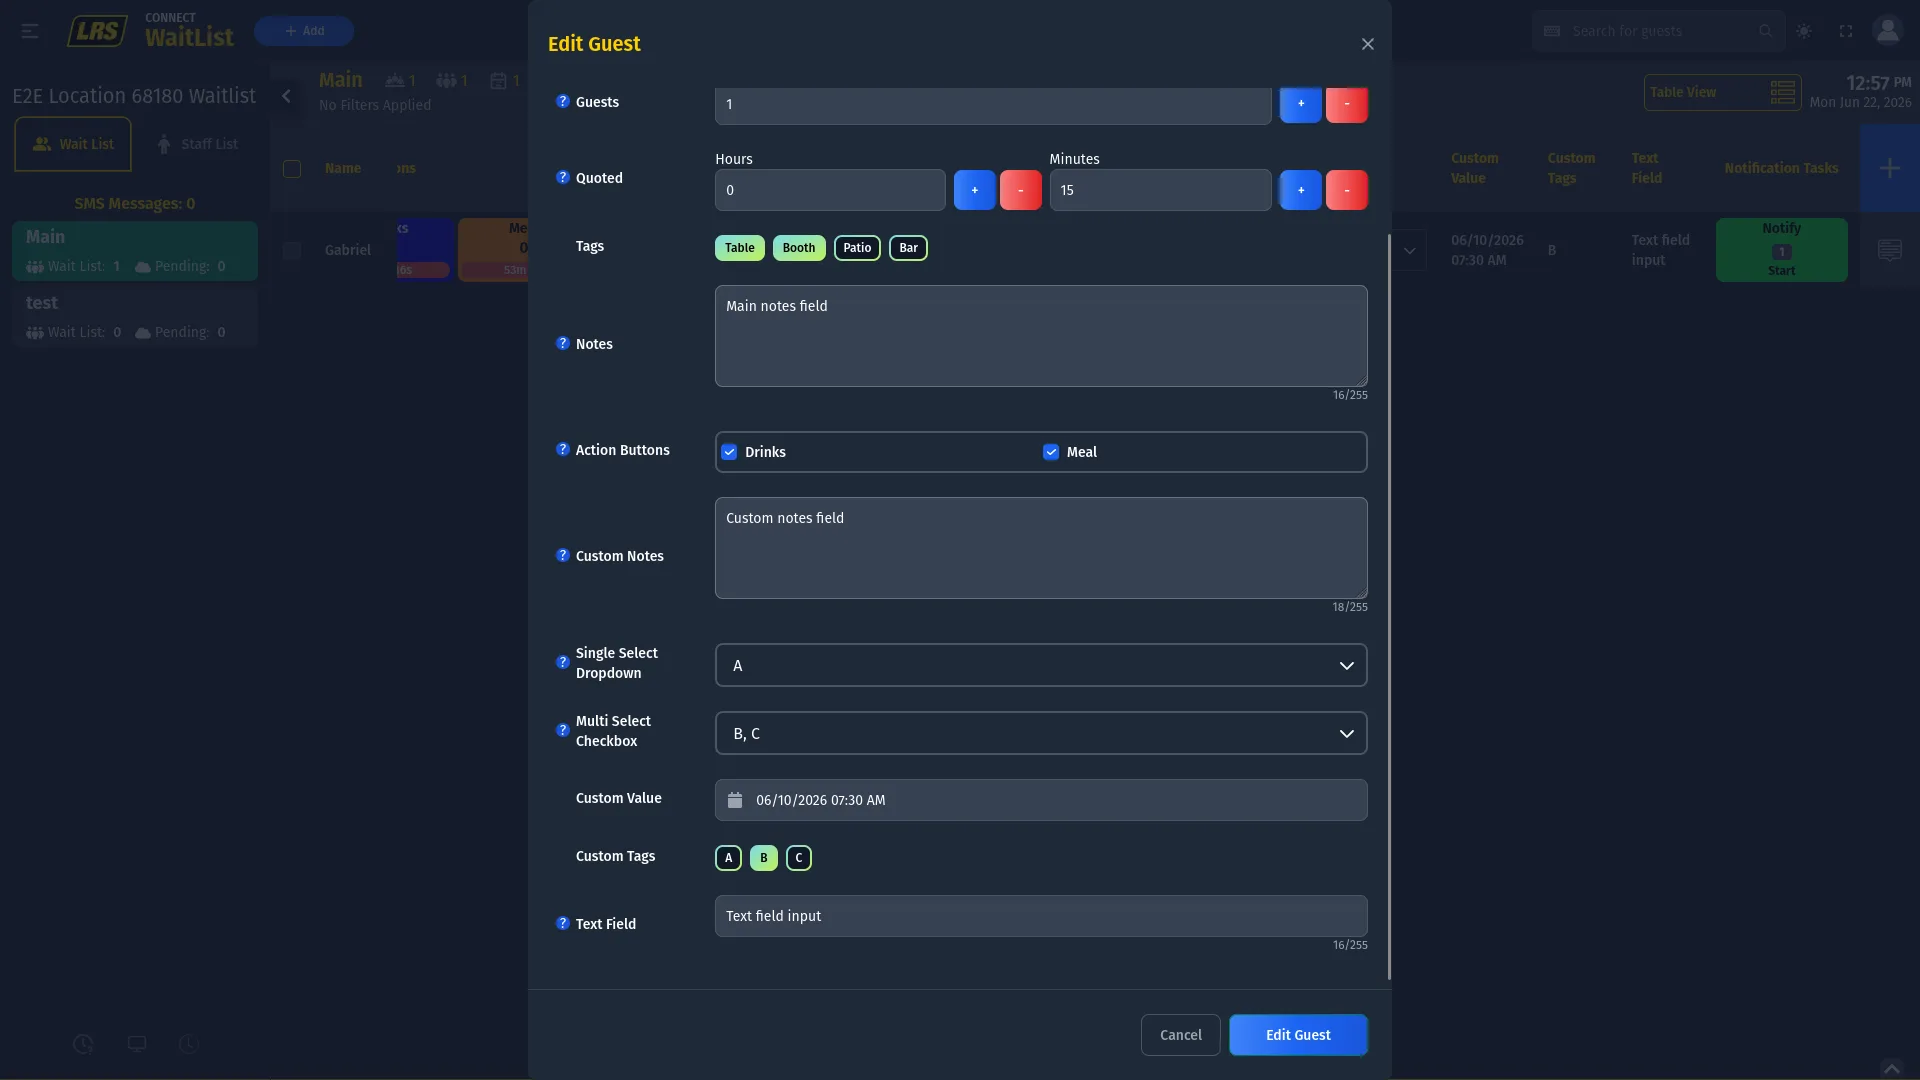
| Edit | Click the entry row to open the action panel, choose Edit Guest Information, update the form, and click Edit Guest. Duplicate phone or pager values are rejected with an inline error. |
| Move | Open the action panel and choose the target area from the Move to Another Waitlist menu, or drag the row directly to another area in the sidebar. |
| Complete | Open the action panel, choose Complete Guest Journey, and confirm in the modal that appears. |
| Remove | Open the action panel, choose Remove from Waitlist, and confirm in the modal that appears. |
| Restore | Click the clock icon at the bottom of the sidebar to open Waitlist History, find the entry, click Restore, and confirm. |
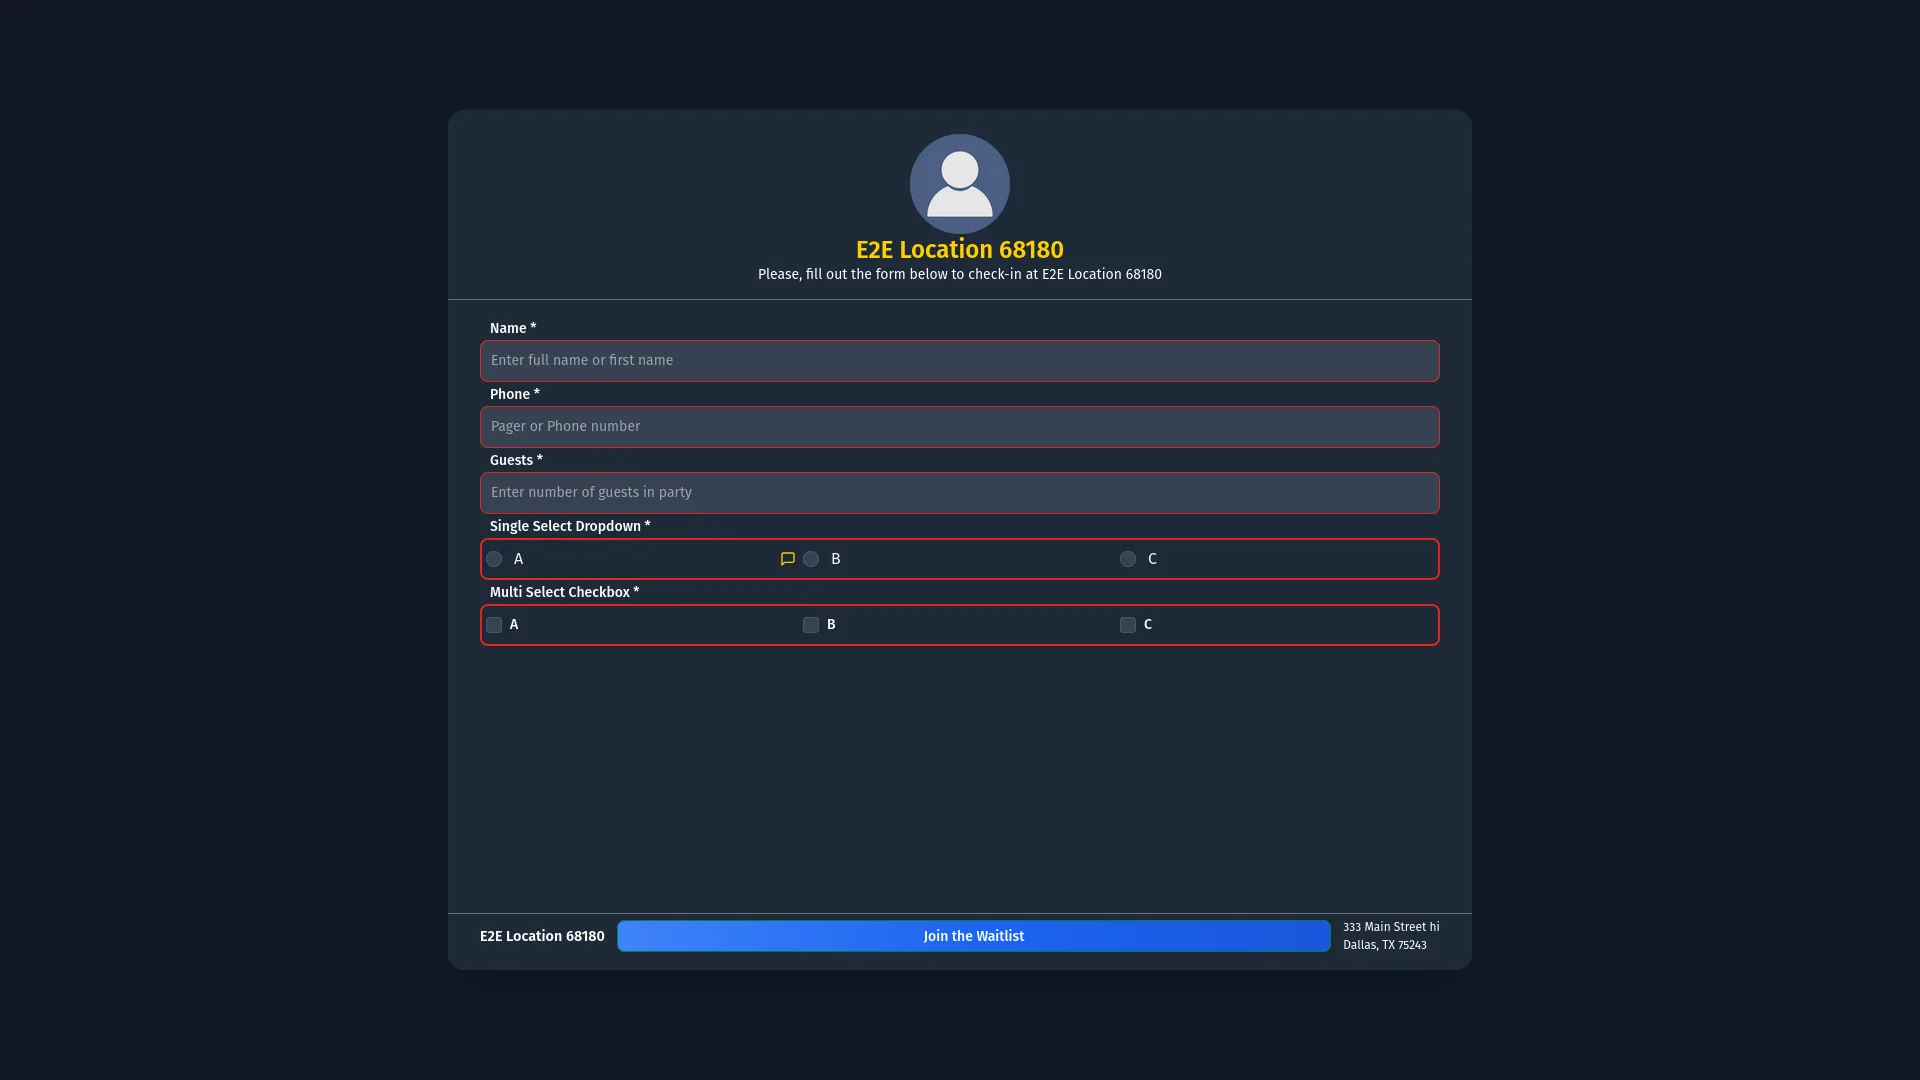
The Add Guest modal shows all staff-visible fields for the selected area in the order set by the Form Designer. Required fields are outlined in red until filled. Action Button fields let staff pre-select which workflow steps apply to this guest before saving — the selected buttons appear immediately as active counters on the entry row.

The Edit Guest modal opens with all values pre-filled. Any change — selecting or deselecting tags, adjusting the quoted time, updating custom fields — takes effect immediately on save and is visible in real time to every staff member viewing the same area.
Entries can be moved to a different area without going through the full remove and re-add flow. The action panel lists all available areas as move targets, and drag-and-drop from the live list to the sidebar is a faster alternative when the panel is not already open.
Complete an entry when the visit or service is finished. Remove it when the guest leaves before being served or cancels. Both actions move the entry to Waitlist History, where it remains available for restore for 24 hours.
Waitlist History (opened from the clock icon at the bottom of the sidebar) shows every entry completed or removed in the last 24 hours. Each entry displays its Quest ID — a persistent identifier that survives restore operations — along with the timestamps for when it was added and when it was finished.
6. Waitlist states
Each entry on the live list has a state that reflects where it is in the workflow. States are visible in the entry's row color and in the action panel options. Understanding them is essential for knowing what to do next with any given entry.
The six states below cover the full lifecycle of an entry, from the moment it is added to when it is completed or removed.
| State | Meaning |
|---|---|
| Waiting | Active and checked in. Added directly by staff, or transitioned from Received Wait Time via Check-in guest. |
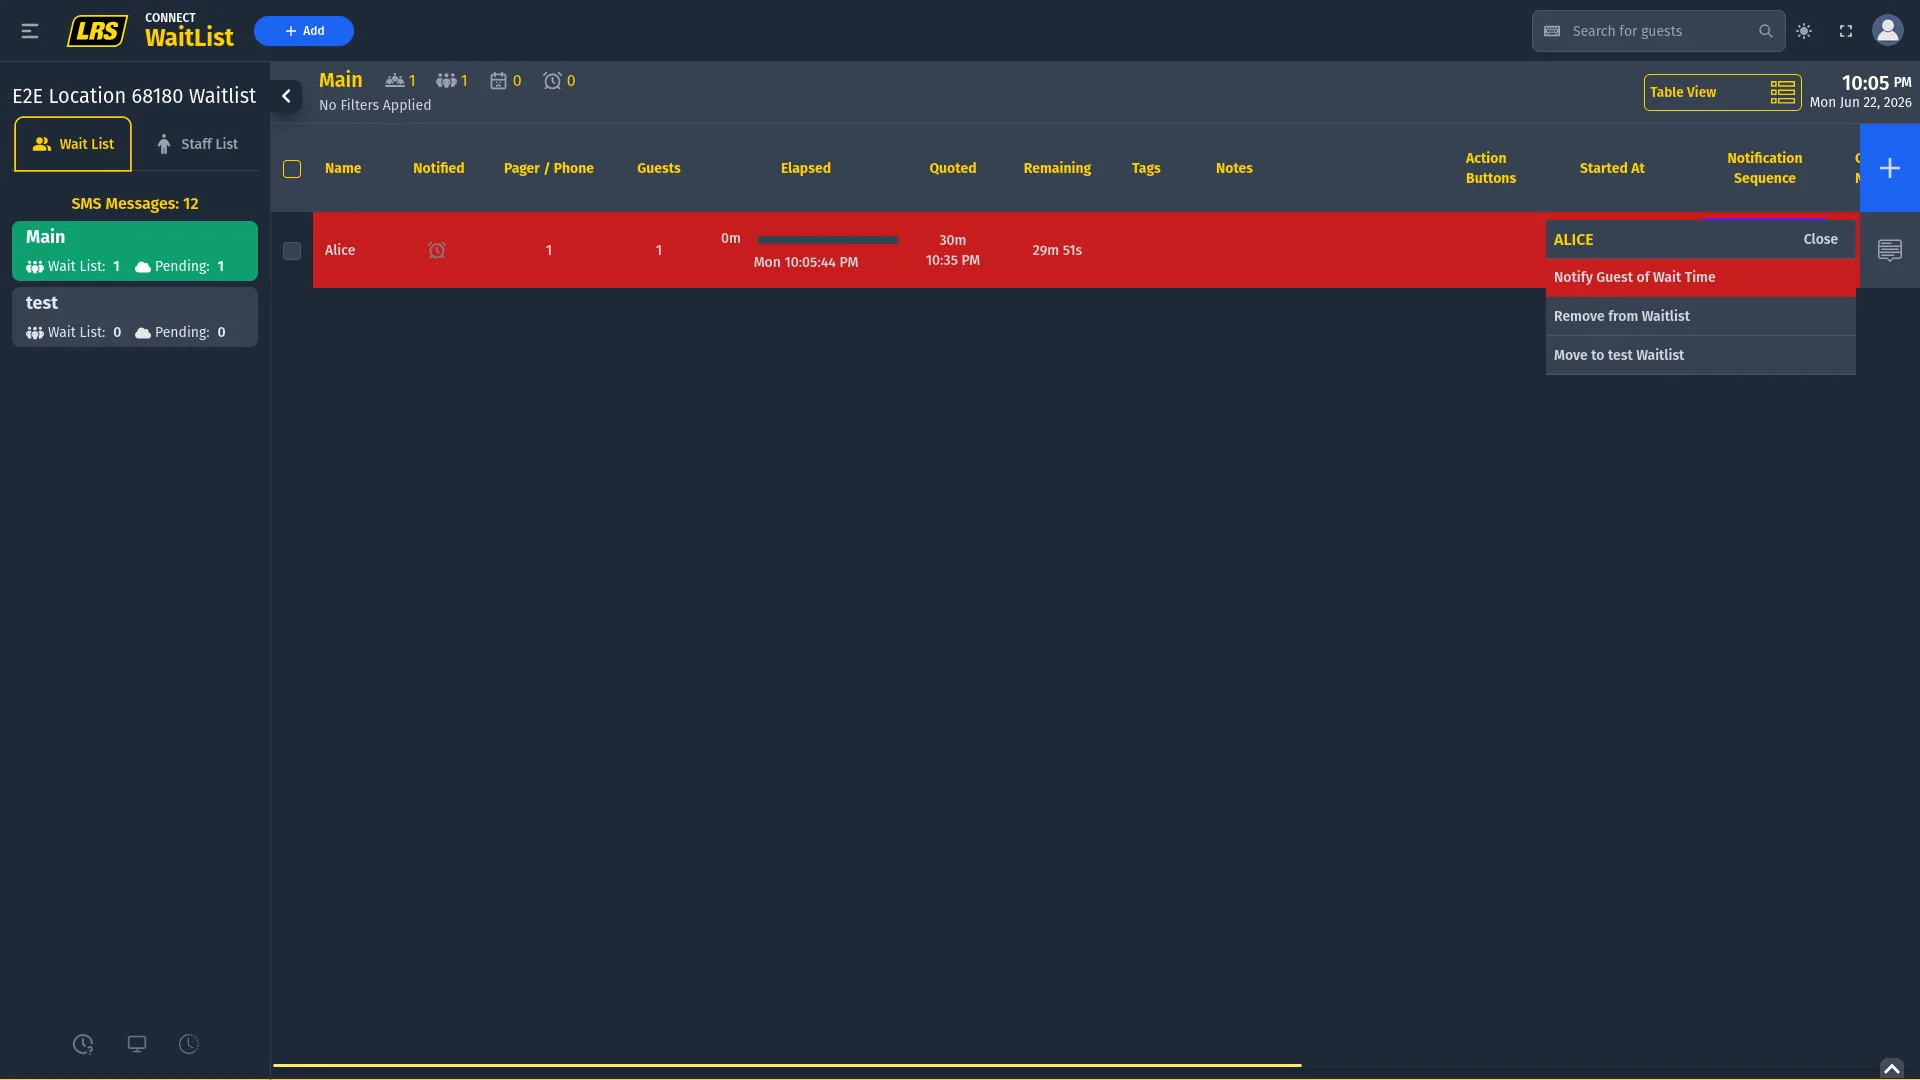
| Pending | Arrived via kiosk or remote self check-in. Waiting for staff to send an estimated wait time before being fully checked in. Row displays in red. |
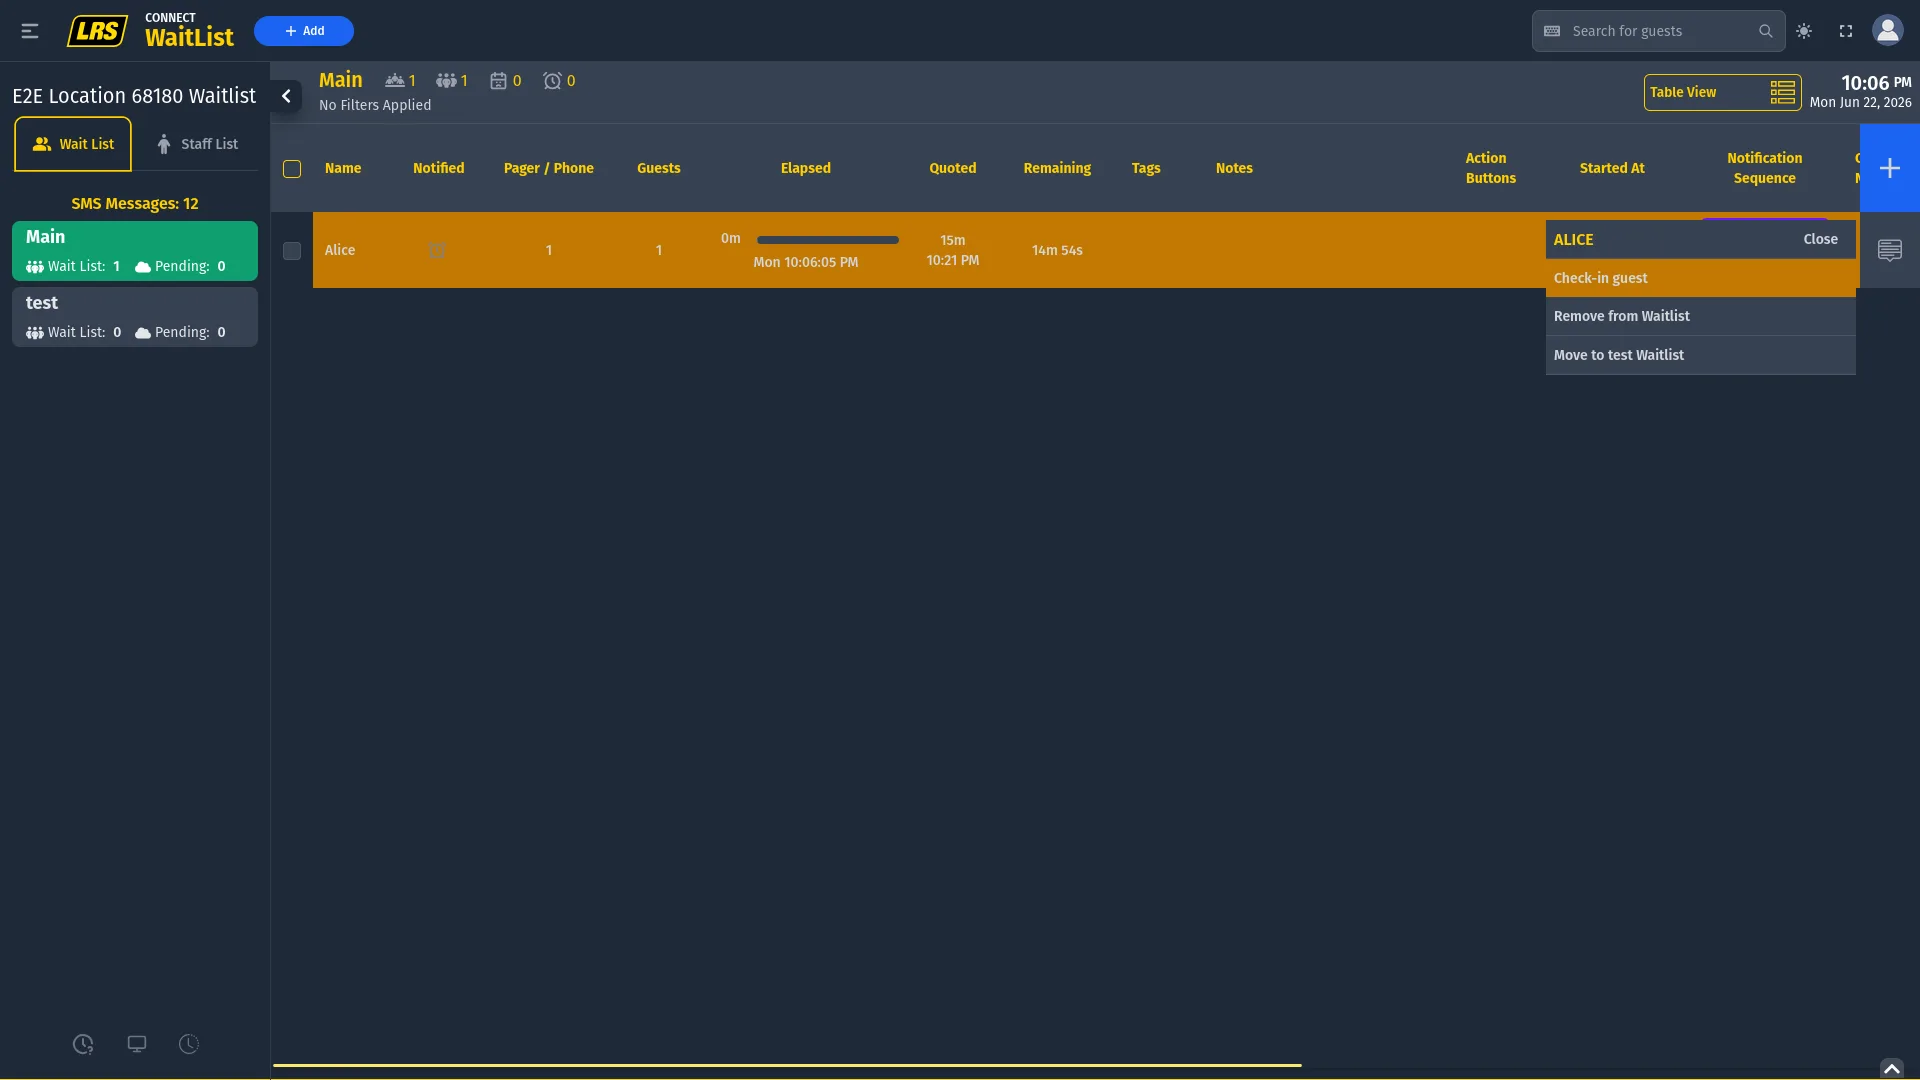
| Received wait time | Staff sent an estimated wait and the guest was notified. Waiting for staff to tap Check-in guest to complete the check-in. Row displays in orange. |
| Notified | The guest has been paged or sent a standard, selectable, or custom notification message. |
| Restored | The entry was recovered from Waitlist History and returned to the active area. |
| Completed / Removed | The entry is no longer active. It appears in Waitlist History for 24 hours and can be restored during that window. |
Two states stand out with a colored row highlight so they cannot be missed in a busy list. All other states use the default row color.
| Row color | State and meaning |
|---|---|
| No highlight | Waiting or Notified — entry is active. Notified entries keep the same row color; notification status is tracked in the Notified column. |
| Red | Pending — arrived via kiosk or remote, needs a wait time from staff. |
| Orange | Received wait time — staff sent a wait time, needs Check-in guest to complete. |
| No highlight (restored) | Restored — returned from Waitlist History to the active area. Displays the same as a Waiting entry. |
A Pending entry is highlighted in solid red across the entire row. When staff opens its action panel, Notify Guest of Wait Time is shown as the primary action. The sidebar also counts Pending separately from Wait List, so managers can see at a glance how many guests are still waiting for their first message.
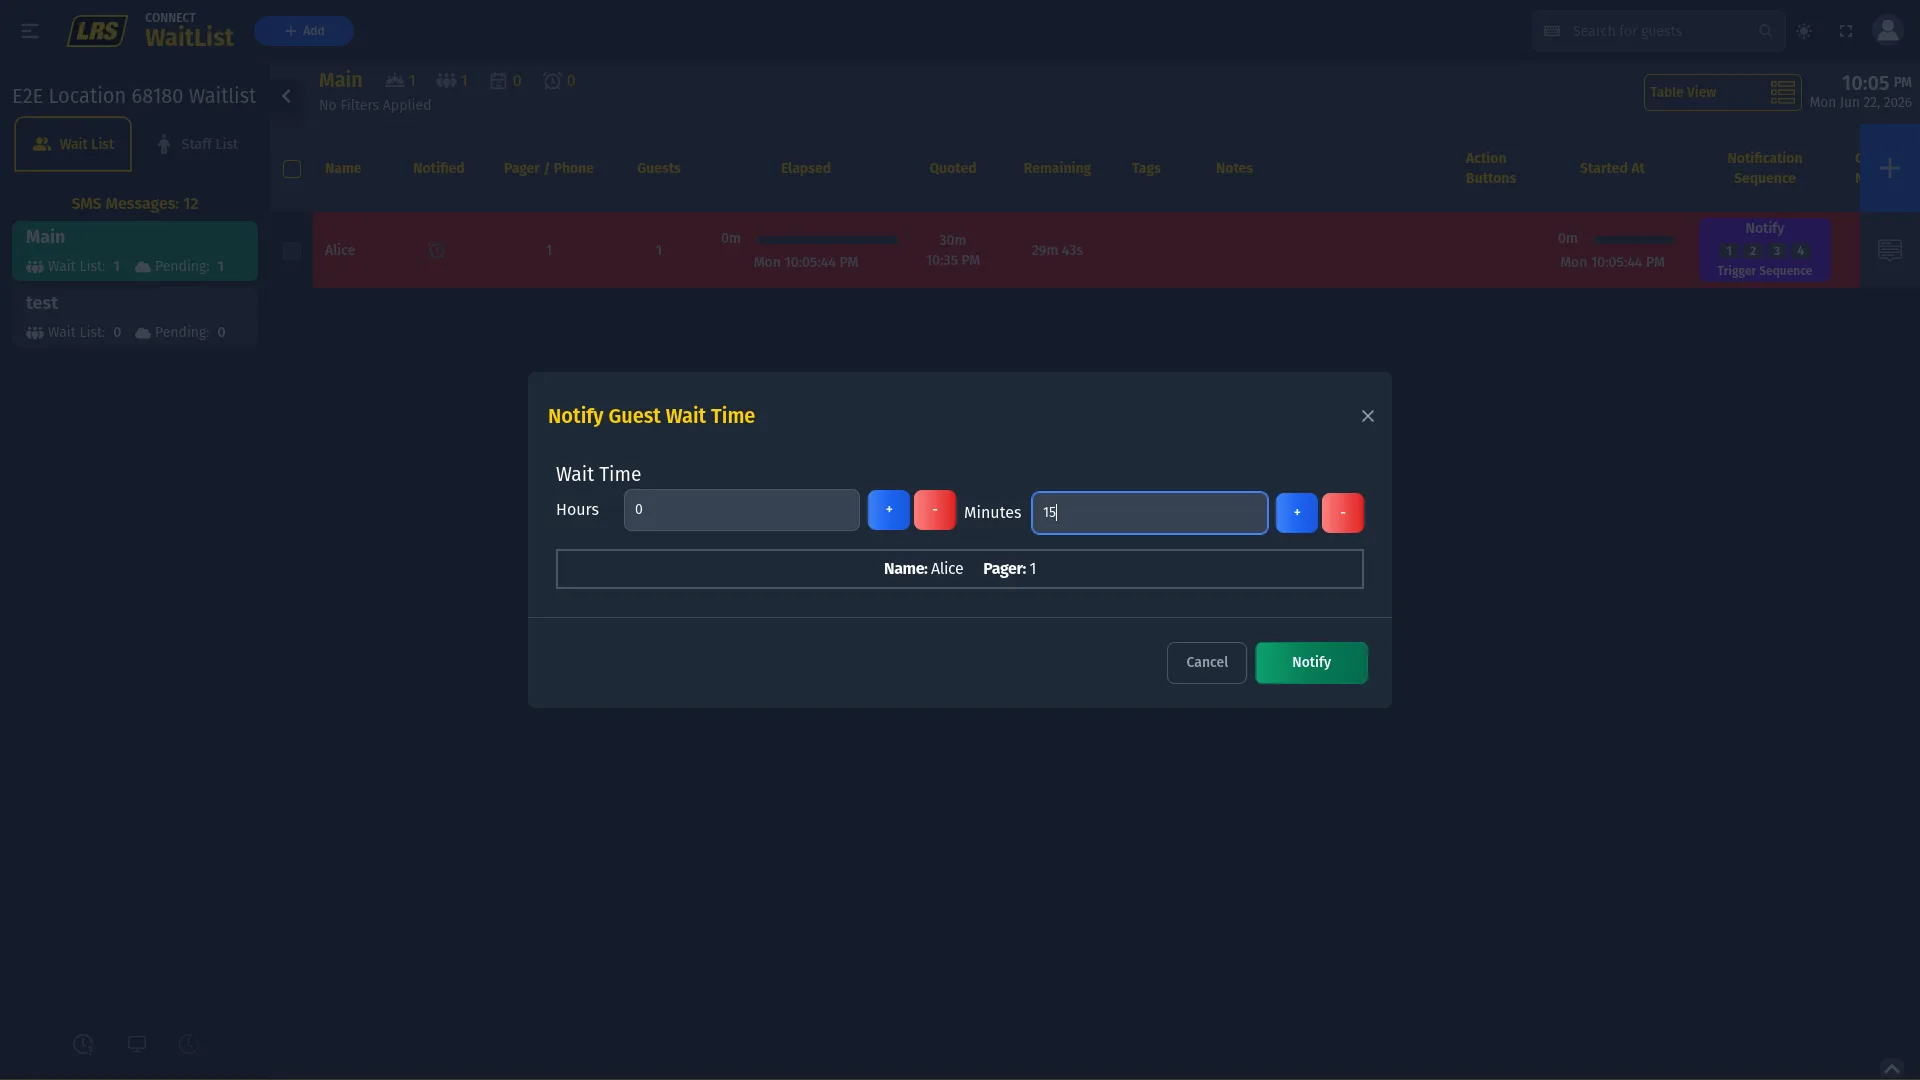
The Notify Guest of Wait Time modal requires setting an estimated wait time in hours and minutes. Setting the time does three things at once: sends the guest an SMS with their wait and a status page link, populates the Quoted column on the entry, and activates any Programmed Notification triggers configured in Dashboard for the area.
After the guest receives a wait time, the entry turns orange — the Received Wait Time state. The action panel now shows Check-in guest as the primary action. Selecting it moves the entry to Waiting, removes the orange highlight, and completes the check-in flow.
7. Notifications
The Waitlist app sends notifications to guests and team members through different channels depending on the situation. Guest notifications go out as SMS or pager broadcasts. Staff notifications route by pager group. Each message type has its own trigger and permission model — the table below maps each type to its purpose and the conditions under which it is available.
| Message type | What it does |
|---|---|
| Wait-time message | Sent to Pending entries. Gives the guest an estimated wait time and a status page link. Transitions the entry from Pending to Received Wait Time. |
| Standard message | Sends the default area notification. Available on active Waiting entries. |
| Selectable message | Lets staff pick from saved message templates when the area does not allow free-text writing. |
| Custom message | Free-text notification. Only available when the selected area has custom messages enabled in Dashboard under Notification Options. |
| Notification Sequence | A timed chain triggered once by staff. Subsequent messages fire automatically at the configured intervals — no further staff action needed per step. |
| Notification Tasks | A multi-step staff workflow. Each task must be manually completed by staff; completing a task triggers its associated notification and optionally auto-closes the entry when all tasks are done. |
Several conditions can prevent a notification from going out. The table below lists the most common blockers and where in Dashboard each one is resolved.
| Situation | What to check |
|---|---|
| No phone number on entry | SMS requires a Pager/Phone value. Edit the entry to add one. |
| SMS plan missing | SMS Messages must be included on the location's service plan in Dashboard. |
| Allowance exhausted | Check the SMS Usage tab in Dashboard. The plan cap or remaining messages may be blocking sends. |
| Custom message not available | Custom writing is toggled per area in Dashboard under Notification Options. |
| Pager alert not firing | Pager alerts require a transmitter assigned to the area and the correct pager hardware type selected in Notification Options. |
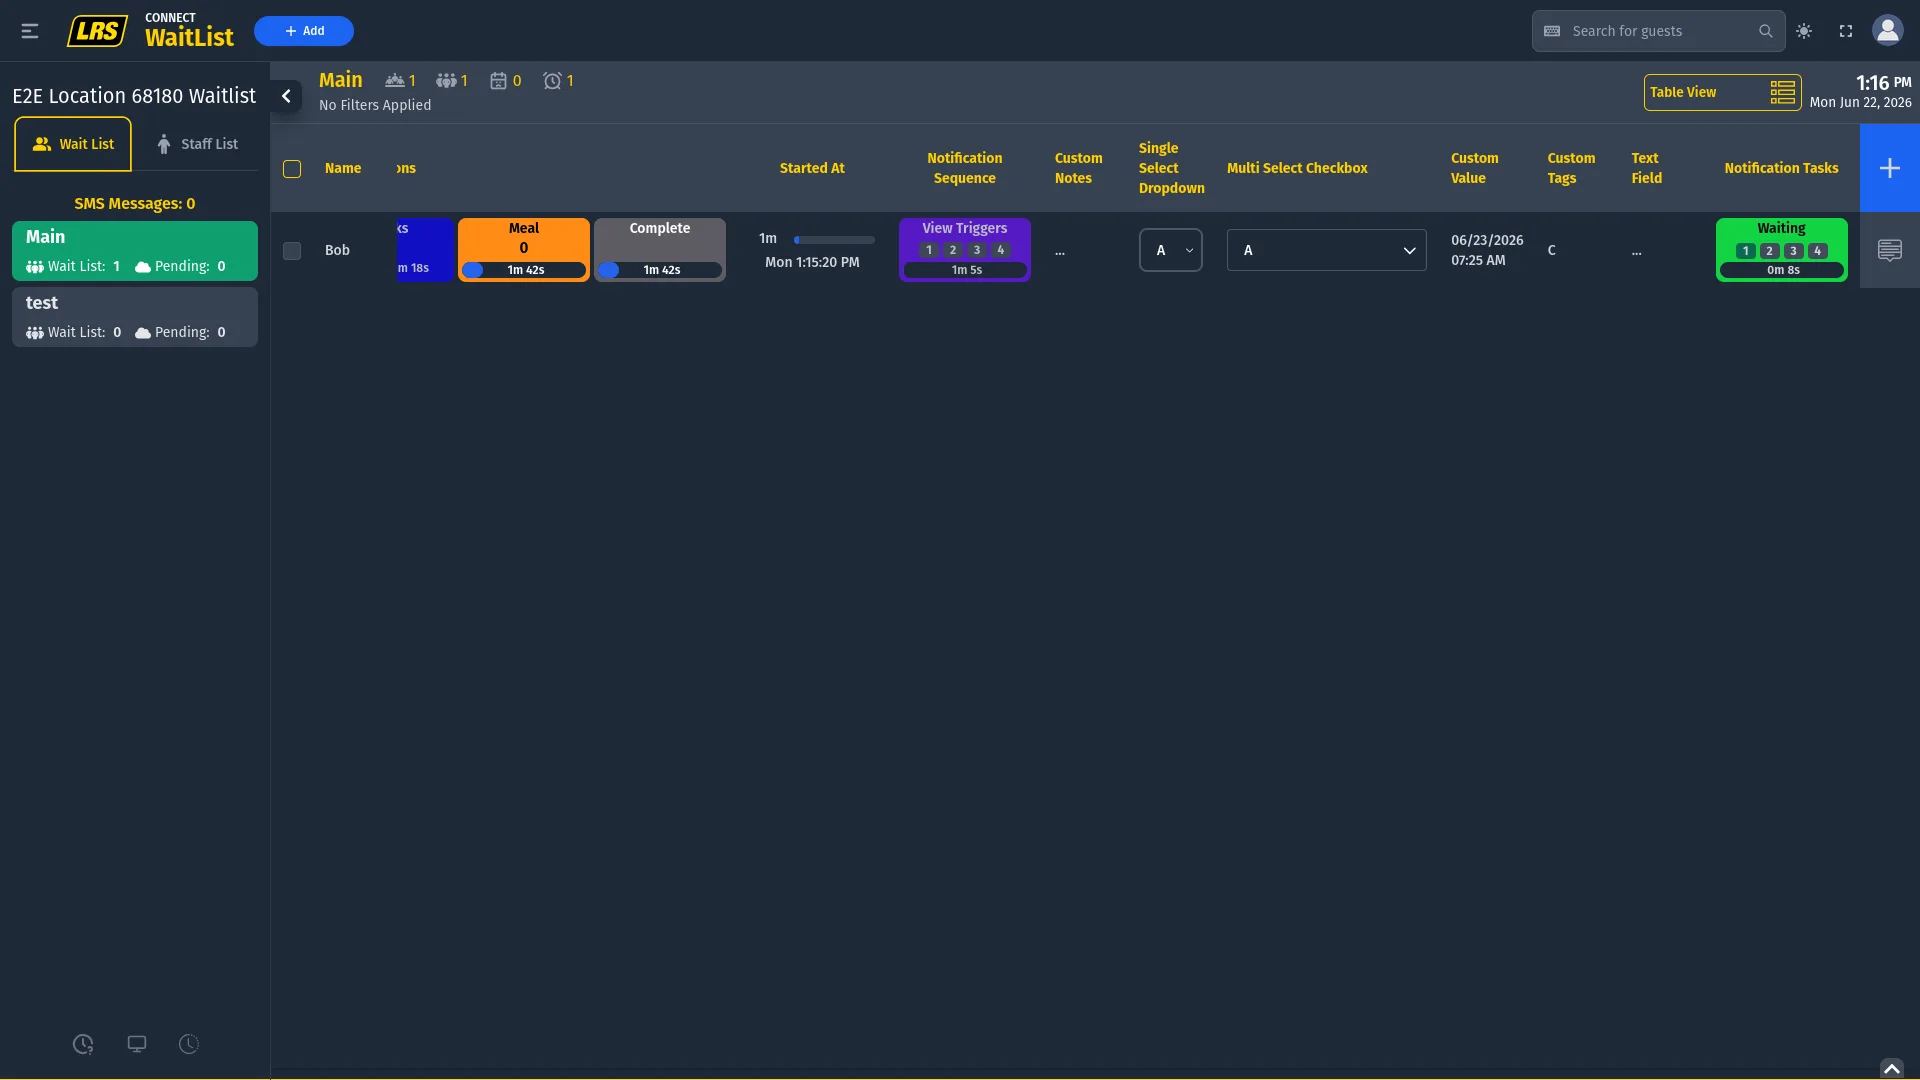
When a Notification Sequence is running on an entry, its column cell shows a purple View Triggers button alongside numbered dot indicators — one dot per configured step, filling in as each step fires. Clicking View Triggers opens the live sequence modal.
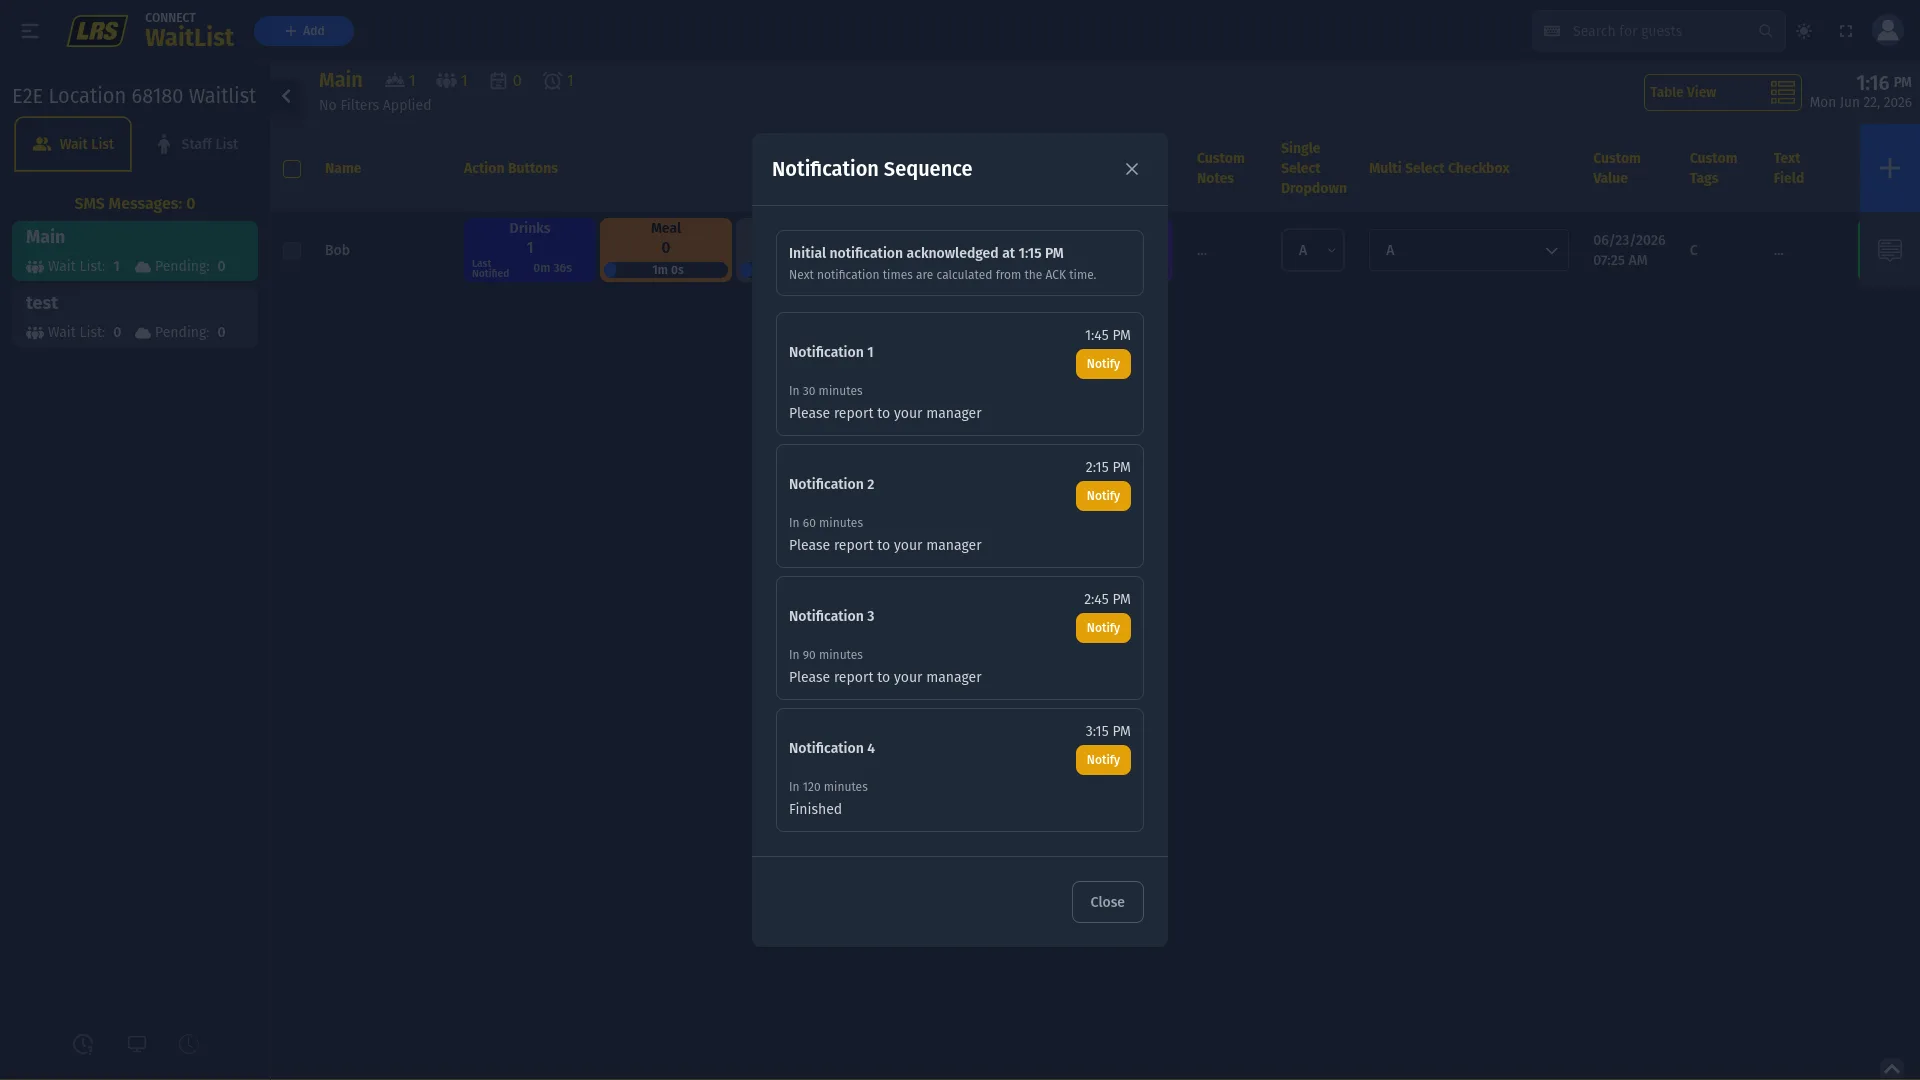
The critical detail in the sequence modal is the acknowledgement time. All subsequent notification times are calculated from the moment the first notification was acknowledged — not from when each step individually fires. This means manually firing a step early does not shift the scheduled times for later steps.
Notification Tasks appear in their own column with a colored state badge (green Waiting, or the current task name) and numbered step dots. Each dot corresponds to a task step. Unlike a Notification Sequence, tasks require staff to manually complete each step before the next one can start. The timer next to the badge tracks how long the current task step has been active. When the Auto Close Booking option is enabled on the task field in Dashboard, completing the final task automatically marks the entry as finished without staff tapping Complete manually.
8. Status Screen
The Status Screen is a read-only view designed to run on a TV or monitor visible to guests in the lobby. It shows the active entries for a selected area, with only the columns set as status-screen-visible in the Form Designer — so staff can choose which guest details are publicly visible without changing anything on the staff live list.
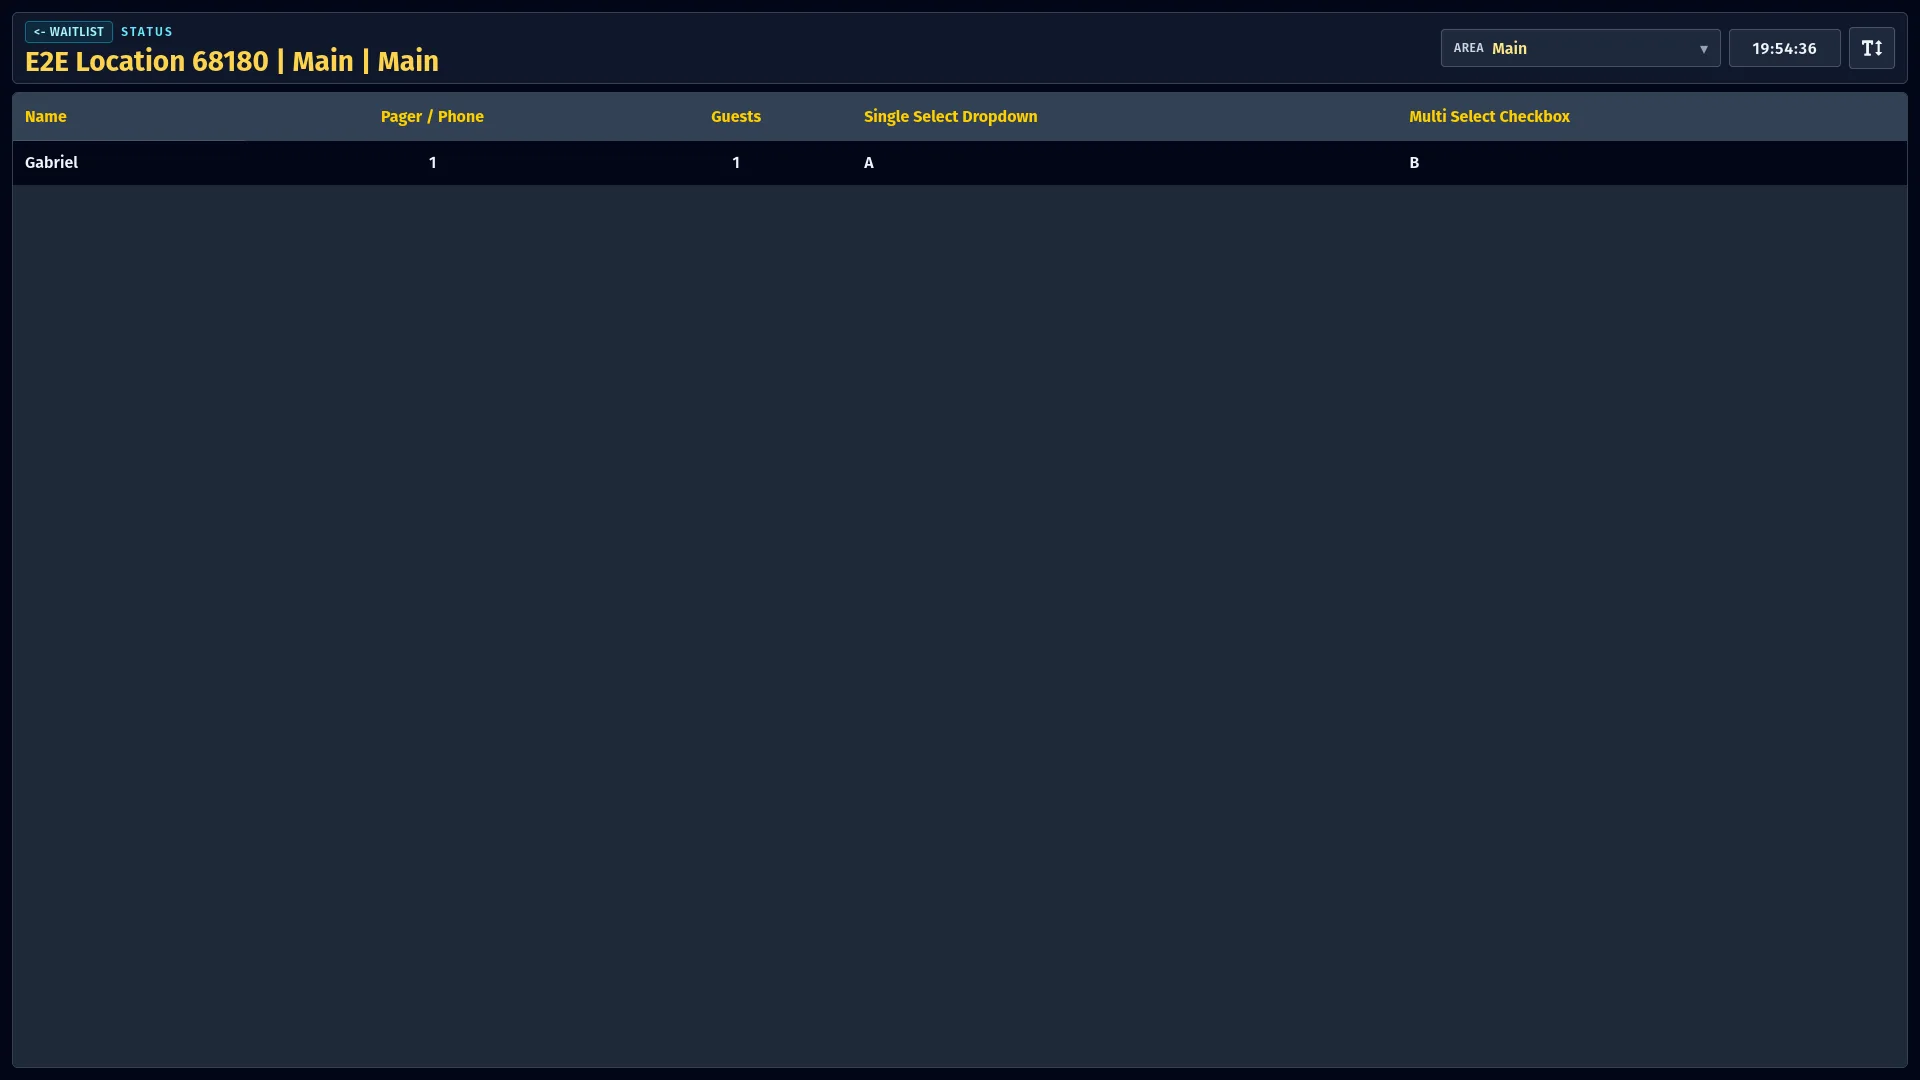
The Status Screen is opened from the monitor icon at the bottom of the left sidebar. The breadcrumb in the top-left corner returns directly to the live list, making it quick to switch between monitoring and managing without re-selecting the area. The area selector in the top-right allows switching to a different area's display without going back to the live list at all. The font size button adjusts text scaling for readability at a distance.
9. Kiosk
Kiosk mode turns a tablet or touchscreen into a self check-in station at the location. Visitors fill the kiosk form themselves and join the waitlist without staff involvement. The entry appears immediately as Pending on the staff live list.

The kiosk form shows only the fields set as kiosk-visible in the Form Designer, in the order configured there. A public position list on the right side of the kiosk screen shows all current entries using only guest initials and party size — no full names are exposed. When a Single Select option has a small chat bubble icon next to its label, choosing that option automatically triggers a notification to staff when the entry is saved.
10. Self check-in
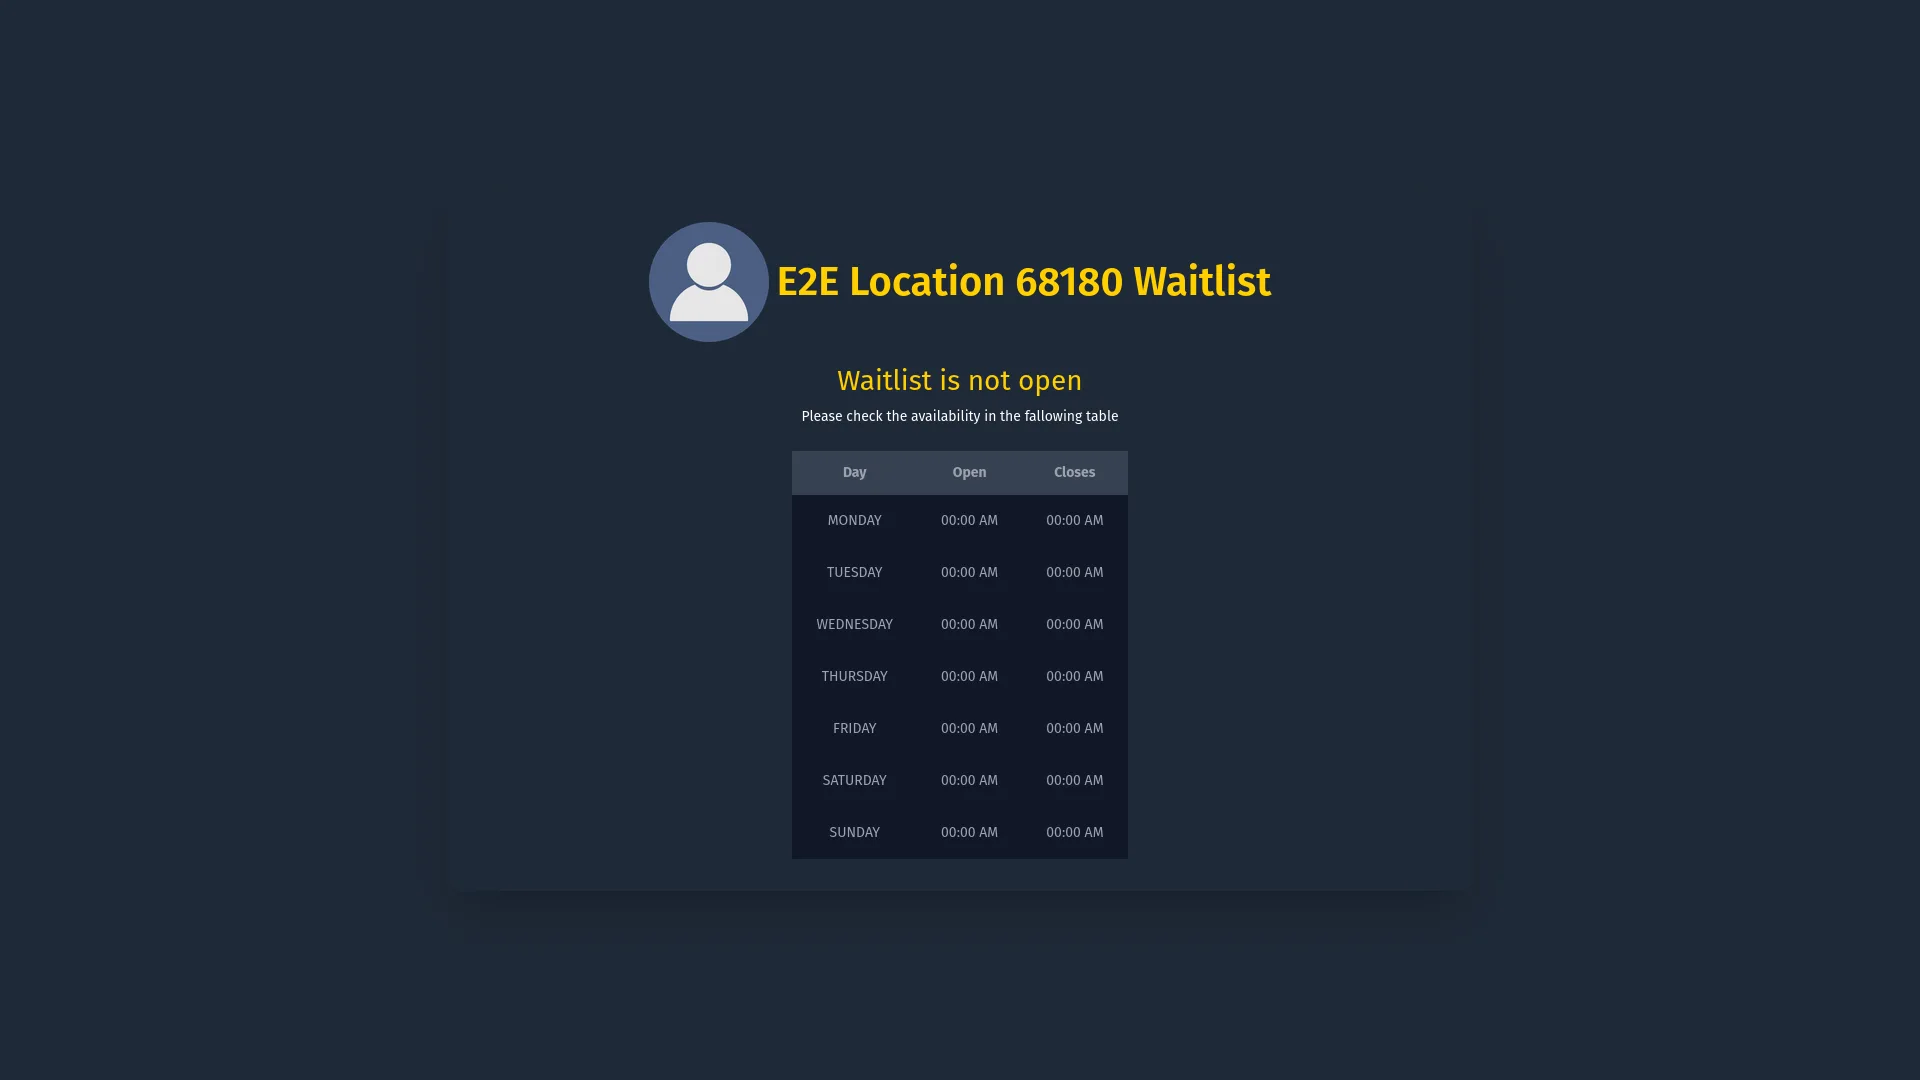
Remote self check-in lets guests join the waitlist from their own device before arriving — by following a link sent to them or posted as a QR code. The link is generated in the area's Settings tab in Dashboard and is only active during configured Remote Check-in hours.
If a visitor opens the link outside the configured hours, the page shows a Waitlist is not open message and the weekly availability schedule, so they know when to return.
When the link is open, visitors see the remote check-in form. Only the fields set as remote-check-in-visible in the Form Designer are shown. Required fields are enforced at submission — the form cannot be sent until they are all filled.
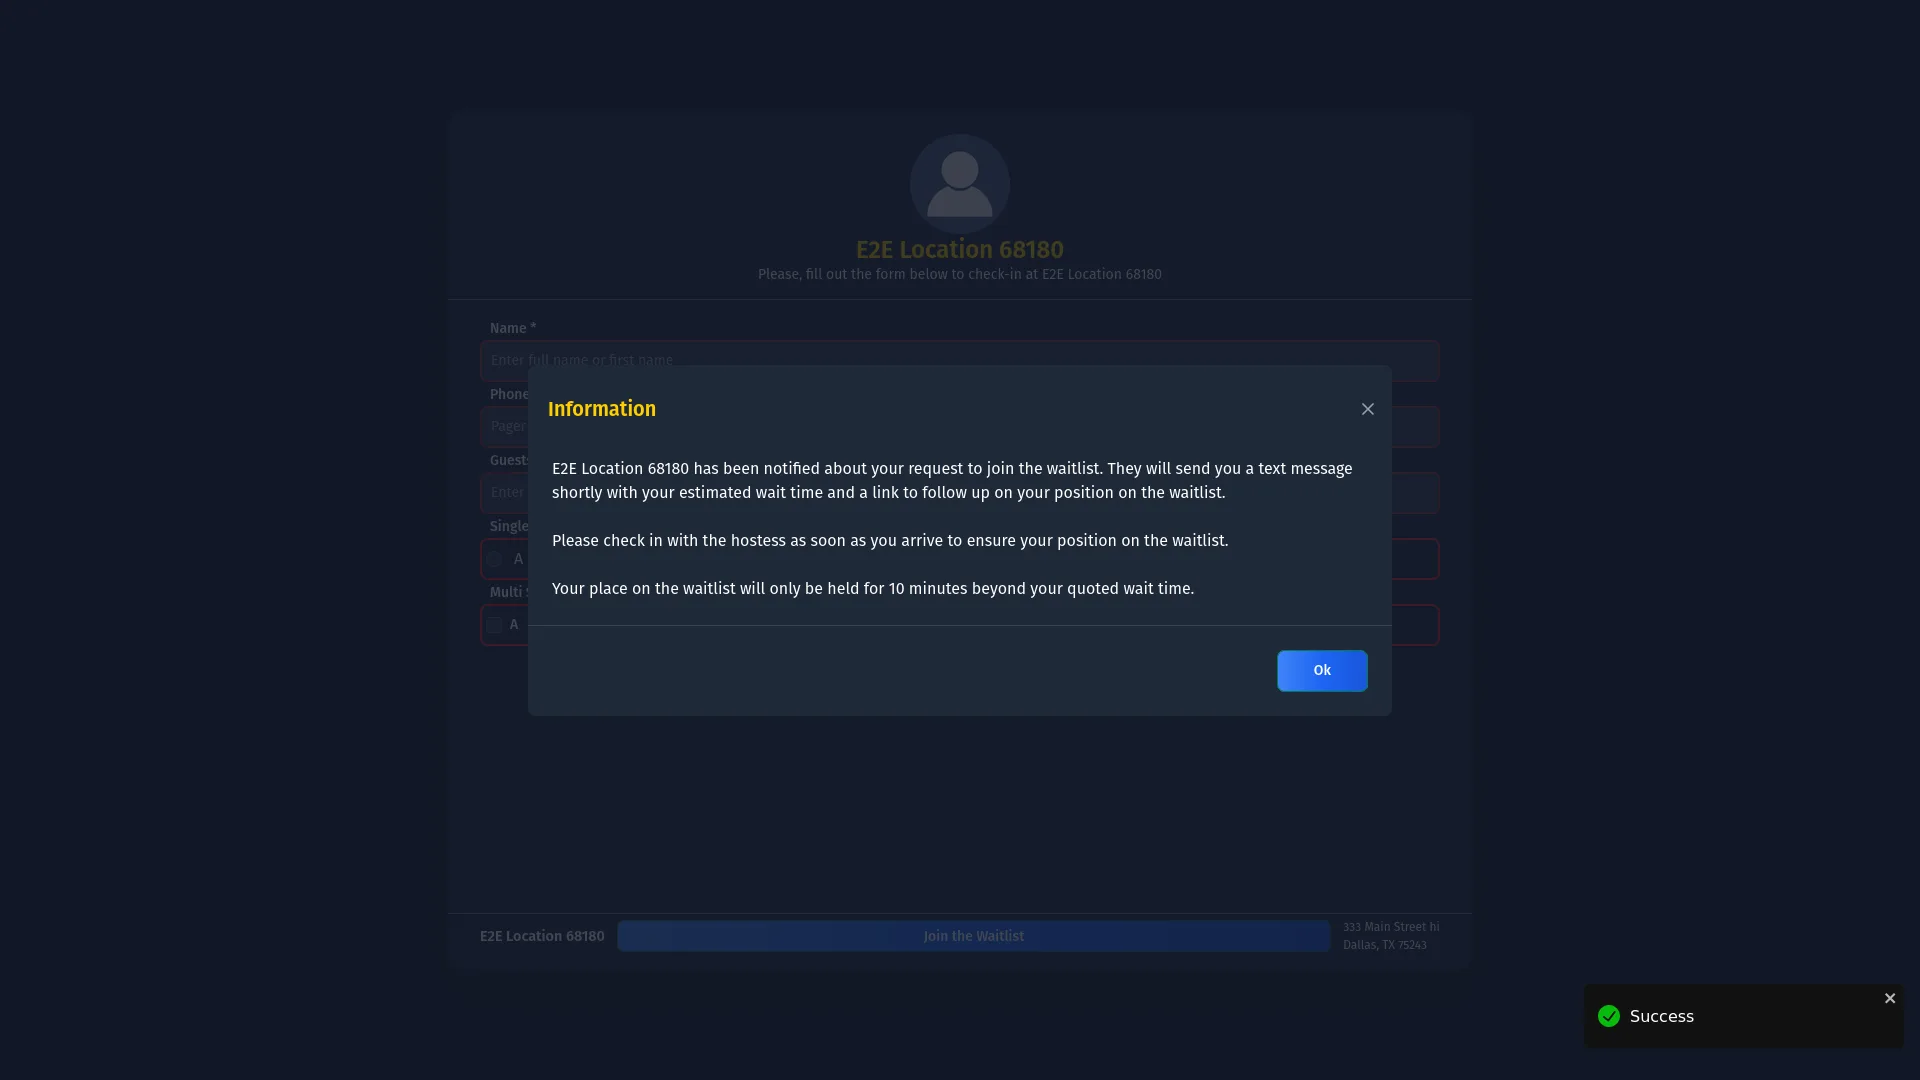
After submitting, a confirmation modal tells the visitor three things: staff was notified and will send an SMS with their estimated wait time and a status page link; they should check in with the hostess when they arrive to secure their position; and their place will only be held for a limited time beyond the quoted wait. That hold duration is set by the Delay Tolerance field on the location's Profile tab in Dashboard.
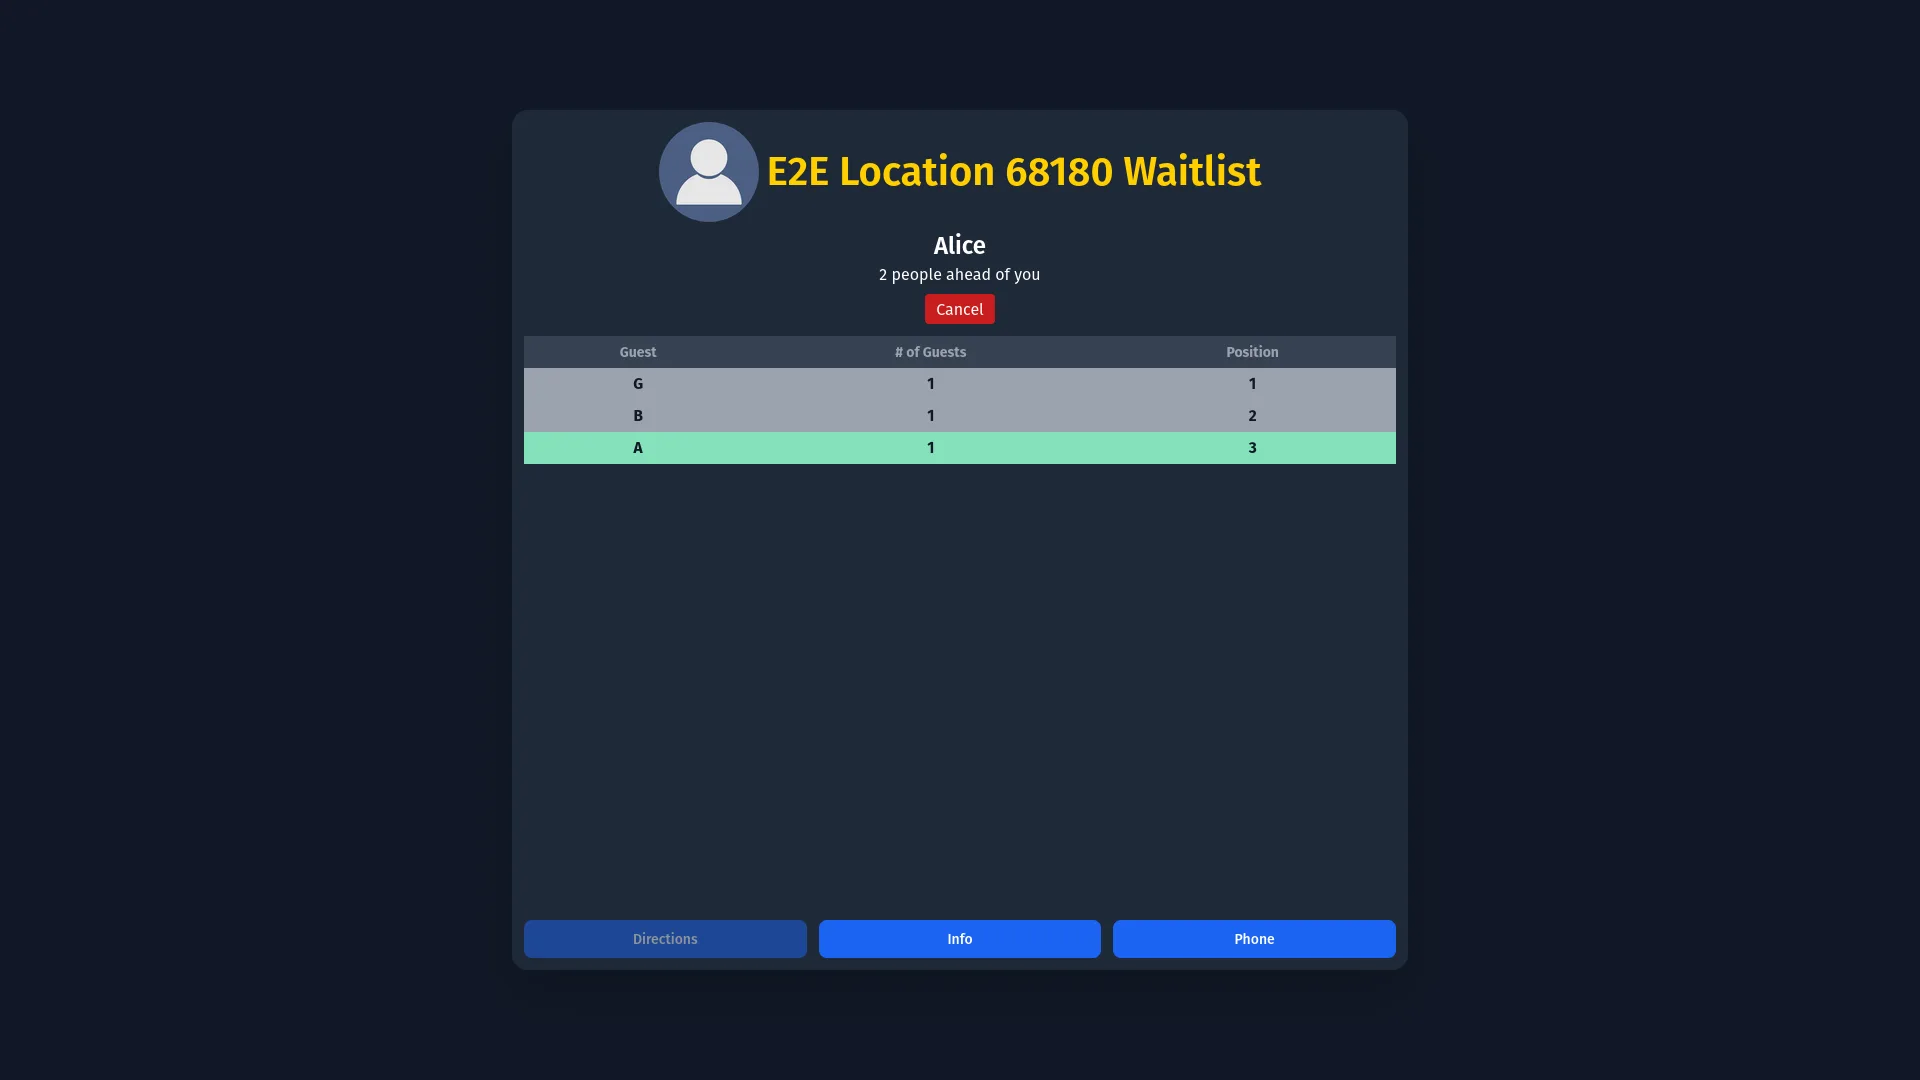
The guest status page is delivered in the SMS when staff sends a wait time. The visitor's own row is highlighted in the queue table so they can see their position at a glance. The Cancel button lets guests remove themselves without contacting staff. The shortcuts at the bottom link to directions, location info, and a direct phone call to the business.
11. Troubleshooting
Open Dashboard, go to the area's Form Designer, and check the visibility switch for the staff add/edit form. A field set to hidden will not appear in the modal even if it is active.
Notify Guest of Wait Time is always available on Pending entries, but the notification requires a Pager/Phone value to send the SMS. If the entry has none, the send will fail — edit the entry to add a contact number first.
The area or the destination area already has an active entry with the same contact. Search for the existing entry, resolve or remove it, then retry the add, move, or restore.
Custom writing is enabled per area in Dashboard under Notification Options. The area may be configured for selectable messages only.
The selected area has active Action Buttons. Action Buttons require table view to show the countdown timers and the Complete button.
The sequence must be started per entry by tapping the sequence button on the form. Once running, automatic firing requires that the configured interval has elapsed since the acknowledgement time — check the View Triggers panel to see the exact scheduled times.
Confirm the staff member has a pager profile in Dashboard with the correct pager number, pager type, and group assignment. Notification Tasks route messages by group.
Confirm a Kiosk Area is selected in the Dashboard guestlist workspace and that the kiosk was launched from the Dashboard guestlist page — not by directly opening a URL on a device.
Check that Remote Check-in hours are set for today in Hours of Operation, that the current time is within those hours, and that a Self Check-in Area is selected in the Dashboard guestlist workspace.