From first access to first live entry
This guide walks you through creating an account, completing onboarding, finishing the minimum Dashboard setup, and running the first live waitlist entry — in that order. Follow each section in sequence; each one depends on the previous.
1. Overview
What LRS Waitlist NEXT does
LRS Waitlist NEXT is a guest and staff management platform for locations that need to track arrivals, communicate wait times, and coordinate team notifications — all from a single browser workspace.
| Capability | What it covers |
|---|---|
| Guest management | Add walk-in guests, accept self check-in and kiosk arrivals, and manage every entry from check-in to completion. |
| Notifications | Page or text guests and staff using pager hardware, SMS, or both — with manual, preset, timed-sequence, and programmed options. |
| Custom forms | Design the entry form for each area independently: choose which fields staff, kiosk visitors, remote visitors, and the status screen each see. |
| Multi-area operation | Run several independent queues under one location — each area has its own transmitter, form, messages, and settings. |
| API integration | Let approved external systems create, update, and remove waitlist entries through a scoped, key-authenticated API. |
| Reporting | Review guest volume, duration, and notification history by date range, area, and role. |
The three product areas
The platform is split into three separate applications. This quickstart covers all three in the order you need them — Dashboard first, then the Waitlist app, then the API portal if an integration is planned.
| Area | Use it for |
|---|---|
| Dashboard | Configuration control center. Set up organizations, locations, billing, users, waitlists, areas, forms, messages, transmitters, and API access before daily operation begins. |
| Waitlist app | Daily operations workspace. Add guests, accept arrivals, send notifications, manage entries, and use kiosk or remote self check-in during active service hours. |
| API portal | Integration and verification tool. Confirm key status, review location setup, manage transmitter assignments, and test every endpoint before connecting an external system. |
2. Account access
Create an account, sign in, or recover access
All users — owners, admins, managers, and staff — access the platform through the Dashboard sign-in page using their registered email address and password. If no account exists yet, start with Account Creation. If the account already exists, go directly to sign-in.
Creating a new account
Account Creation establishes the account owner and the top-level account structure. Complete this step only once per organization — all other users are added later through Dashboard after onboarding is done.
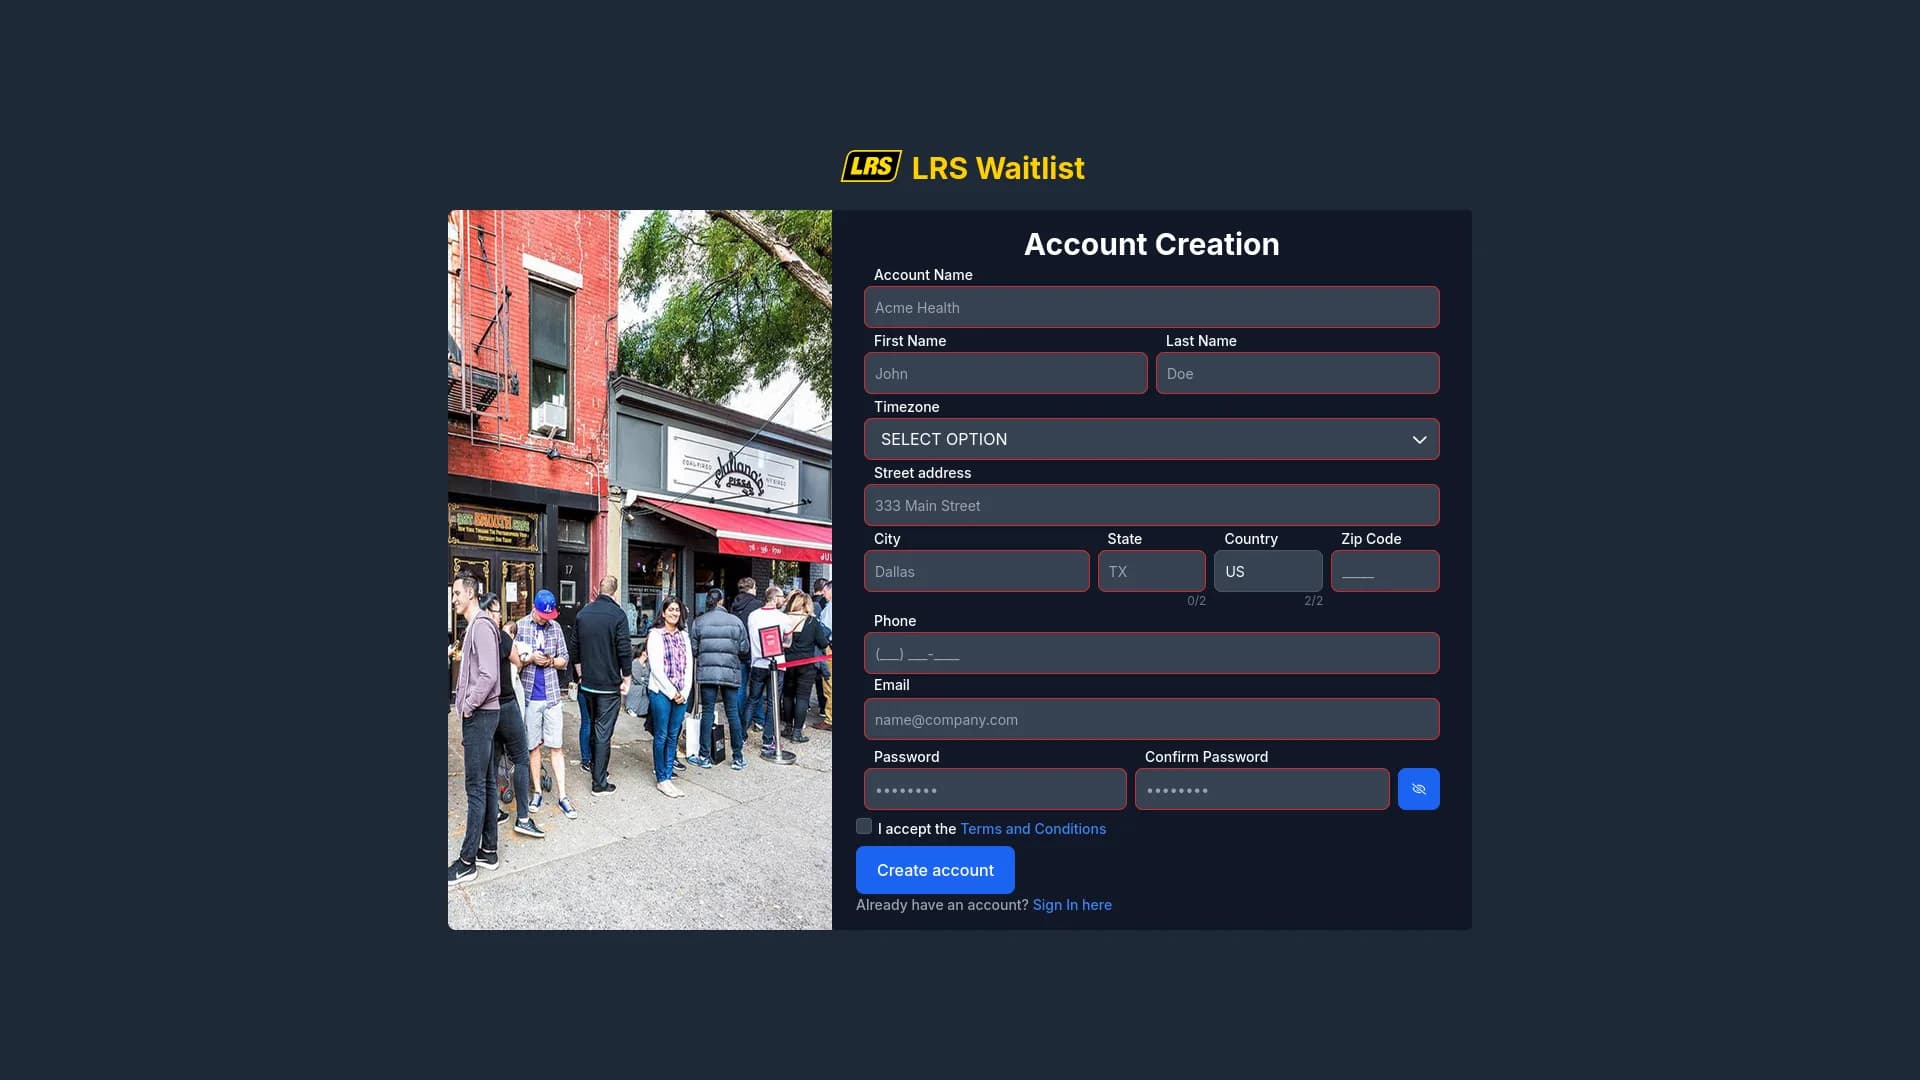
- Navigate to Account Creation.
- Fill in Account Name, First Name, Last Name, Timezone, Street Address, City, State, Country, Zip Code, Phone, Email, Password, and Confirm Password.
- Accept the Terms and Conditions and click Create account. Dashboard redirects you to the sign-in page.
- Check your inbox for the activation email and click the link inside it. The account cannot be signed into until this step is complete.
Signing in
Once the account exists and onboarding is complete, every user signs in the same way.
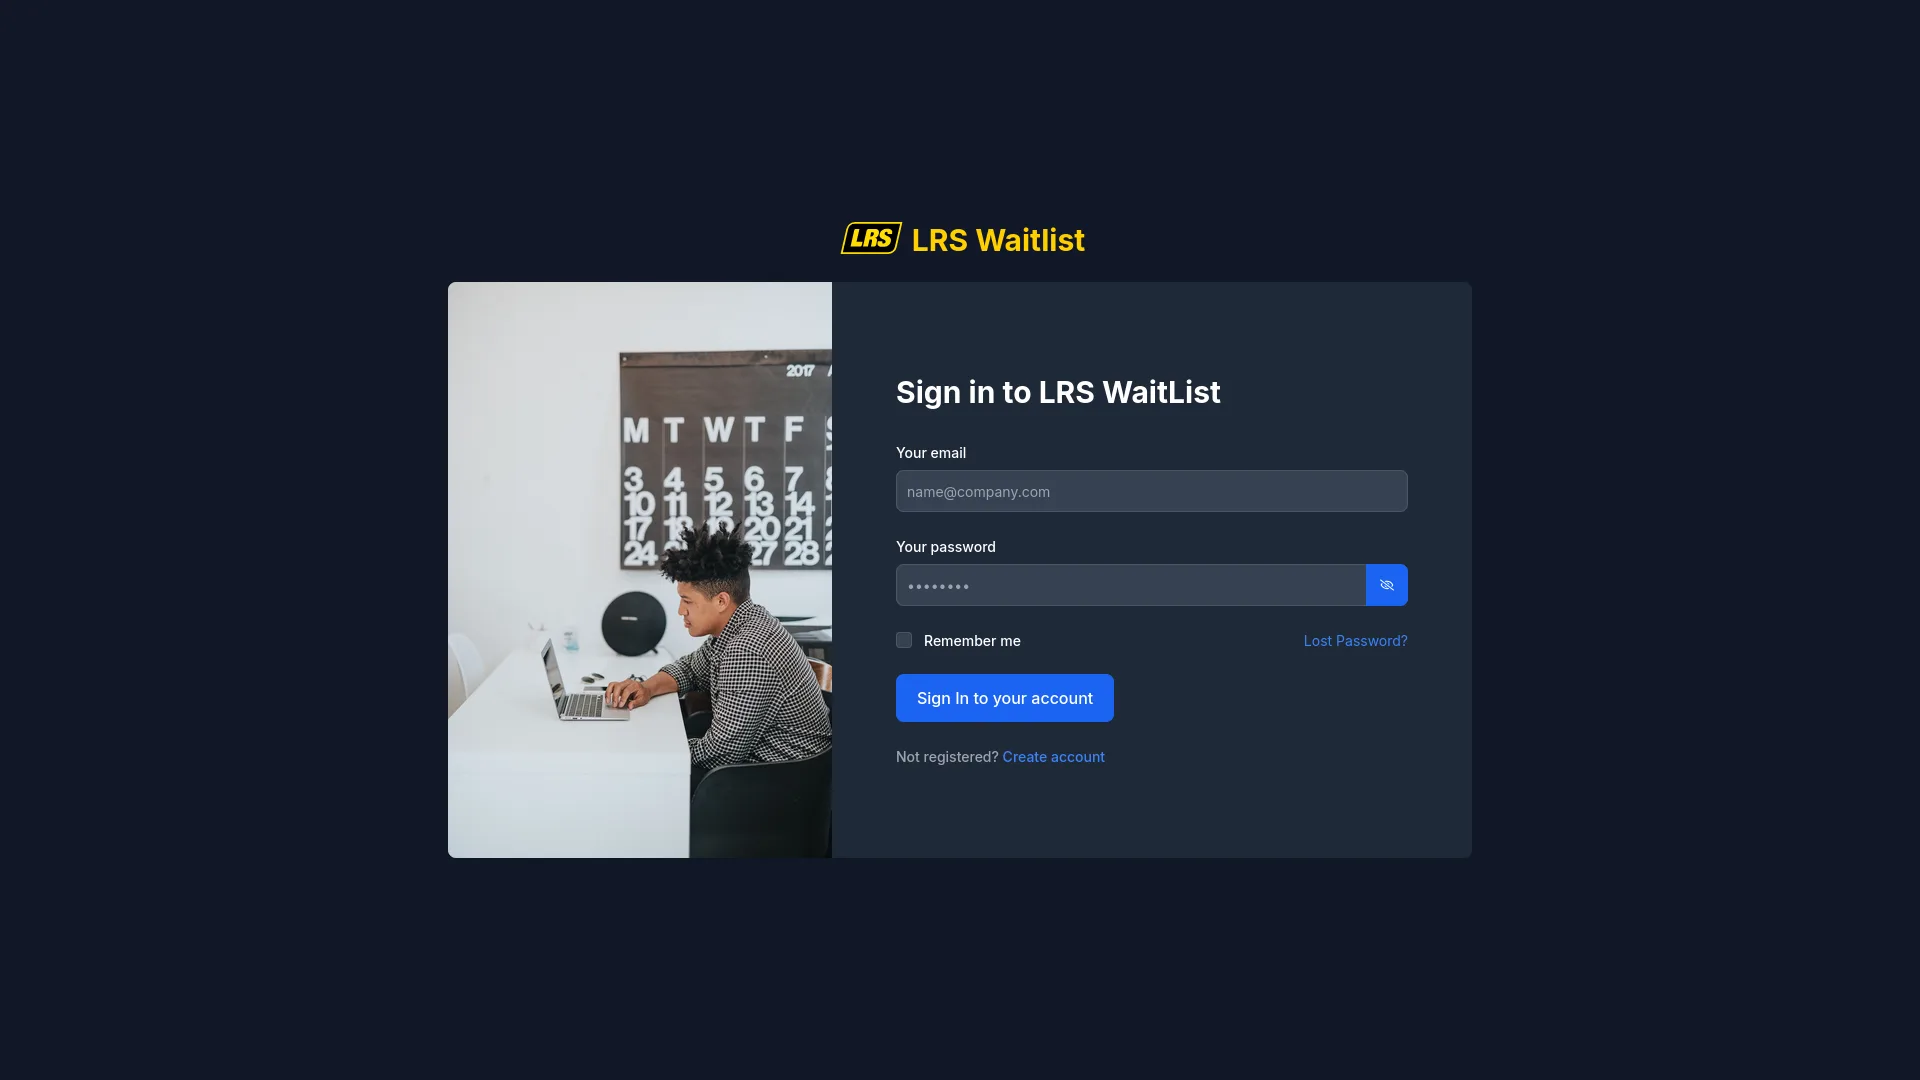
- Open the Dashboard sign-in page.
- Enter your registered email address and password.
- Check Remember me only on personal or dedicated devices — avoid it on shared terminals.
- Click Sign in. Dashboard opens to the home screen if your account is active and onboarding is already complete.
Recovering a lost password
- Click Lost Password? on the Dashboard sign-in page.
- Enter the email address registered to the account and submit the form.
- Open the password-reset email and follow the link to set a new password.
- Return to the sign-in page and sign in with the new password.
3. Onboarding
Complete the first billing and plan setup
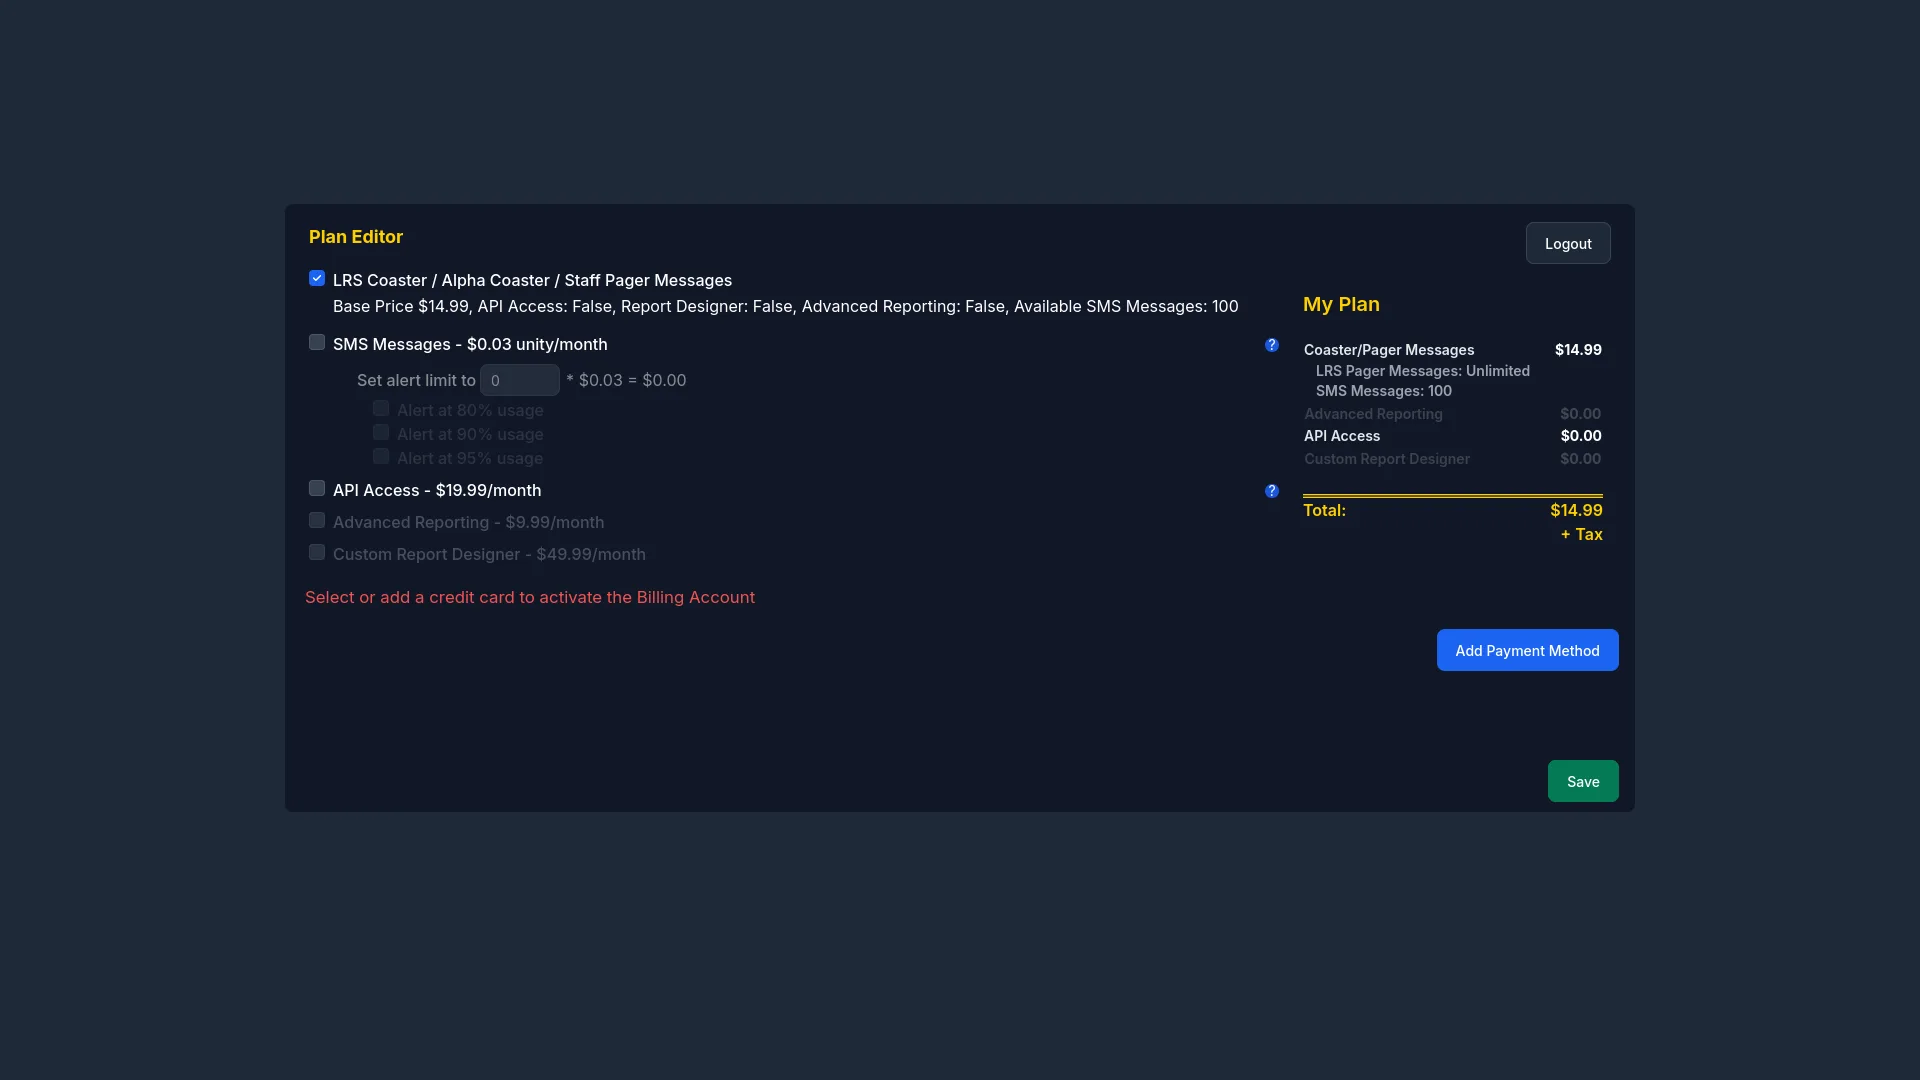
Onboarding runs once, the first time you sign in after activating a new account. Dashboard detects that the account has not yet been configured and opens the Plan Editor automatically — you do not need to navigate to it. Complete every step before moving on to Dashboard setup; the location will not be usable until onboarding is saved.
- Sign in after activating your account. Dashboard automatically detects that onboarding has not been completed and opens the Plan Editor — you do not need to navigate to it manually.
- Review the Plan Editor. LRS Coaster / Alpha Coaster / Staff Pager Messages are included in the base plan — this option is always active and cannot be deselected.
- Enable SMS Messages if the location will send text notifications to guests or staff. The base plan includes 100 messages per month; additional messages are charged at $0.03 each. Optionally configure usage alerts at 80%, 90%, or 95% of the plan allowance.
- Enable API Access if an approved external system will connect to this location through the API. Leave it off if no external integration is planned.
- Enter a credit card in the payment section.
- Click Save. Dashboard activates the location plan, links the billing account, and reloads to the main interface. Onboarding does not need to be repeated.
Expected result
When onboarding is complete, confirm the following before continuing to the setup path.
| What to confirm | How to verify it |
|---|---|
| Active plan | The location shows an active service plan. SMS Messages or API Access appear as active add-ons when those options were selected. |
| Billing linked | A payment method is saved and the location is assigned to the first billing account. |
| Dashboard ready | After Save, Dashboard reloads to the normal configuration interface. The Plan Editor no longer appears on sign-in. |
4. Minimum setup path
Prepare every area before the first arrival
Every item below must be in place before staff can open the Waitlist app and manage entries. Work through them in order — each one depends on what came before. The full field-by-field details for each item are in the Dashboard guide; use this table as the sequence to follow.
| Setup item | What to confirm or configure |
|---|---|
| Organization | Confirm the organization name, address, phone, and logo. Add users and verify the financial and API key state. |
| Billing account | Create a billing account, add a payment method, enter invoice recipient emails, and assign the location to the account. |
| Location profile | Confirm the location name, timezone, address, phone, and website. Verify the service plan is active, billing is linked, and an API key is assigned if the API add-on is in use. |
| Hours of Operation | Set active days and operation hours. Add Remote Check-in windows for self check-in. Set target wait times for each day when programmed notifications will be used. |
| Waitlist and areas | Create the waitlist at the organization level, add at least one active area, and assign the waitlist to the location from the Guestlist tab. |
| Guestlist form | Open the Form Designer and set field visibility independently for the staff add/edit form, live list columns, kiosk entry form, remote self check-in form, and the visitor status screen. |
| Messages and notifications | Set the confirmation, notification, check-in, and cancellation message templates. Configure pager hardware type and alert options. Add and test transmitters if the location uses pager hardware. Configure SMS behavior if SMS is on the plan. |
| Users and staff | Add Dashboard users, assign organization or location roles, set report subscriptions, and create staff pager profiles for team members who carry hardware pagers. |
5. First live run
Open the Waitlist app and create the first entry
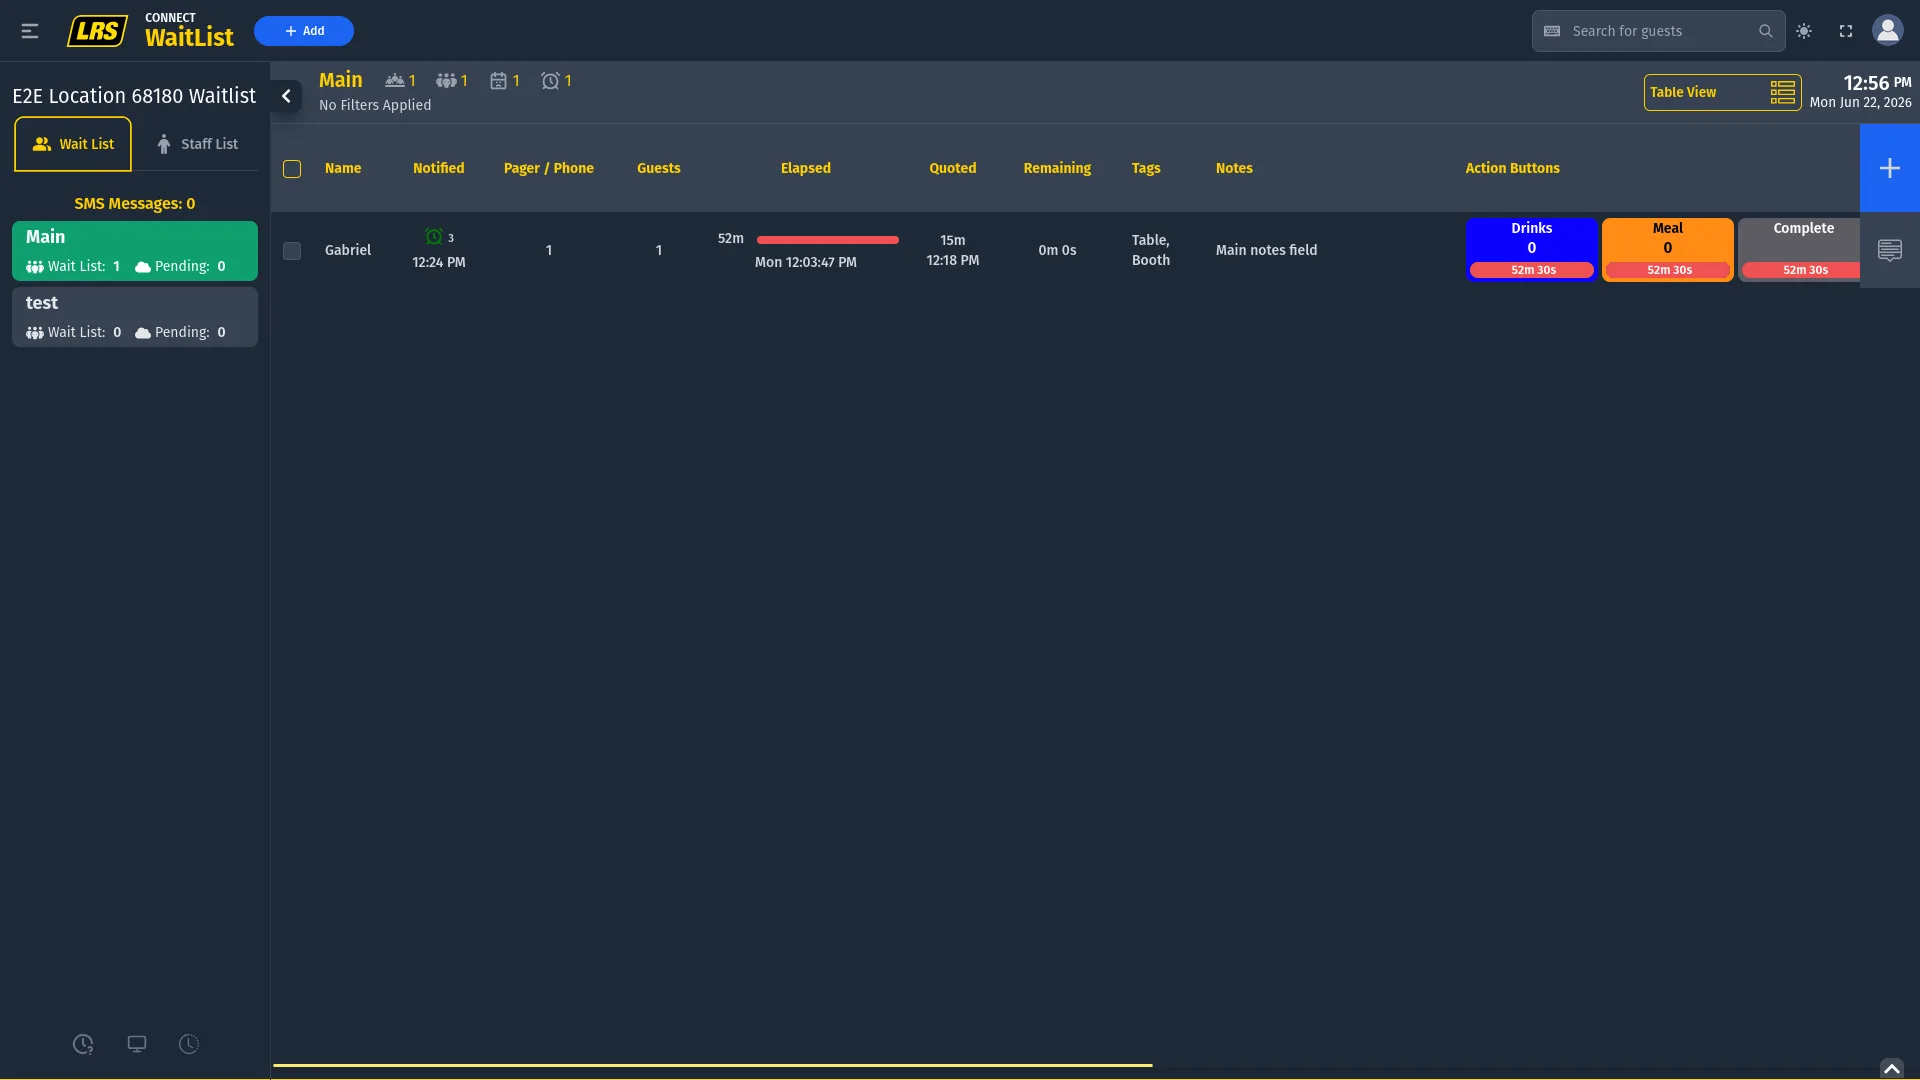
Once Dashboard setup is complete, open the Waitlist app and run through the core flow from start to finish. Doing this before the location goes live confirms that every piece of the configuration works together.
- From the Dashboard, navigate to the locations workspace. Find the location card and click Open app. Dashboard generates a one-time access link and opens the Waitlist app in a new tab — no separate Waitlist login is required.
- Confirm the correct waitlist and area are active. The selected area appears highlighted in green in the sidebar.
- Click + Add to open the Add Guest modal. Fill in the required fields and click Add Guest to Waitlist. The entry appears immediately in the active list.
- Click the entry row to open the action panel. Send the notification appropriate for the entry state — Notify Guest of Wait Time for Pending entries, or a standard or custom message for Waiting entries.
- If the workflow requires it, open the action panel and choose Move to [area name], or drag the entry row to a different area in the sidebar.
- When the visit is finished, open the action panel and choose Complete Guest Journey.
- If a completion or removal was a mistake, click the clock icon at the bottom of the sidebar to open Waitlist History and click Restore.
Expected result
After running through the flow, verify the following. If any item is missing, check the setup item it depends on in the Dashboard guide.
| What you should see | What it confirms |
|---|---|
| Entry appears in the list | The walk-in, self check-in, kiosk, or API-created entry appears in the expected area immediately after being added or submitted. |
| Notification reaches the guest | The SMS message, pager alert, or both are delivered when the service plan, the entry's contact value, the transmitter assignment, and the area notification options are all correctly in place. |
| Staff can act on every state | Edit, notify, move, complete, and remove actions are all available from the action panel. Restore is available from Waitlist History for up to 24 hours after completion or removal. |
Prerequisites by entry flow
Not every entry method is available by default. Confirm what needs to be in place for each flow you plan to use before expecting it to work.
| Entry flow | Required setup |
|---|---|
| Staff walk-in | Active location, active waitlist, at least one active area, and at least one field visible on the staff add/edit form. |
| Remote self check-in | Self Check-in Area selected in the Guestlist workspace, Remote Check-in hours enabled and currently open in Hours of Operation, remote-visible fields on the form, and an active SMS plan to deliver the wait-time link to the visitor. |
| Kiosk | Kiosk Area selected in the Guestlist workspace, kiosk-visible fields on the form, current operation hours open, and kiosk launched from the Guestlist workspace Launch Kiosk button — not by opening a direct URL on the device. |
6. Go-live checklist
Confirm everything is ready before the team starts
Use this checklist before handing the system over to the team. Every item should be true before staff begins live operation.
- The account is active and all expected users can sign in.
- Onboarding is complete and the location service plan is active.
- The organization, billing account, location profile, and payment method are confirmed.
- Hours of Operation has active days with operation hours set. Remote Check-in windows are configured when self check-in is used.
- At least one active waitlist is assigned to the location, with at least one active area inside it.
- Kiosk Area and Self Check-in Area are selected in the Guestlist workspace when those arrival flows are used.
- The Form Designer has the correct fields enabled for each context — staff add/edit form, live list columns, kiosk, remote check-in, and status screen.
- Default messages, pager notification options, SMS behavior, and transmitter assignments are all confirmed before staff sends the first notification.
- Every Dashboard user has the correct organization or location role and the expected report subscriptions.
- API keys are active and bound only to the locations the integration is authorized to access, if API is in use.
7. Next steps
Use the detailed guides or contact support
The quickstart covers the shortest path to a working setup. For full configuration details, daily operation reference, or integration documentation, use the guides below.
Detailed setup reference
Full field-by-field details for organizations, locations, billing, waitlists, areas, forms, users, API keys, and auditing.
WaitlistDaily operation reference
Entry methods, states, notification types, movement, recovery flows, visitor-facing views, and display screens.
APIIntegration reference
Prerequisites, authentication, endpoint reference, booking rules, the portal, and troubleshooting for external integrations.
If you are blocked by an issue the guides do not resolve, contact LRS support with the account name, organization, location, affected user or entry, the time the issue occurred, and a description of what was clicked and what the team expected to happen.