Menu item missing after login
Confirm the user has a location manager or org manager assignment. Staff without a manager role cannot see Dashboard configuration menus.
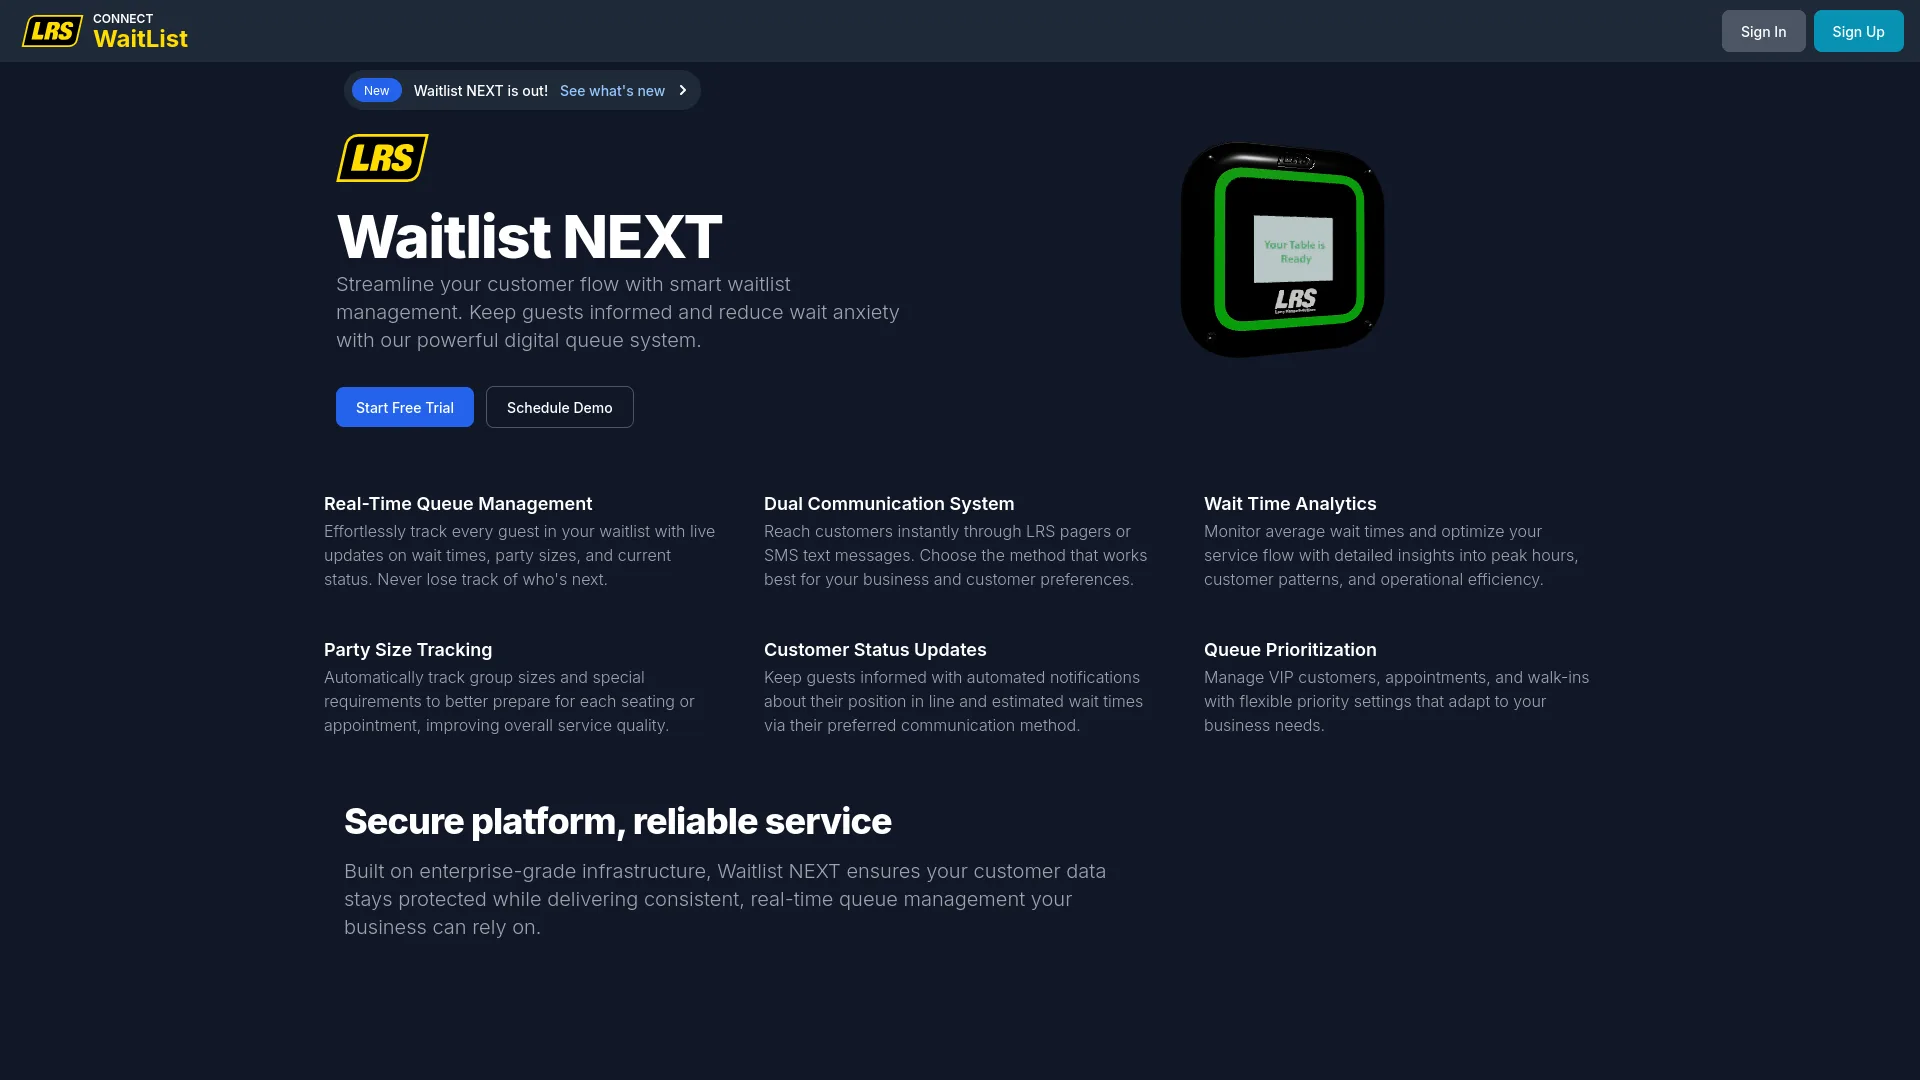
Dashboard is the control center for LRS Waitlist NEXT. This guide covers every area of Dashboard organized by role — from public access up to account owner — so you can go directly to the section that matches your level of access.
1. Role model
Dashboard adapts its sidebar, menus, and available tabs to the signed-in user's role. A user can hold multiple roles at once — for example, being an org manager for one organization while also acting as a location manager for a location in a different organization. The sidebar updates automatically when role assignments change.
| Role | Scope of access |
|---|---|
| Public (unauthenticated) | Can view the landing page and request a demo. No access to Dashboard or the live Waitlist app. |
| Staff | Signs in with email and password. Cannot access Dashboard configuration. Redirected to the live Waitlist app. |
| Staff Manager / Location Manager | Manages assigned locations: profile, hours, plan, transmitters, guestlists, areas, form designer, staff profiles, SMS, and location users. |
| Org Manager | Manages assigned organizations: org profile, users, financial overview, API keys, billing accounts, and the org-level waitlist structure. |
| Account Admin | Full access equivalent to the owner: all organizations, all locations, global users, and auditing. |
| Account Owner | The account creator. Full and permanent access. Cannot be removed by other users. |
2. Public
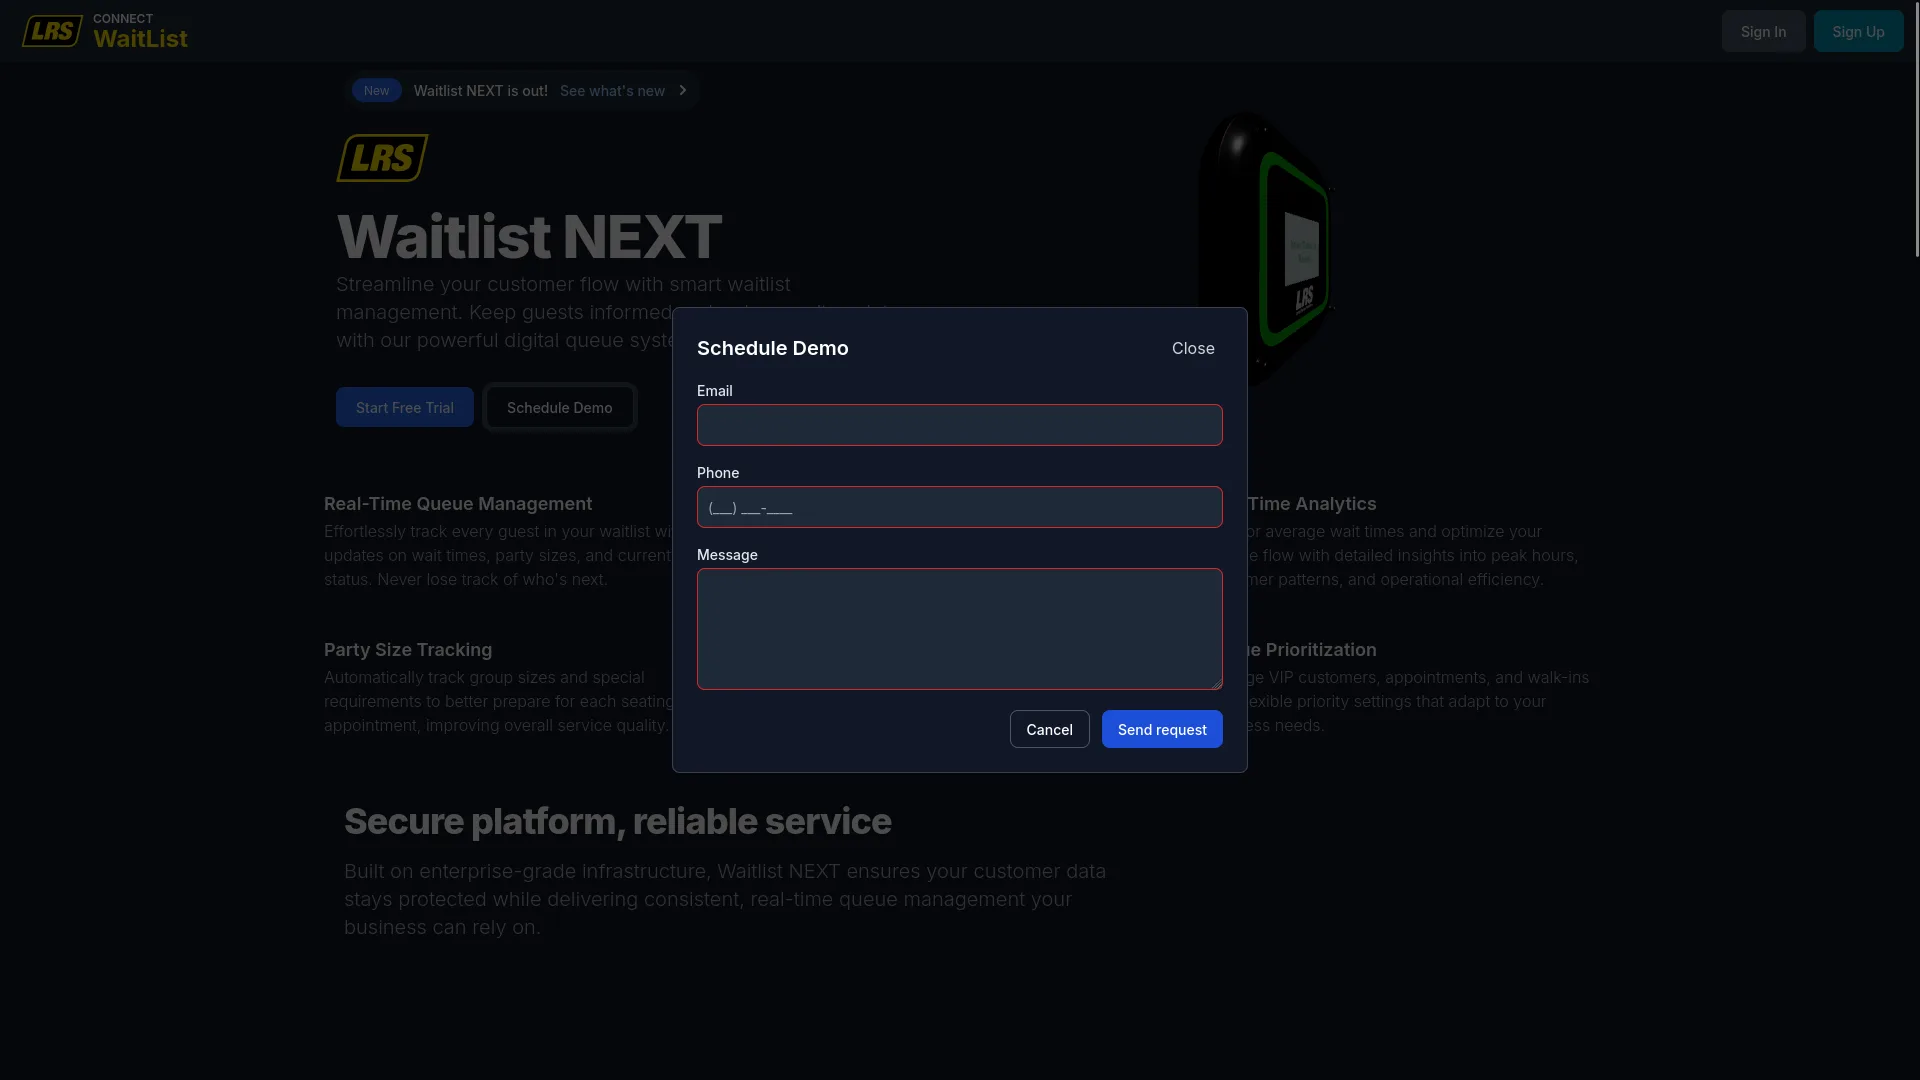
Before signing in, any visitor can explore the product on the LRS Waitlist NEXT landing page. The landing page offers two primary paths: create a new account or sign in to an existing one. A Schedule Demo option lets prospects request a guided walkthrough before committing.
The Schedule Demo form collects email, phone, and an optional message. An LRS representative follows up directly to arrange the session.
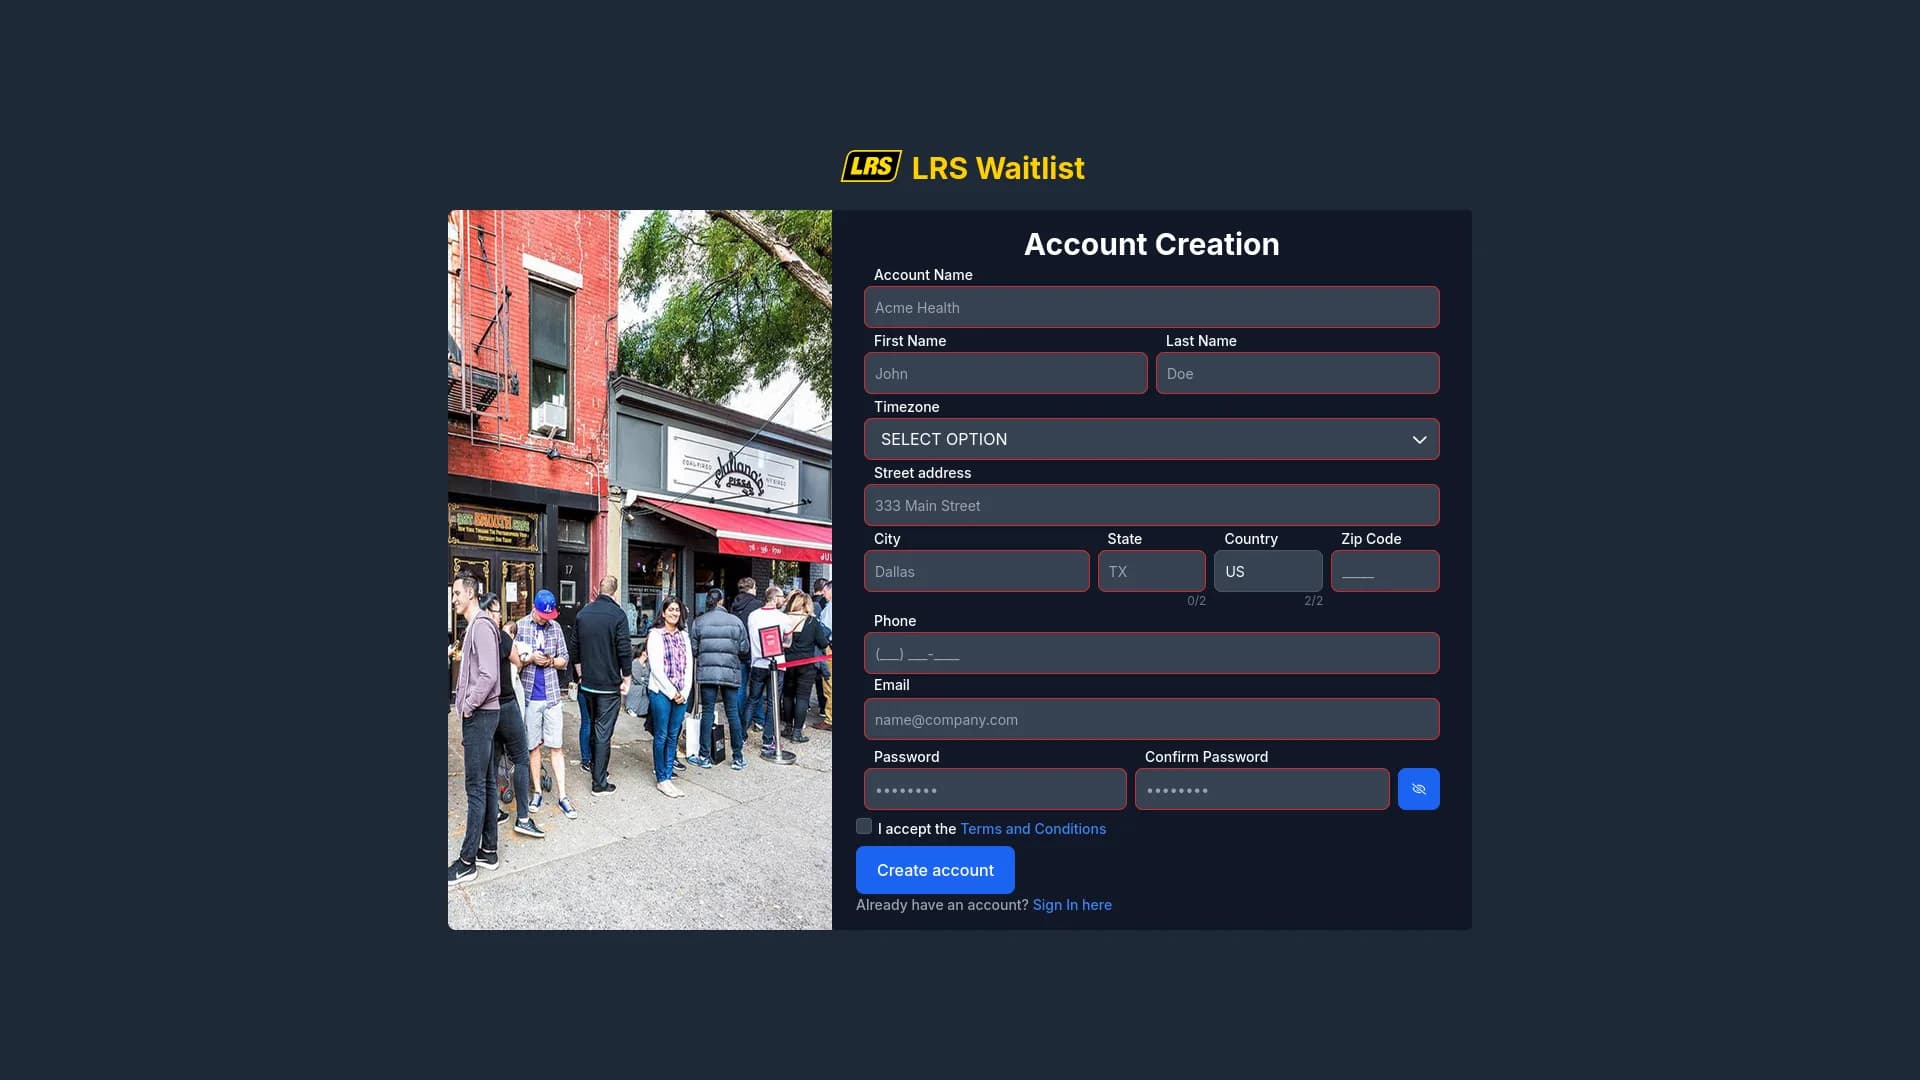
Account creation establishes the account owner and the top-level account structure. Complete this once — all other users are added later through Dashboard.
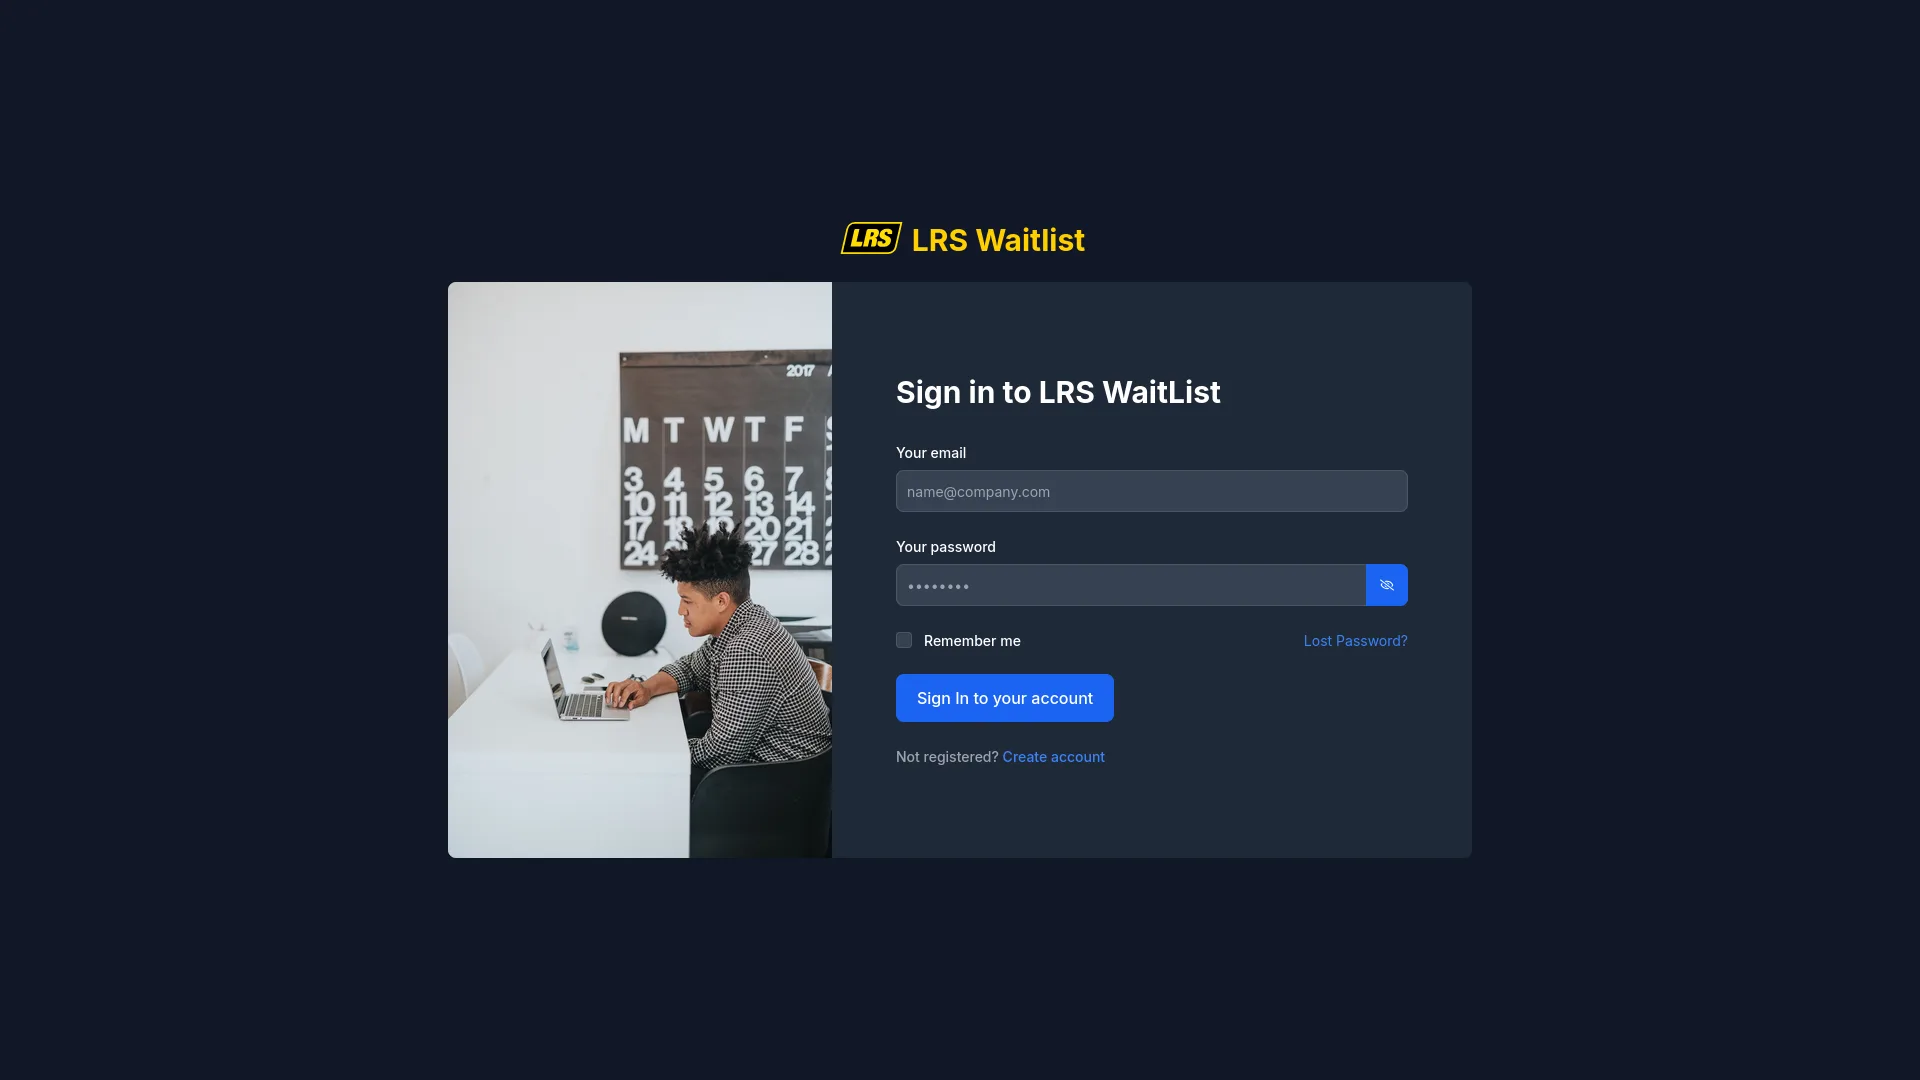
Once activated, all users — owners, admins, managers, and staff — sign in from the Dashboard sign-in screen using their registered email and password.
3. Staff
Users assigned as Staff without a manager role cannot access Dashboard setup screens. Dashboard detects the missing permission when they sign in and shows the screen below instead of the configuration interface.
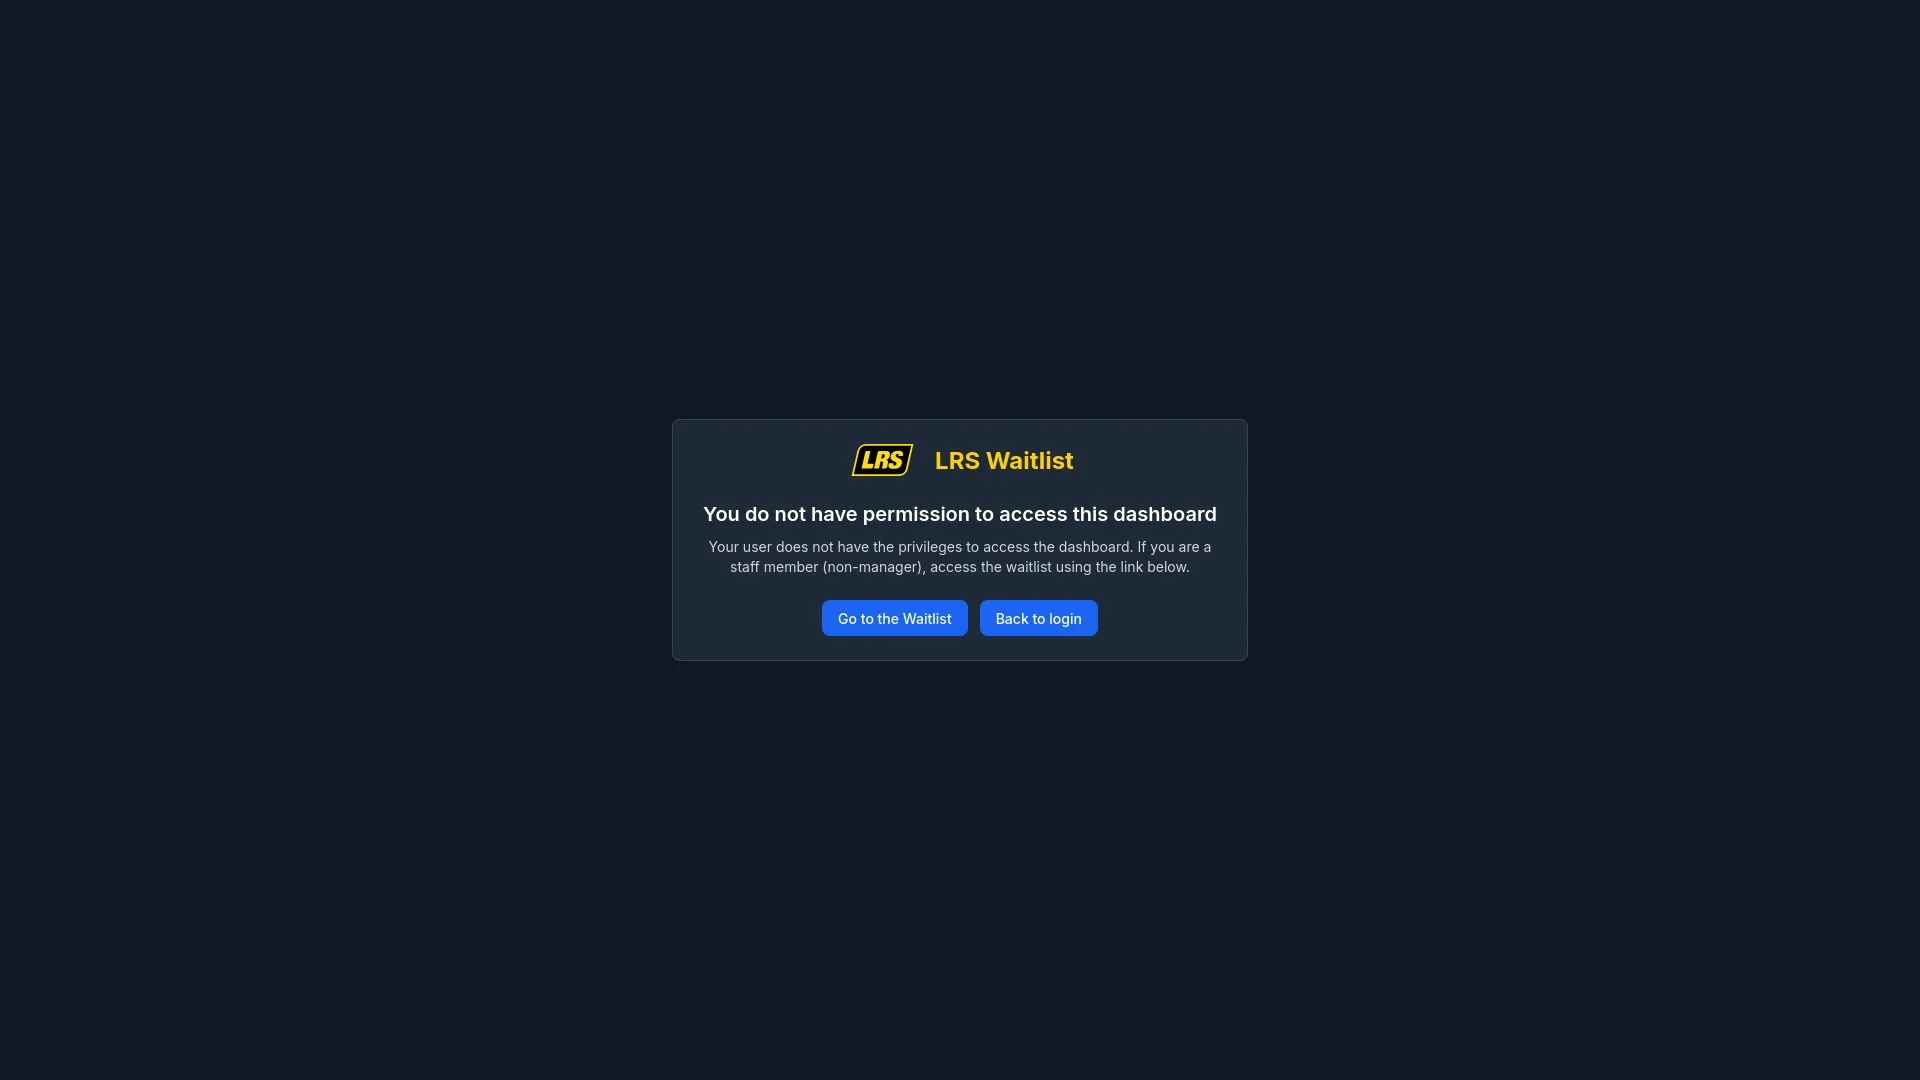
Staff use the live Waitlist app for their daily work: adding guests, sending notifications, managing entries, and completing visits. Everything a staff user needs is covered in the Waitlist guide, not here. The Go to the Waitlist button on the redirect screen takes them directly there.
4. Location Manager
Location managers are the primary daily users of Dashboard. They can view performance analytics for their assigned locations and configure every aspect of how those locations run — from operating hours and transmitters to staff pager profiles and user access.
The Dashboard home is visible to all manager roles and scopes its data to the locations accessible to the signed-in user. Unlike scheduled report emails, the home page reflects real-time data and updates as entries are added, completed, and removed throughout the day. The date range selector at the top filters all panels simultaneously.
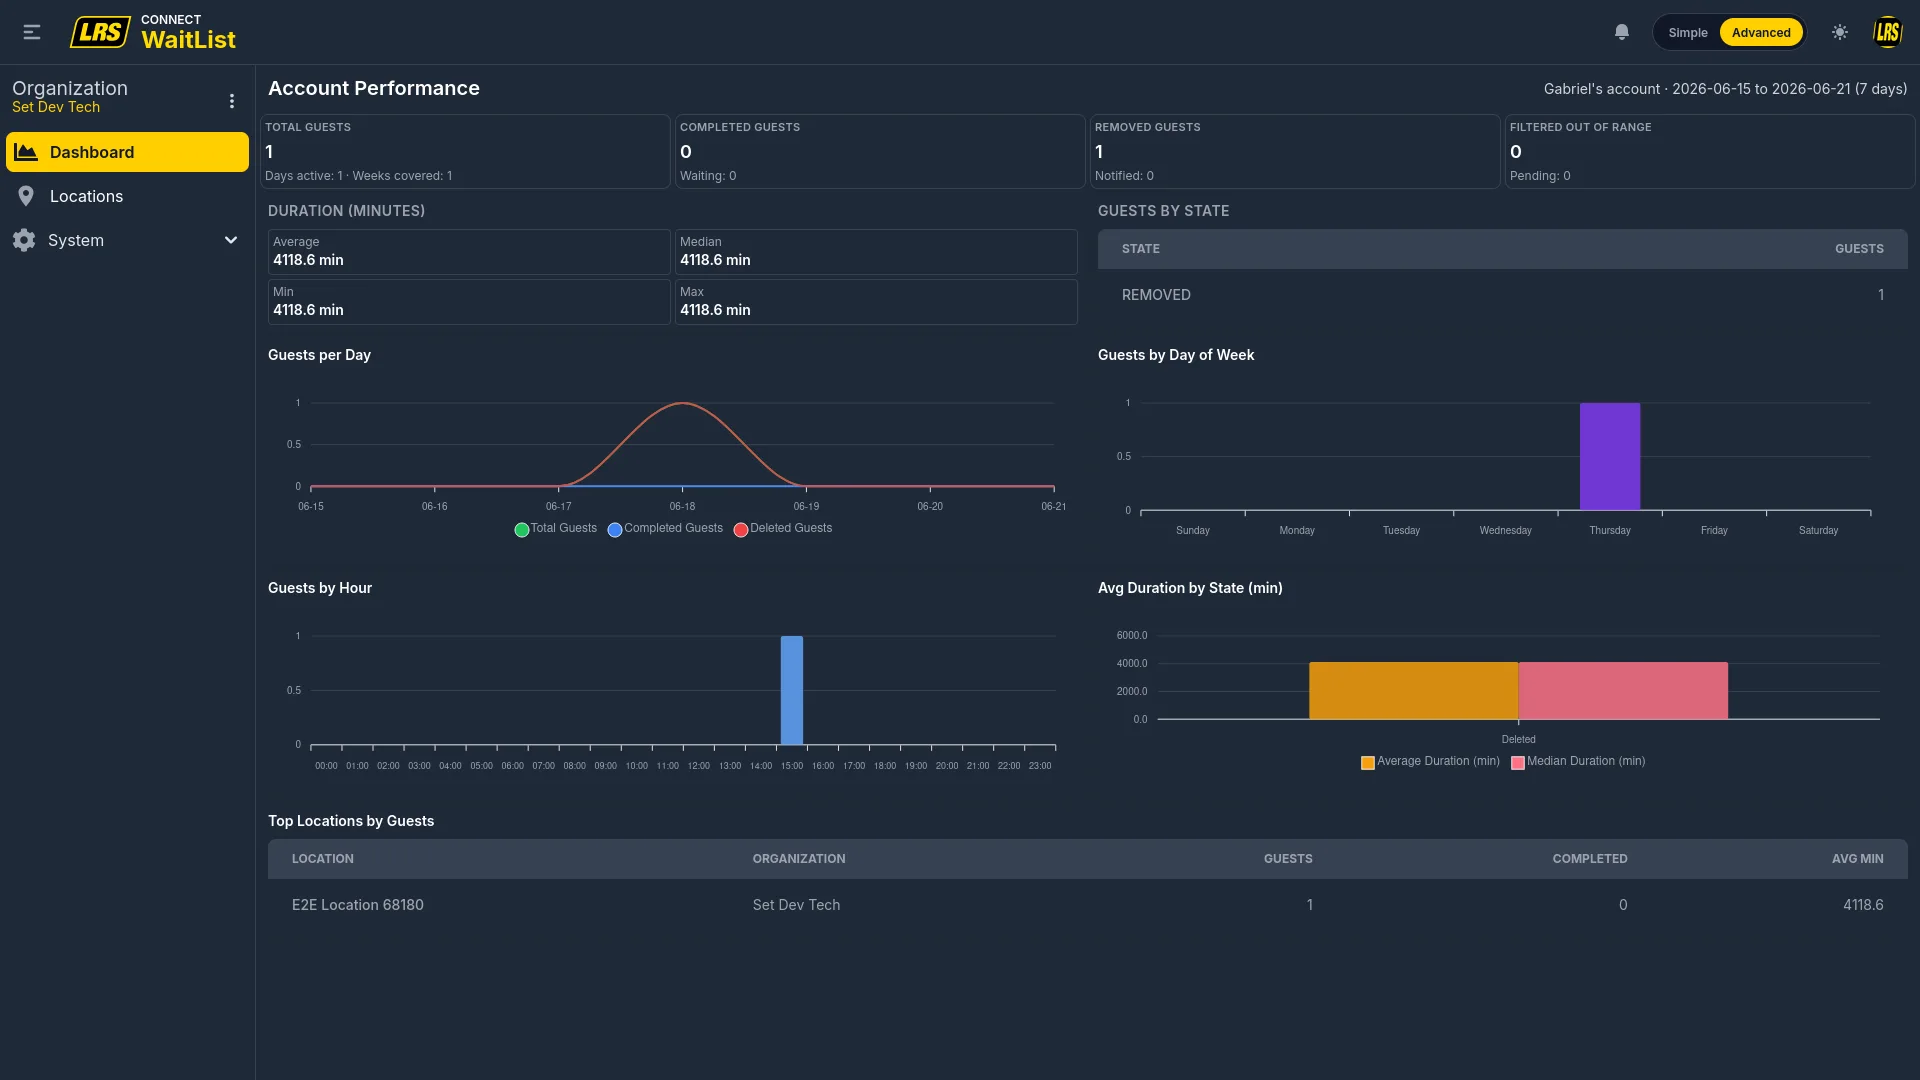
| Metric | What it measures |
|---|---|
| Total Guests | All entries added during the period. Subtext shows the number of active days and weeks covered. |
| Completed Guests | Entries that reached completed state. Subtext shows the count currently in Waiting state. |
| Removed Guests | Entries removed before completion. Subtext shows how many had been notified before removal. |
| Filtered Out Of Range | Entries excluded from the period totals because their timestamps fall outside the selected date range. Subtext shows the count in Pending state. |
| Duration (minutes) | Four values — average, median, minimum, and maximum — calculated across all completed entries in the period. |
| Guests By State | Table listing every entry state with its total count for the period. |
| Guests per Day | Line chart showing total, completed, and deleted entry volume by calendar day. |
| Guests by Hour | Bar chart showing which hours of the day receive the most entries. |
| Guests by Day of Week | Bar chart showing which weekdays carry the most volume. |
| Avg Duration by State | Bar chart comparing average and median wait time per final entry state. |
| Top Locations by Guests | Table ranking locations by guest volume with completed count and average duration. |
In simple mode, clicking Locations in the sidebar opens the workspace — a card-based view where each location shows three readiness panels: Guestlist, Plan, and Health. The Manage button on a card opens the location's Manage page. The Open app button generates a one-time sign-in link and opens the live Waitlist app in a new tab.
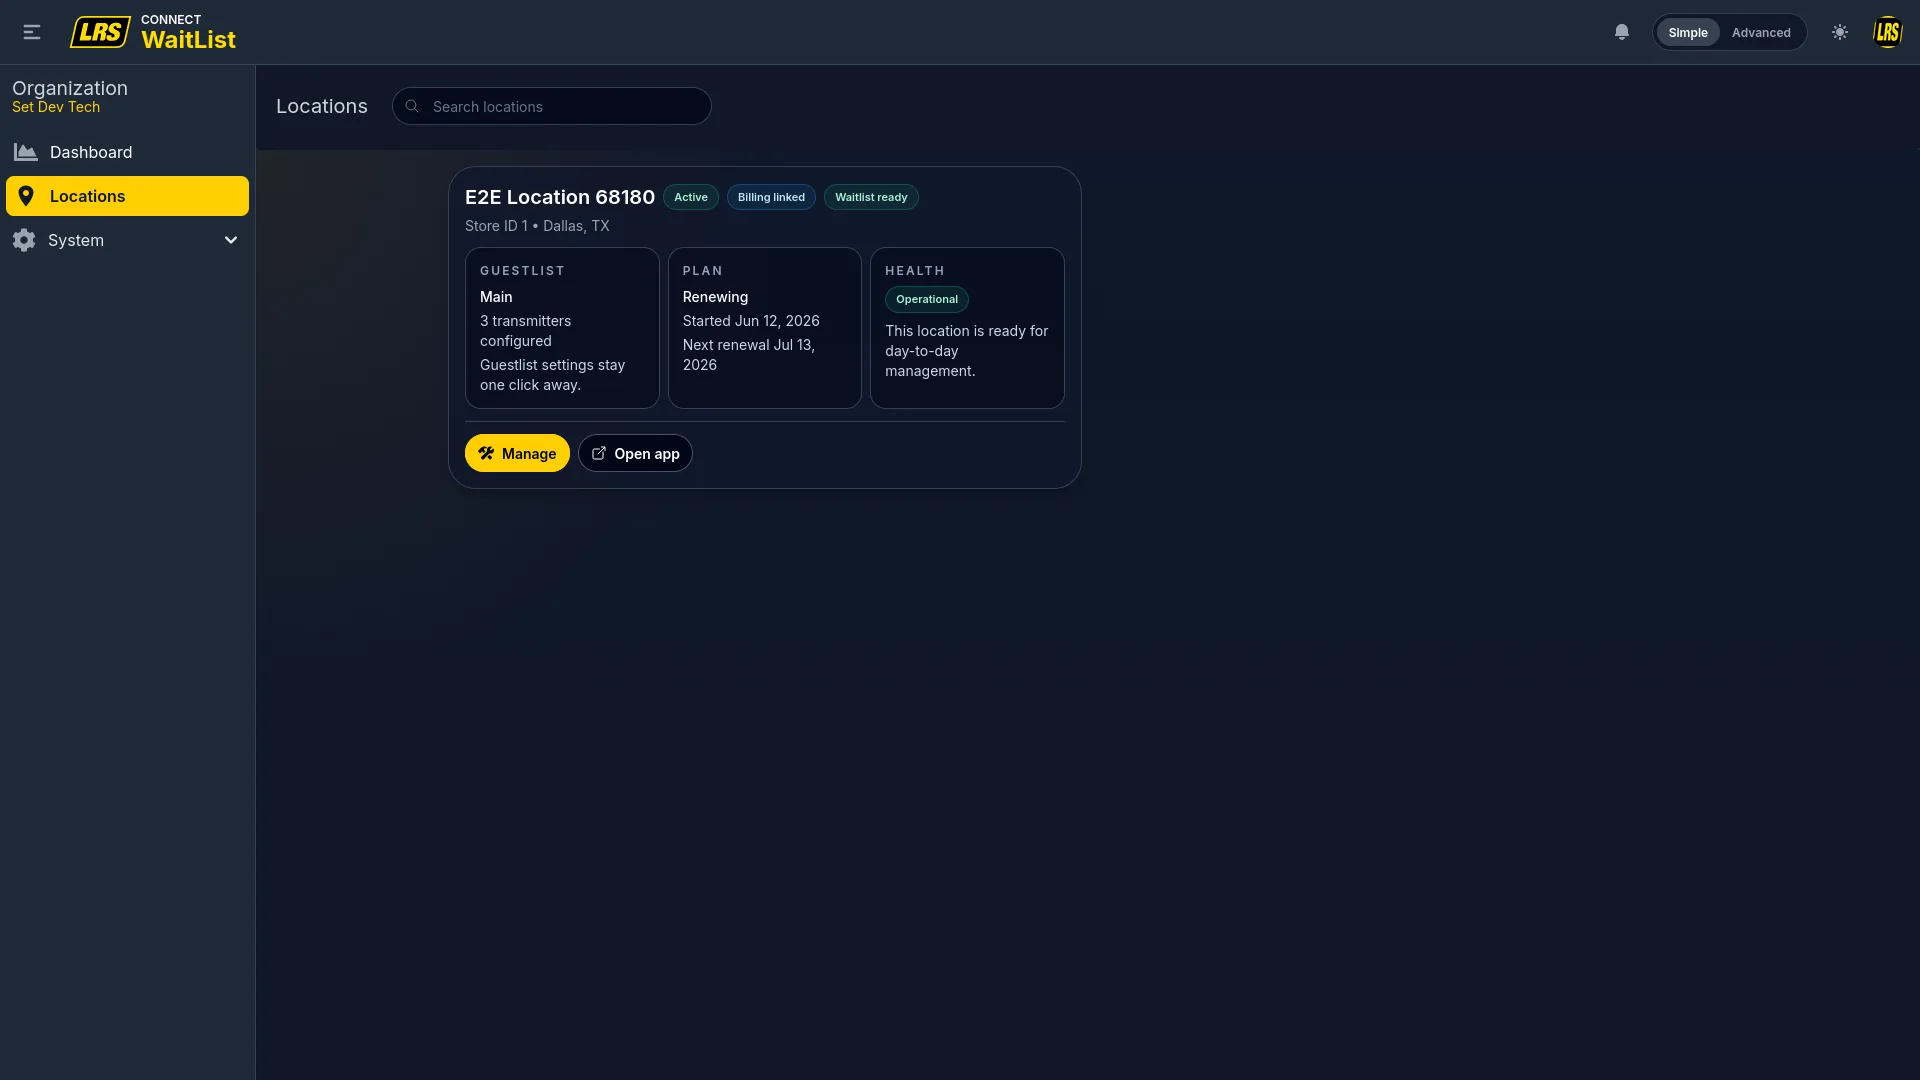
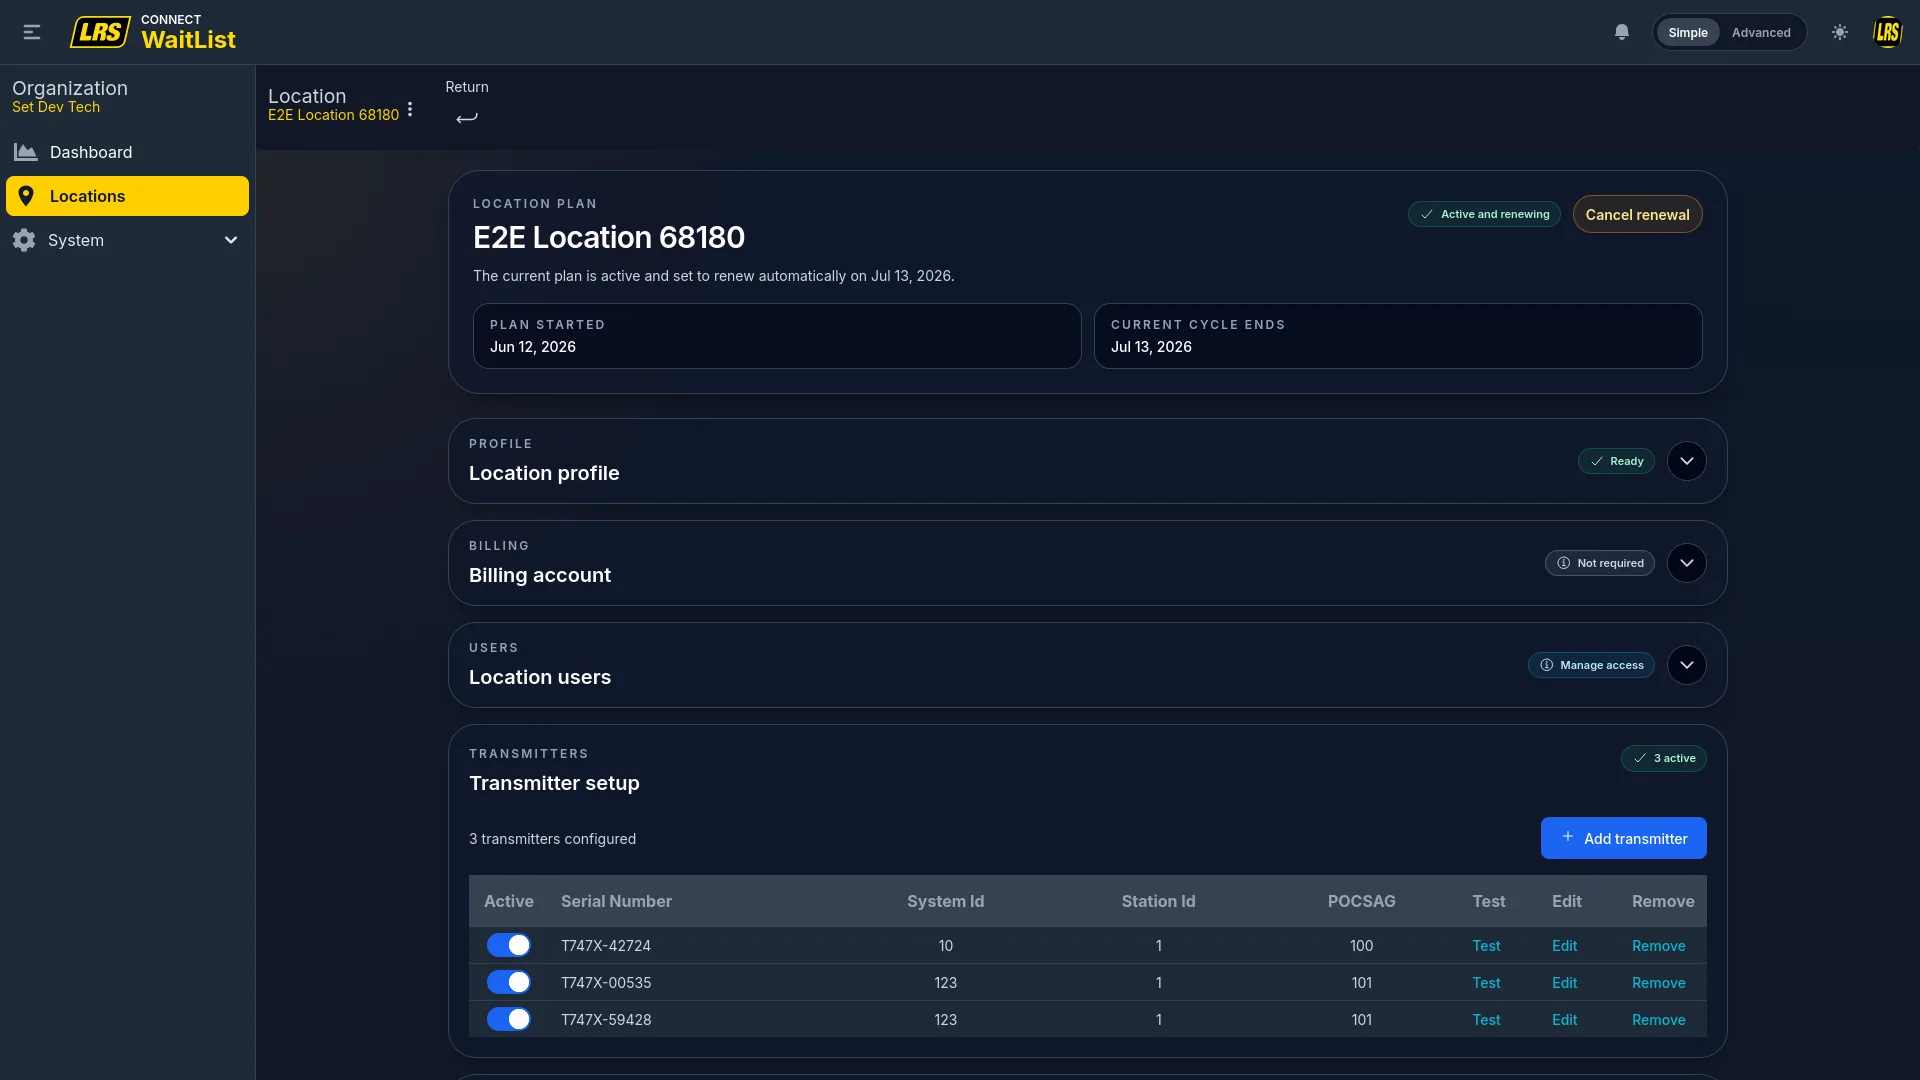
The Manage page collects everything the location needs to operate into collapsible sections: Profile, Plan, Billing, Users, Transmitters, and Guestlist. Each section shows a readiness badge — green when ready, yellow when setup is incomplete. Expand a section to configure it without leaving the page. The Transmitters and Guestlist sections are always expanded inline because they are needed most often during daily setup.
In advanced mode the sidebar exposes the complete organization hierarchy. Clicking Locations opens a table showing Status, Store ID, Name, Current Waitlist (with Manage and View buttons), Billing, Renewing state, and an Edit link. Advanced mode is more efficient when overseeing many locations at once — billing dates and renewal state are visible per row without opening each location individually.
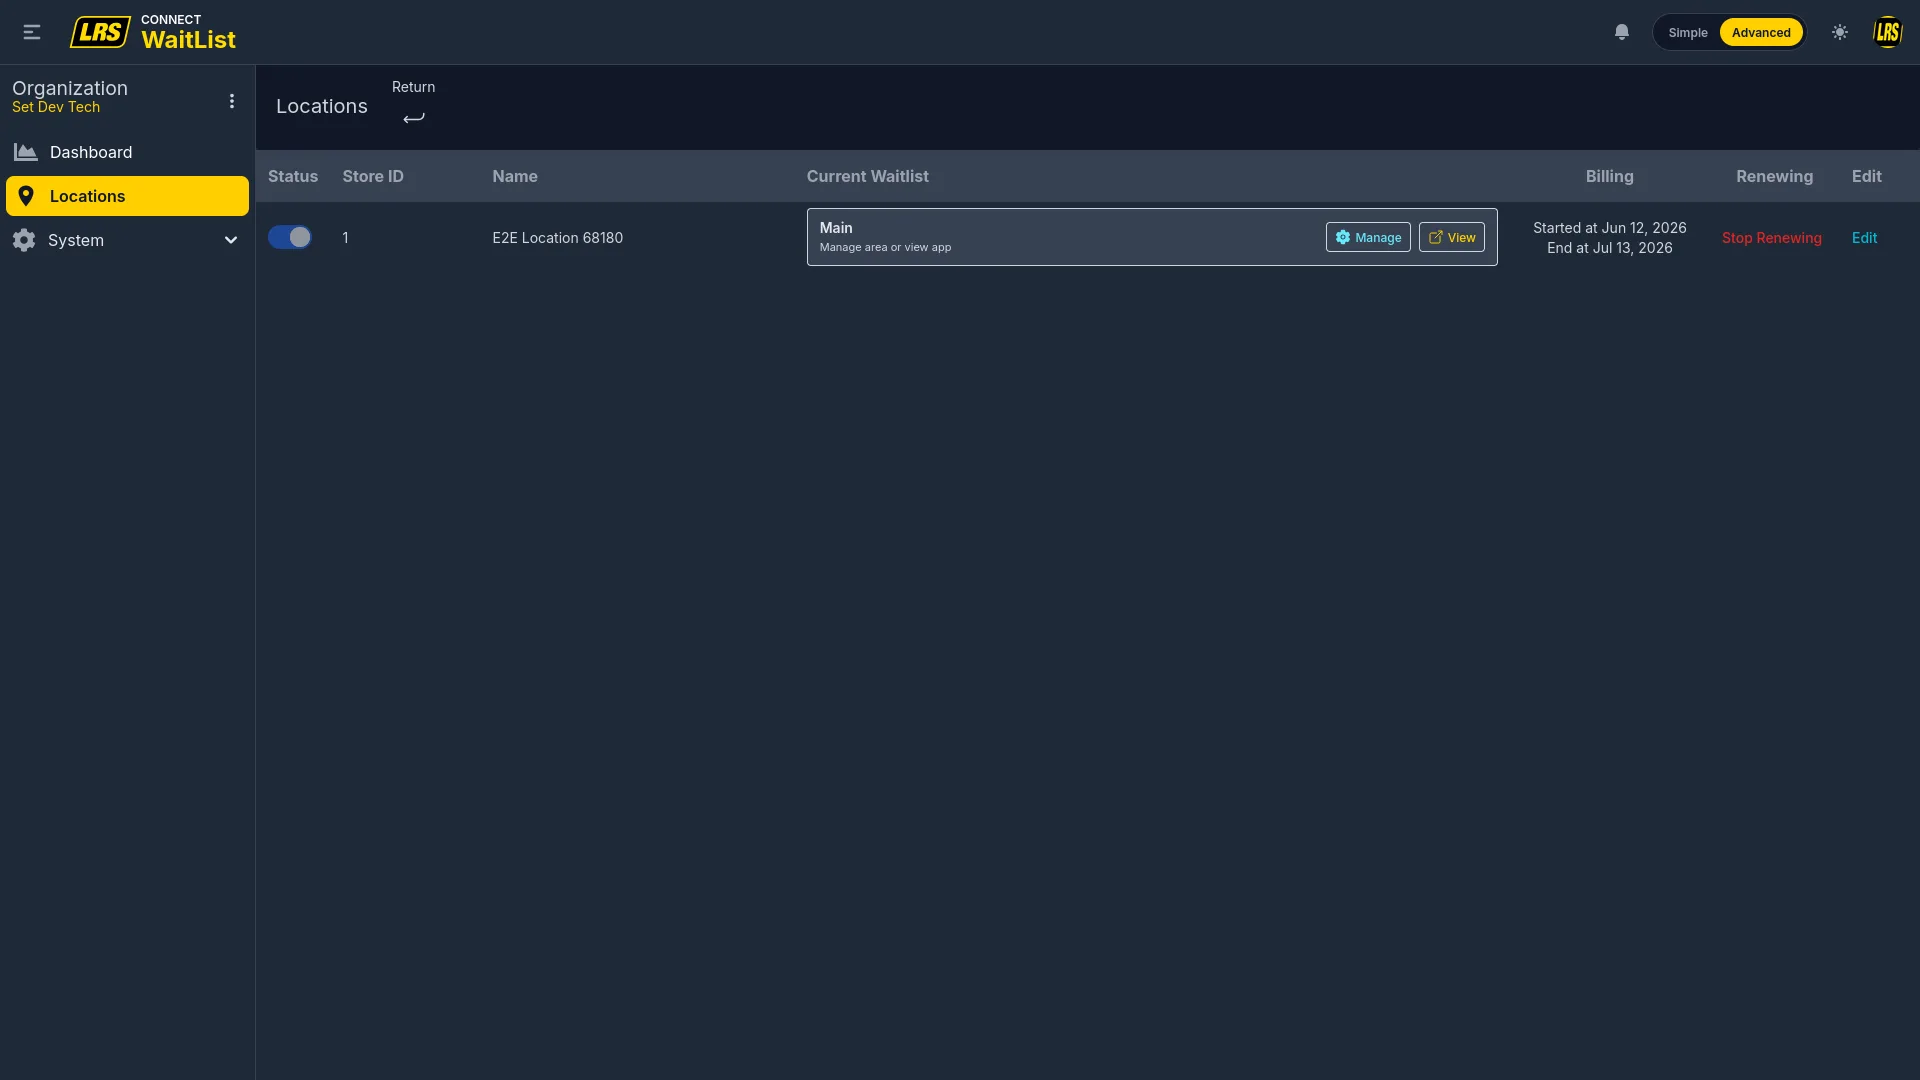
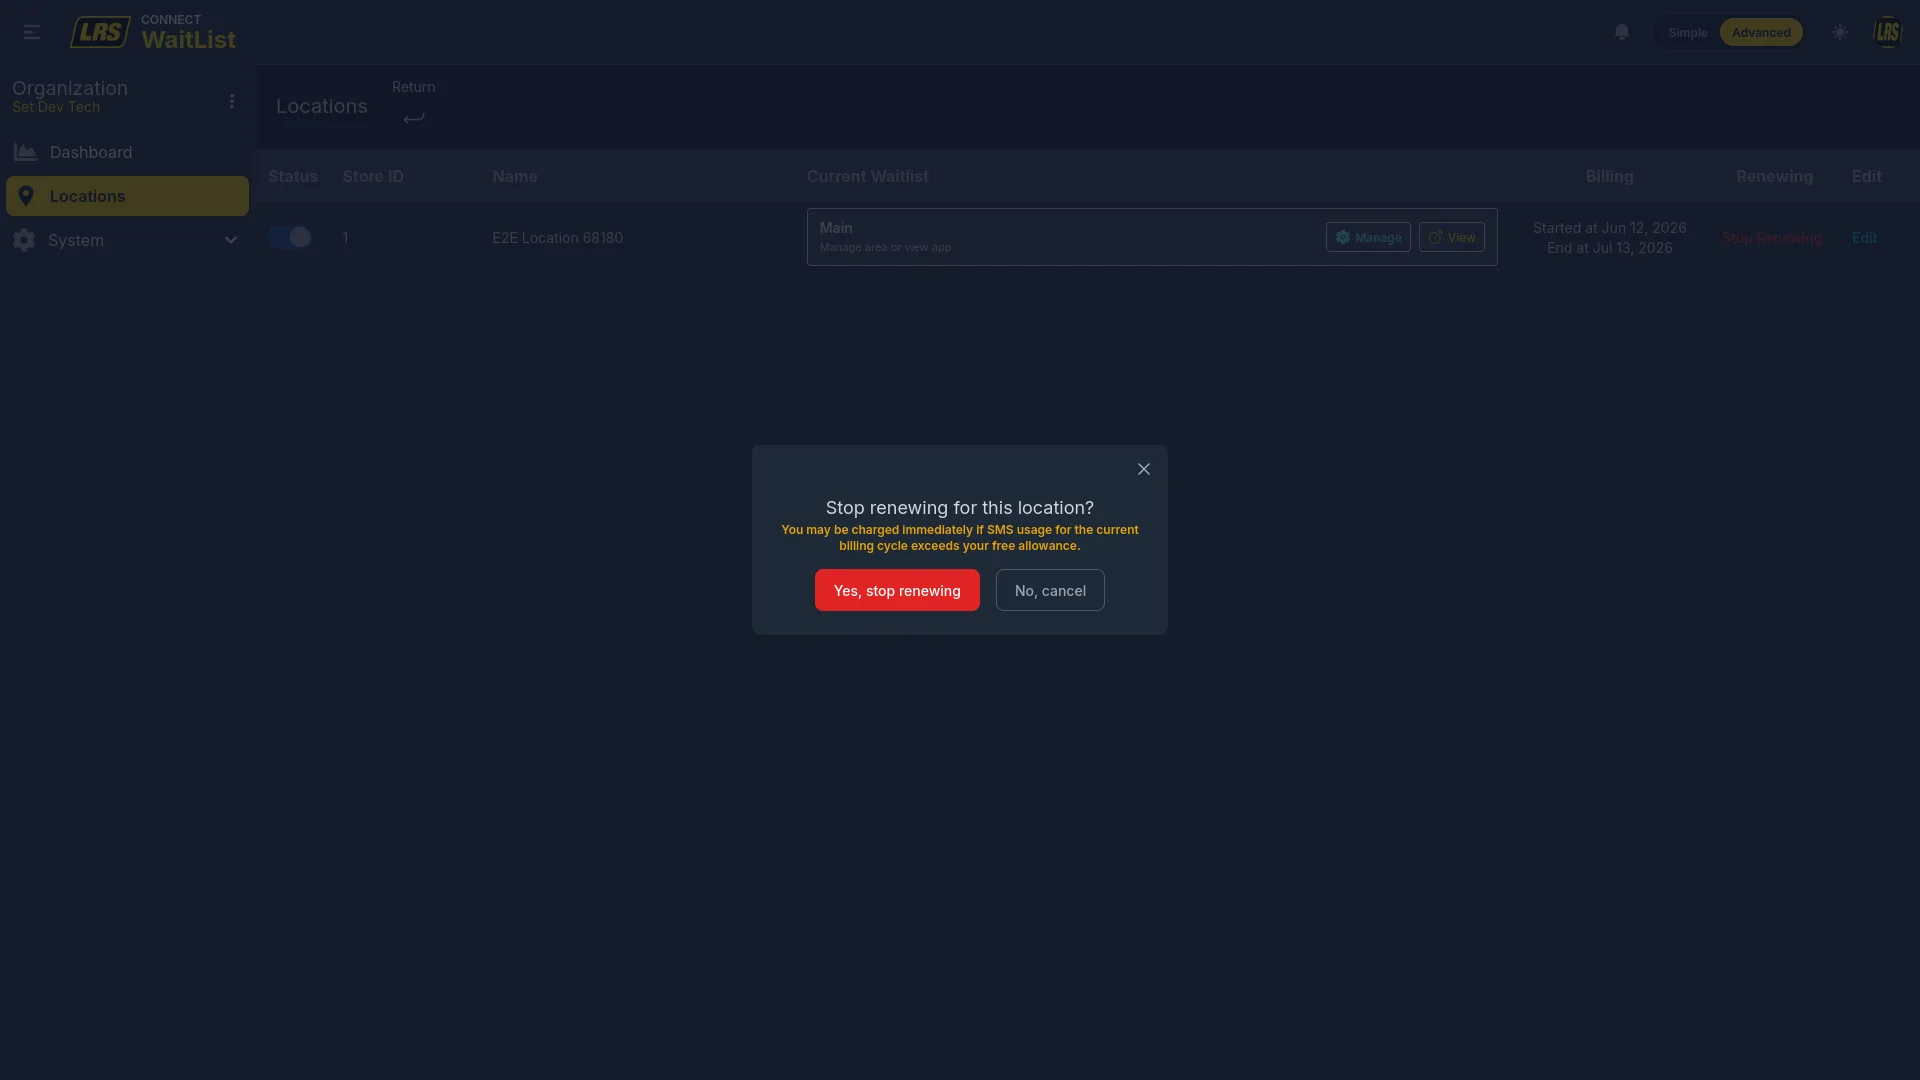
Stop Renewing ends the service plan at the end of the current billing cycle. The location remains active until the cycle ends and continues to accept entries. The warning in the confirmation modal notes that SMS usage for the current cycle may result in an immediate charge if the free allowance has been exceeded.
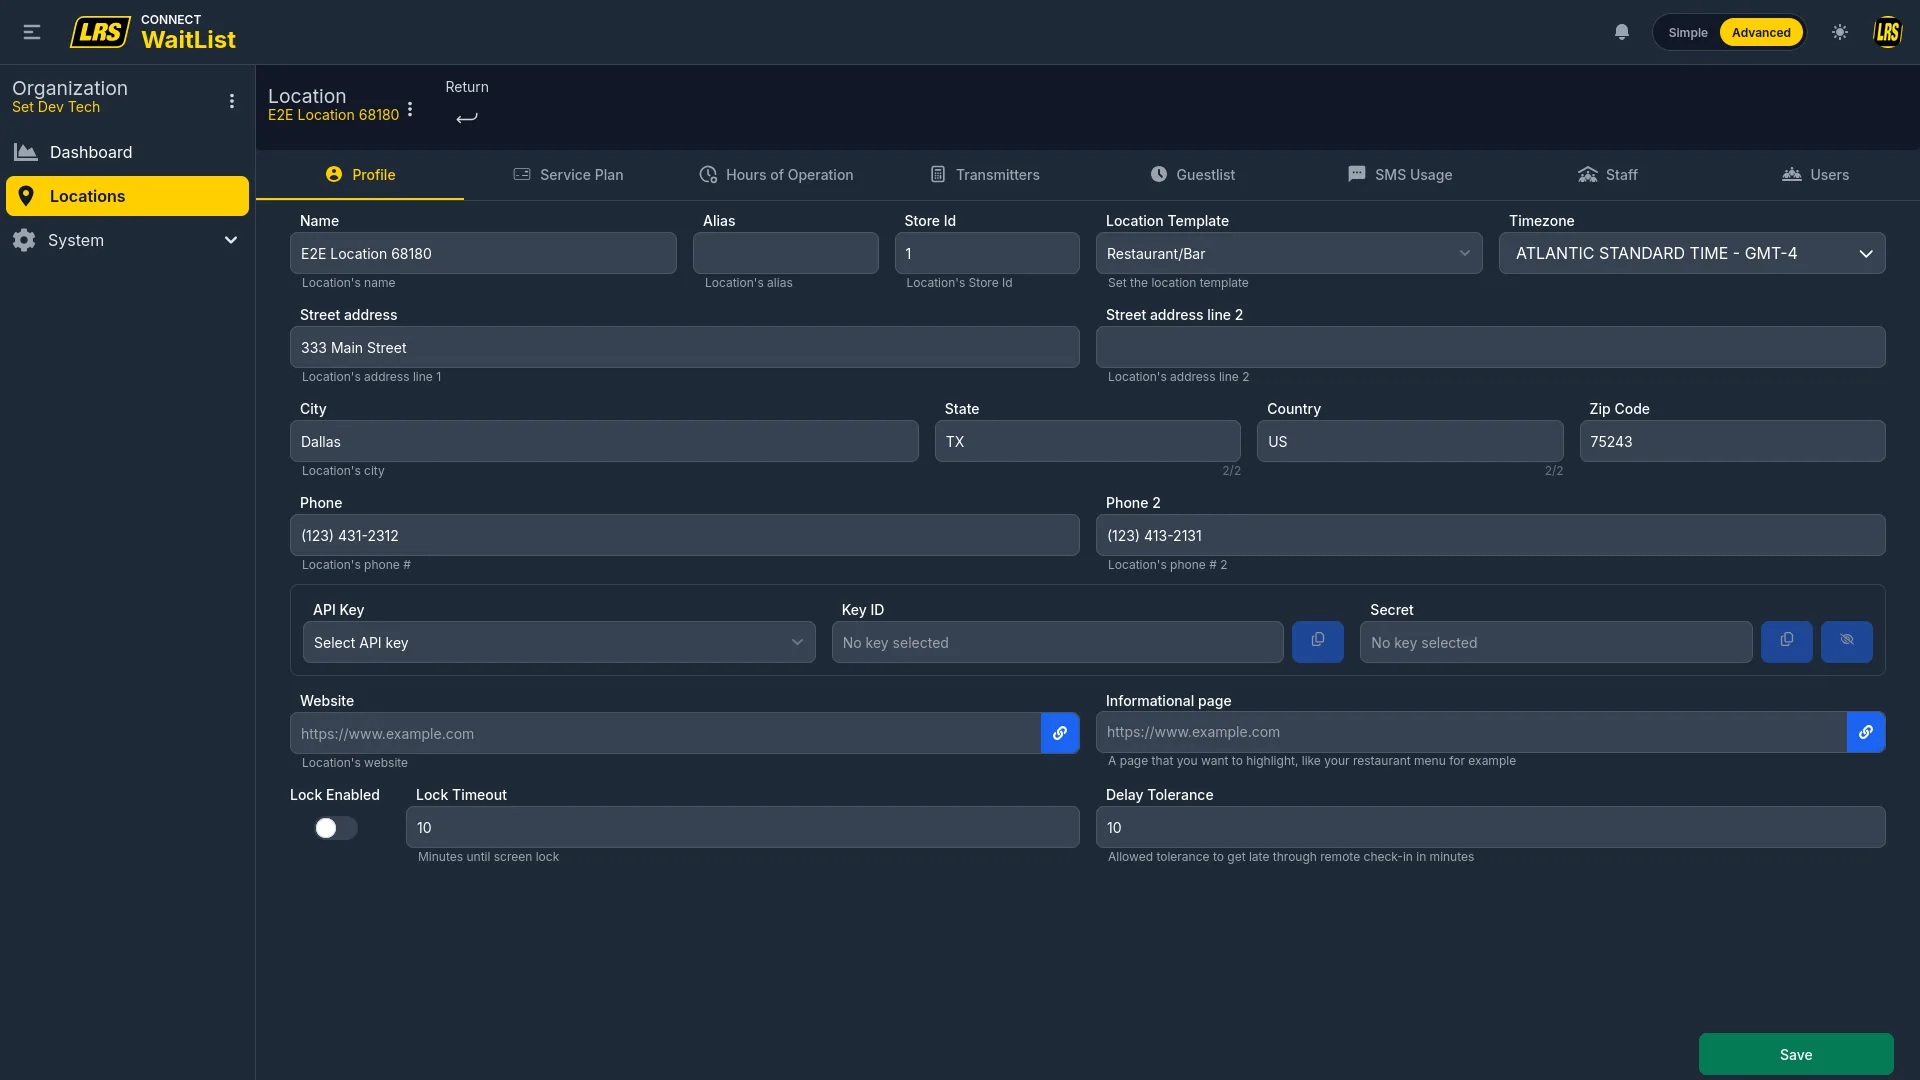
Clicking Edit in the advanced mode locations table opens the full location configuration with eight tabs. These tabs are only available in advanced mode — in simple mode the Manage button opens the Manage page described above.
| Tab | What it configures |
|---|---|
| Profile | Name, alias, store ID, Location Template, timezone, address, phone 1 and 2, API key assignment, website, informational page, lock enabled / timeout, and remote check-in delay tolerance. |
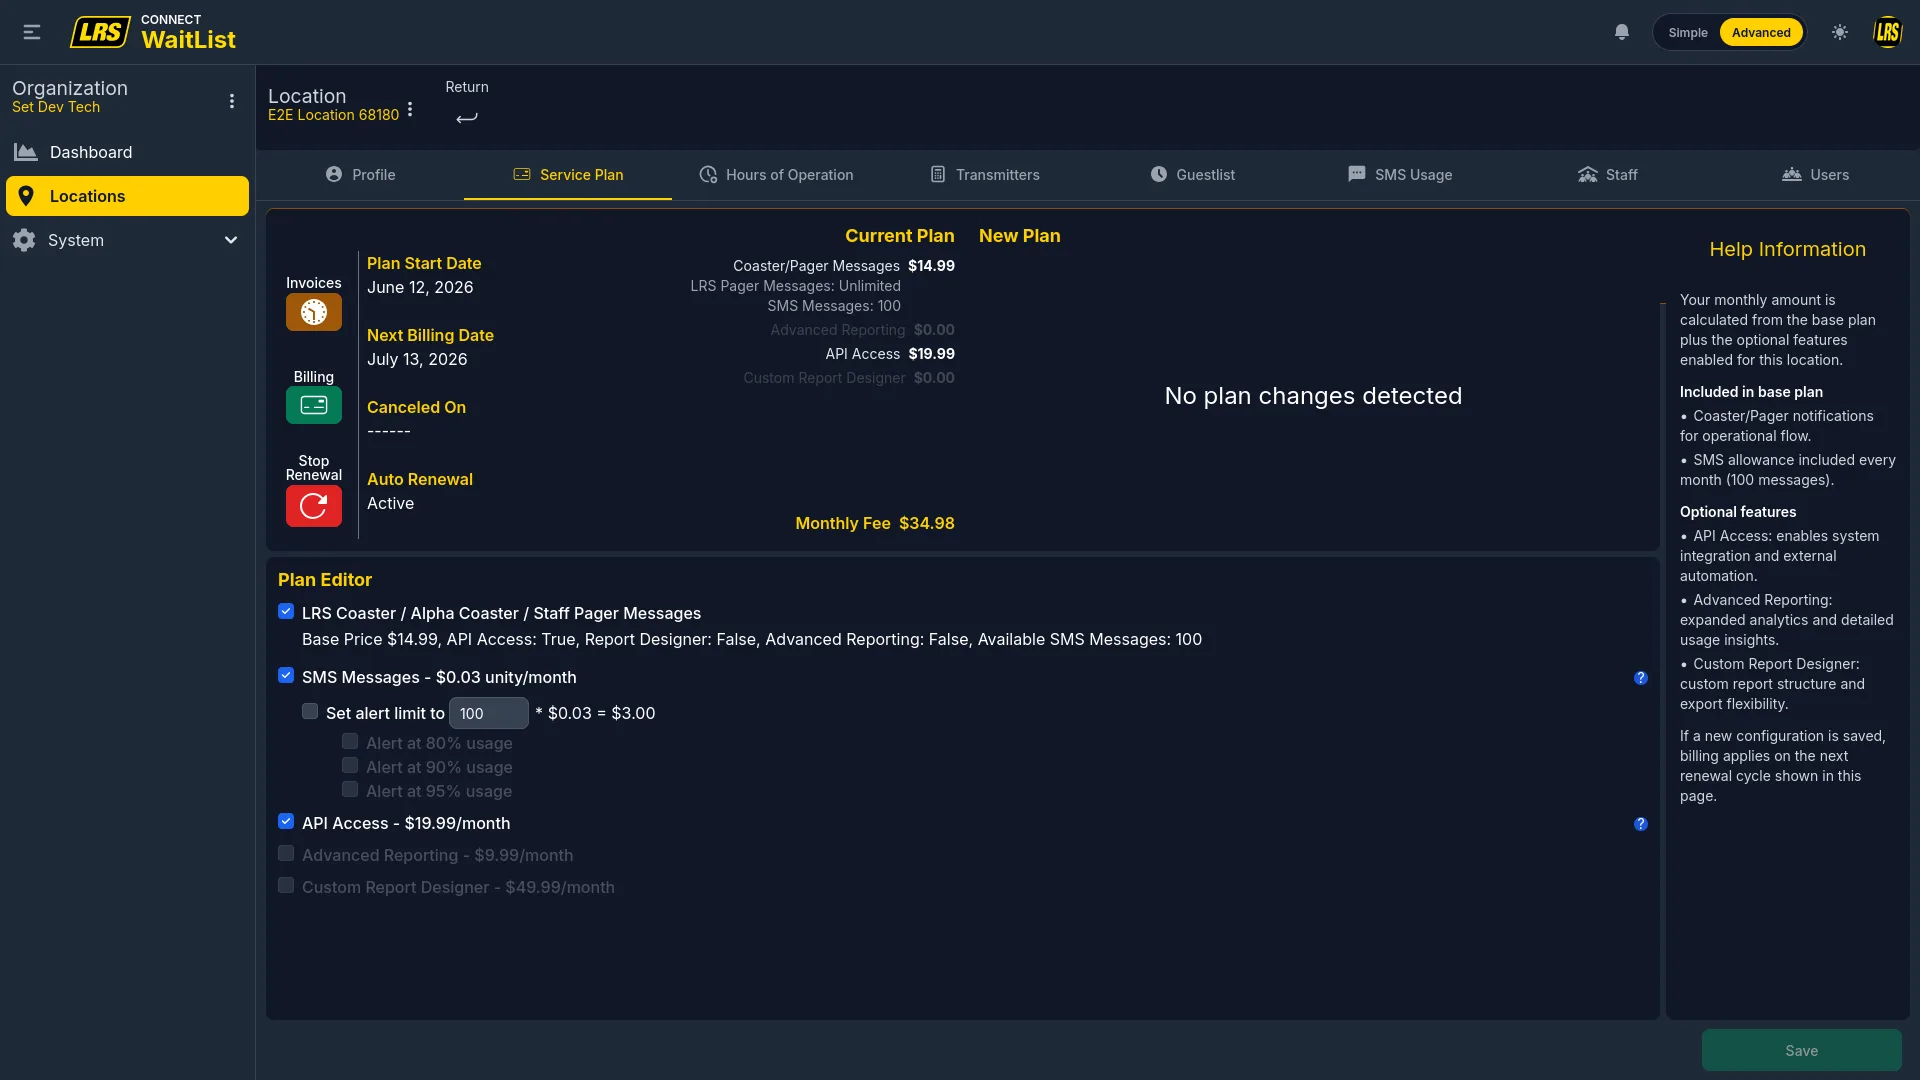
| Service Plan | Active plan, cycle start and end dates, add-ons (SMS messaging, API access), and renewal state. |
| Hours of Operation | Per-day operation hours, remote check-in windows, target wait times, and named service periods. |
| Transmitters | List, add, edit, test, and remove LRS pager transmitters registered at the location. |
| Guestlist | The daily operations workspace: waitlist selection, area selector, kiosk and self check-in area assignments, transmitter status, and live form preview. |
| SMS Usage | Three stat cards: message volume (total and daily average), plan card (alert thresholds, cycle dates, cost per message), and bonus messages remaining. Plus a paginated send log with date/time, type, list name, recipients, and message preview. |
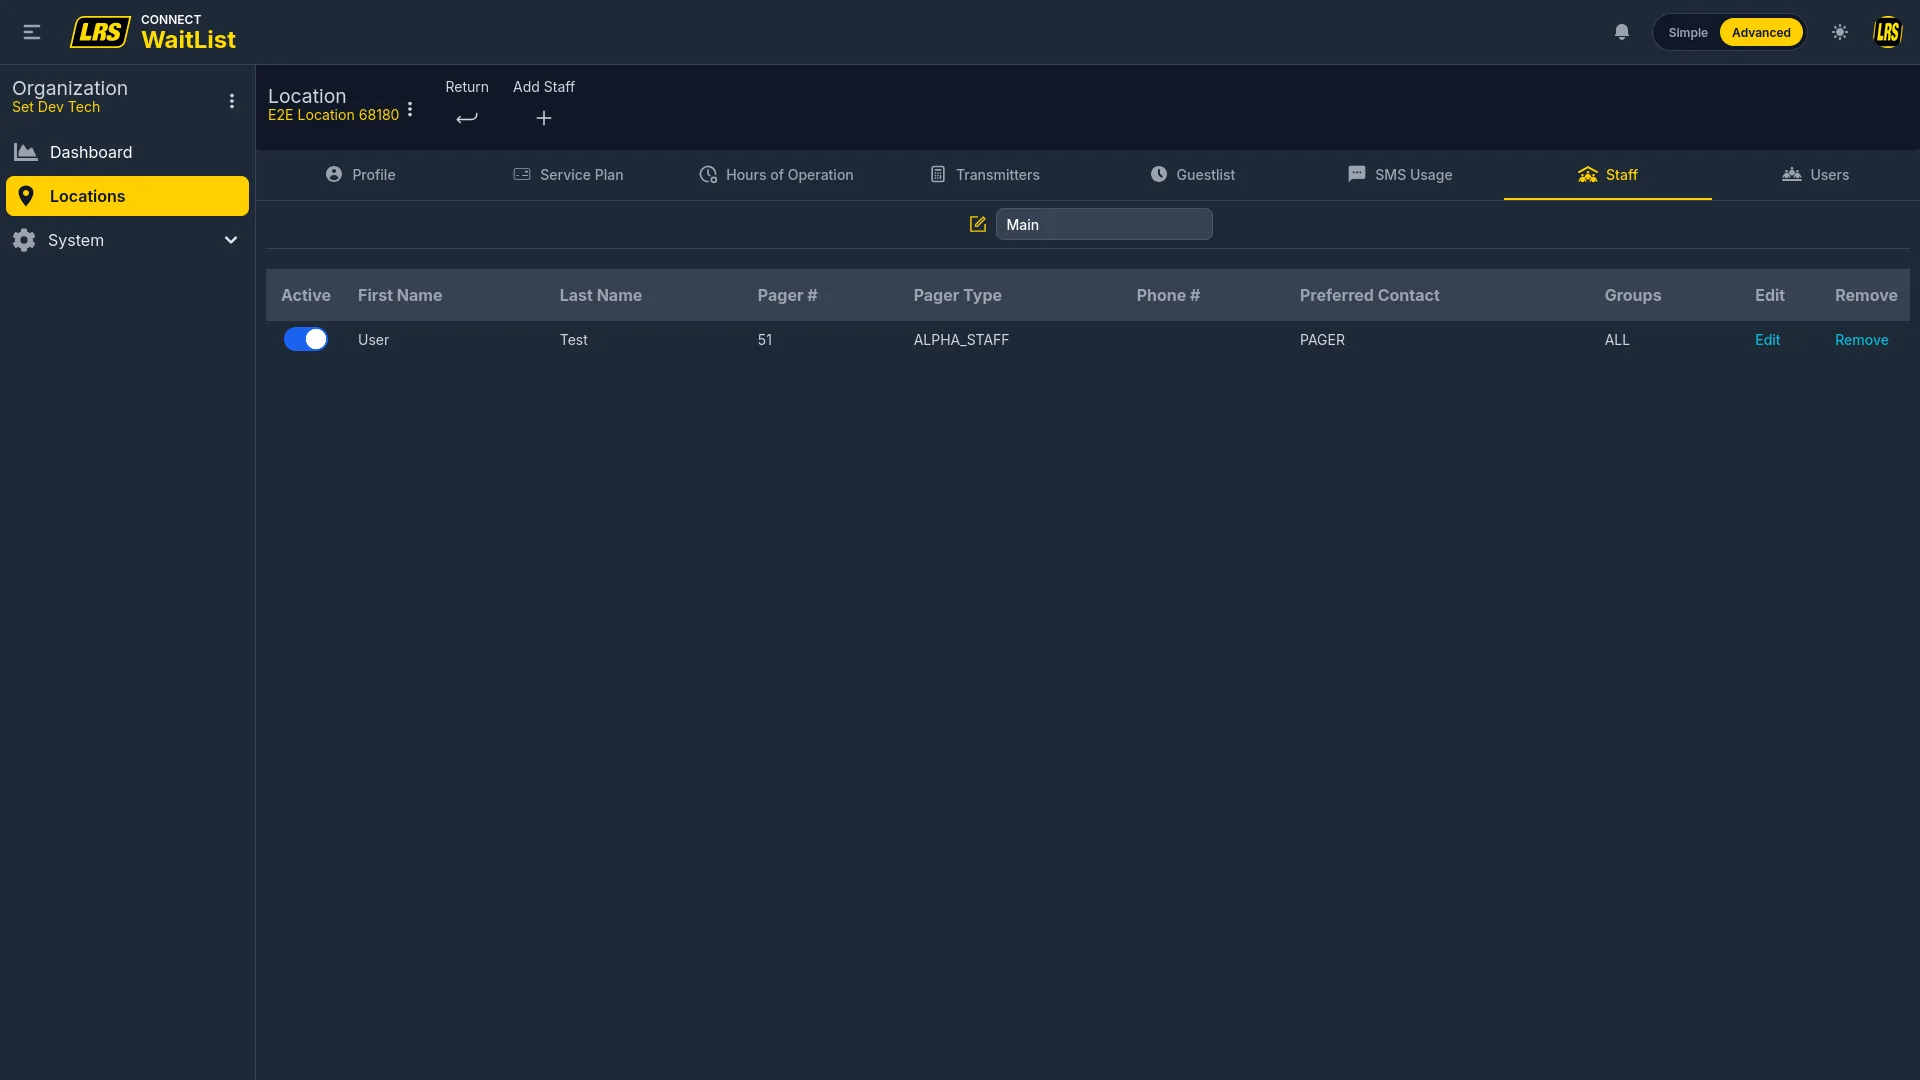
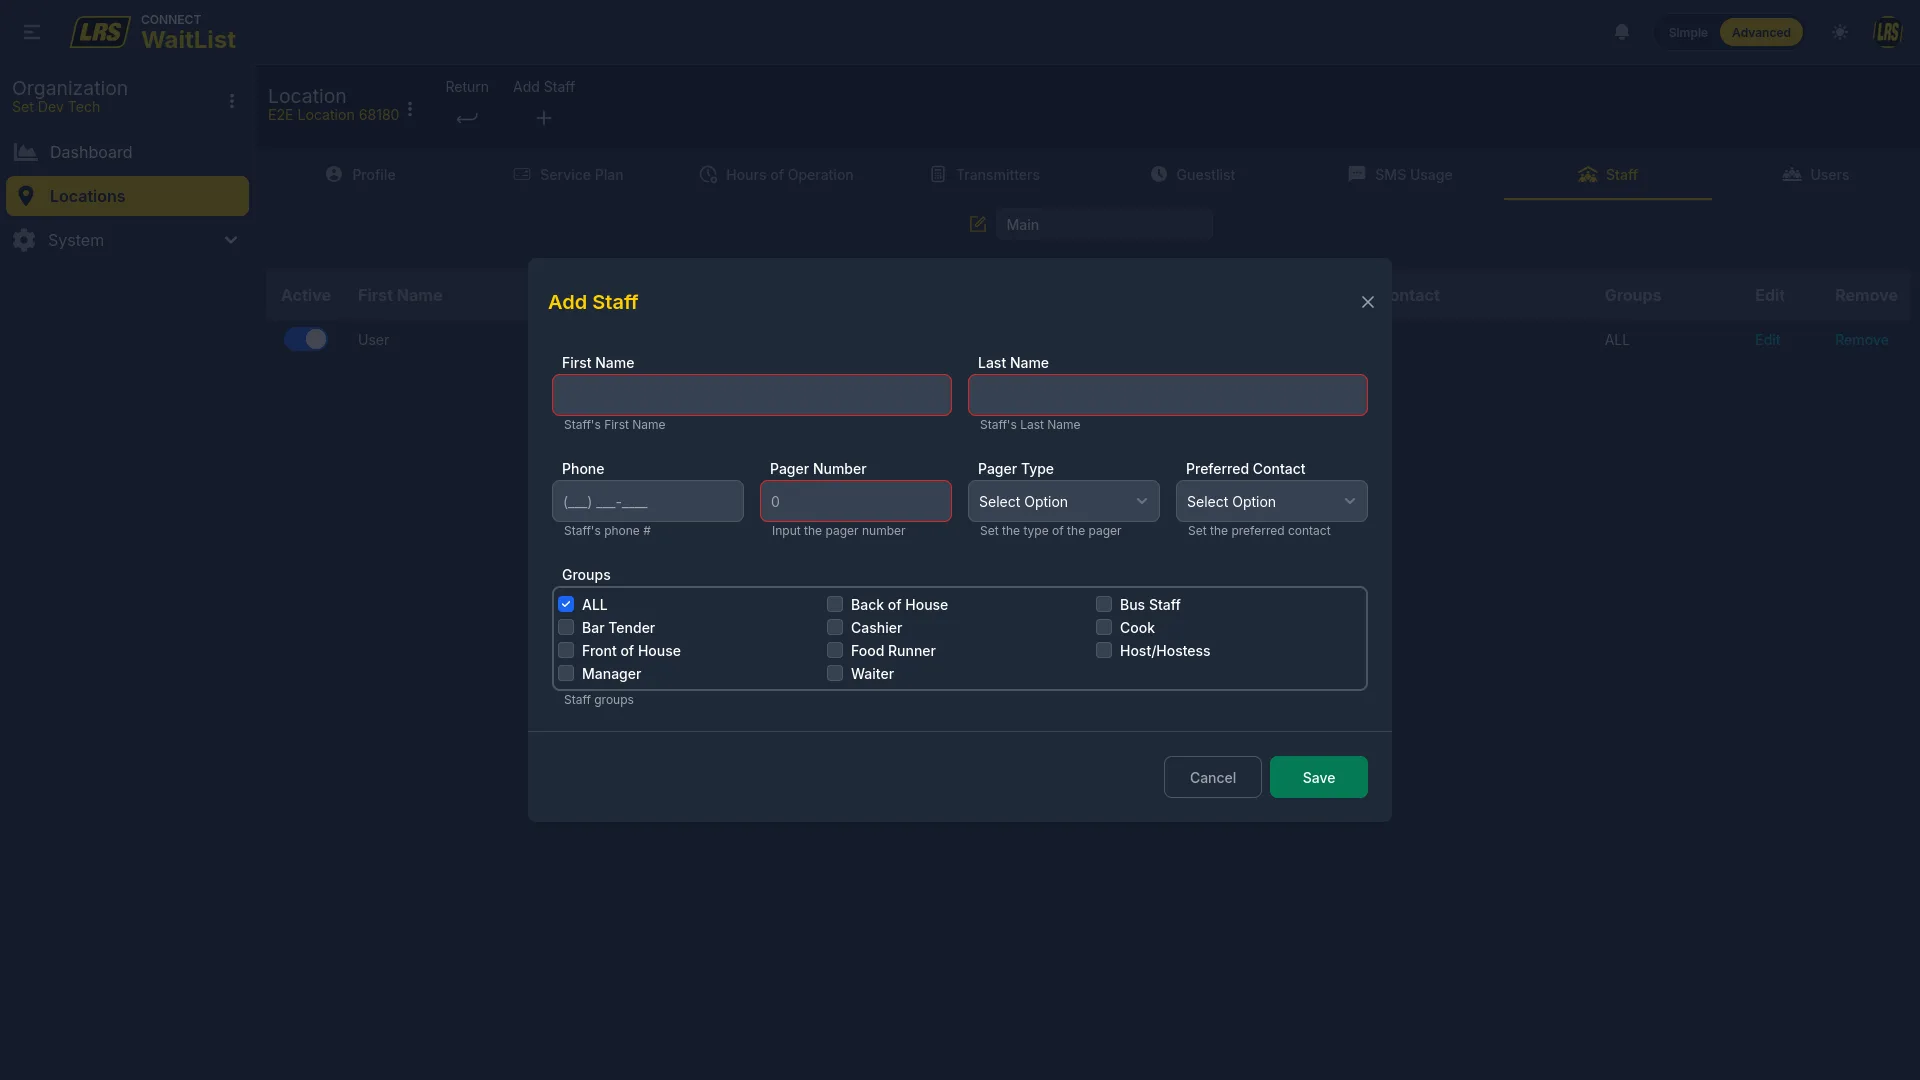
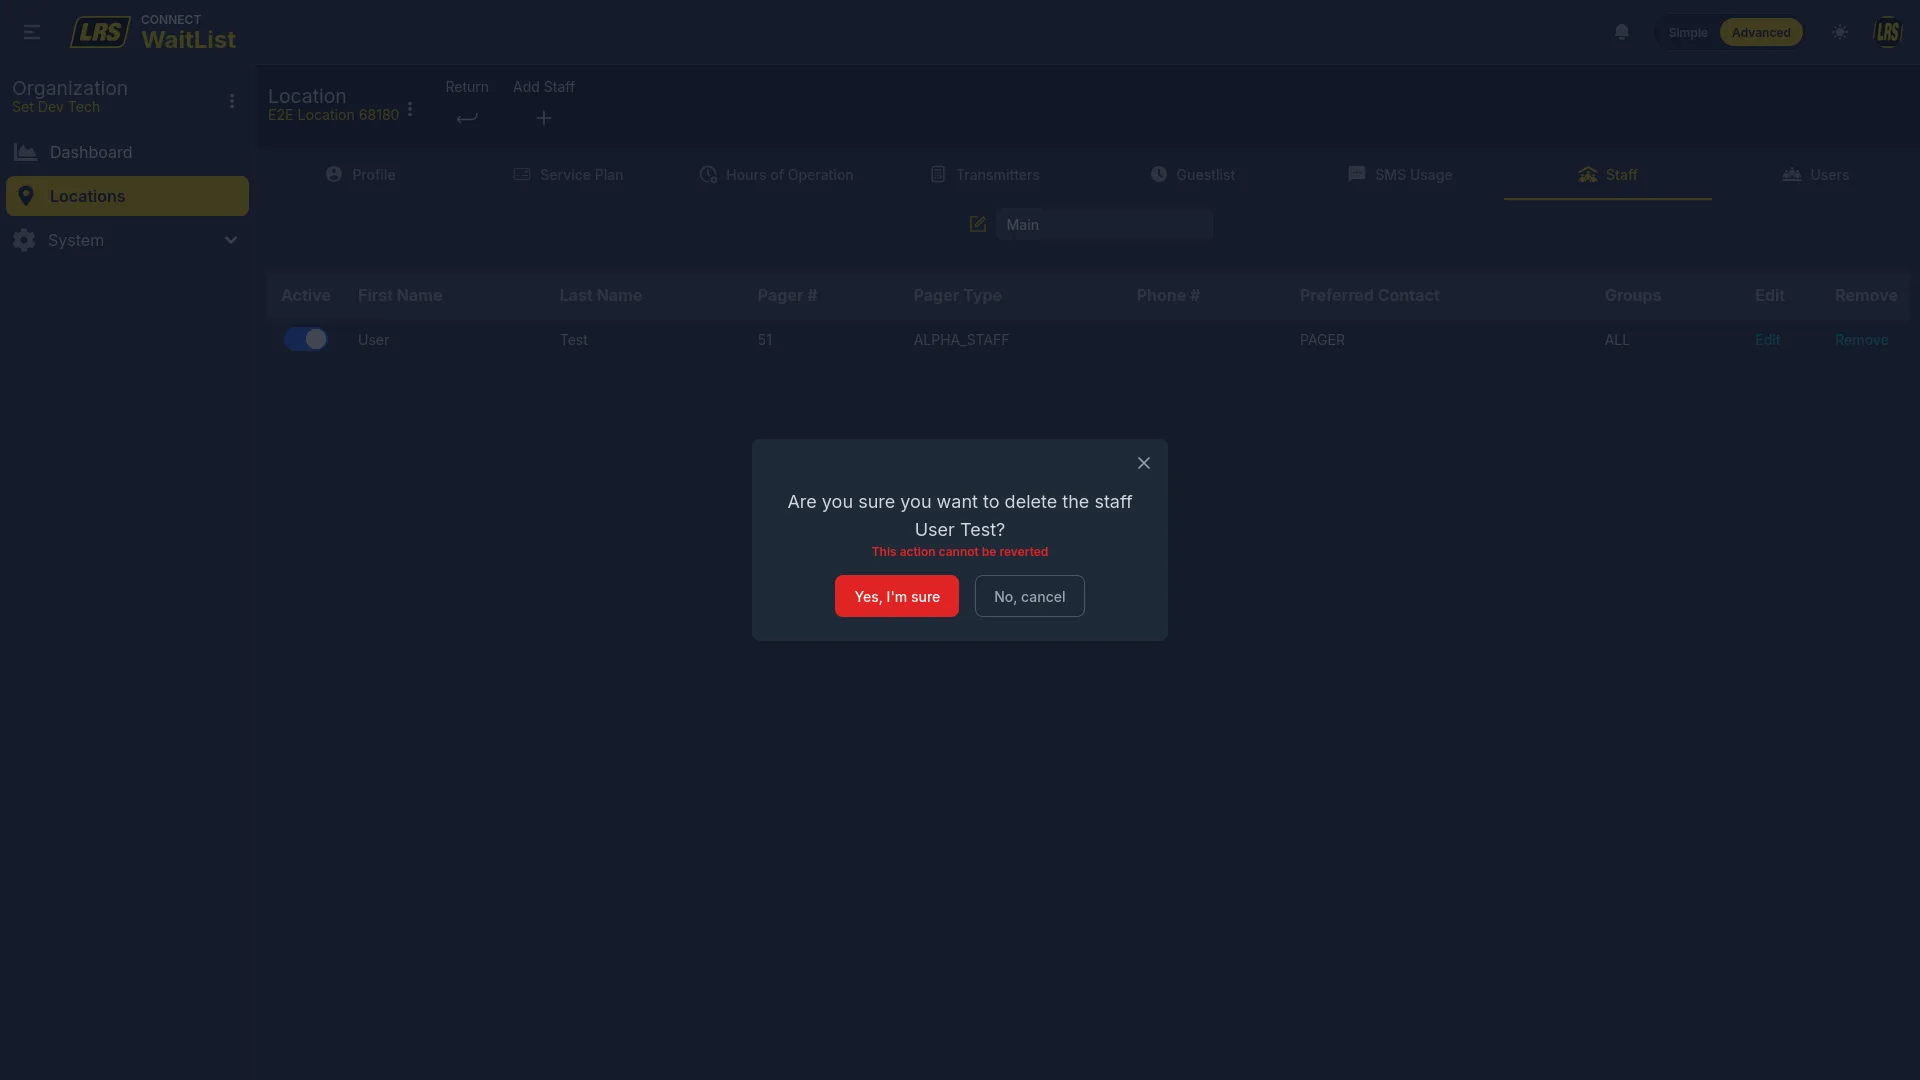
| Staff | Pager profiles for team members: name, pager number, pager type, preferred contact, and group assignments. |
| Users | Dashboard users with access to this location: role (Staff or Location Manager), lock password, and report subscriptions. |
The Profile tab holds the location's identity and operational settings. The Name field is the public-facing name; the Alias field stores a shorter internal reference useful when the full name is too long for reports or integrations. The Store ID links the location to external systems or POS identifiers. The Location Template dropdown sets the industry preset that shapes default messaging and terminology across the interface.
The Timezone setting affects how operation hours and timestamps display throughout Dashboard and in reports — set it correctly before the location goes live. The Website field stores the location's public URL; the Informational page field holds a secondary URL highlighted to guests — for example, a menu or event page. The Delay Tolerance field controls how long beyond the quoted wait time a guest's position is held: if set to 10 minutes, a guest quoted 15 minutes has until the 25-minute mark before their slot is considered expired. The Lock settings protect the live Waitlist screen from unintended changes — when enabled, the screen locks after the configured idle minutes and requires the user's lock password to resume.
The Service Plan tab shows the active plan's cycle dates and provides three shortcuts in the left column: Invoices (billing history), Billing (link or change the billing account), and Stop Renewal. The center panel shows a Current Plan / New Plan comparison with all line items and the monthly total. The base plan is always active at $14.99/month and includes LRS Coaster/Pager broadcasts and 100 SMS messages. The Plan Editor below the summary lets managers toggle optional add-ons: API Access ($19.99/month) and, where available, Advanced Reporting ($9.99/month) and Custom Report Designer ($49.99/month). The SMS Messages item lets you configure an alert threshold so Dashboard notifies you before overage charges apply. Changes saved here take effect at the start of the next renewal cycle.
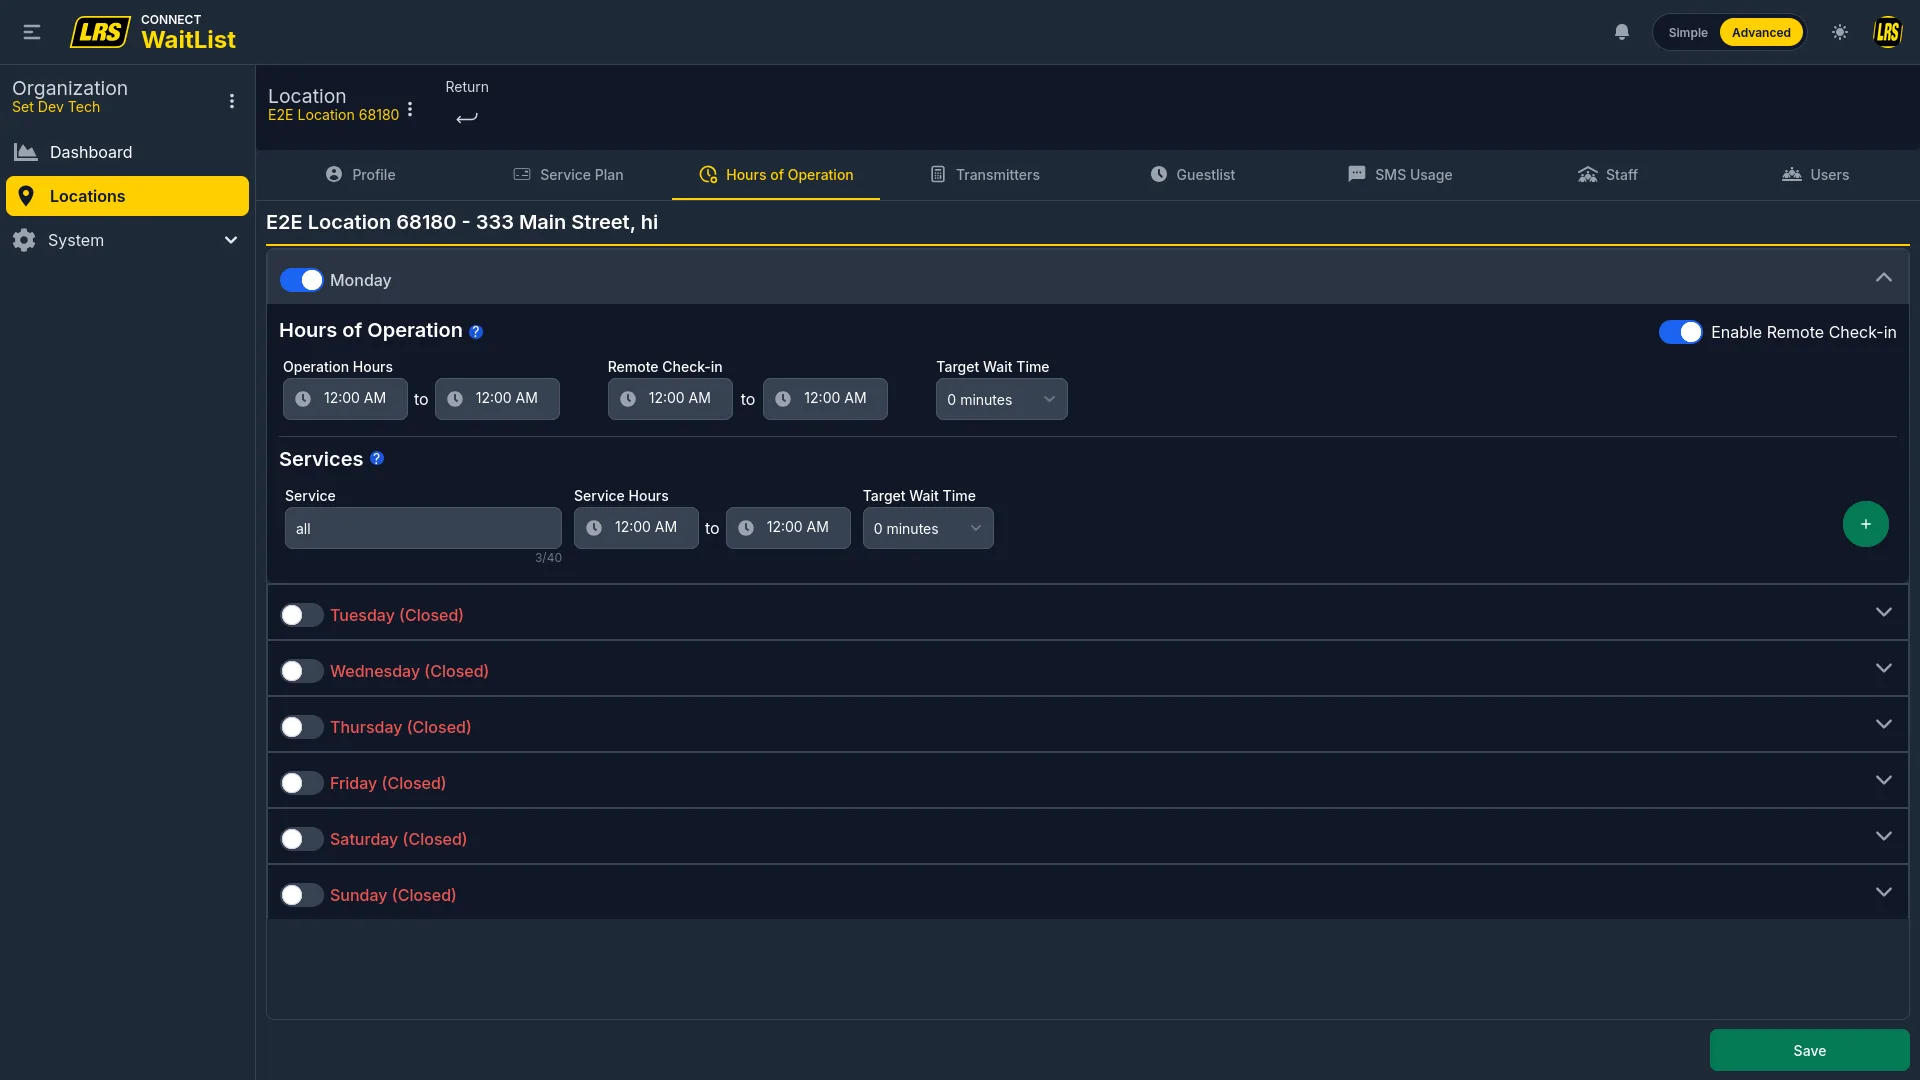
Each day has independent settings. Expand a day to set the Operation Hours during which the location is considered open, the Remote Check-in time window, and a Target Wait Time used by Programmed Notifications. The Enable Remote Check-in toggle on the right side of the expanded day must be on for self check-in to accept visitors — turning off the toggle disables remote check-in for that day even if hours are configured. The Services section lets managers add named service periods (Lunch, Dinner, etc.), each with its own Service Hours and Target Wait Time. Multiple services can be added per day with the + button. Days with the day toggle set to off are treated as Closed and remote check-in is disabled regardless of the Enable toggle.
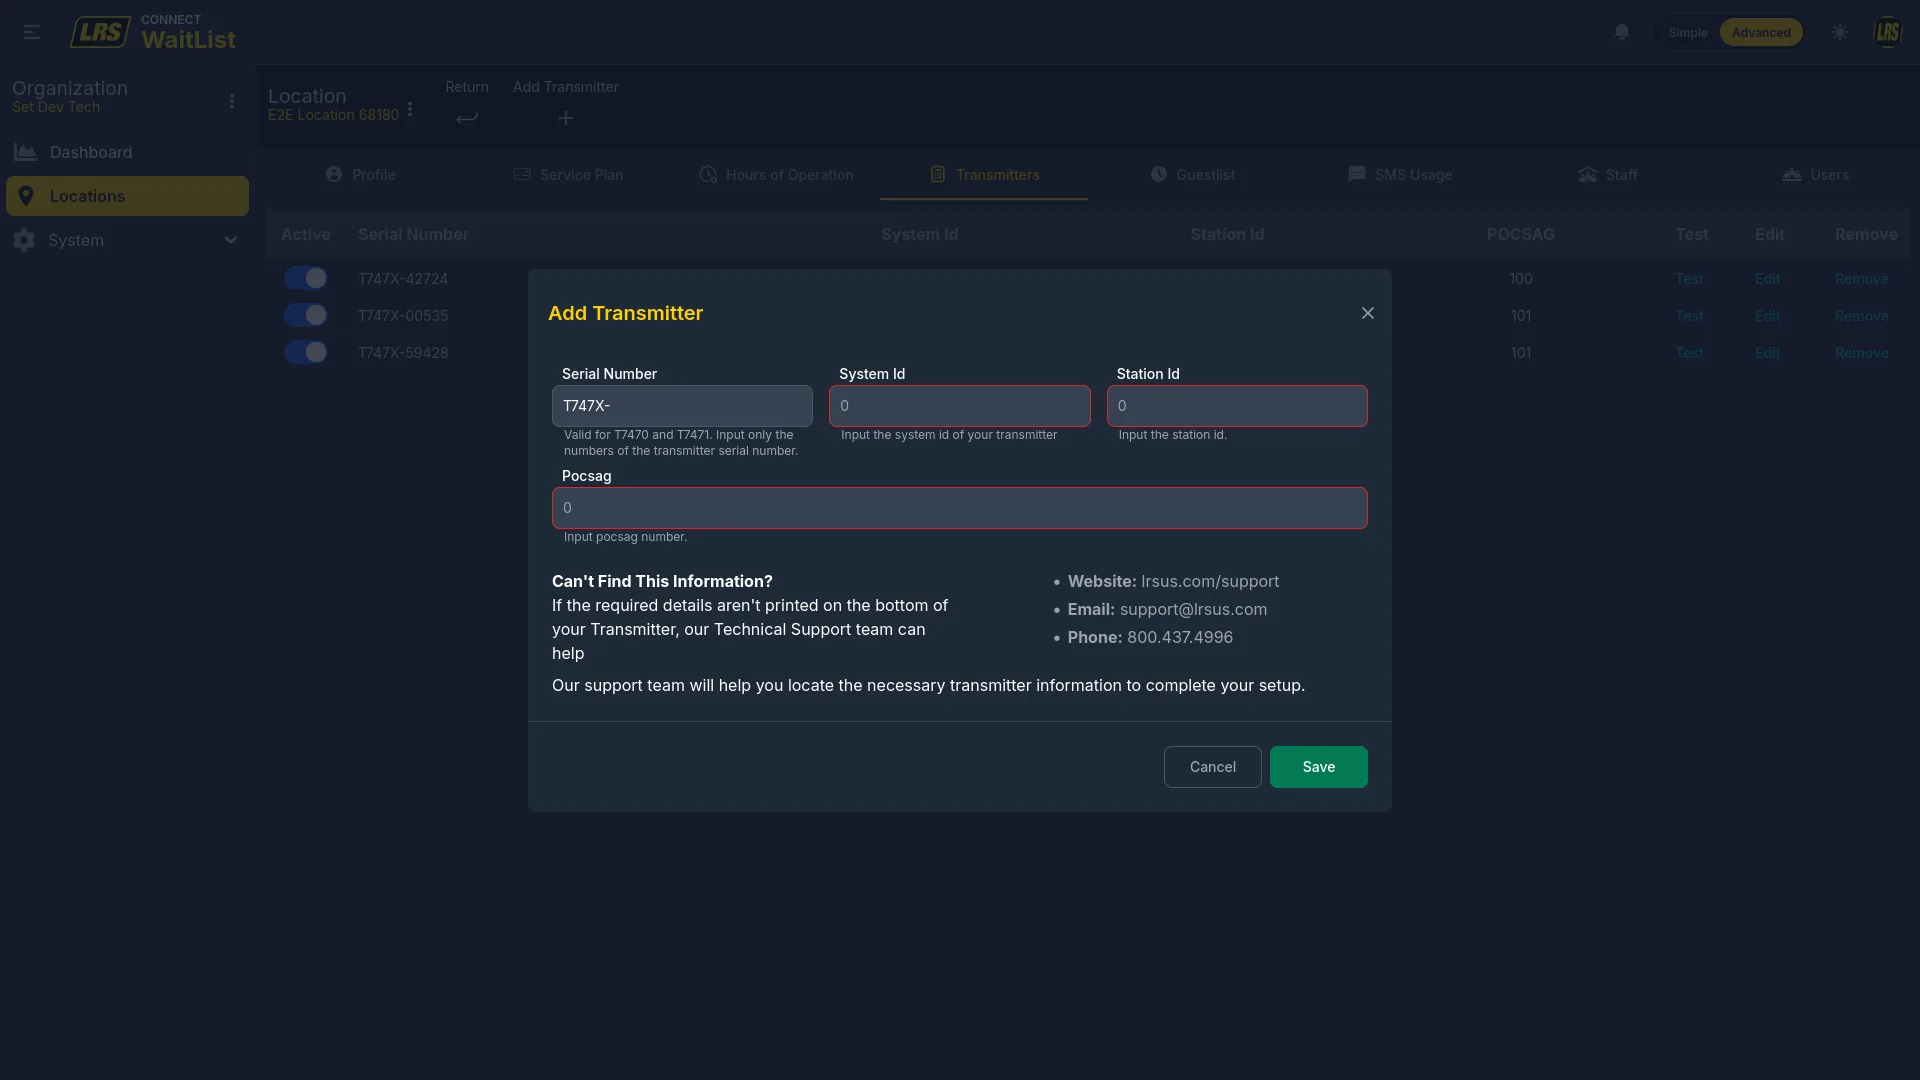
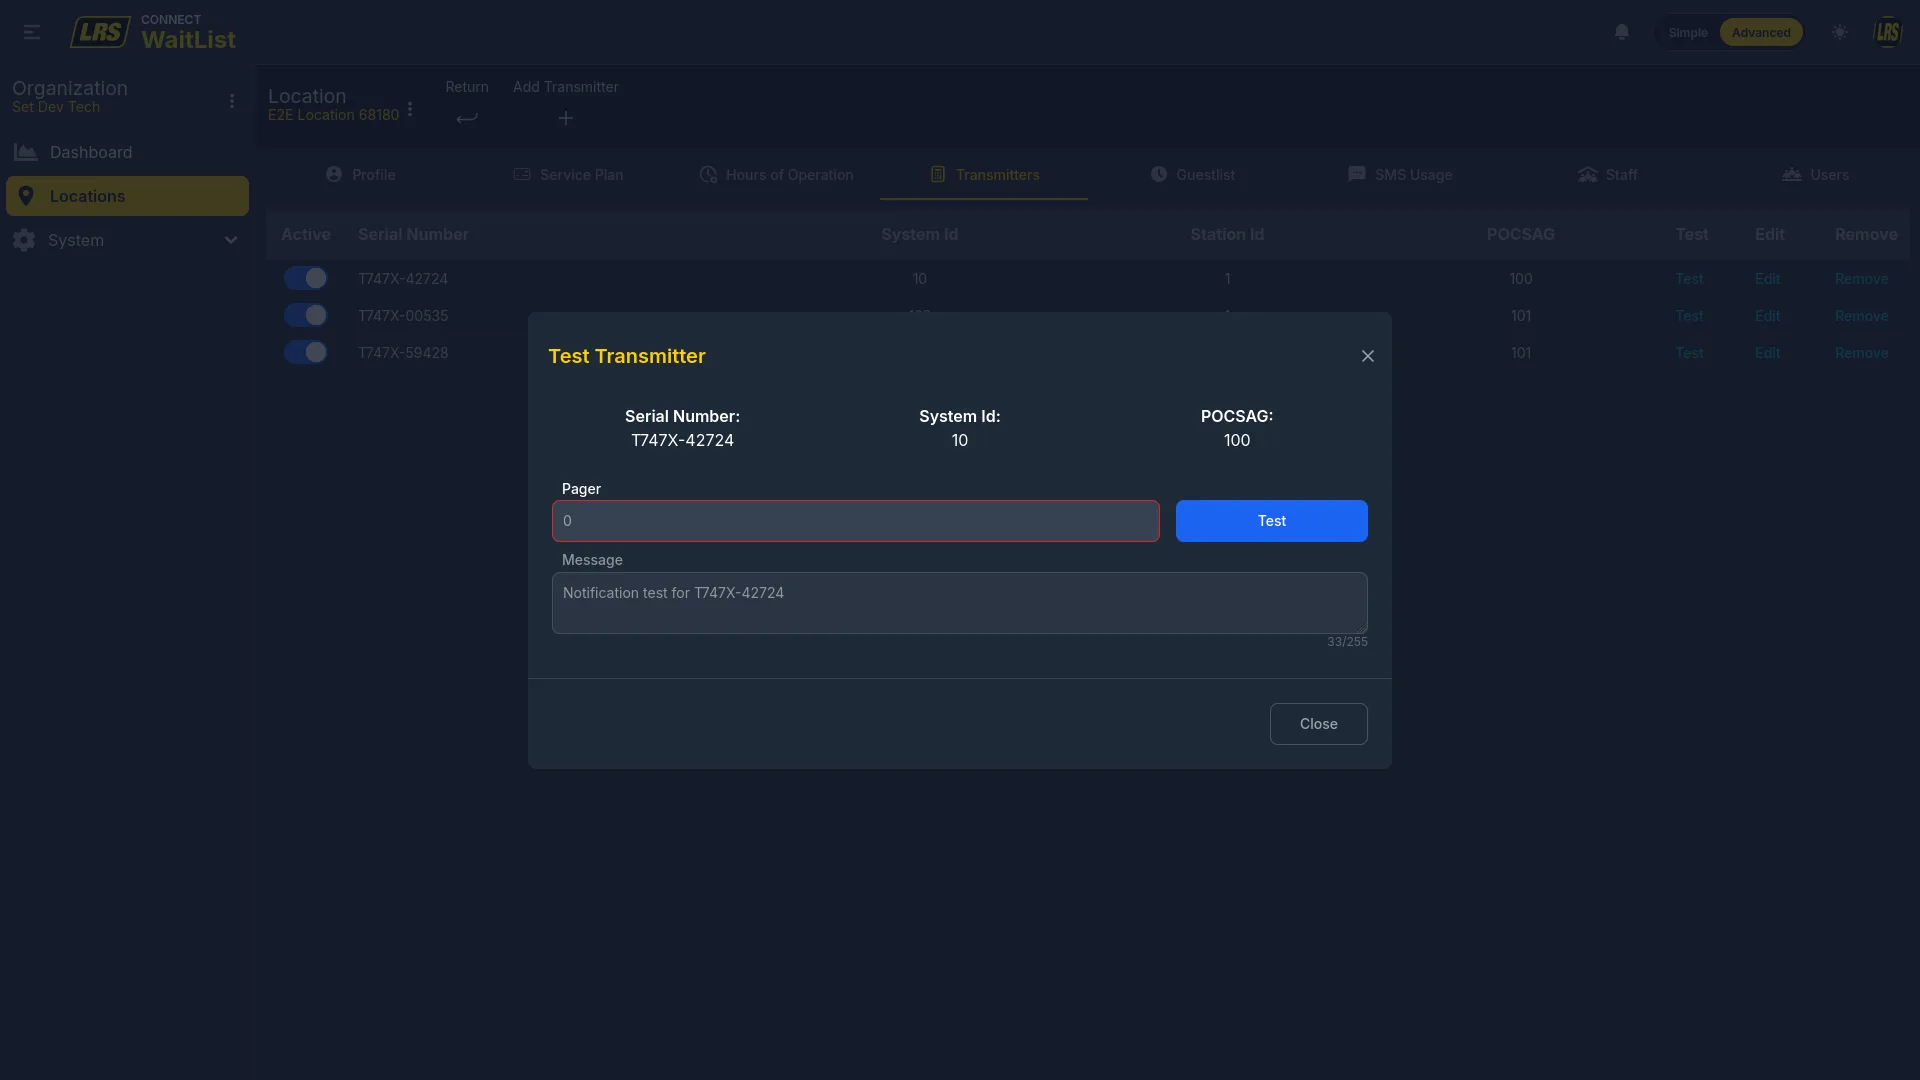
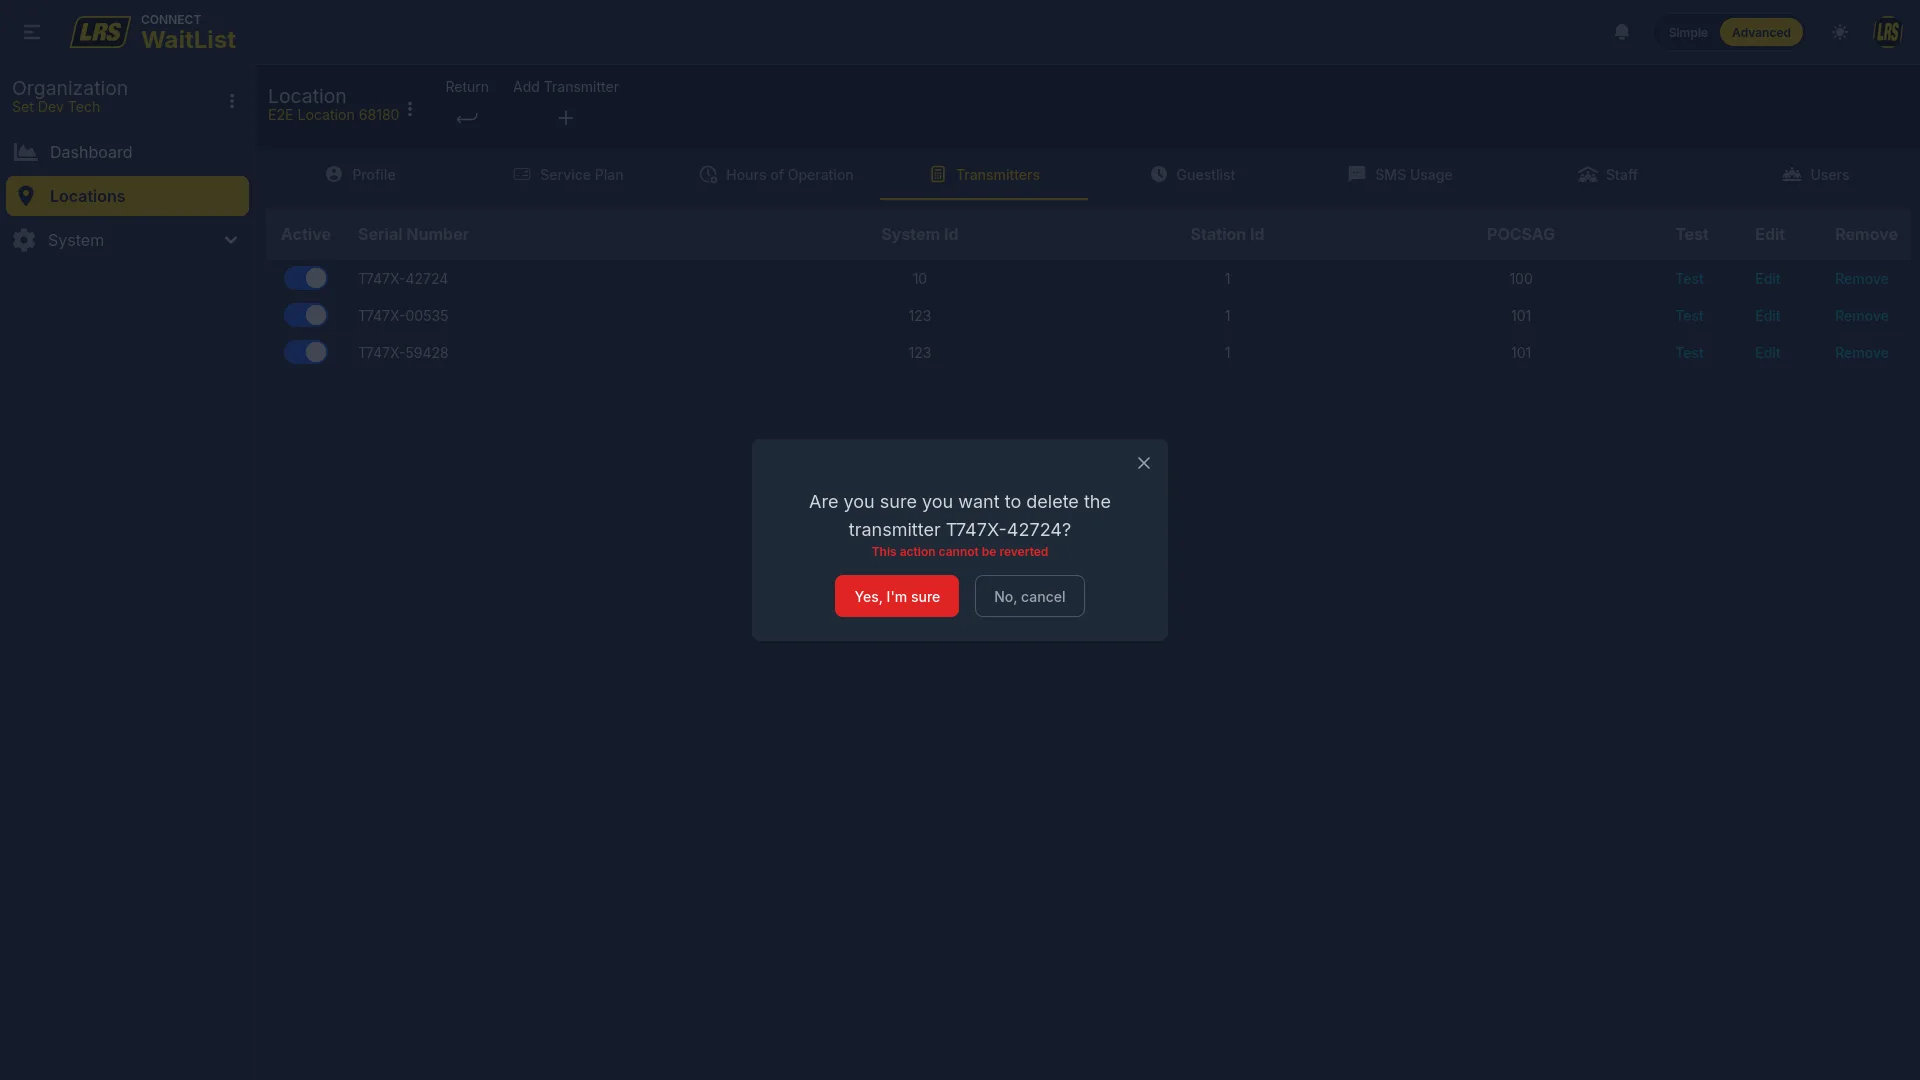
The Transmitters tab manages the LRS pager transmitters registered at the location. A transmitter must be registered here before it can be assigned to a guestlist area. The list shows each device's serial number, system ID, station ID, and POCSAG channel.
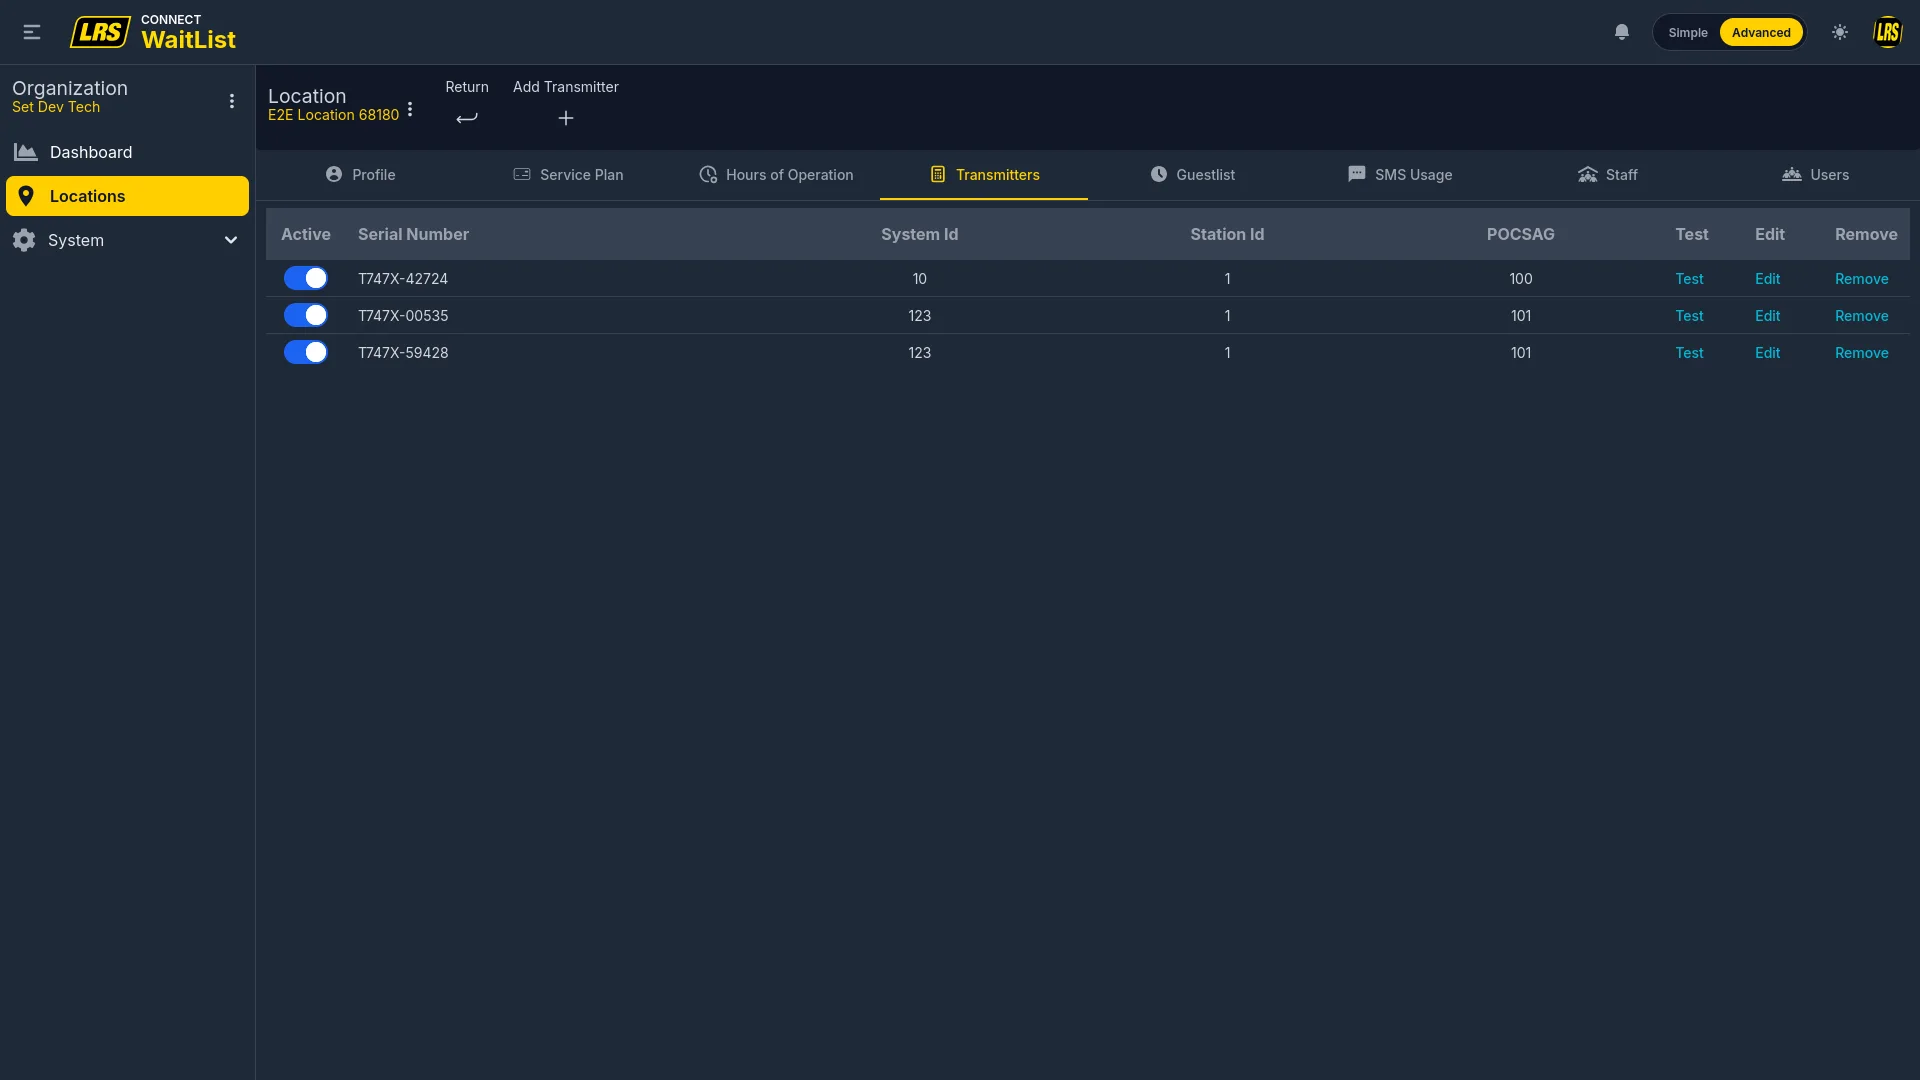
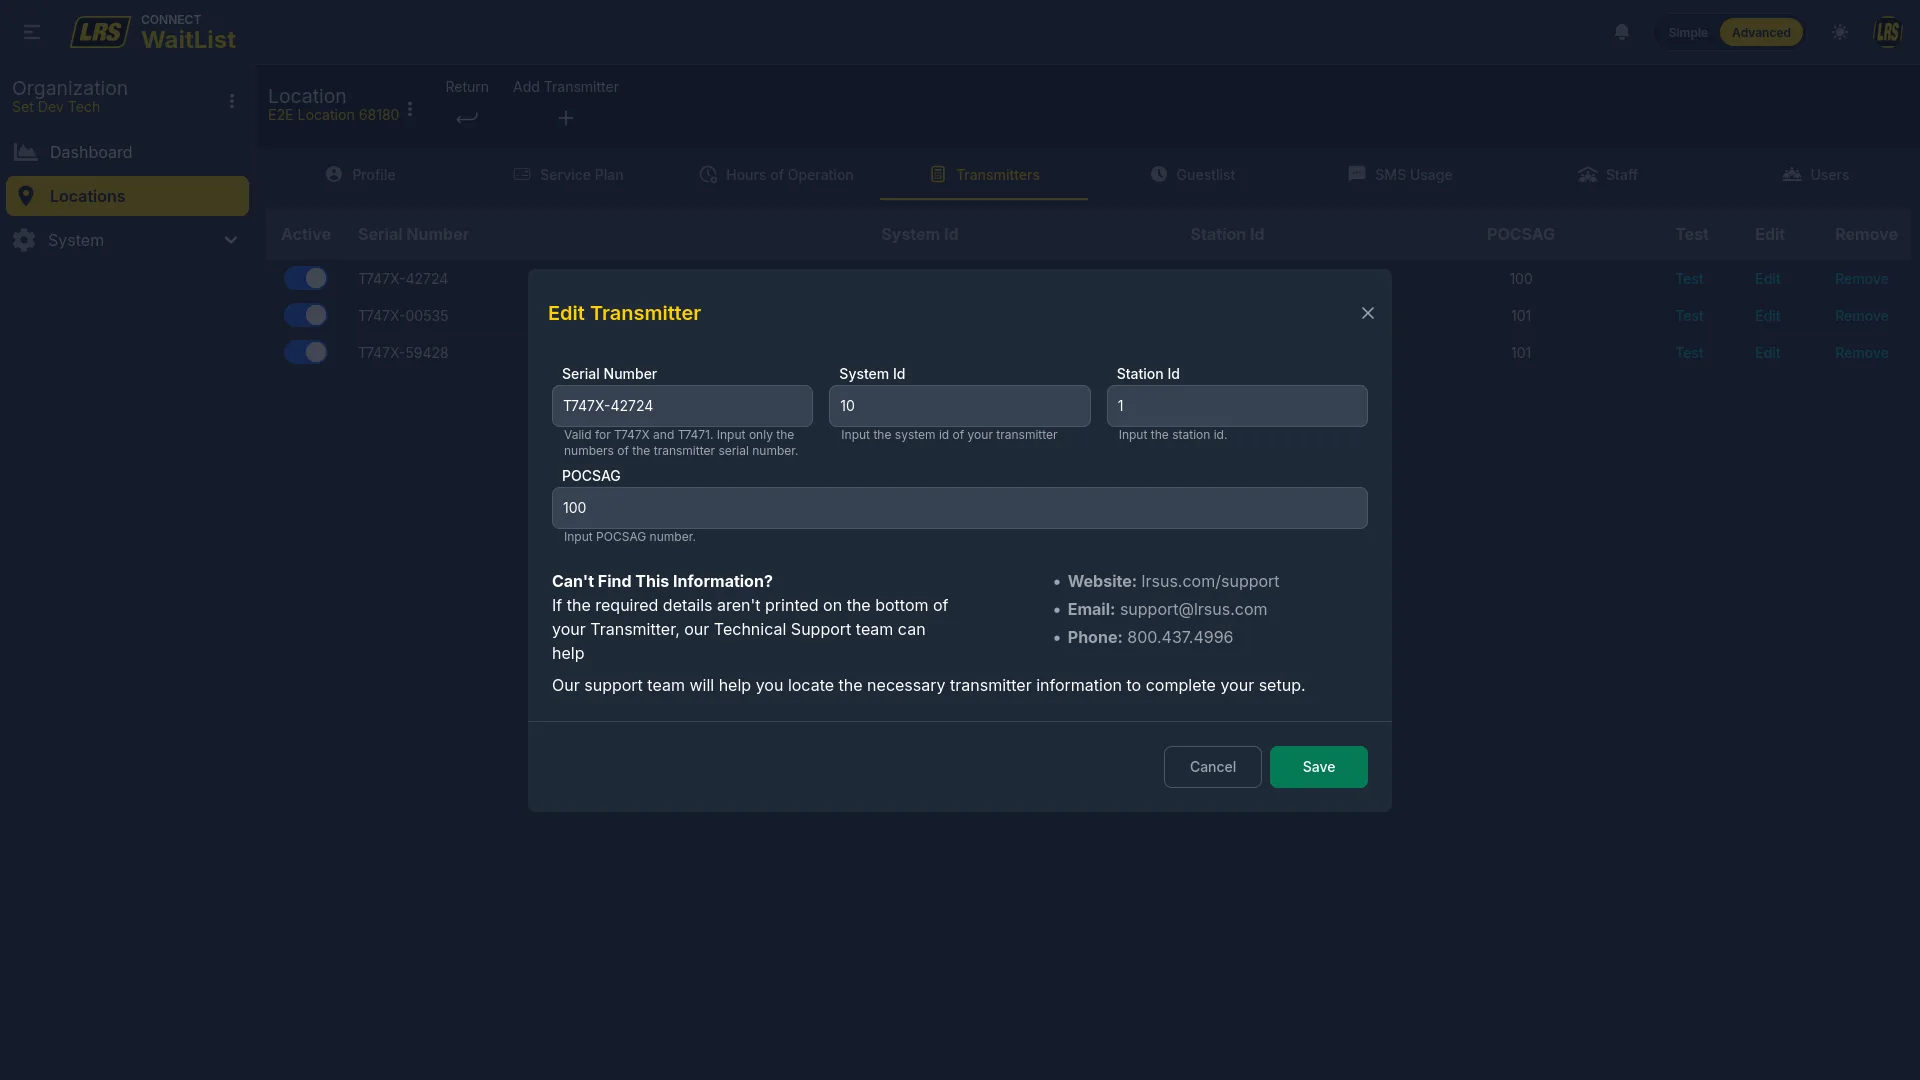
Run a test after adding or editing a transmitter to confirm the device is broadcasting correctly before going live.
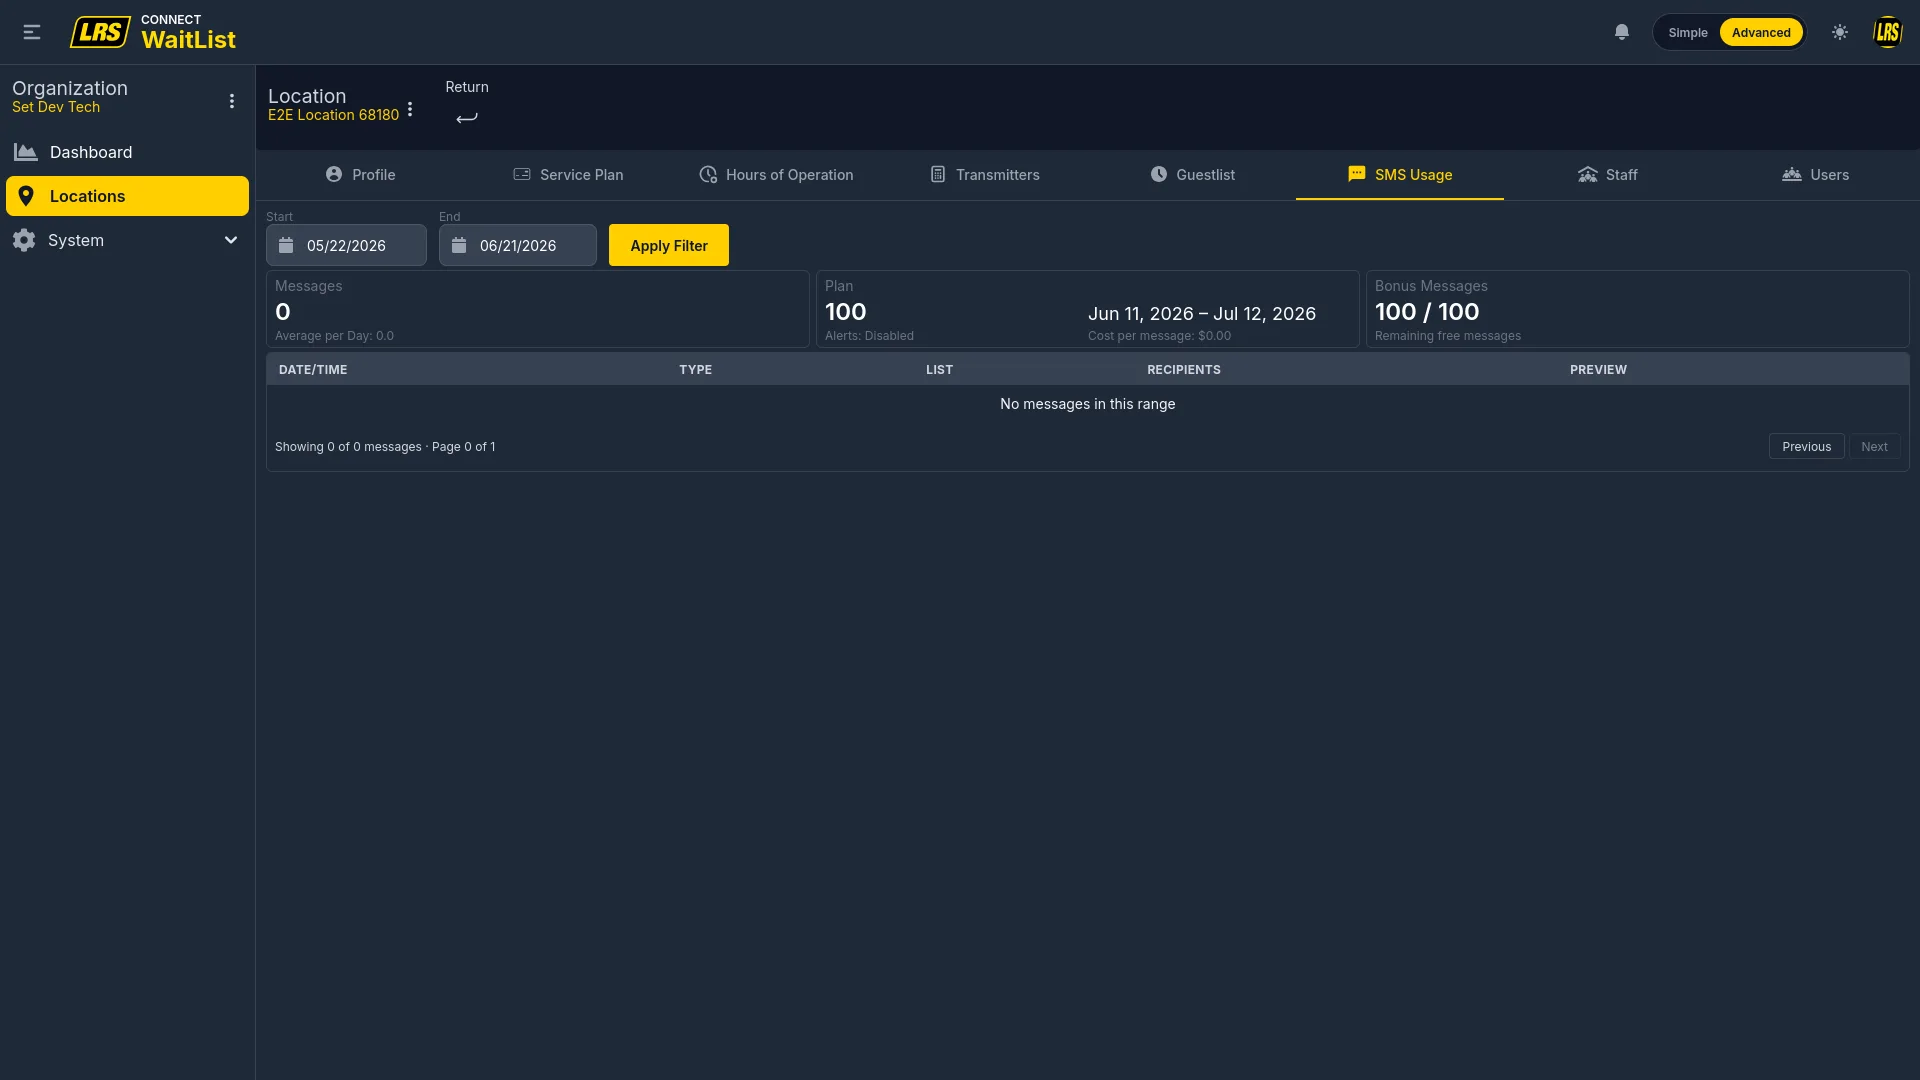
The SMS Usage tab shows message volume for a configurable date range. Set the Start and End dates and click Apply Filter to load results. Three stat cards summarize the period: Messages shows the total sent and daily average; Plan shows the alert threshold configuration (80%, 90%, 95% options), the current plan cycle dates, and the cost per message; Bonus Messages shows remaining free messages out of the total bonus pool. The log below the cards lists every sent message with its date/time, type, list name, recipients, and a preview of the message body — useful for verifying that automated notifications are firing as expected.
The Staff tab manages pager profiles for team members — these are separate from Dashboard user accounts. A pager profile stores the physical device number and type, the preferred contact method, and group assignments. Groups are used by the Notification Tasks form field to route workflow notifications to the right role (e.g., sending a task alert to all Bar Tenders or to Management only).

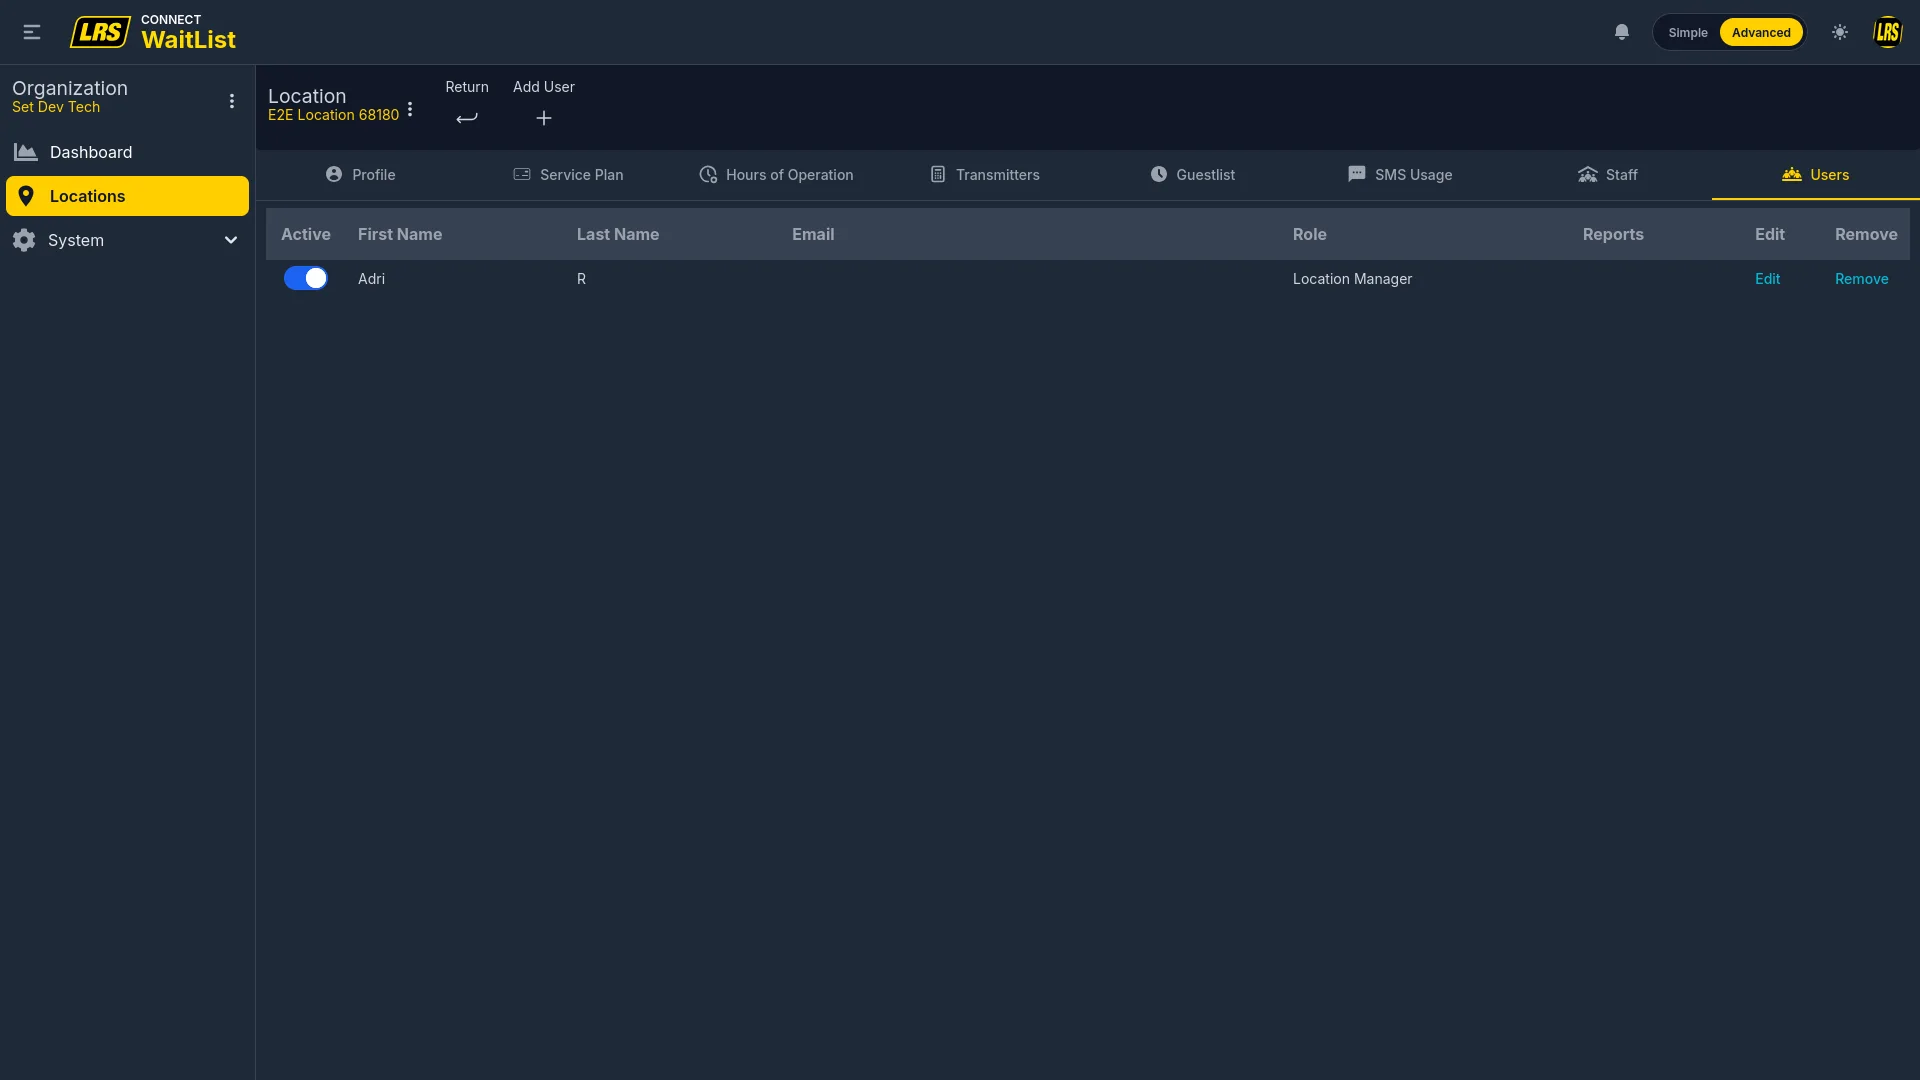
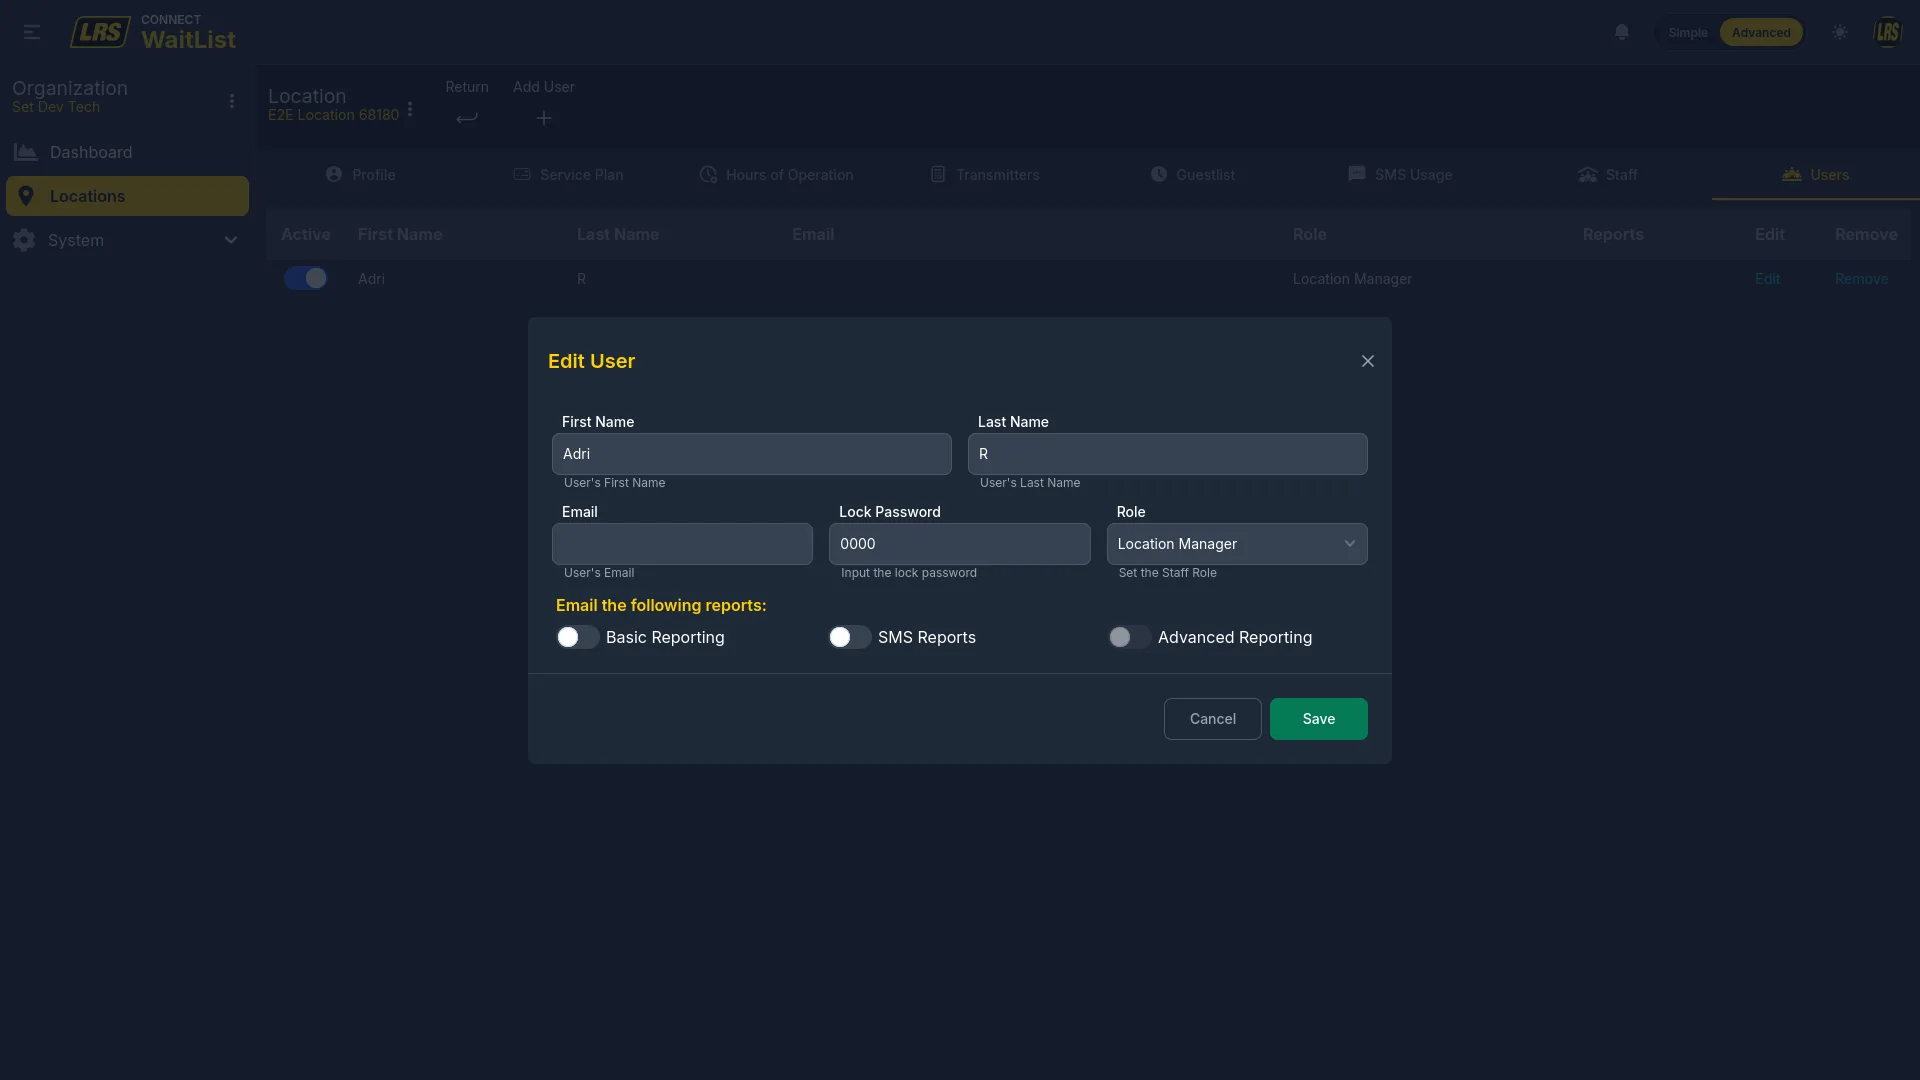
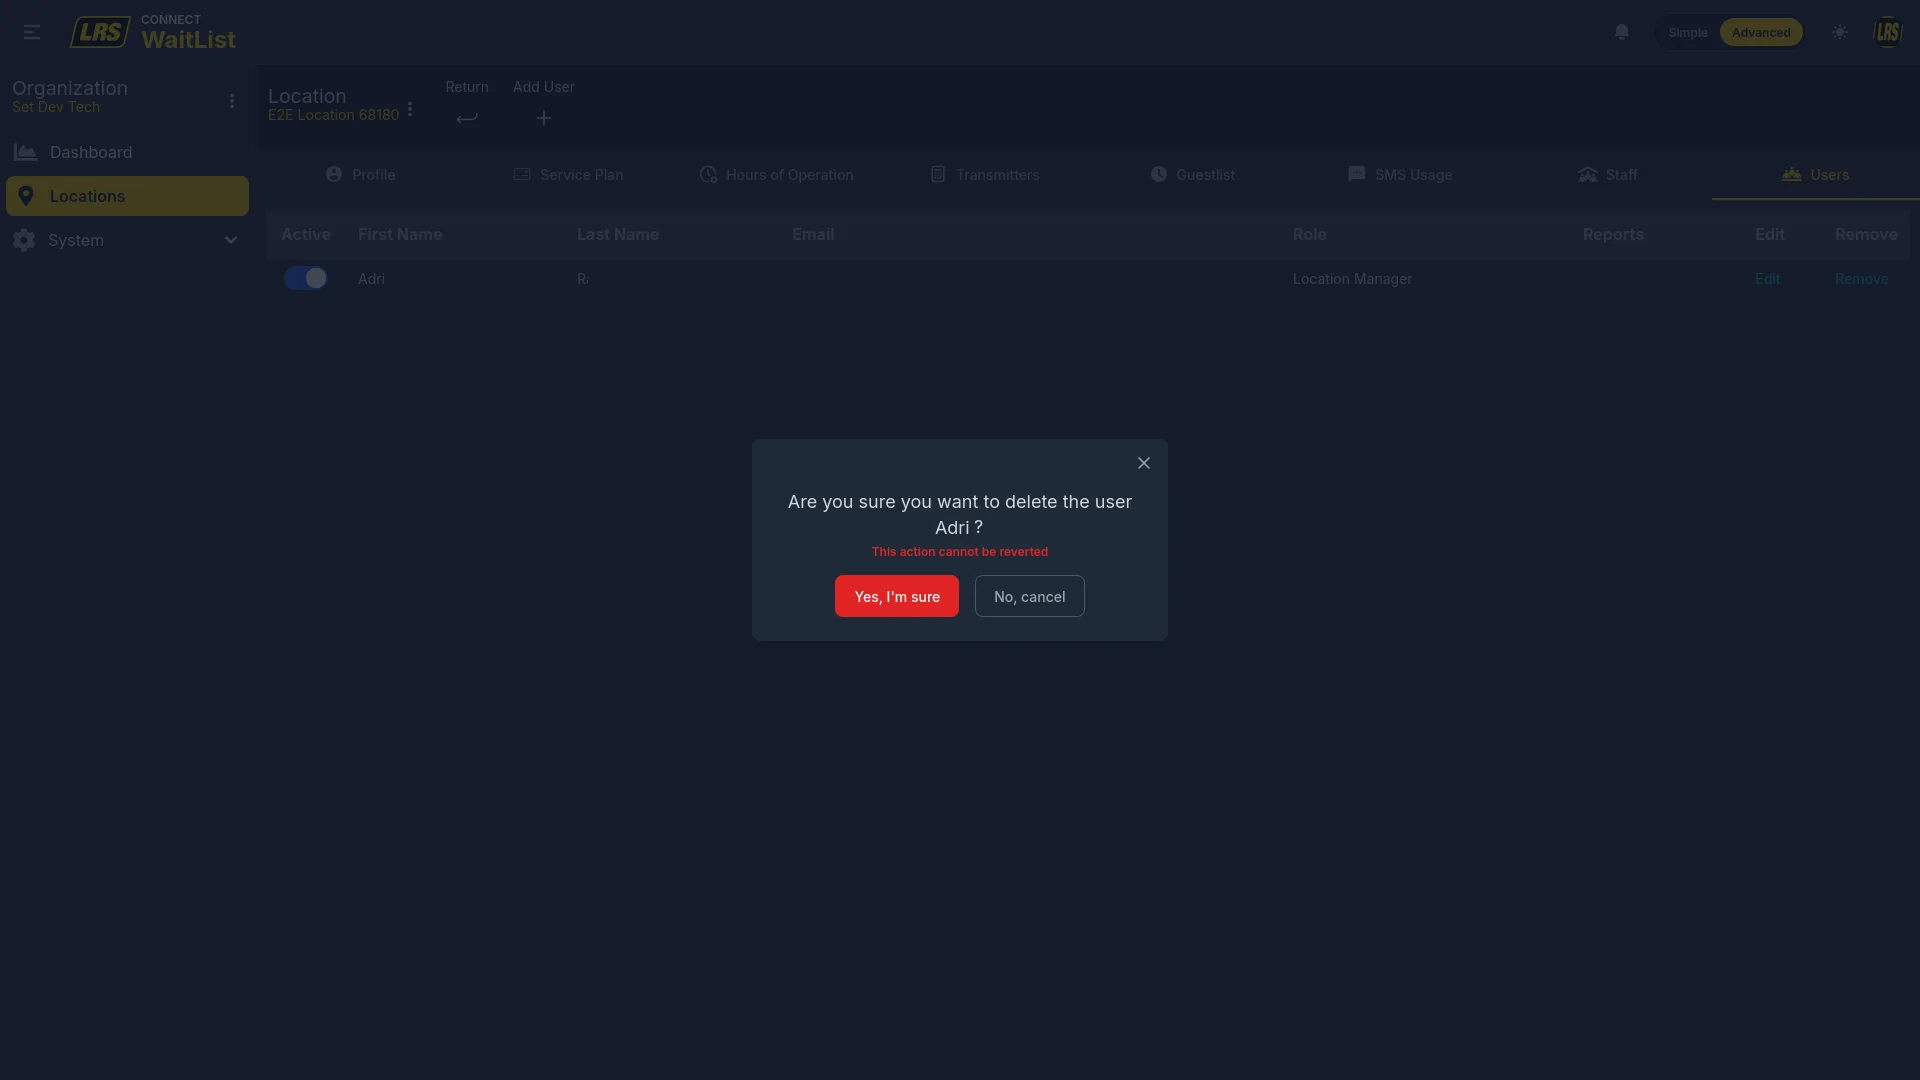
The Users tab at location level manages who can sign in to Dashboard and access this location. It is independent of the Staff tab — a user can have a Dashboard login without a pager profile, and vice versa. The Role dropdown sets whether the user is a Staff member (no Dashboard configuration access) or a Location Manager (full access to this location's tabs).

5. Waitlist configuration
Waitlist configuration covers everything that determines how the live Waitlist app behaves for a specific location: which waitlist and area are active, how kiosk and self check-in modes are launched, how areas are configured, and what the entry form looks like for each audience. The Form Designer is covered separately in the next section.
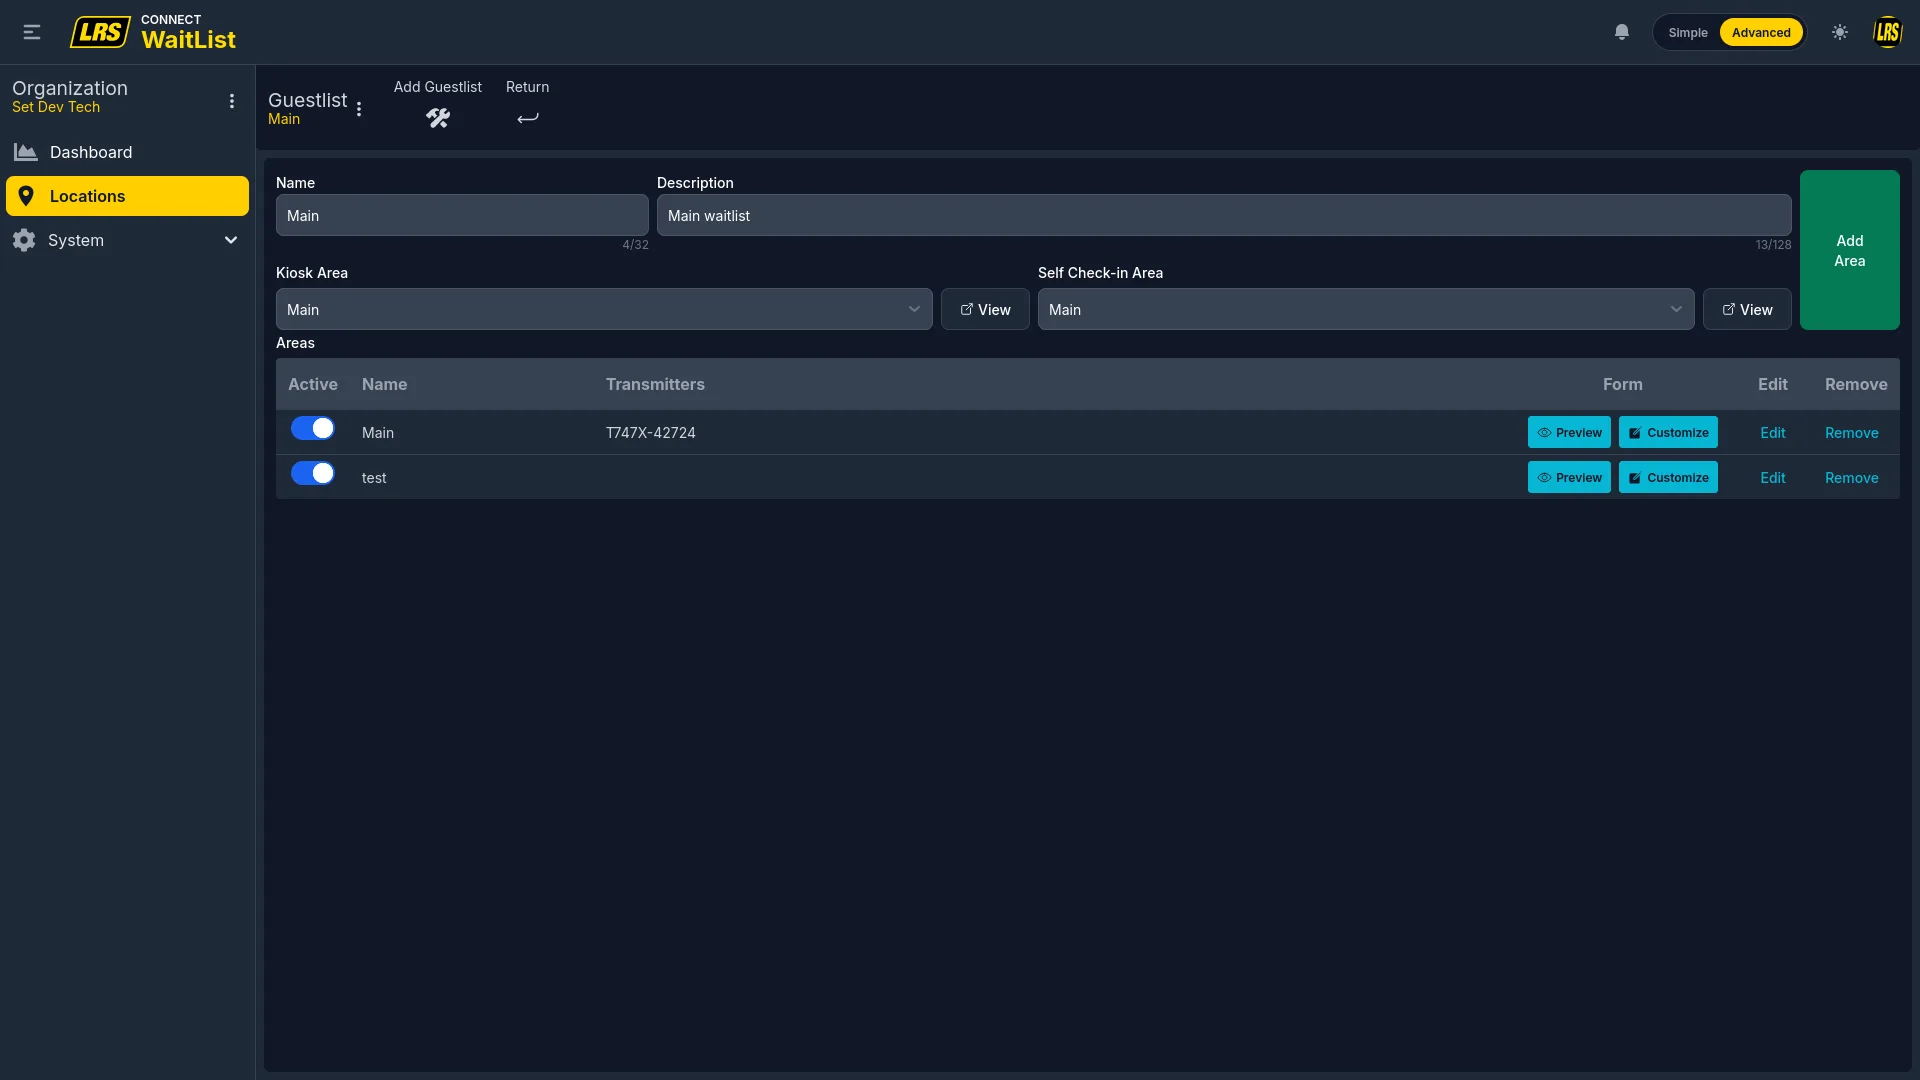
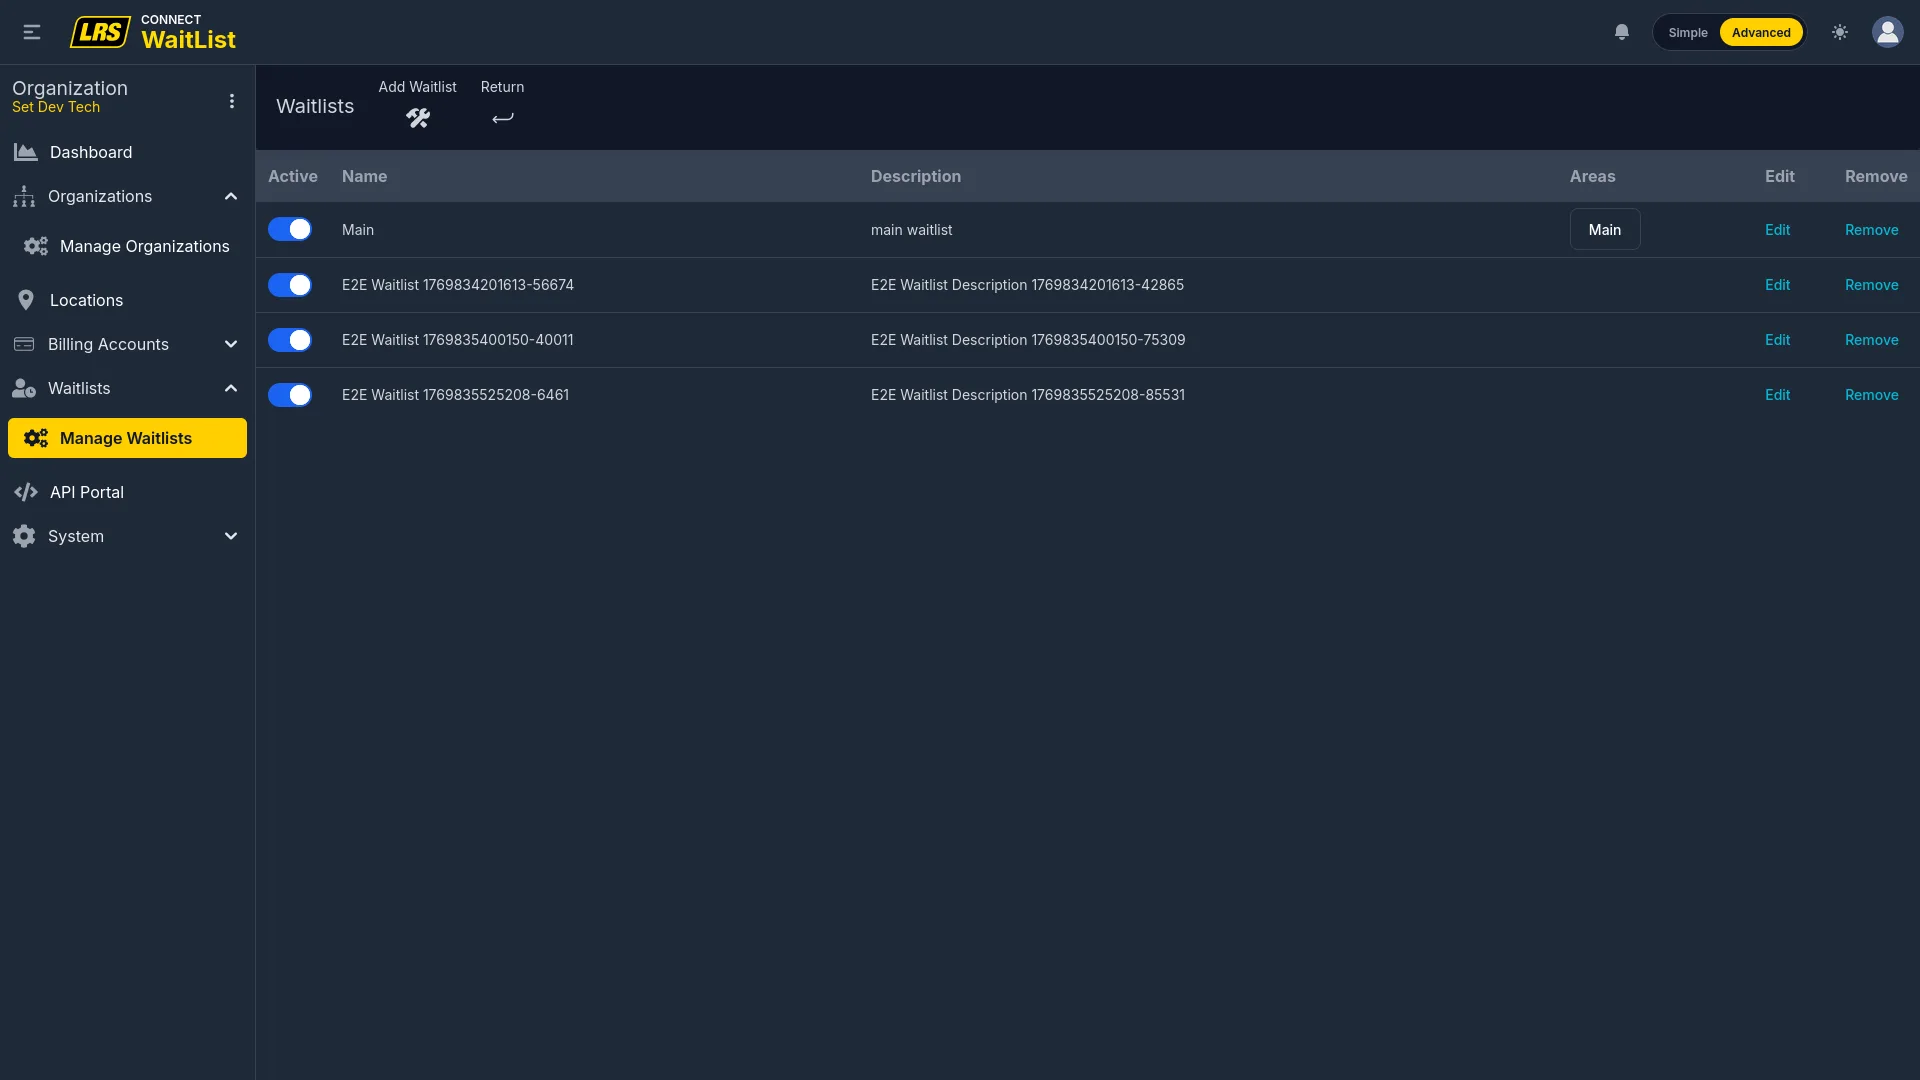
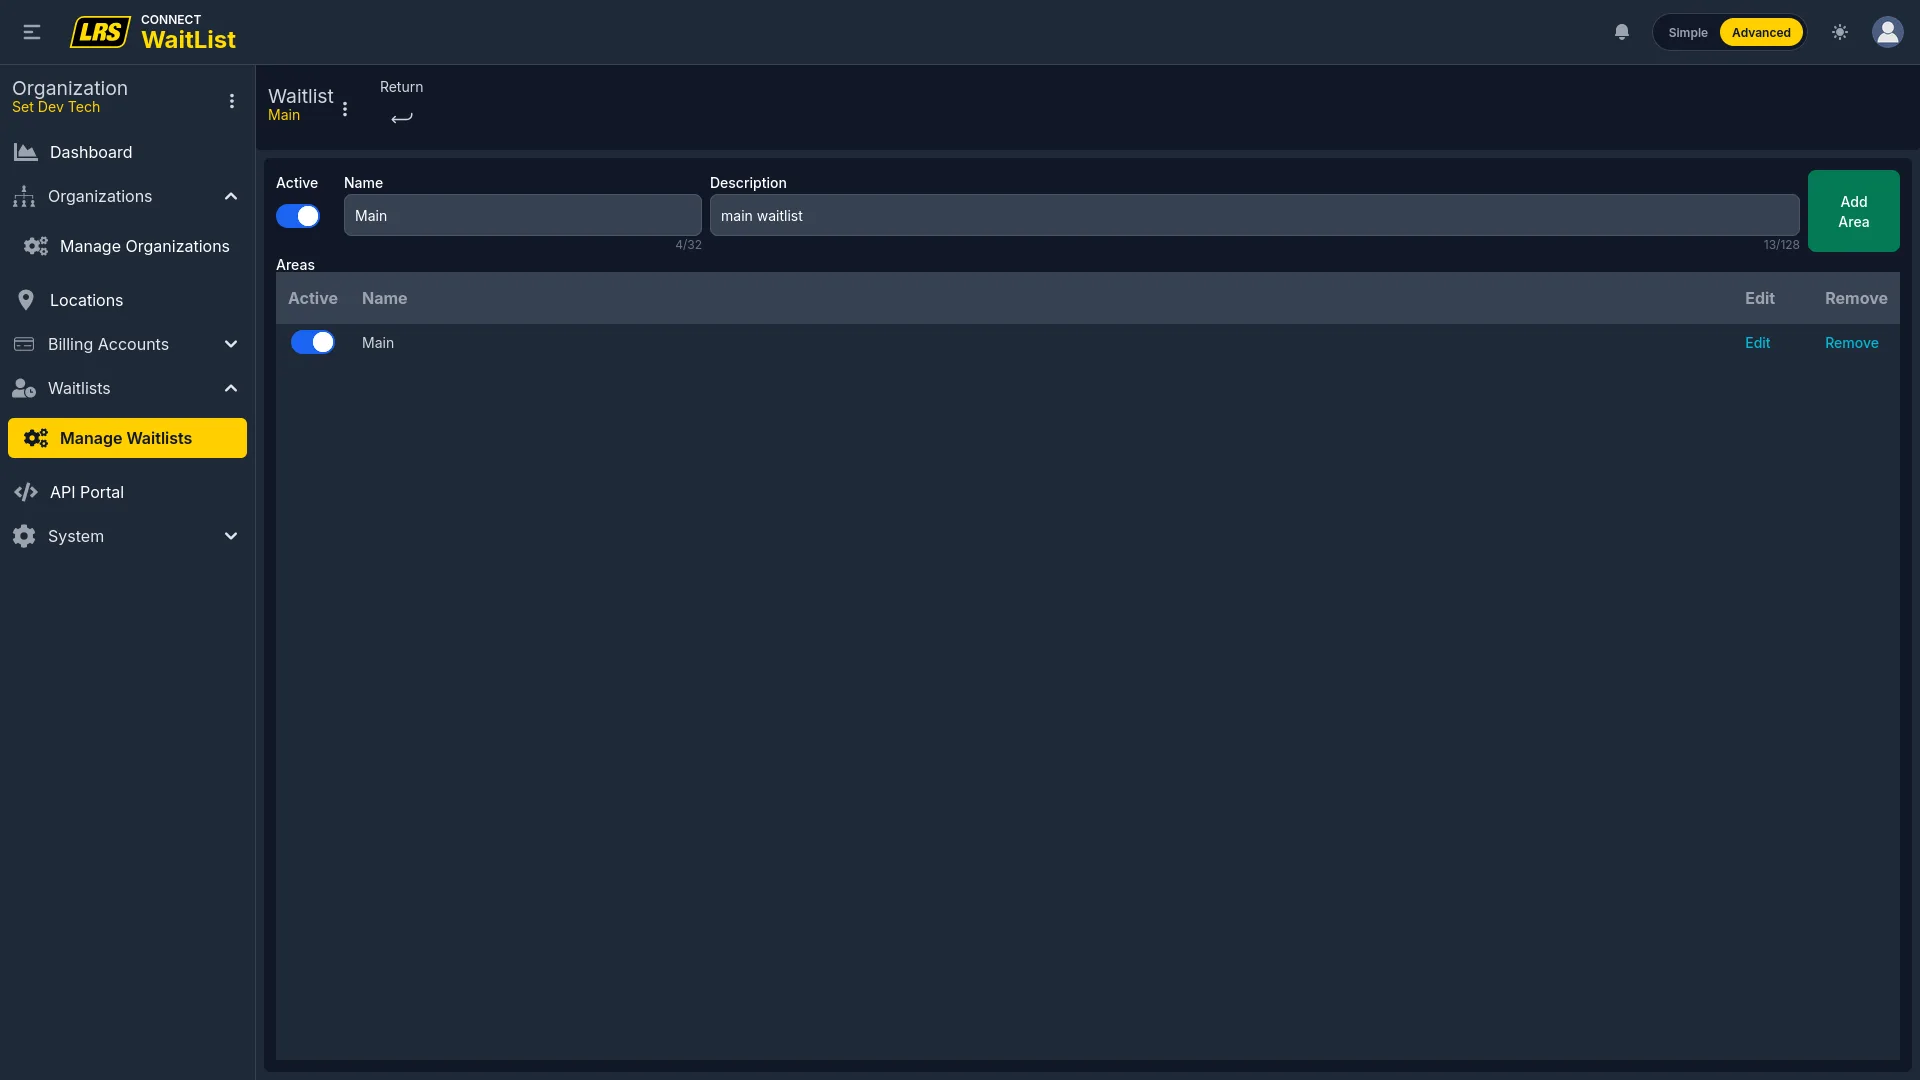
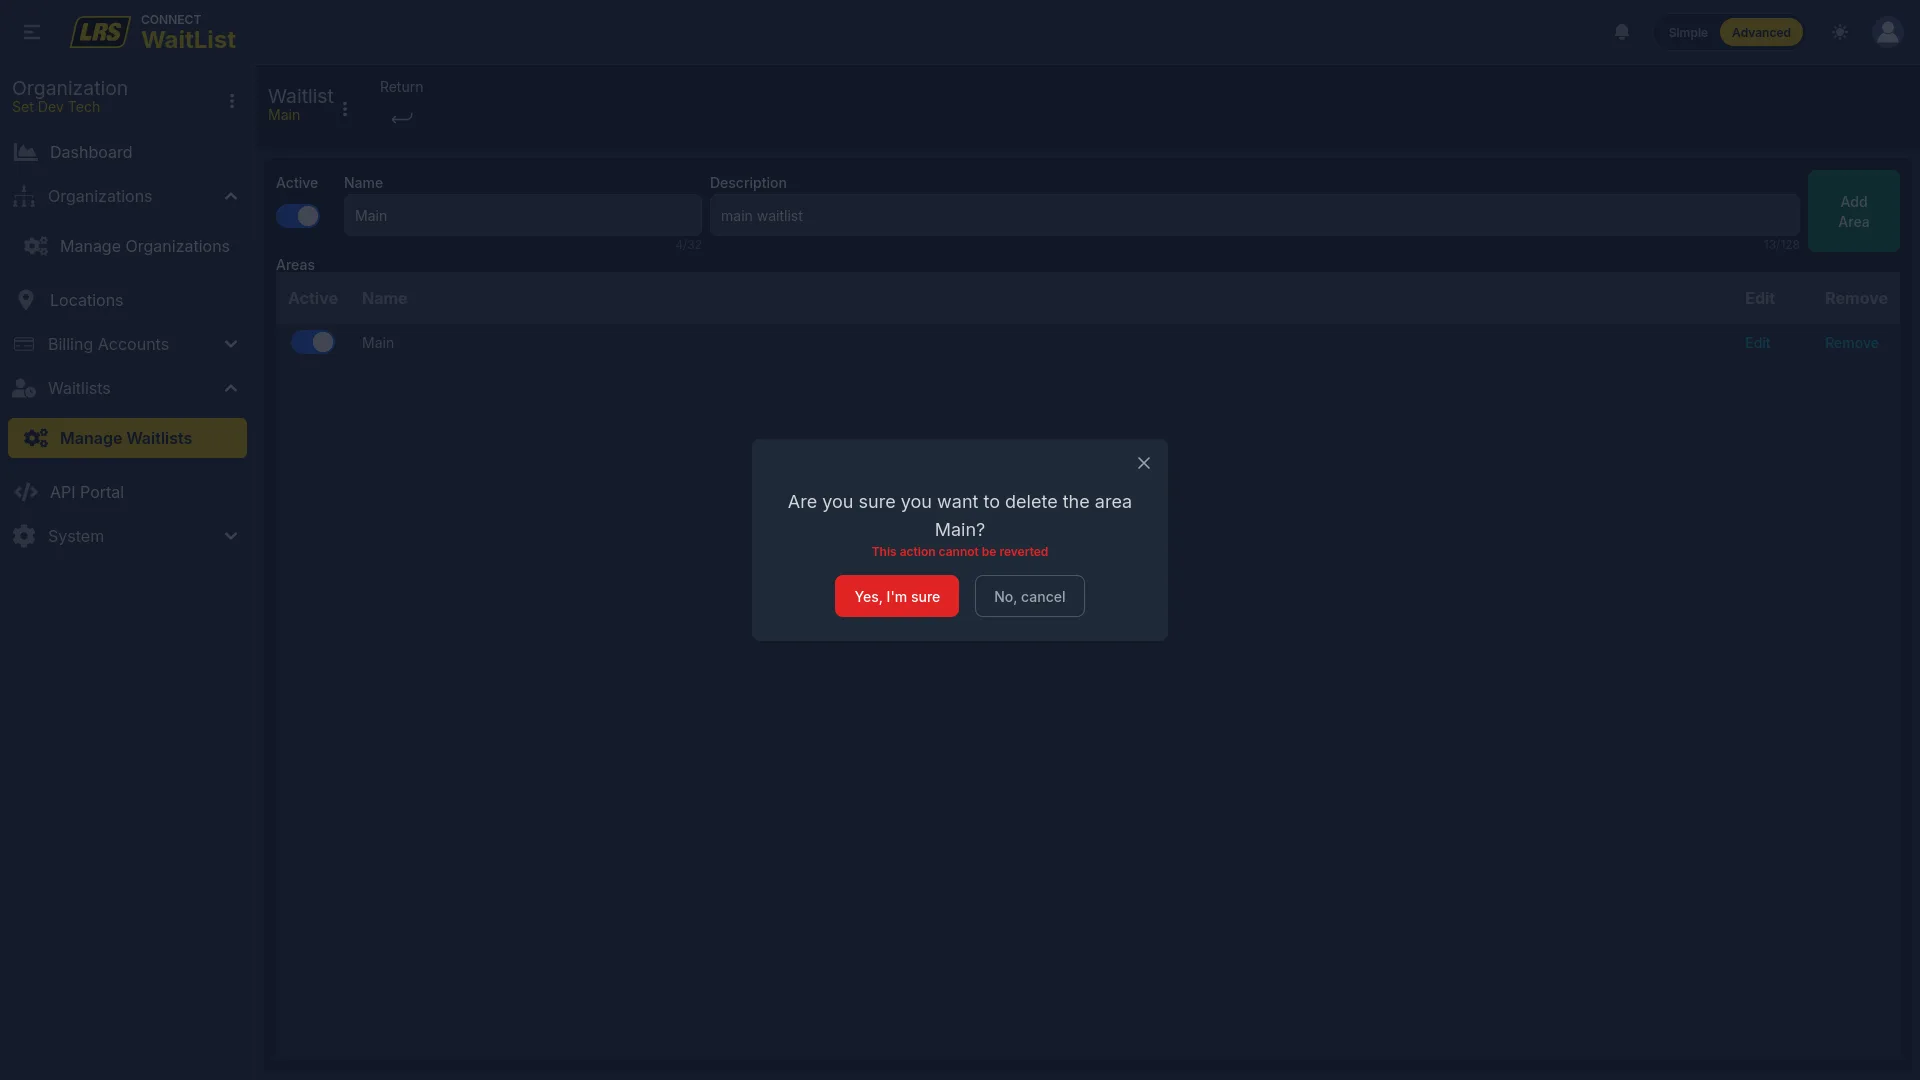
The Guestlist tab inside a location lists all waitlists assigned to it. A location must have at least one active waitlist with at least one active area before the Waitlist app will open. The area chips on each row name the areas assigned to that waitlist.
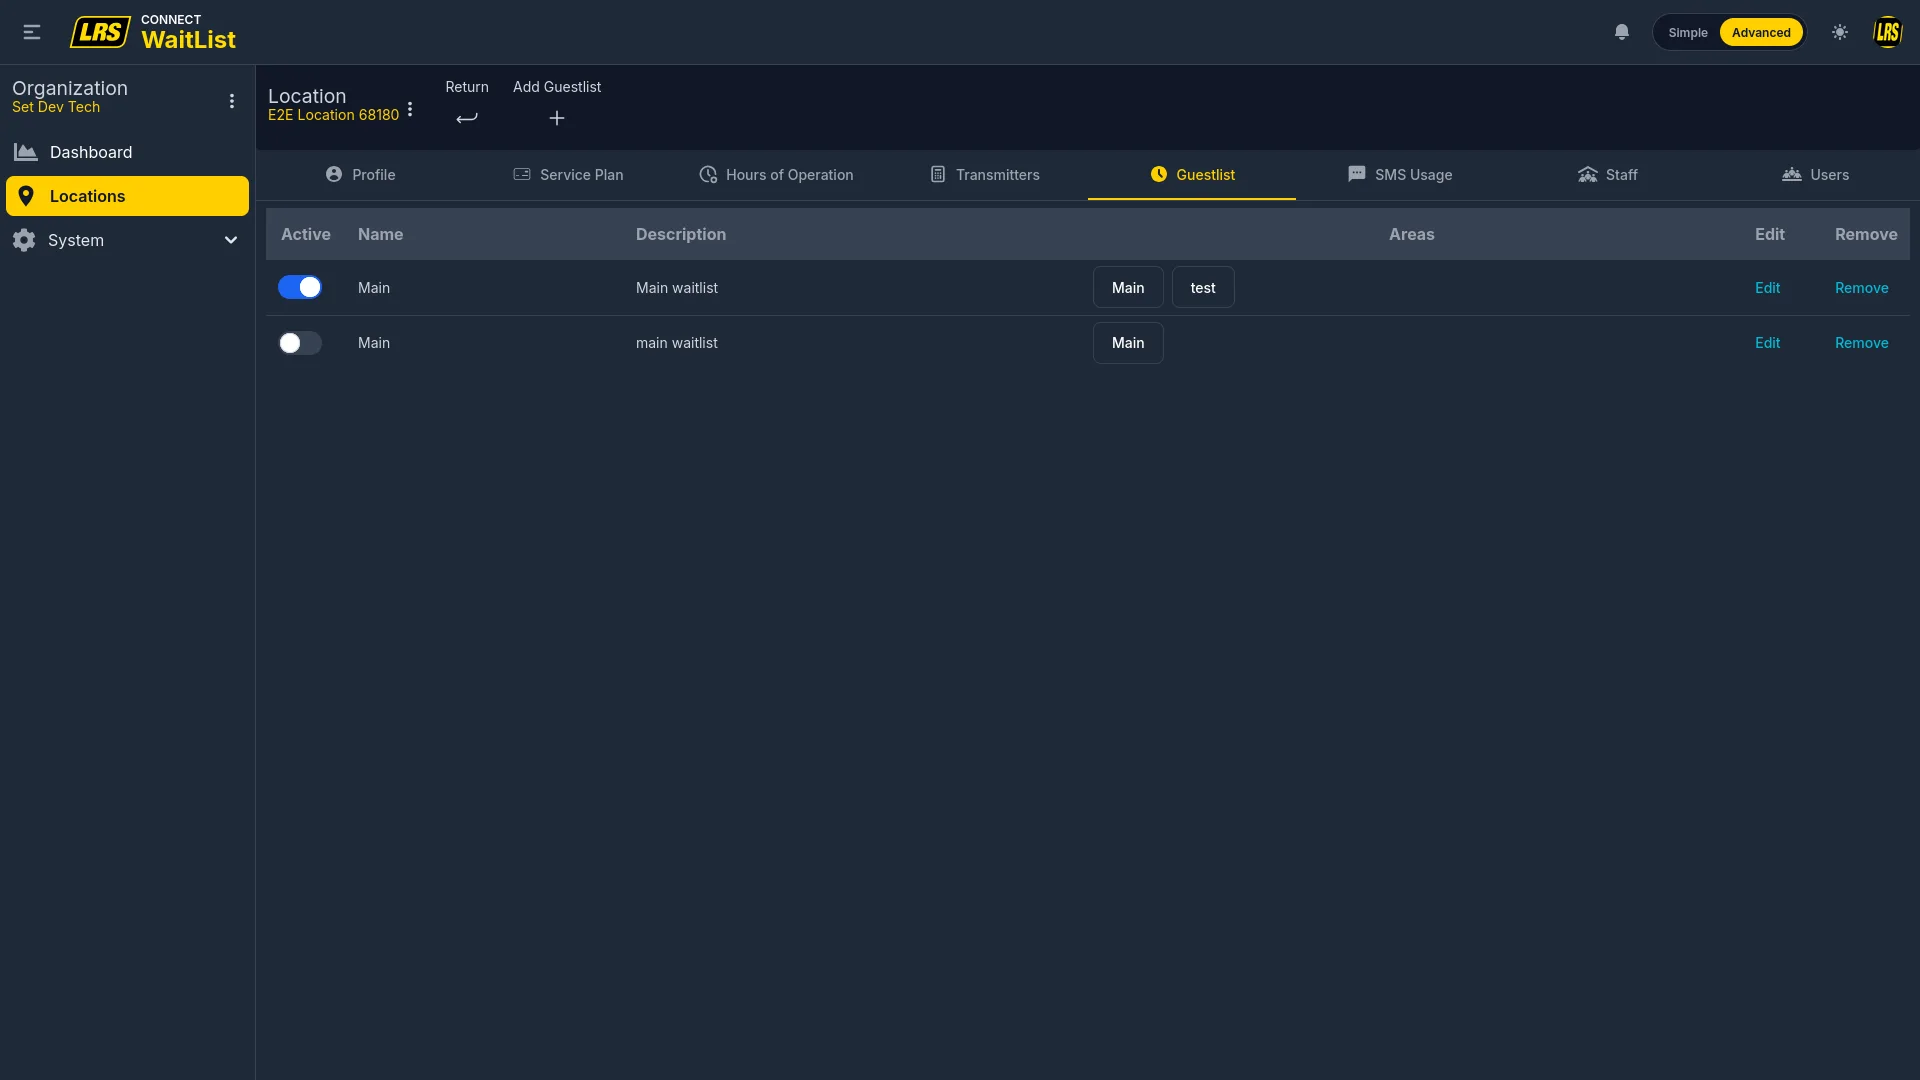
Clicking Add Guestlist starts the assignment flow. The first screen shows all waitlists already configured at the organization level. Selecting one previews the areas that will be available.

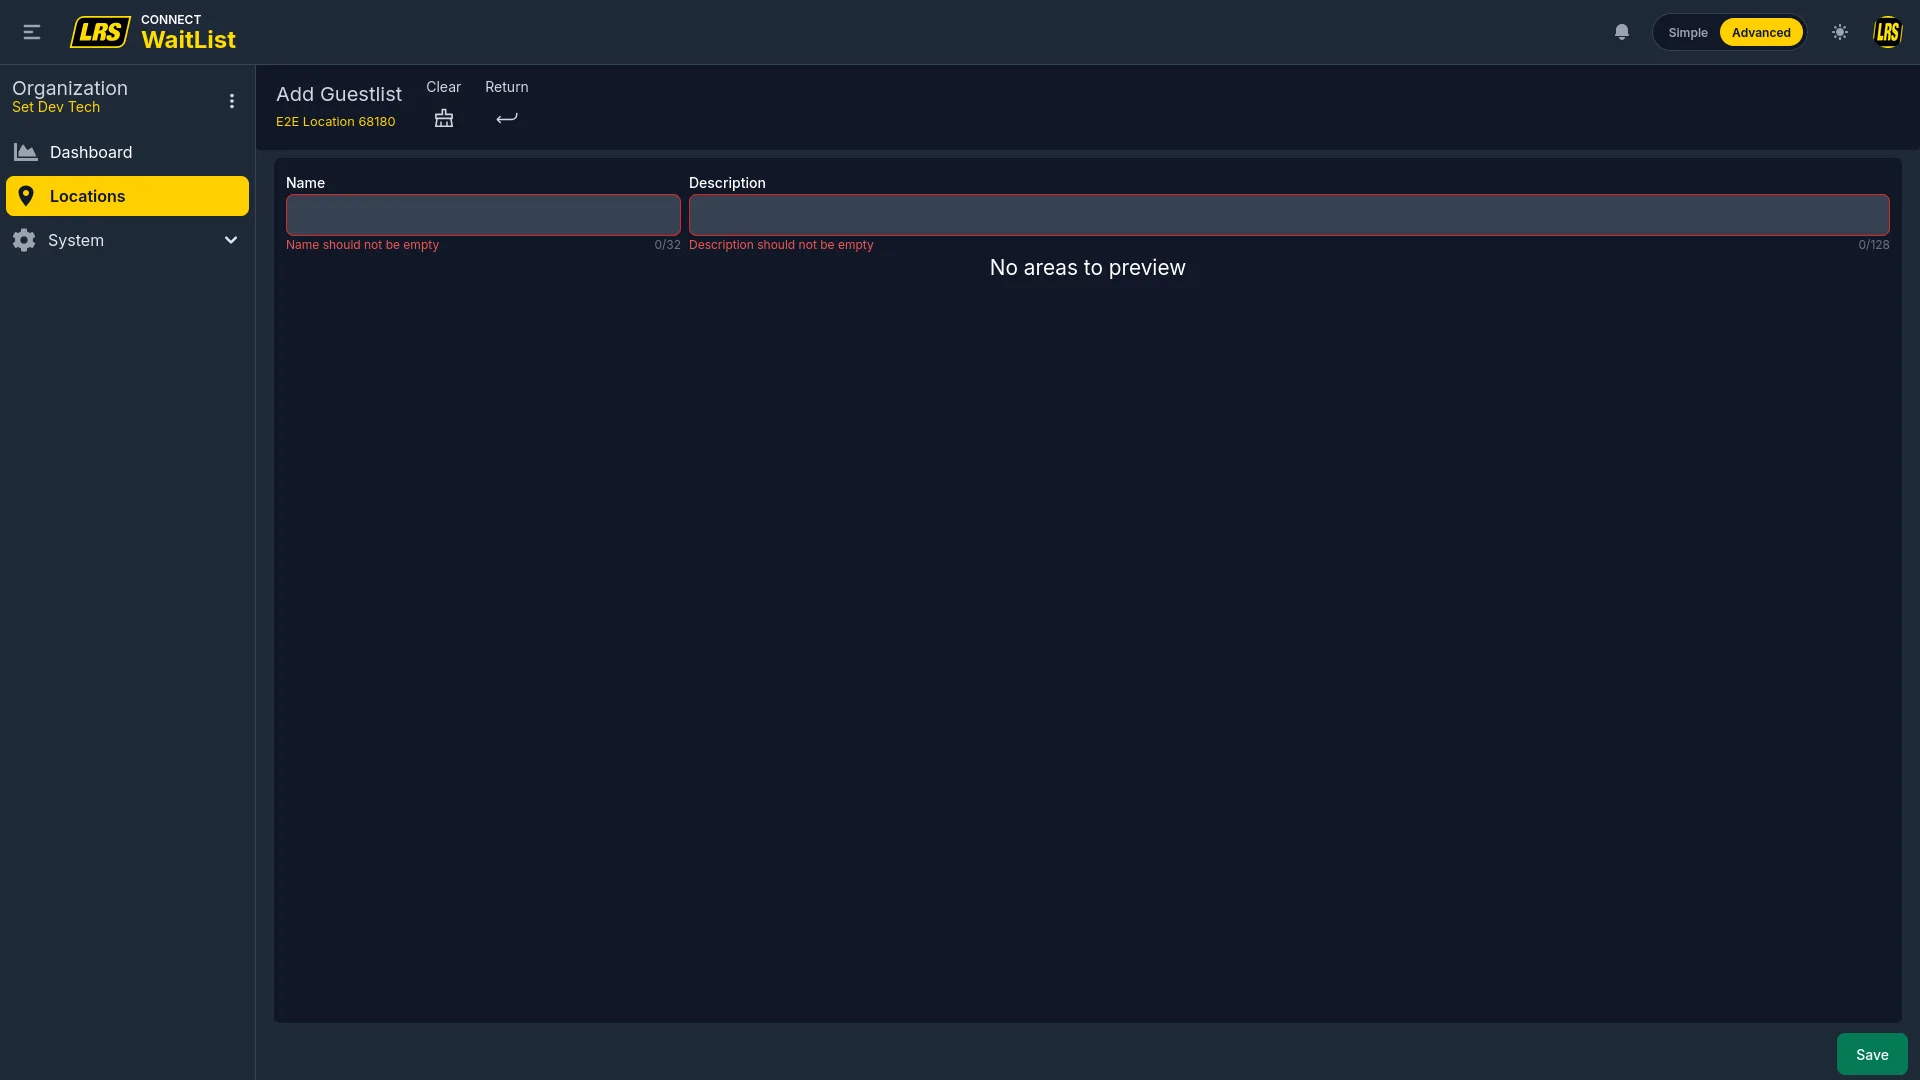
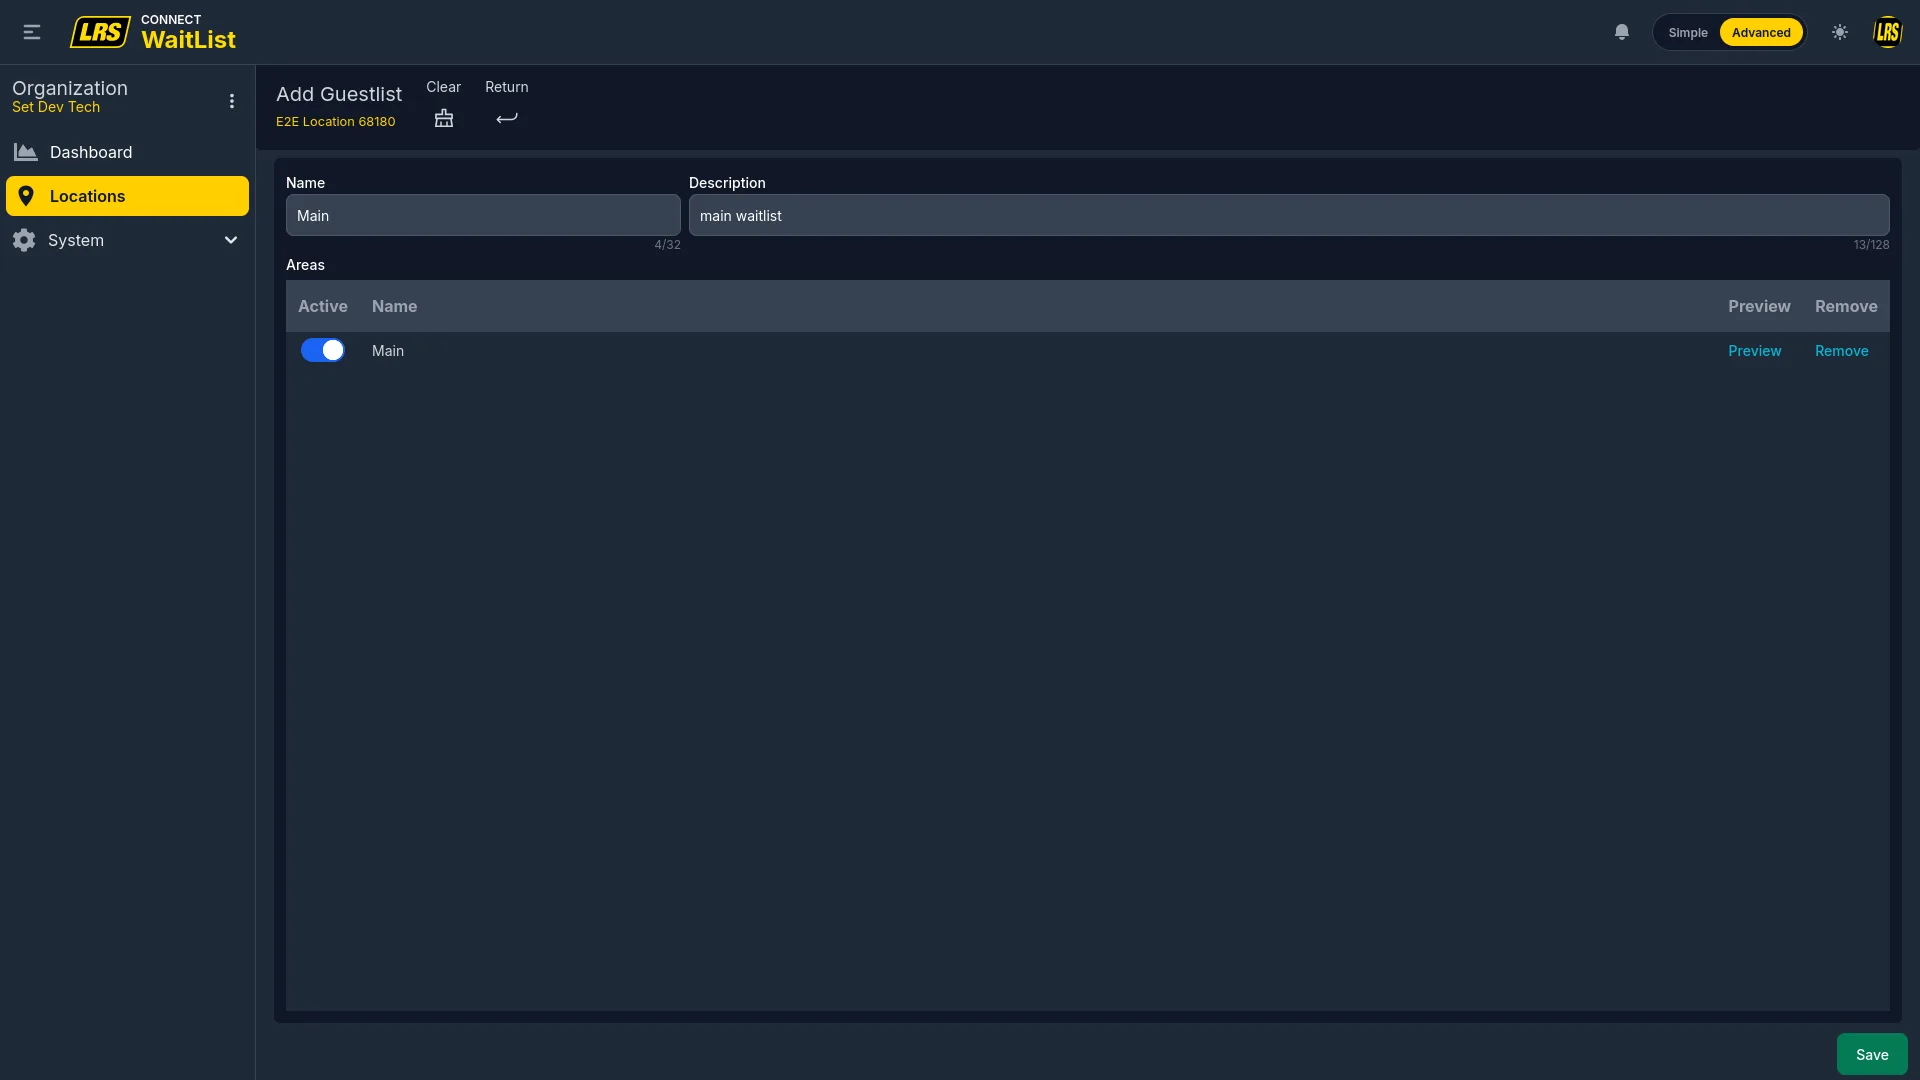
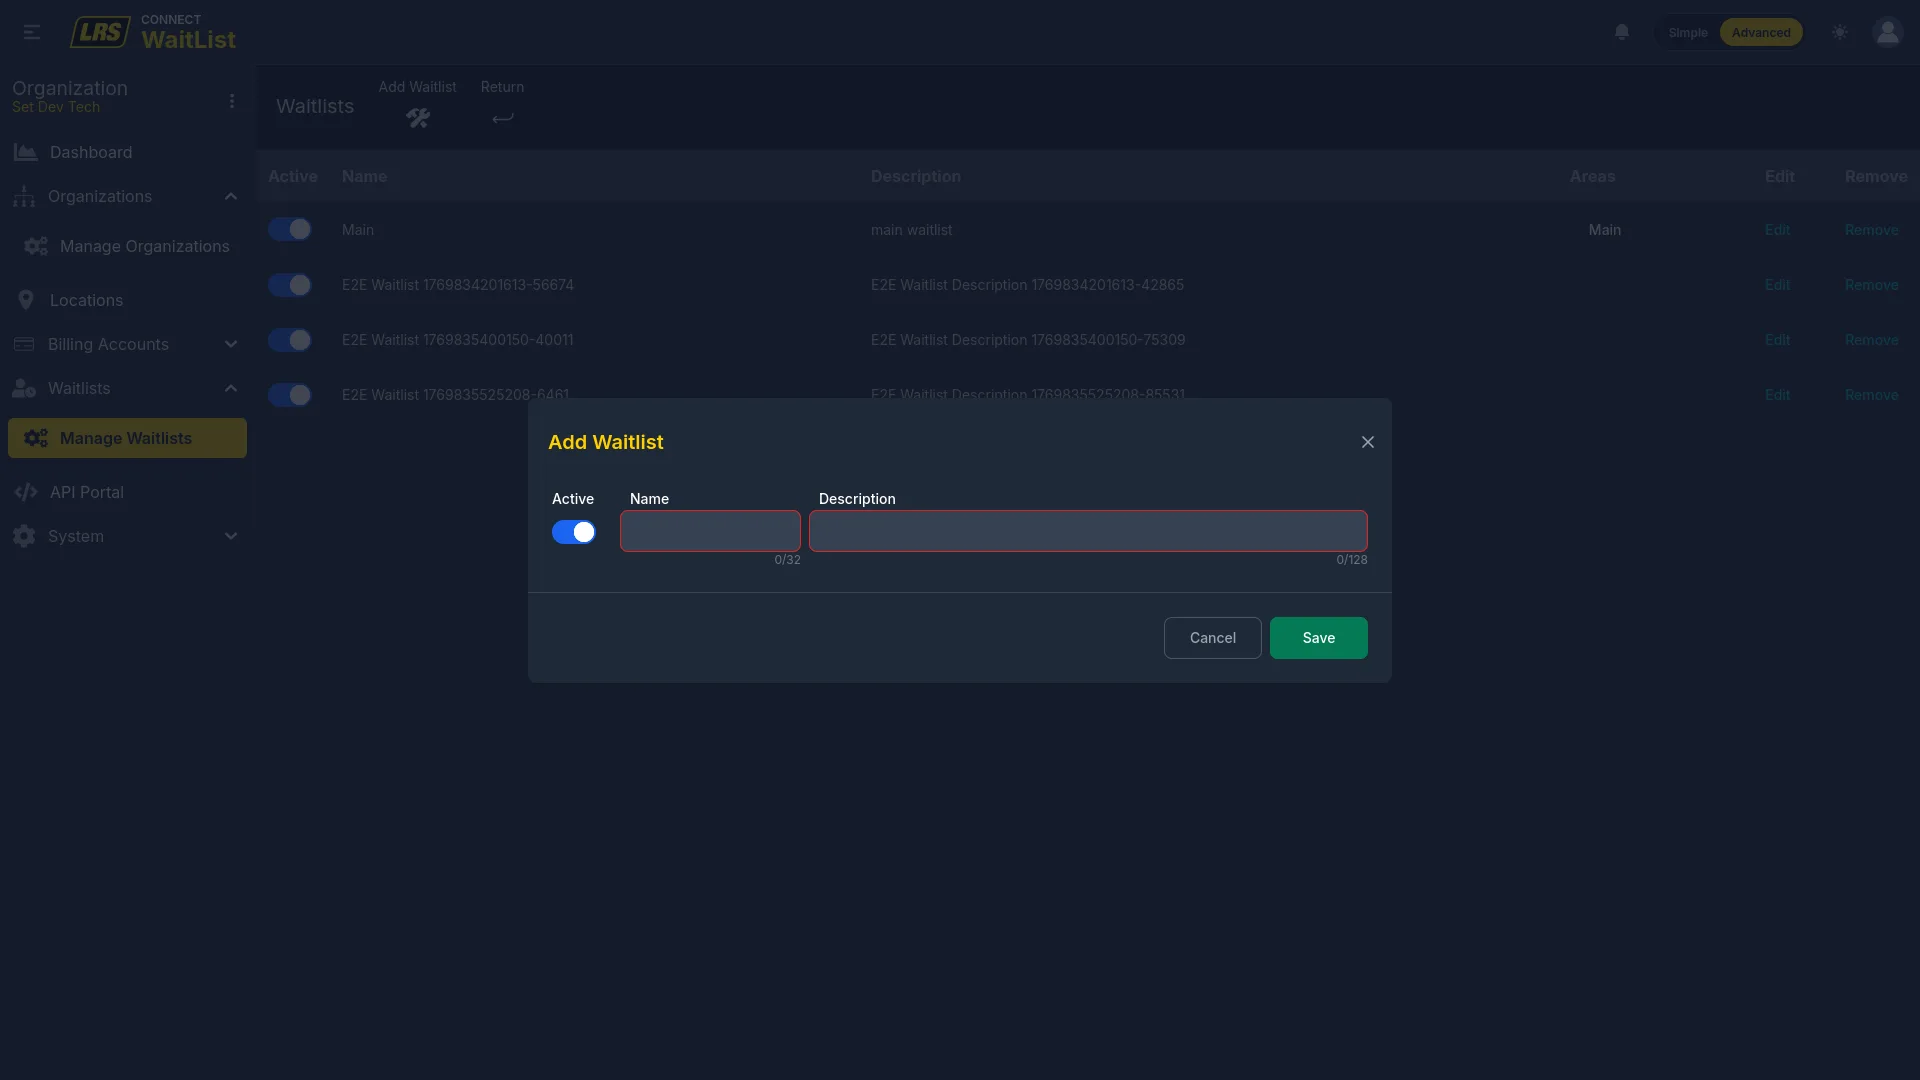
If no existing waitlist fits, click the click here link below the list to continue without selecting one. Fill in a Name and Description to create a new waitlist directly from this flow. The new waitlist is also added to the organization's Waitlists menu for reuse at other locations.
With a name filled in, the areas table shows what will be assigned. The Preview button on each area row opens the form preview to verify field order and required fields before confirming.
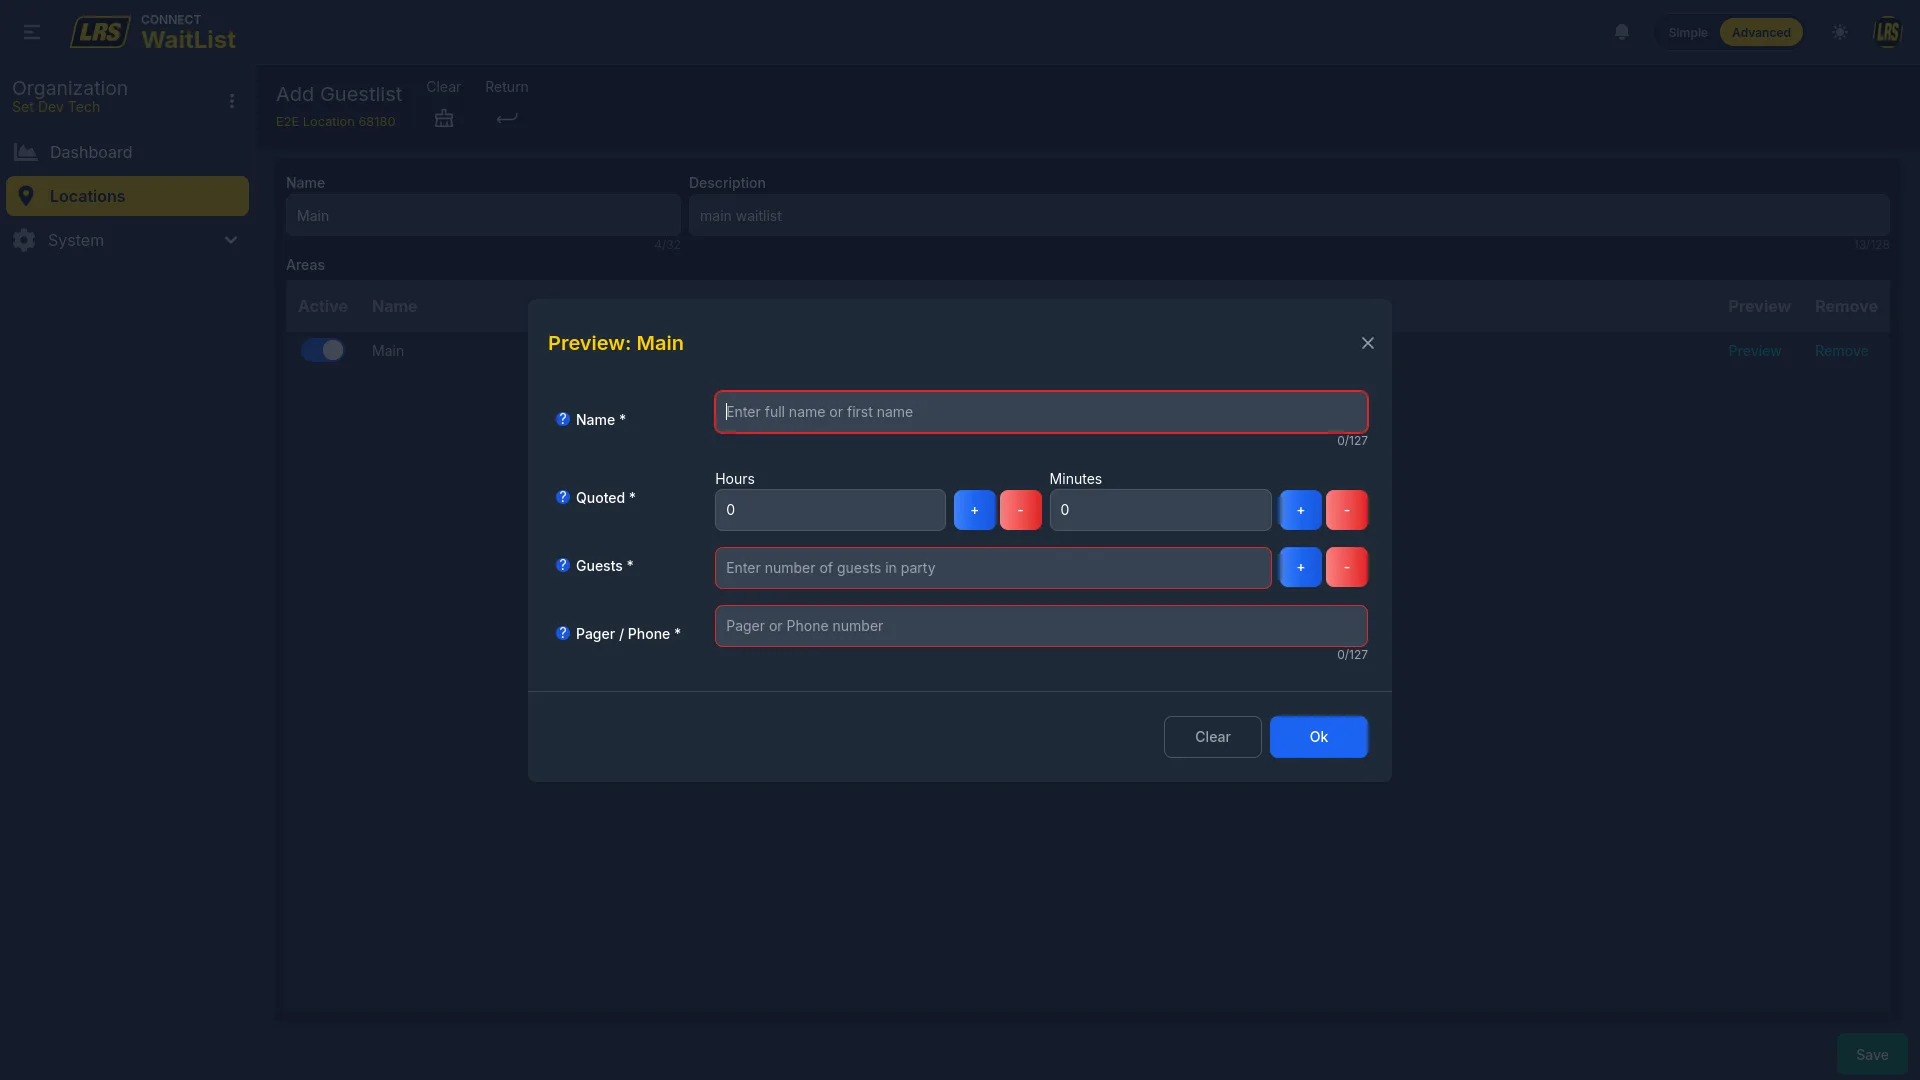
After a guestlist is assigned, the workspace is the central setup hub for that location. It shows which waitlist and area are active, lets managers set the Kiosk Area and Self Check-in Area, configure transmitter assignments per area, and edit the entry form — all from a single page. The Kiosk Area determines where kiosk-mode entries land; the Self Check-in Area is where remote check-in visitors queue.
The View button next to the Kiosk Area dropdown launches kiosk mode on the current device using the assigned area. This button generates a one-time session token required by kiosk mode — opening a direct URL without this token will not initialize kiosk mode correctly.
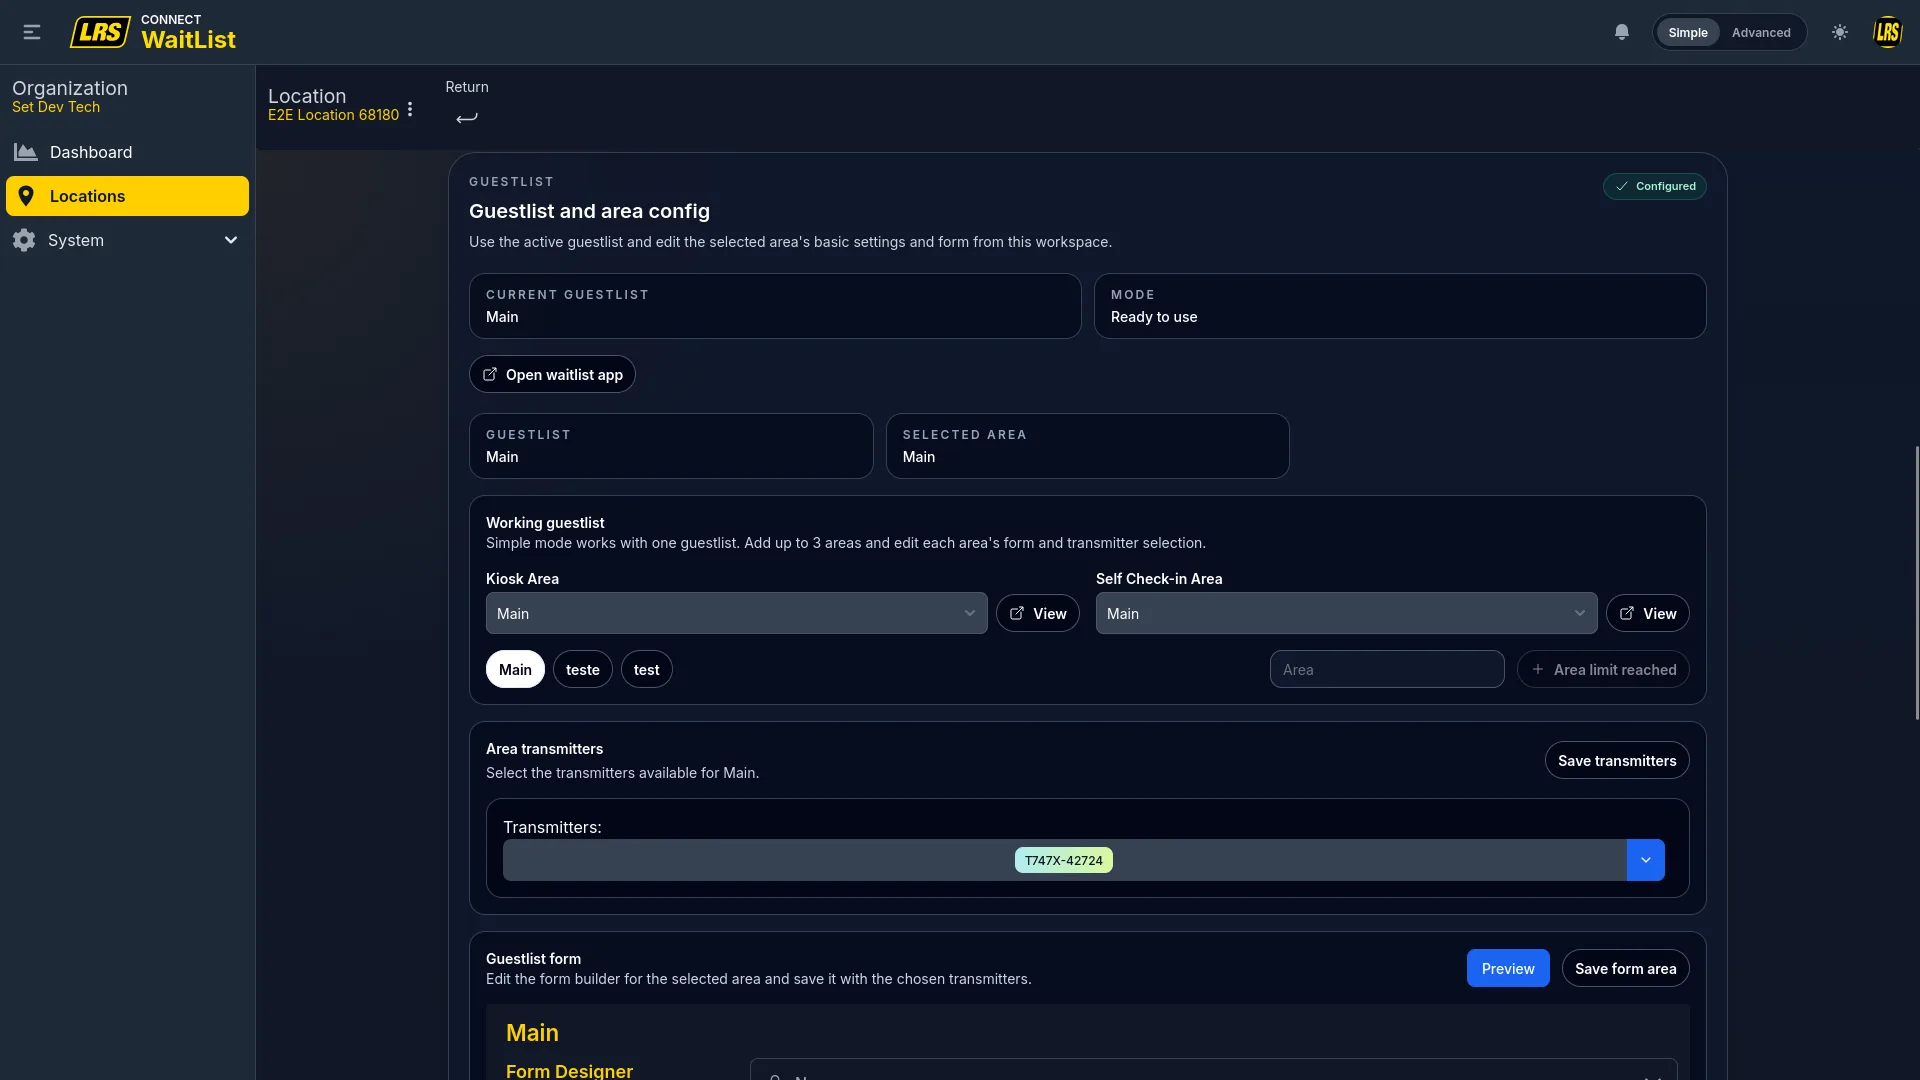
In advanced mode, clicking Edit on a guestlist row in the Guestlist tab opens the guestlist detail, where the Kiosk Area and Self Check-in Area dropdowns are configured and each area's transmitter assignment and form can be accessed via the Customize button.
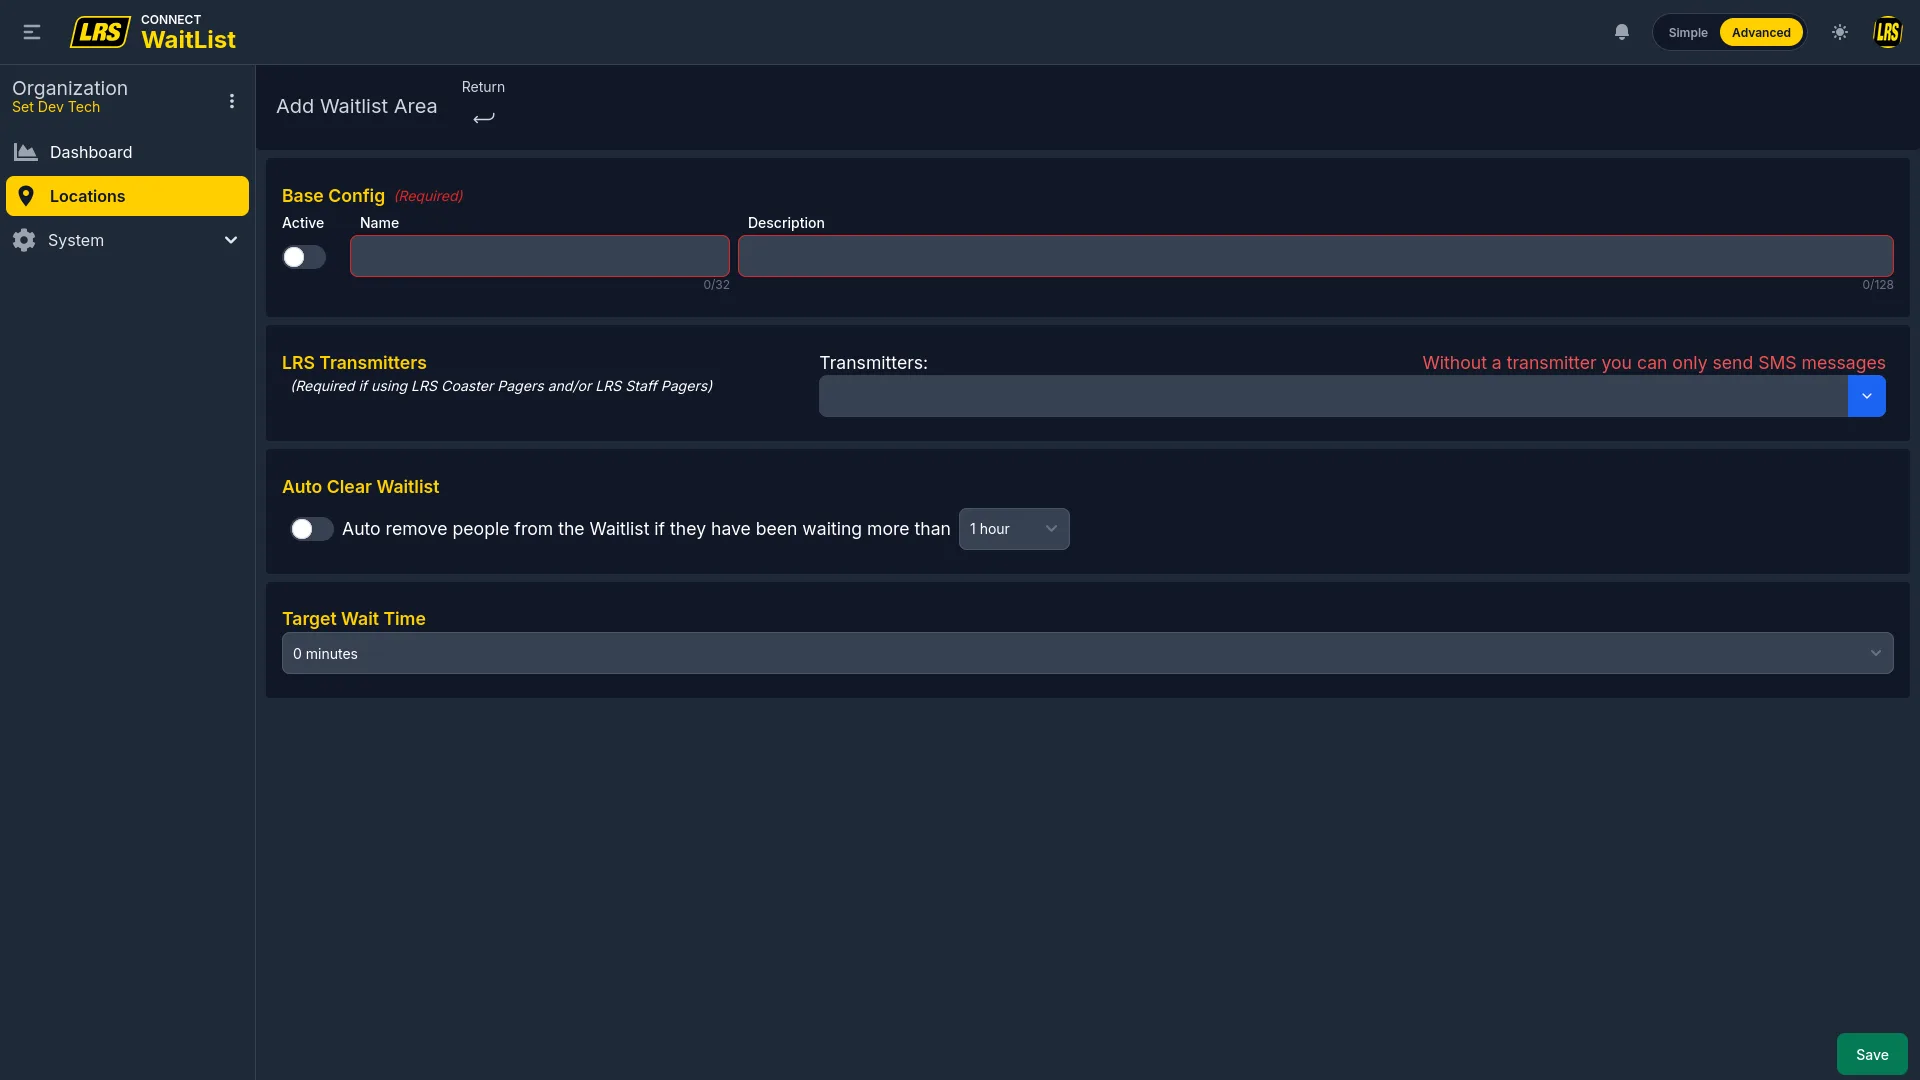
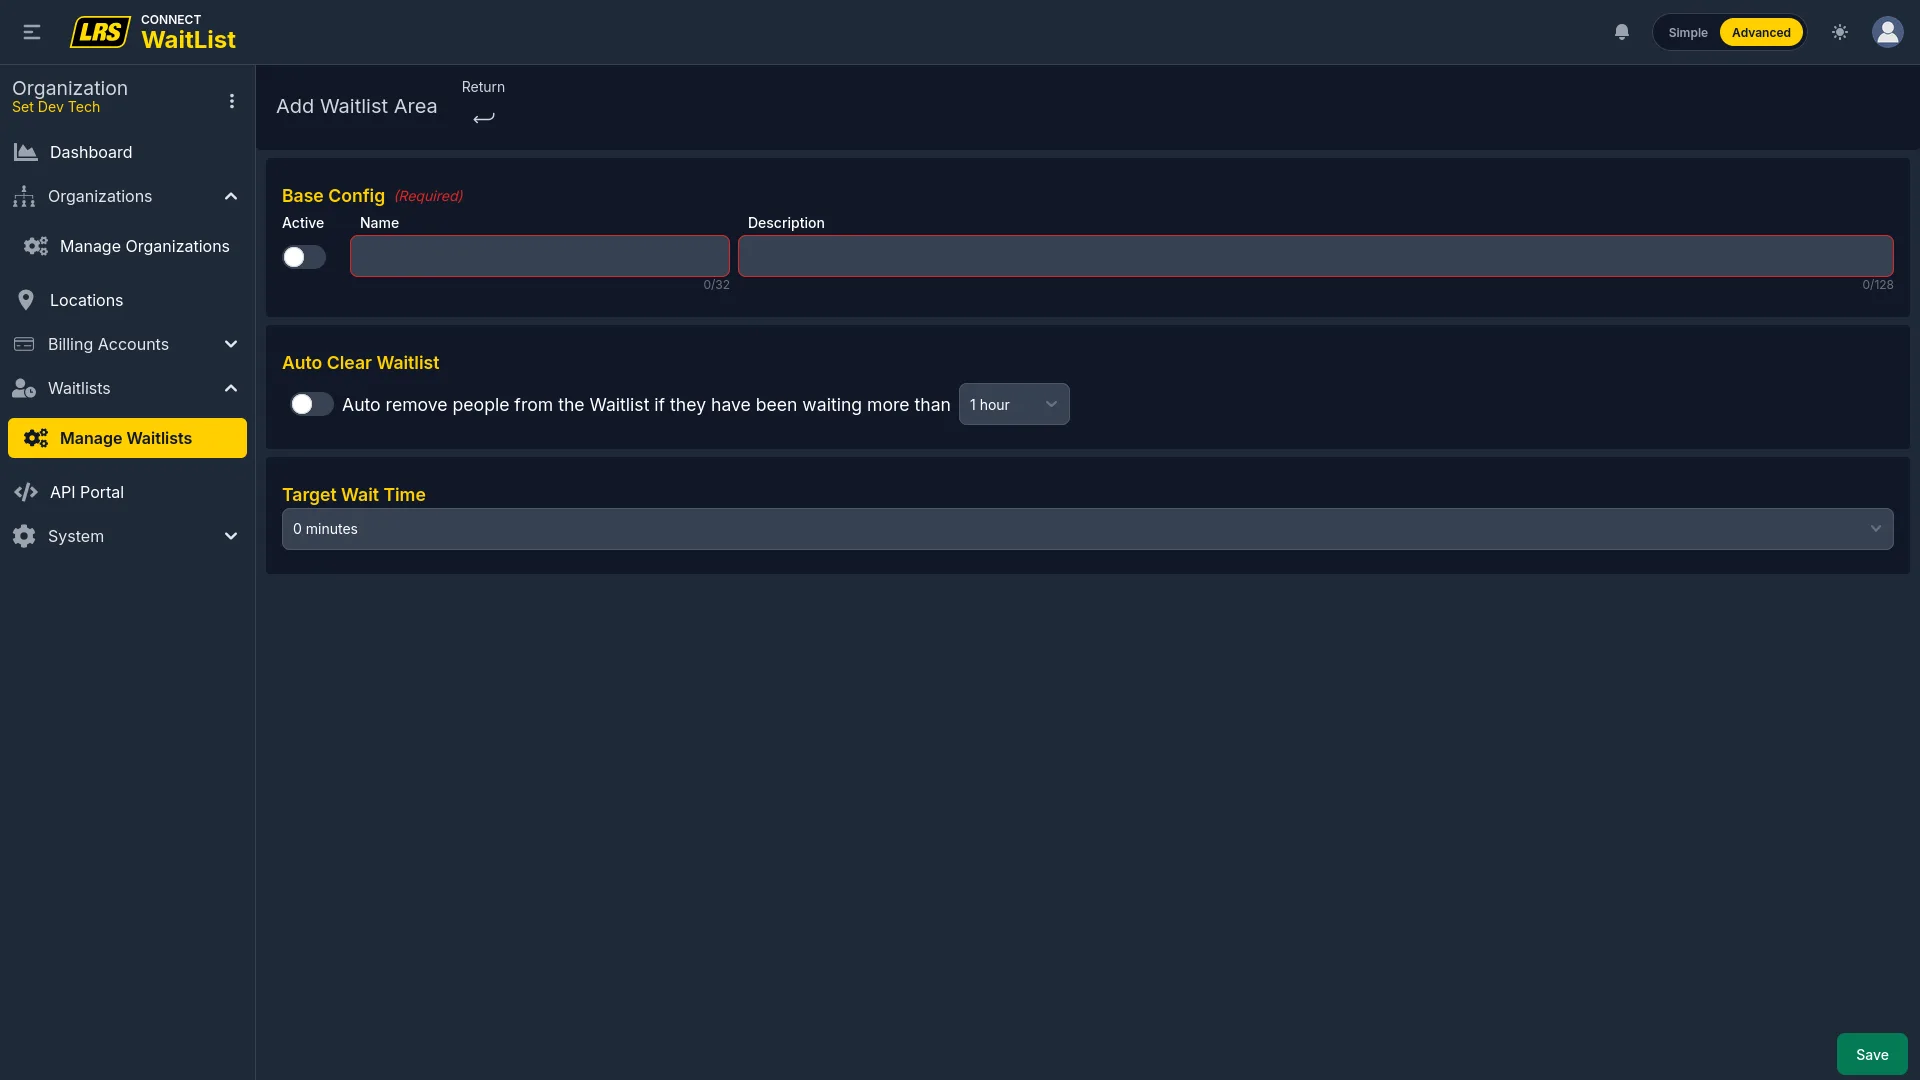
Each area inside a waitlist is an independent queue with its own transmitters, auto-clear timer, target wait time, messaging, notifications, and form. Click Add Area inside the guestlist detail to create a new one. Auto Clear removes entries from the area after a configurable idle time; Target Wait Time is the baseline used by Programmed Notifications and performance reporting.
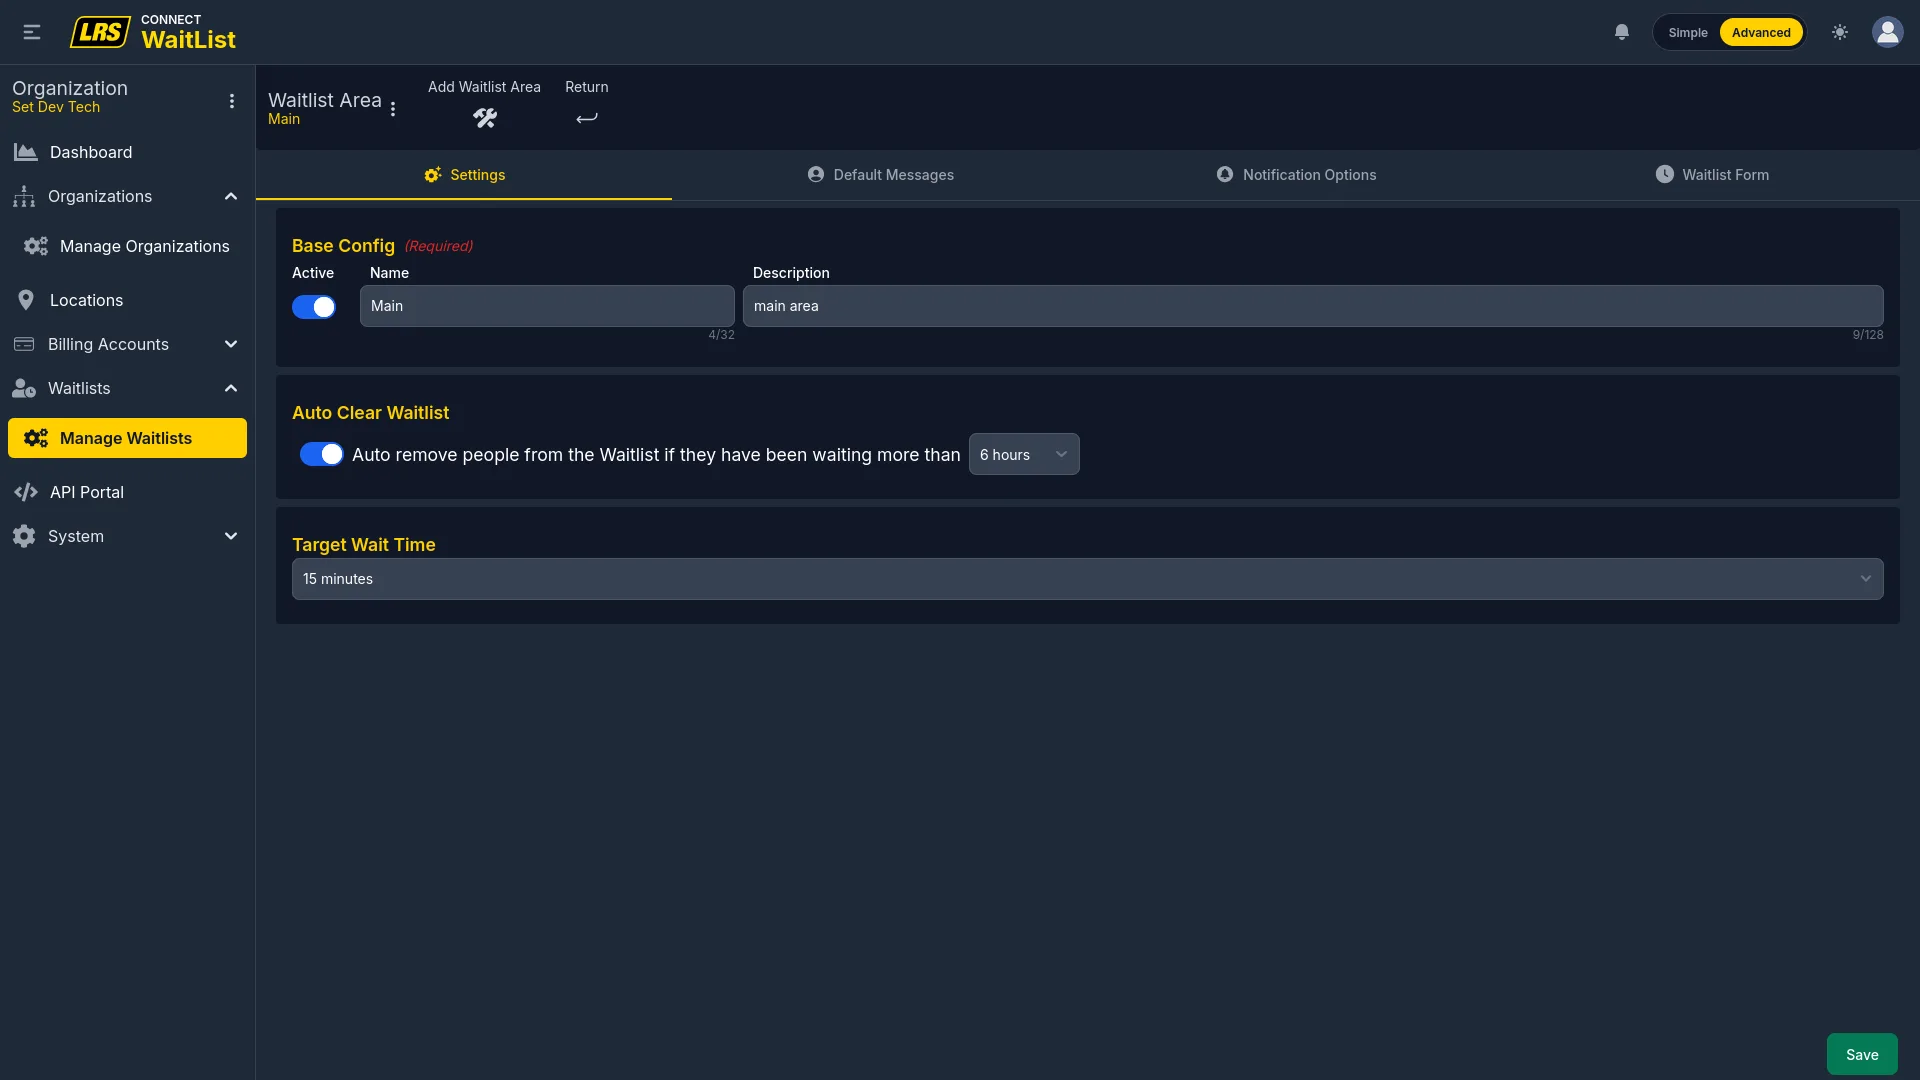
After creation, click Customize on the area row to open the full area configuration. Areas accessed from within a location have six tabs; areas accessed from the org level have four (Programmed Notifications and API Settings require the location context to function).
| Tab | What it configures |
|---|---|
| Settings | Name, description, transmitter assignment, auto-clear timeout, target wait time, and remote check-in link generation. |
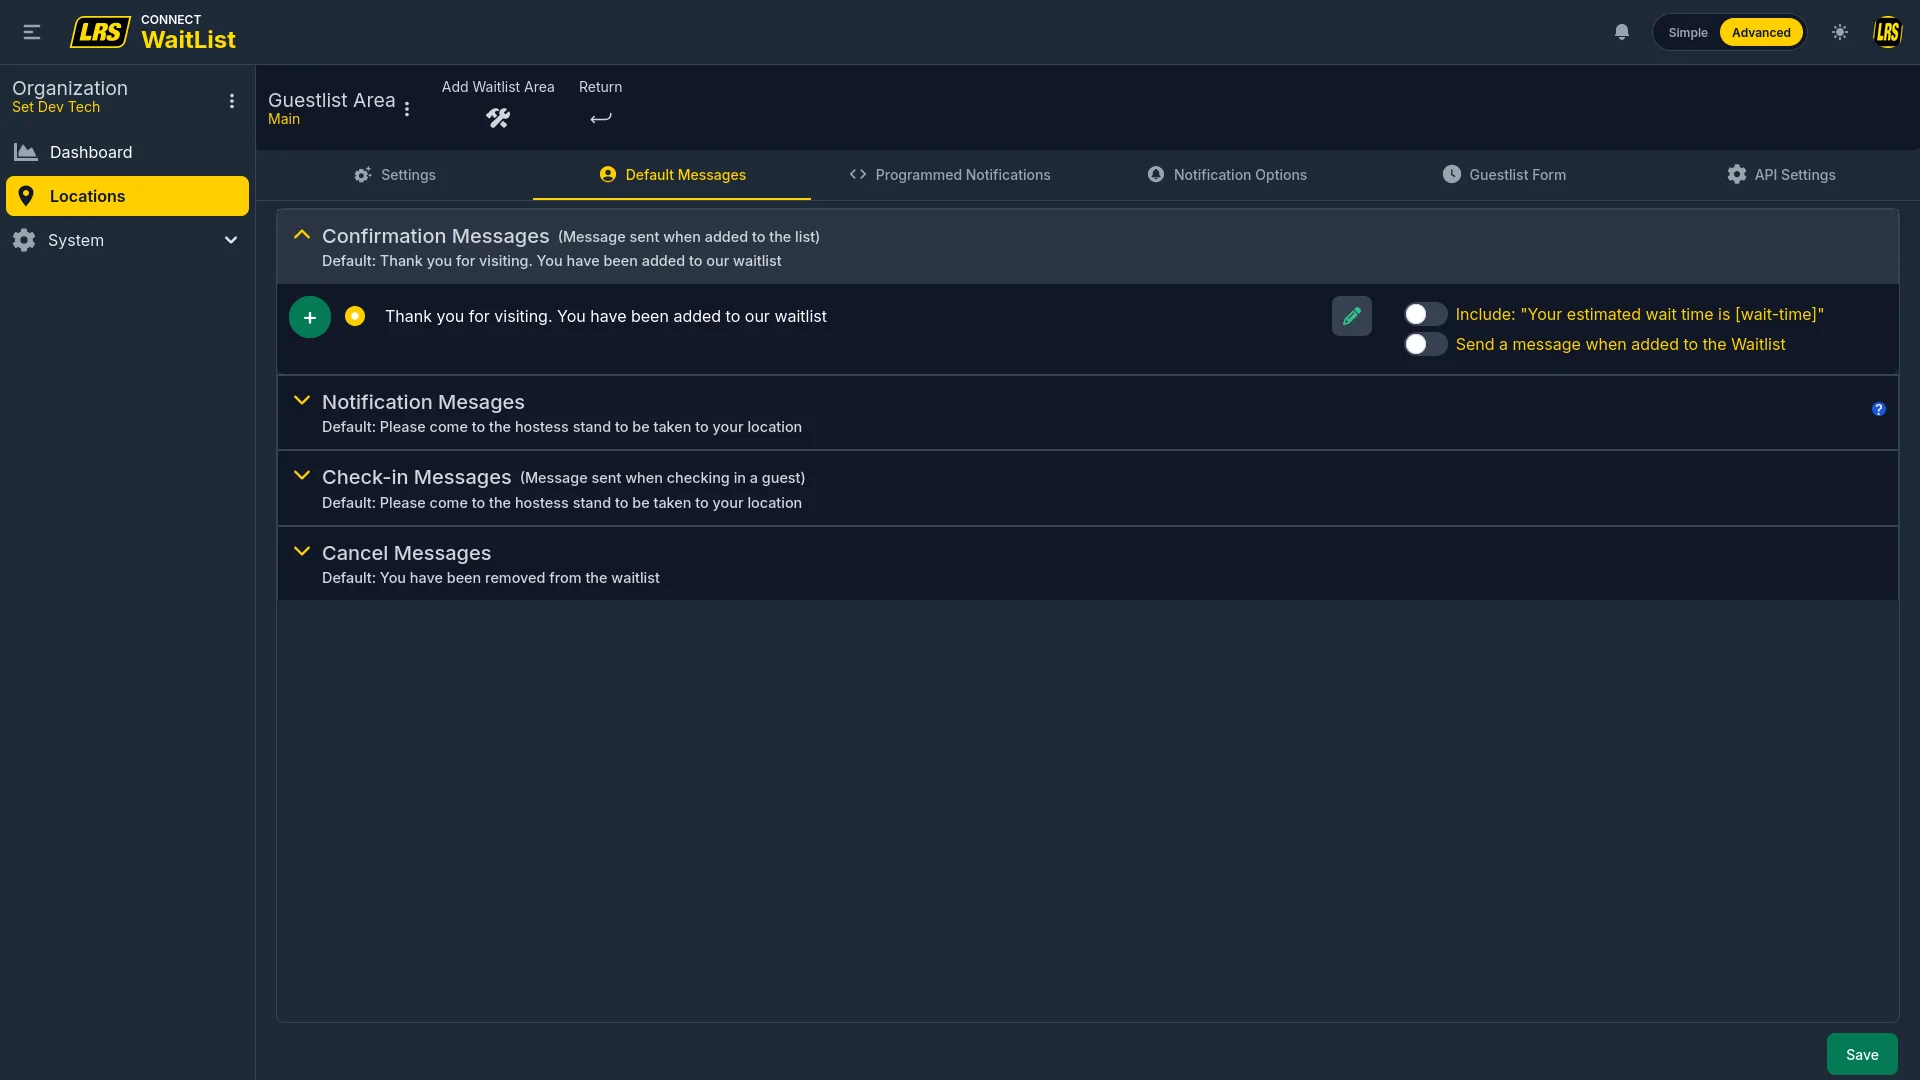
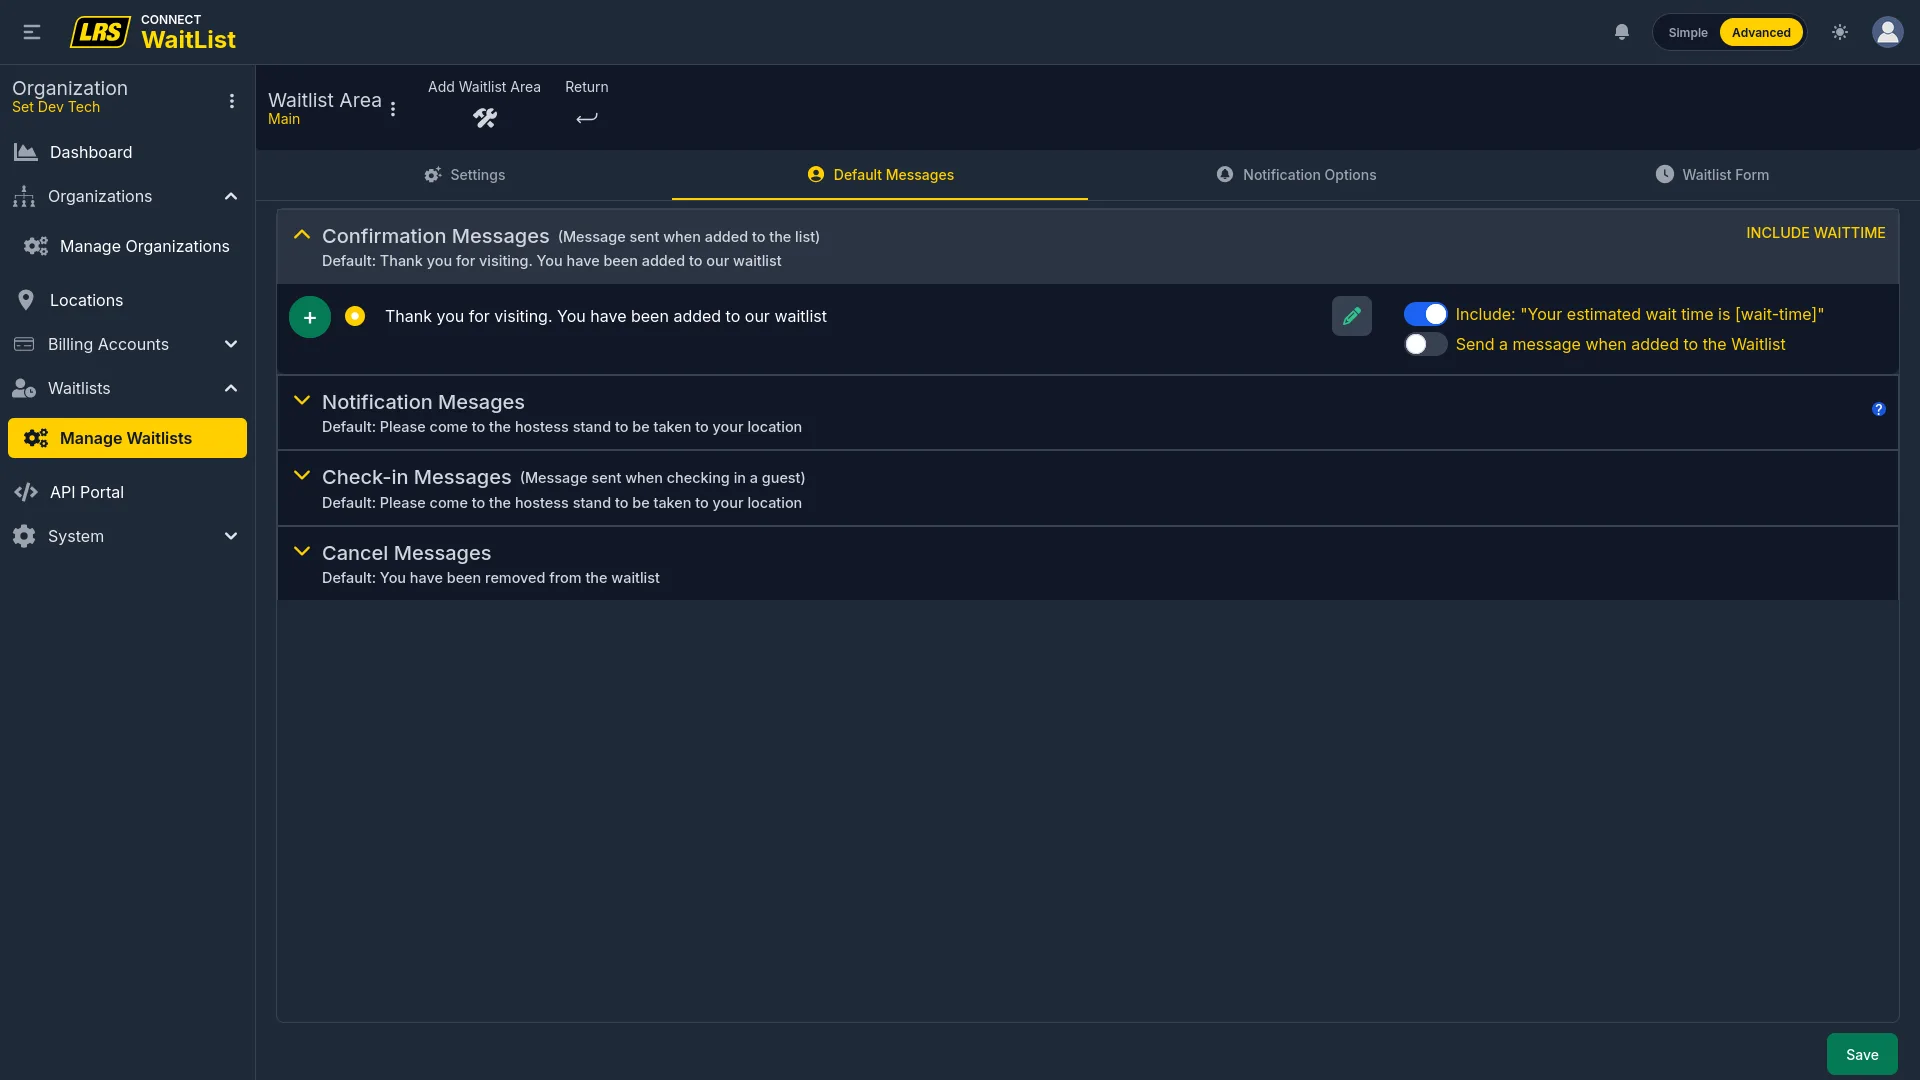
| Default Messages | Confirmation, notification, check-in, and cancellation message templates. |
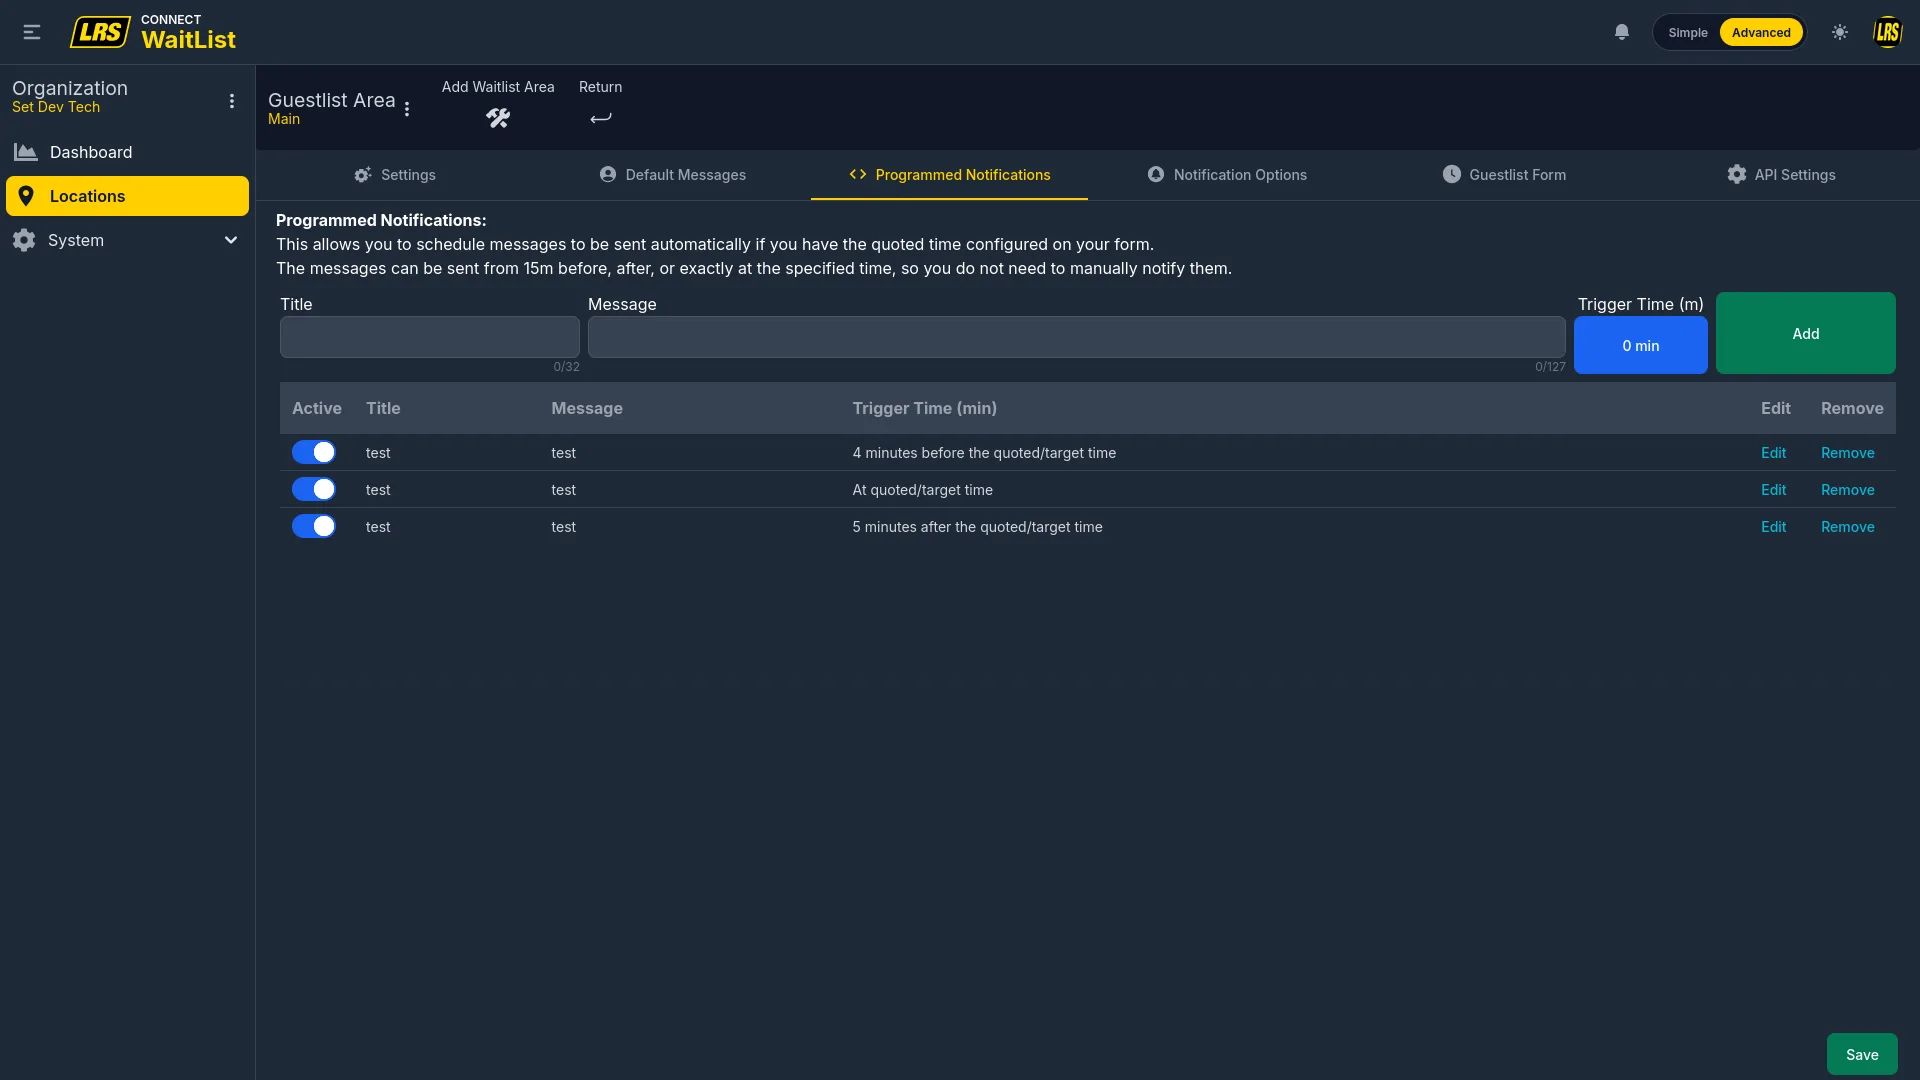
| Programmed Notifications (location only) | Automated messages triggered before, at, or after the quoted wait time. |
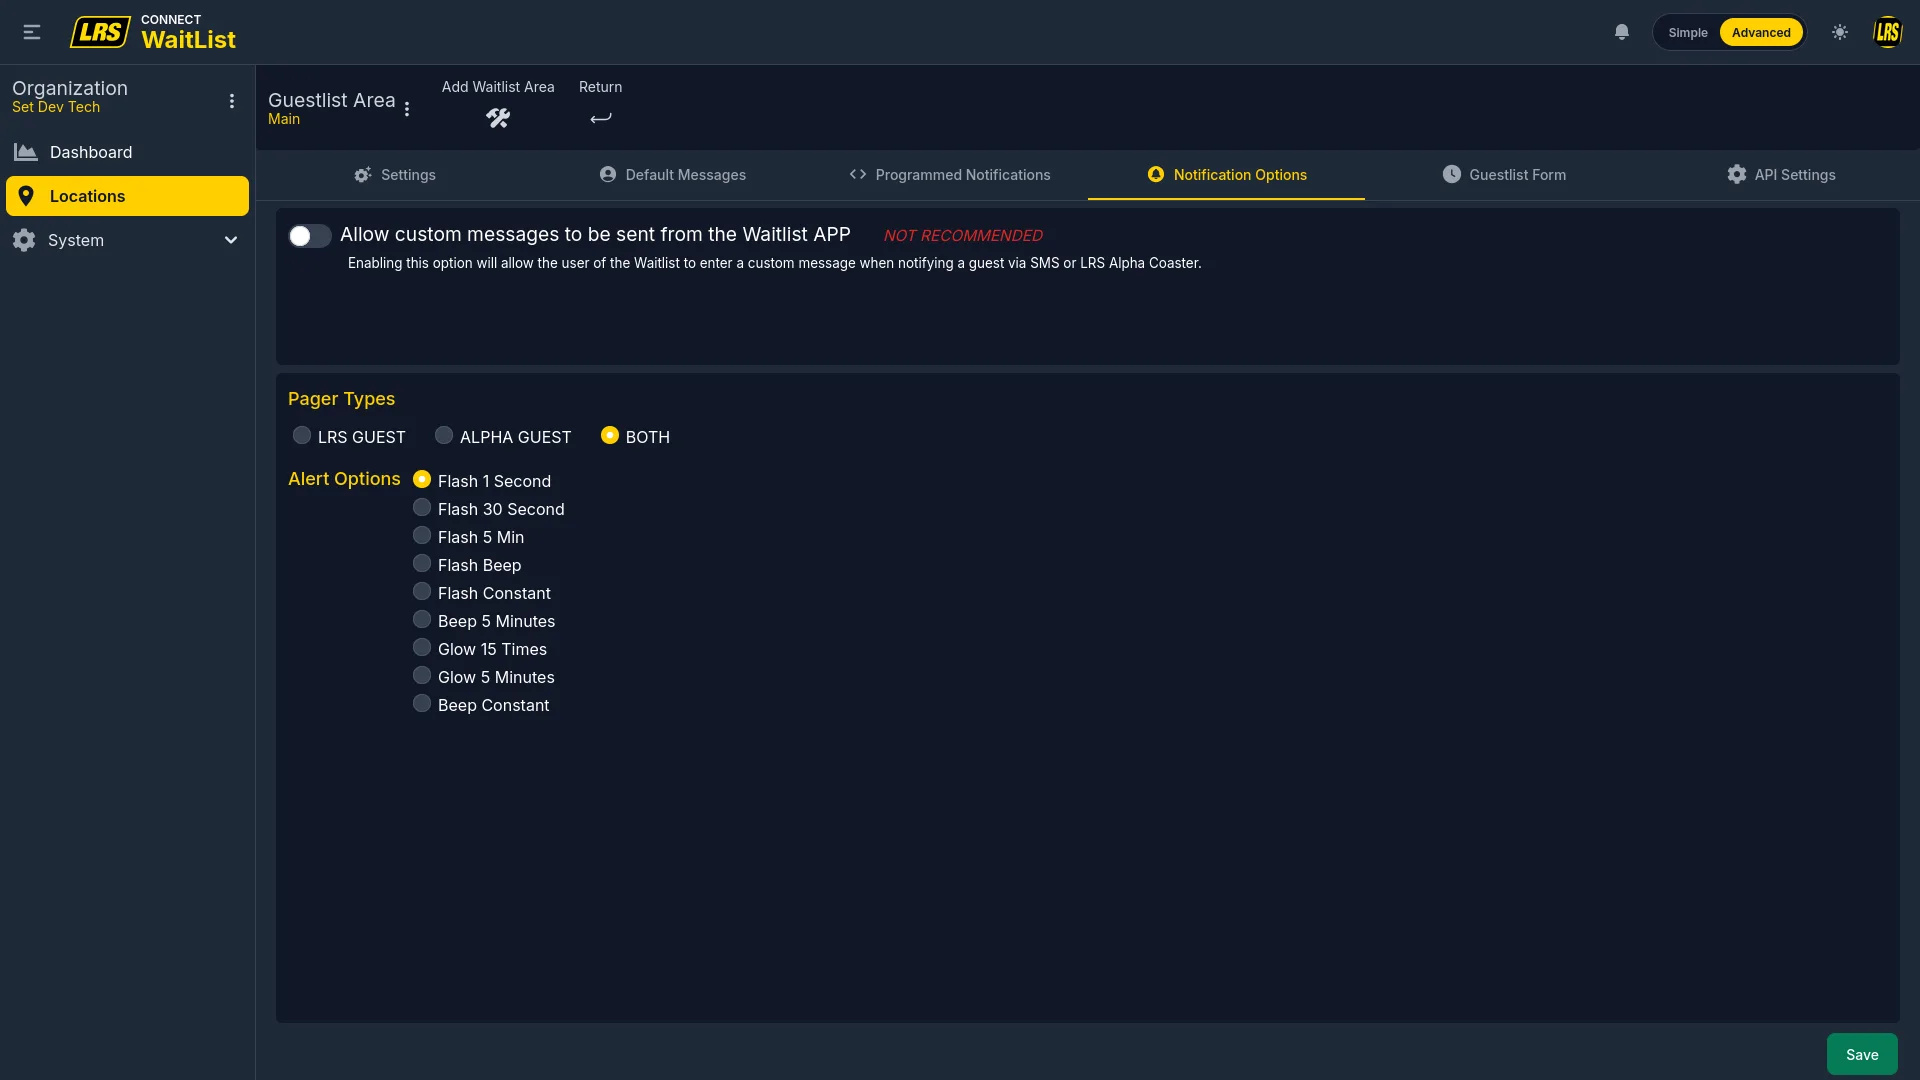
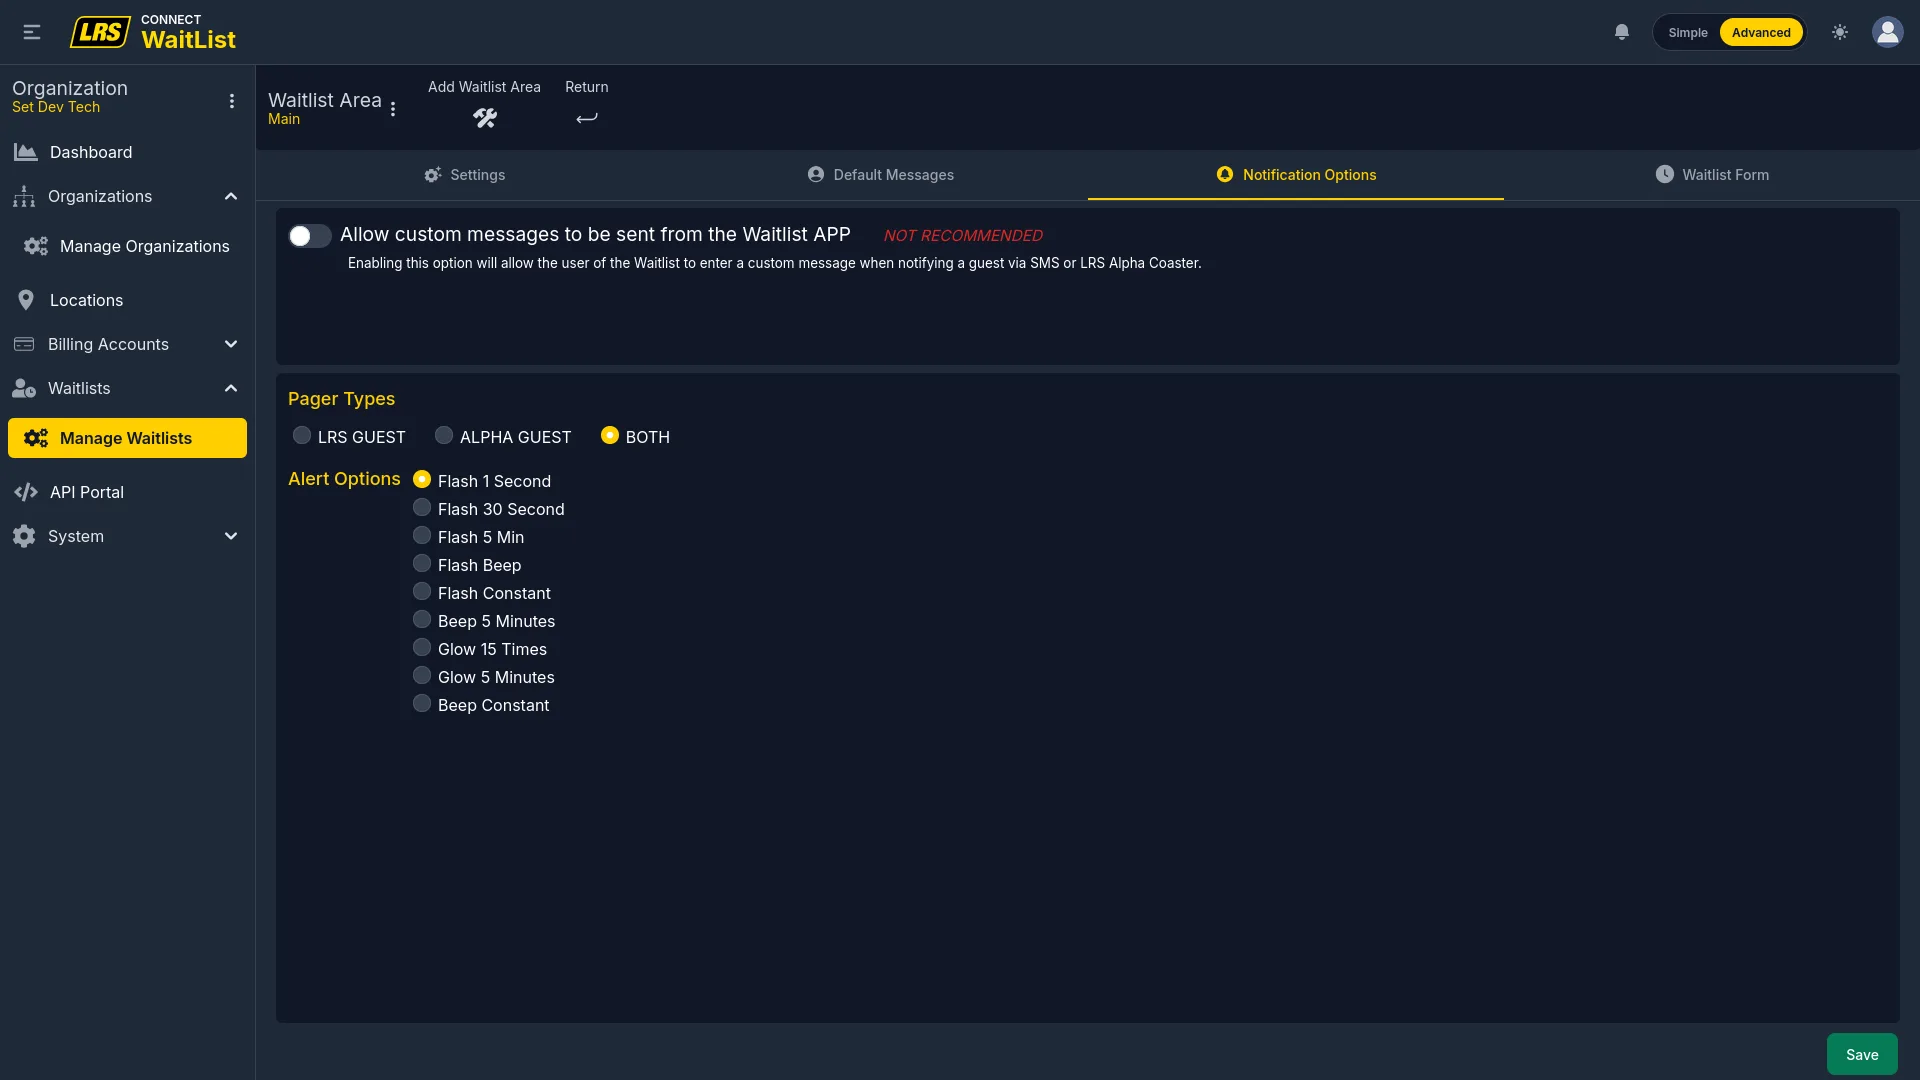
| Notification Options | Pager hardware type (LRS Guest, Alpha Guest, Both) and default alert sound pattern. |
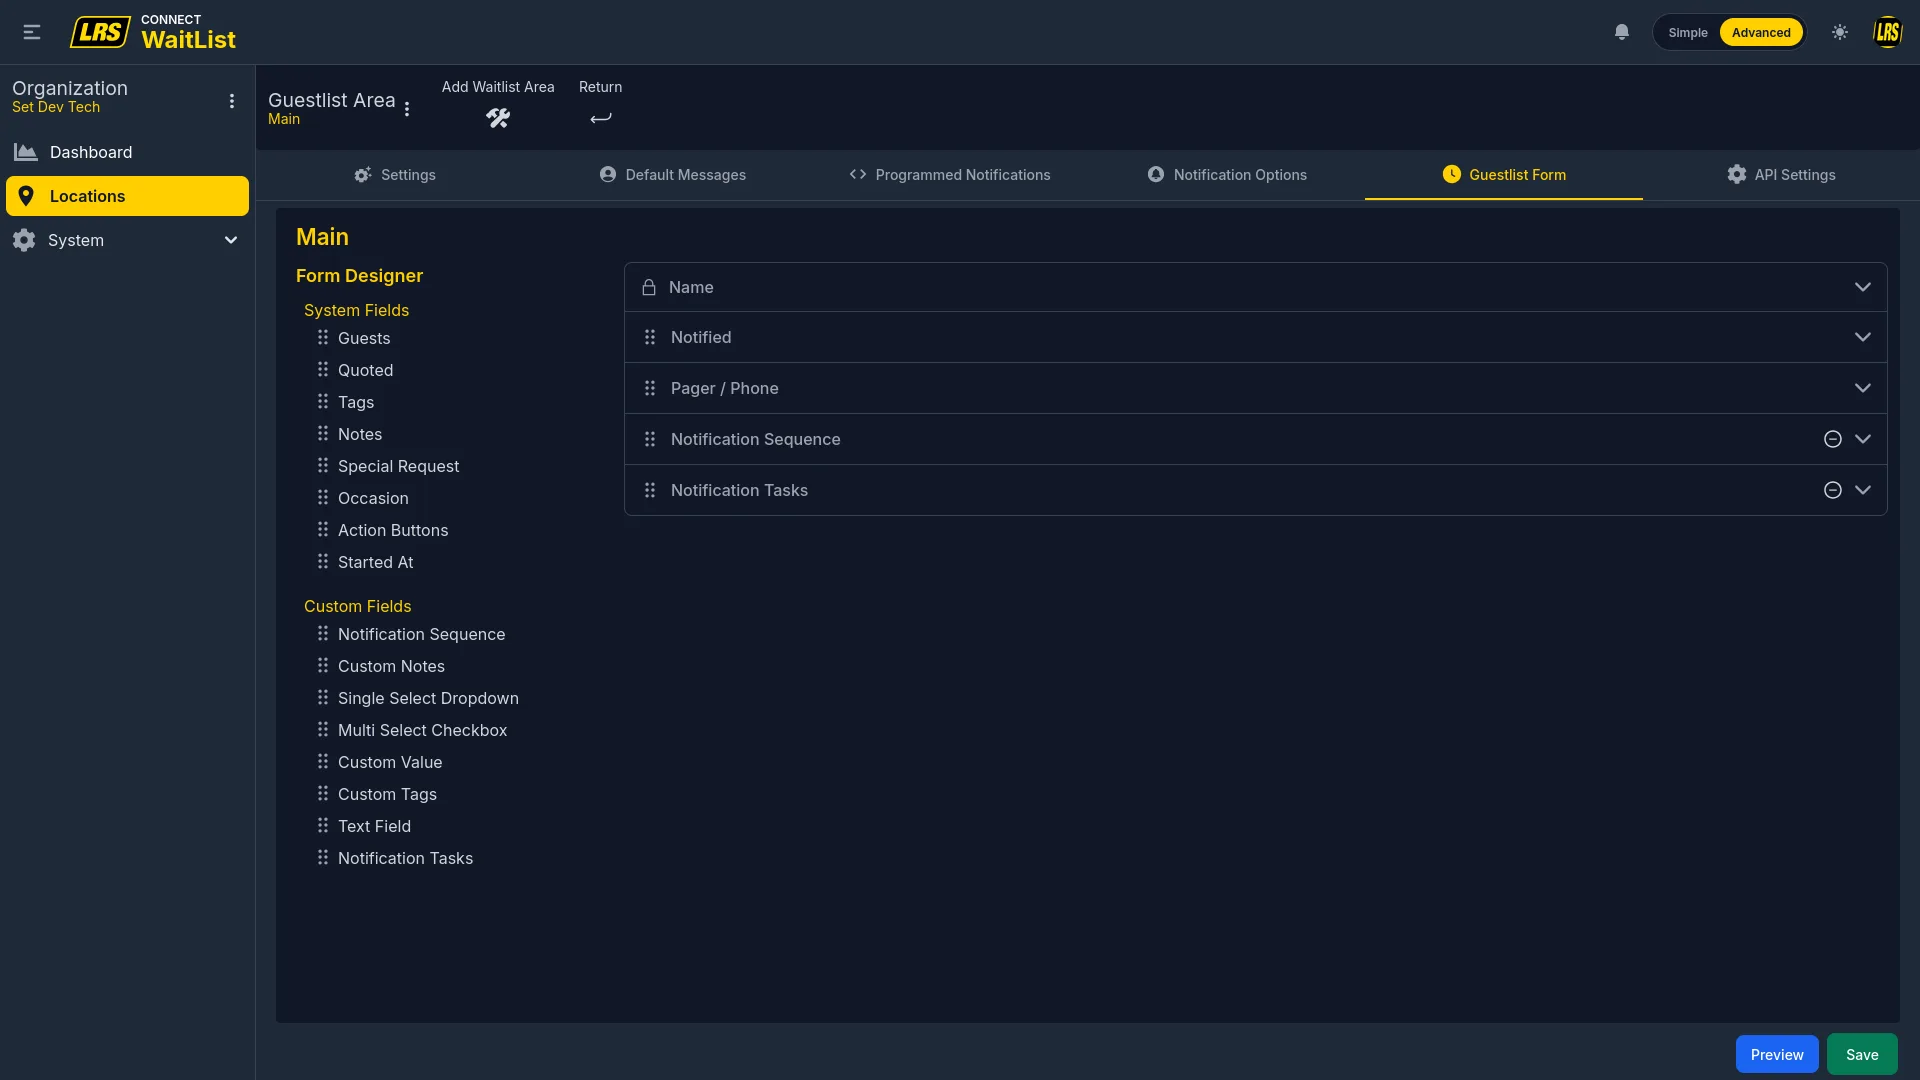
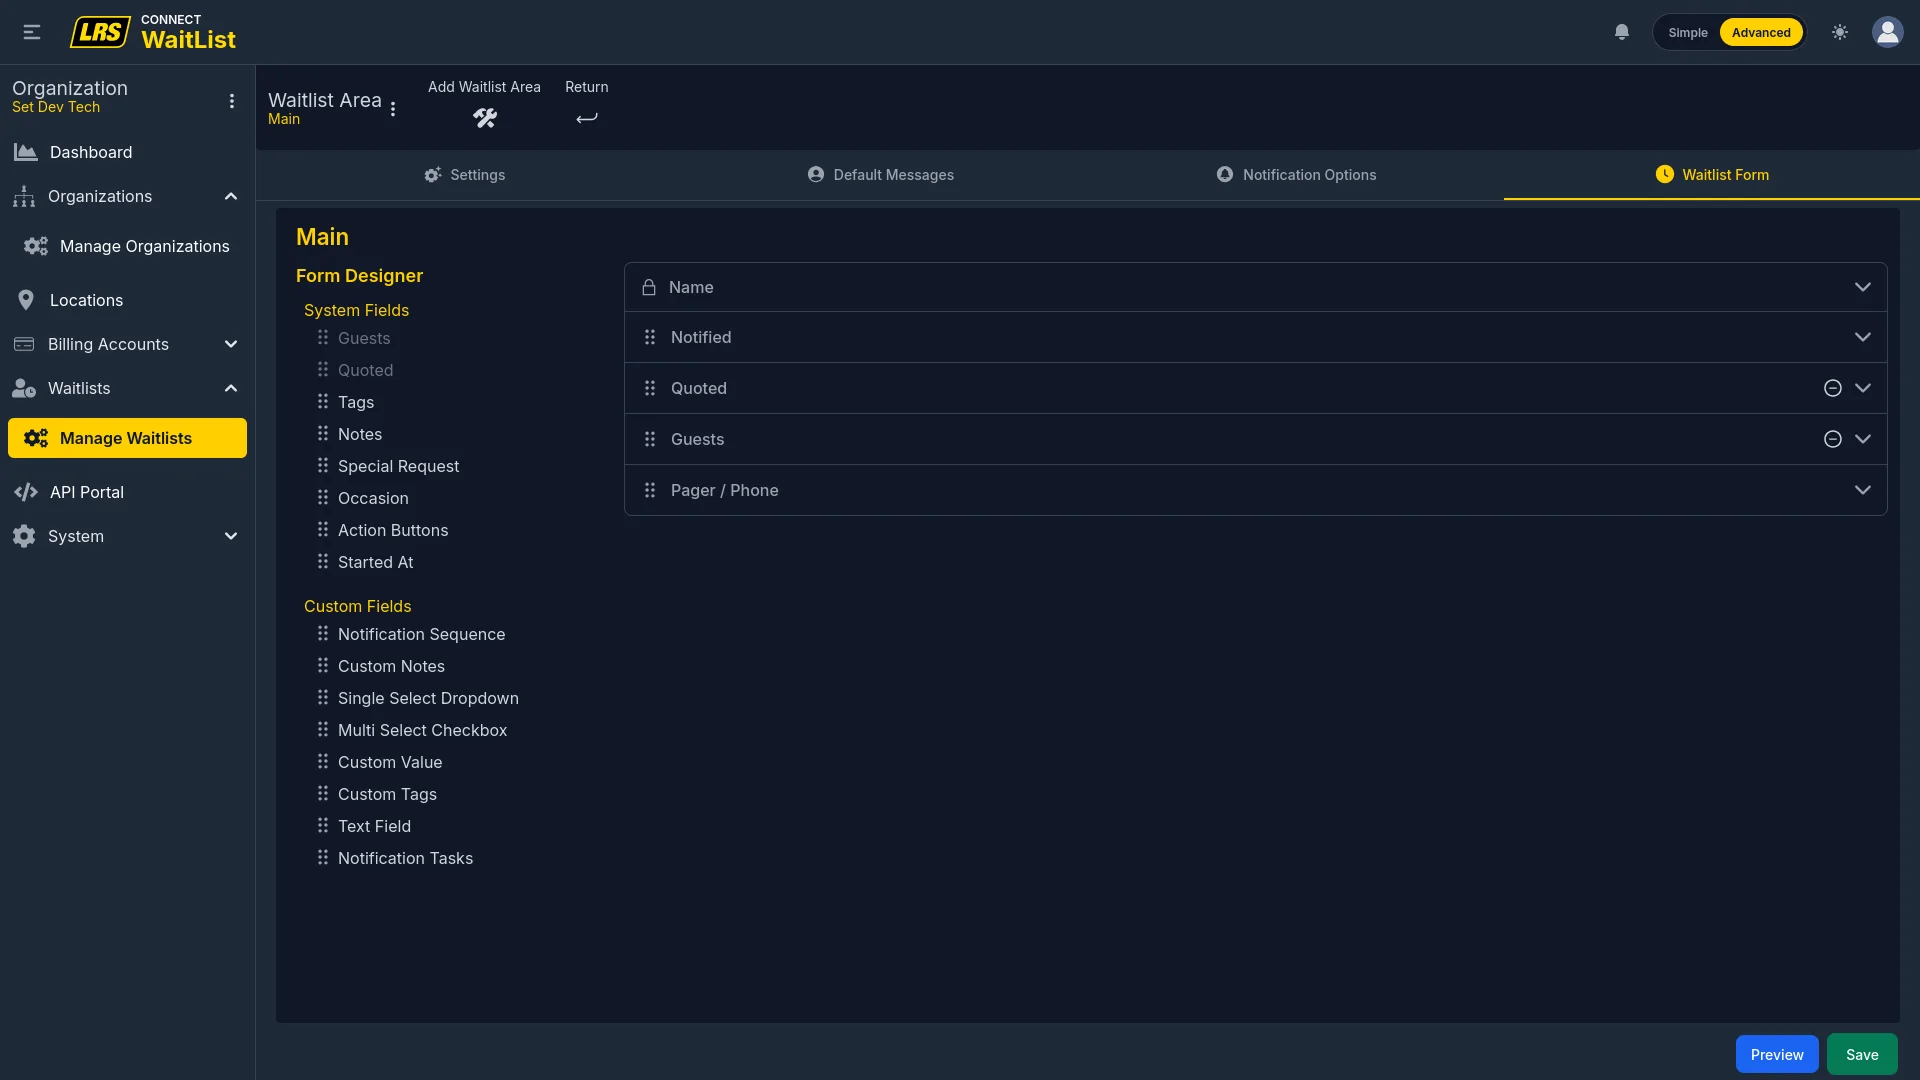
| Guestlist Form | The Form Designer: active fields, per-field Required and Active flags, and per-context visibility switches. |
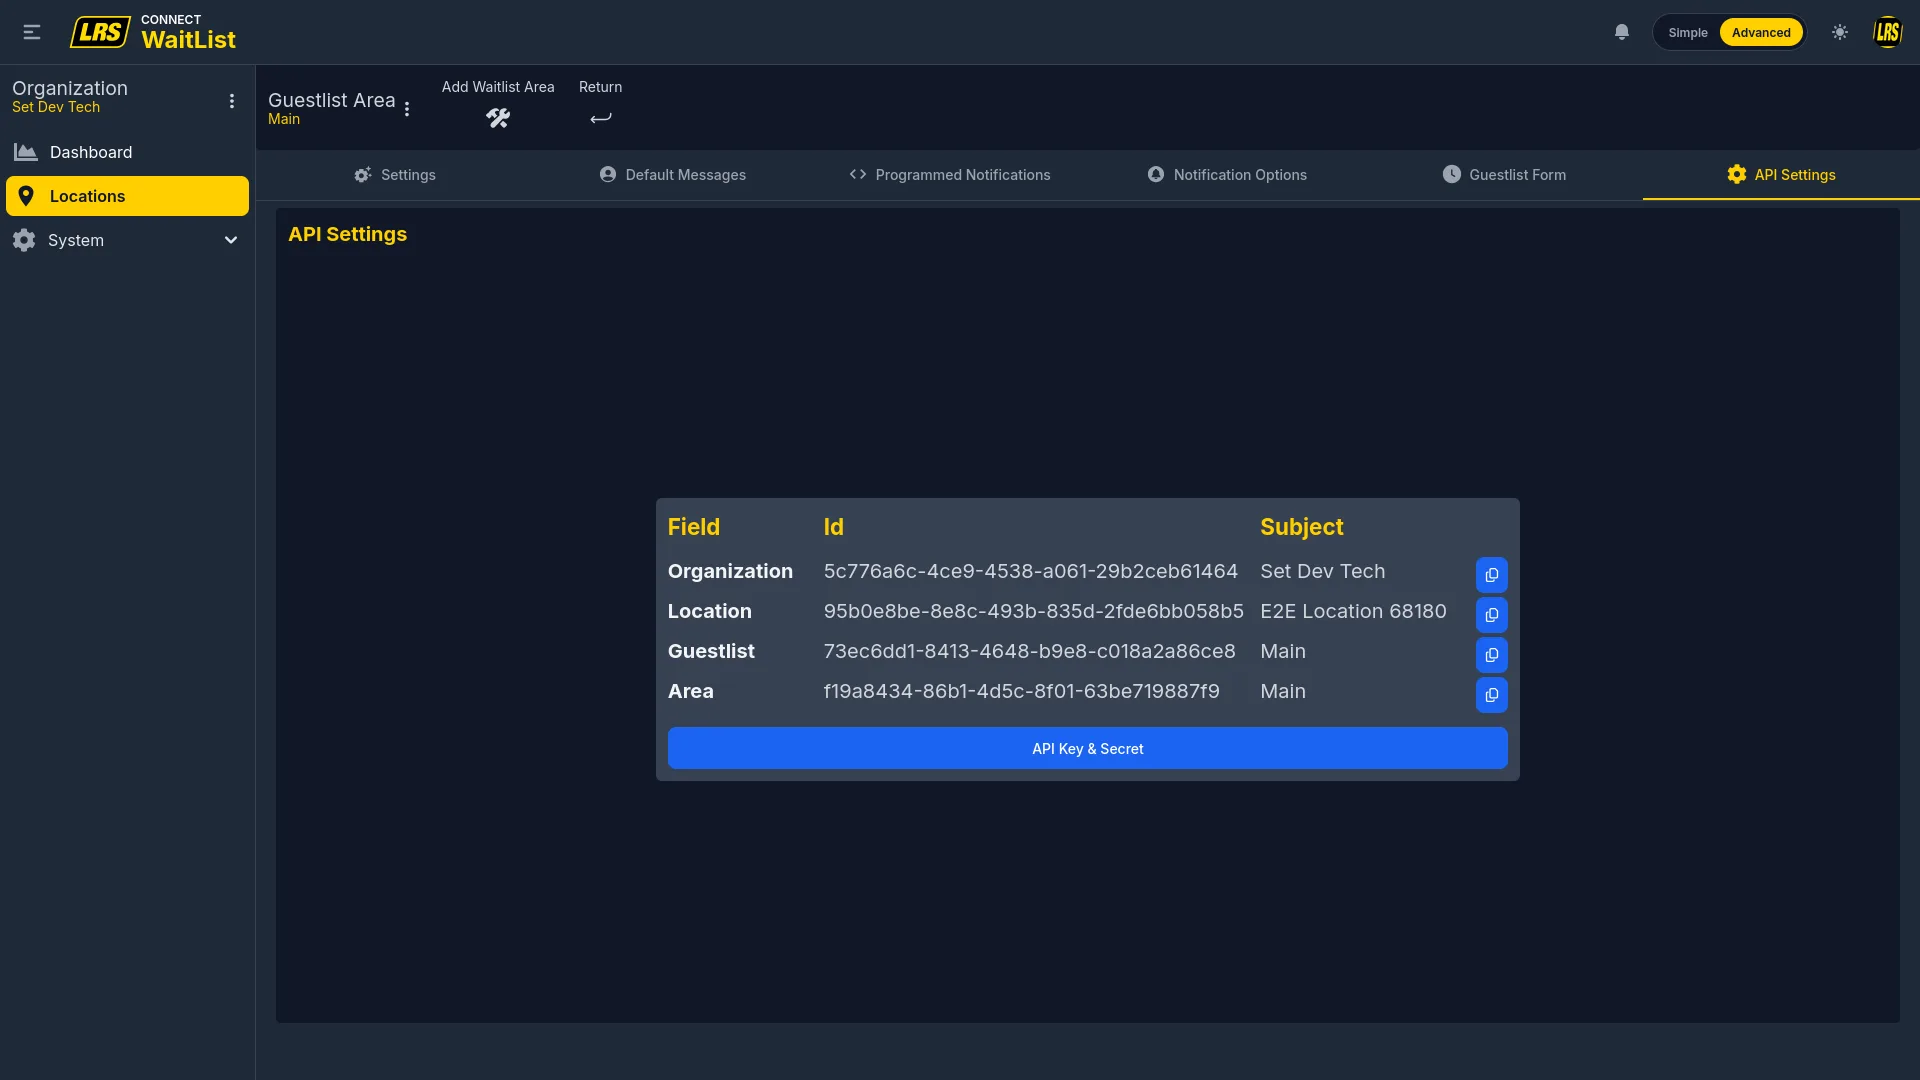
| API Settings (location only) | Organization, location, guestlist, and area UUIDs for use by external integrations. |
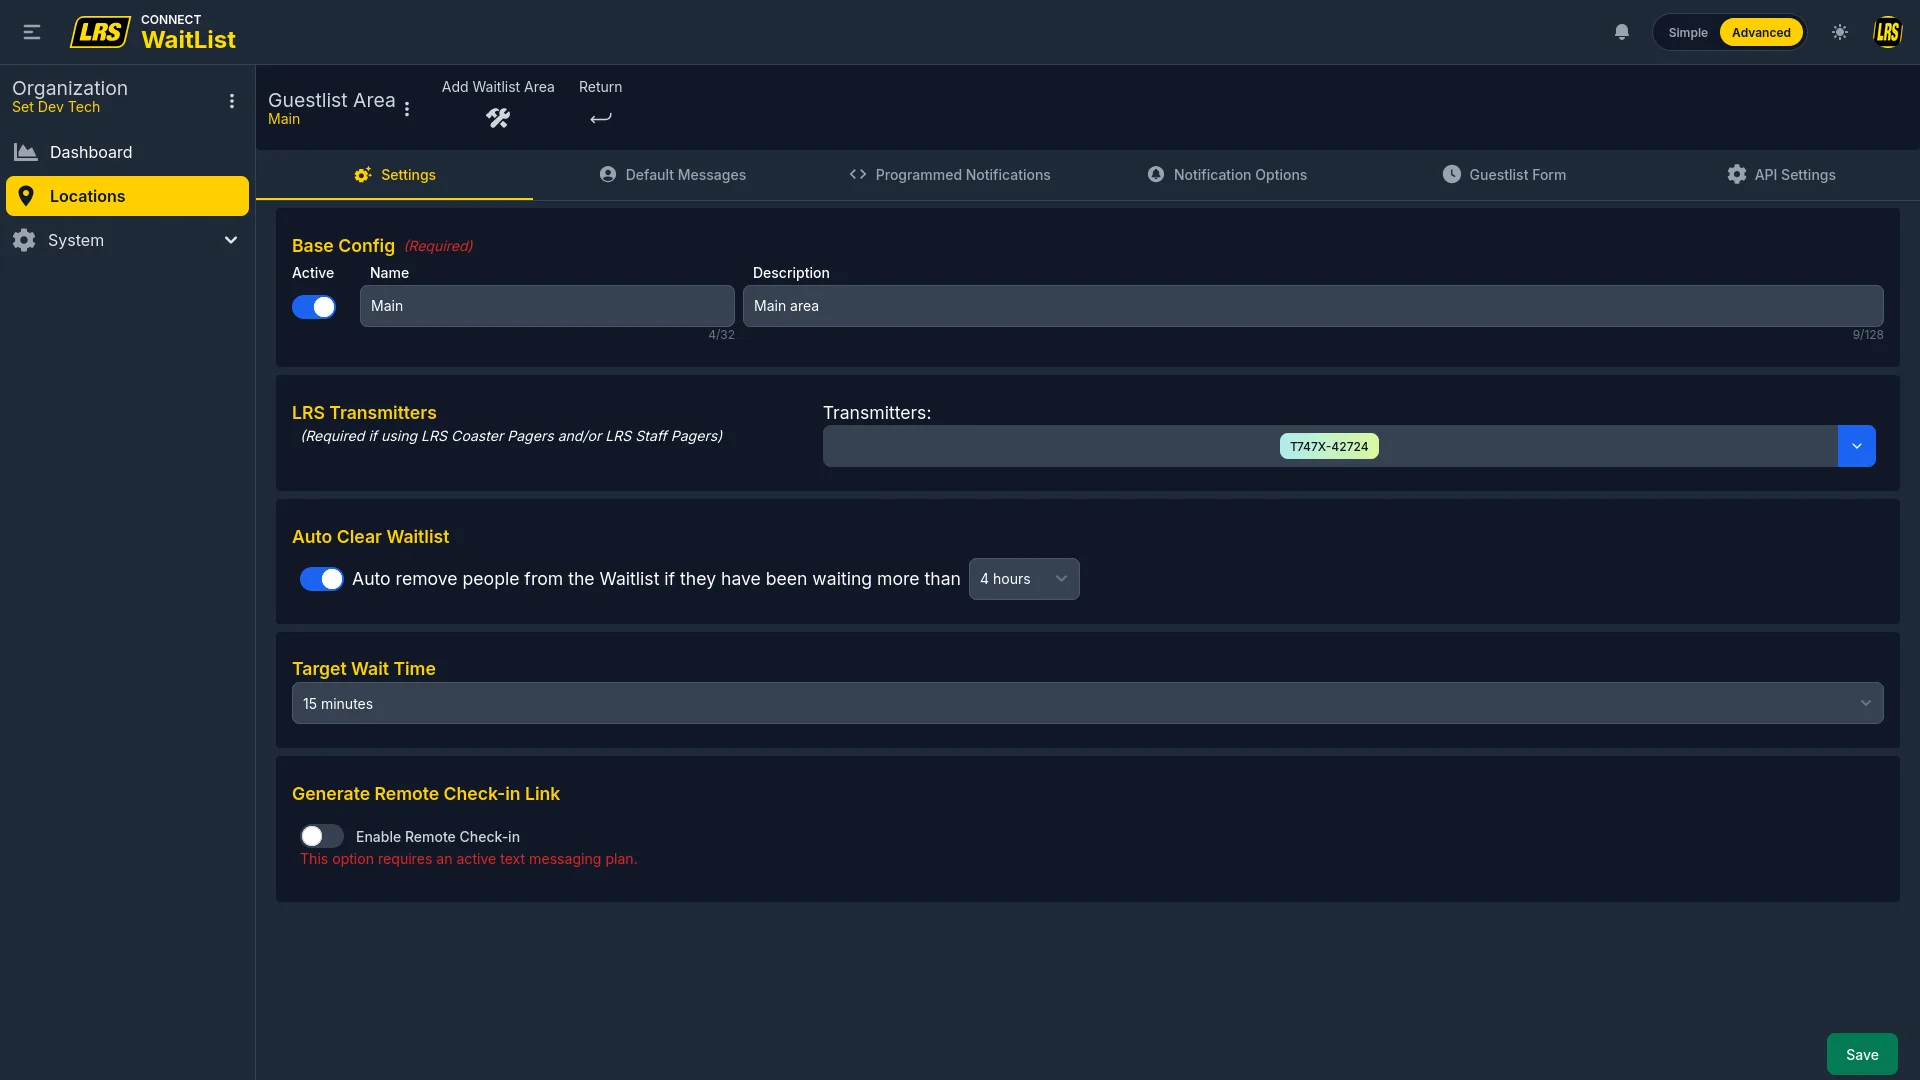
The Settings tab groups four configuration blocks: the Base Config (Active toggle, name, description), LRS Transmitters, Auto Clear Waitlist (removes entries after a configurable number of idle hours), and Target Wait Time (the baseline for Programmed Notifications and reporting). A fifth block — Generate Remote Check-in Link — shows the Enable Remote Check-in toggle and, once enabled, the self check-in URL and QR code. The section notes that an active SMS plan is required for remote check-in to work.
Default Messages define what guests receive at each stage of the waitlist flow. The Confirmation message fires when staff creates an entry and can embed the estimated wait time automatically. The Notification message is what guests receive when paged or texted. The Check-in message fires when staff marks a guest as arrived, and the Cancel message fires when an entry is removed.
Programmed Notifications remove the burden of manually following up with guests. Each trigger in the list fires at a configured offset relative to the quoted wait time — for example, 4 minutes before, at the exact quoted time, or 5 minutes after. Entries must have a quoted wait time set for any trigger to fire. This tab is only available when the area is accessed from within a location.
Notification Options set the pager hardware type used by this area (LRS Guest, Alpha Guest, or Both) and the default alert sound pattern broadcast when a guest is notified. The custom messages toggle controls whether staff can write their own notification text or are limited to predefined messages.
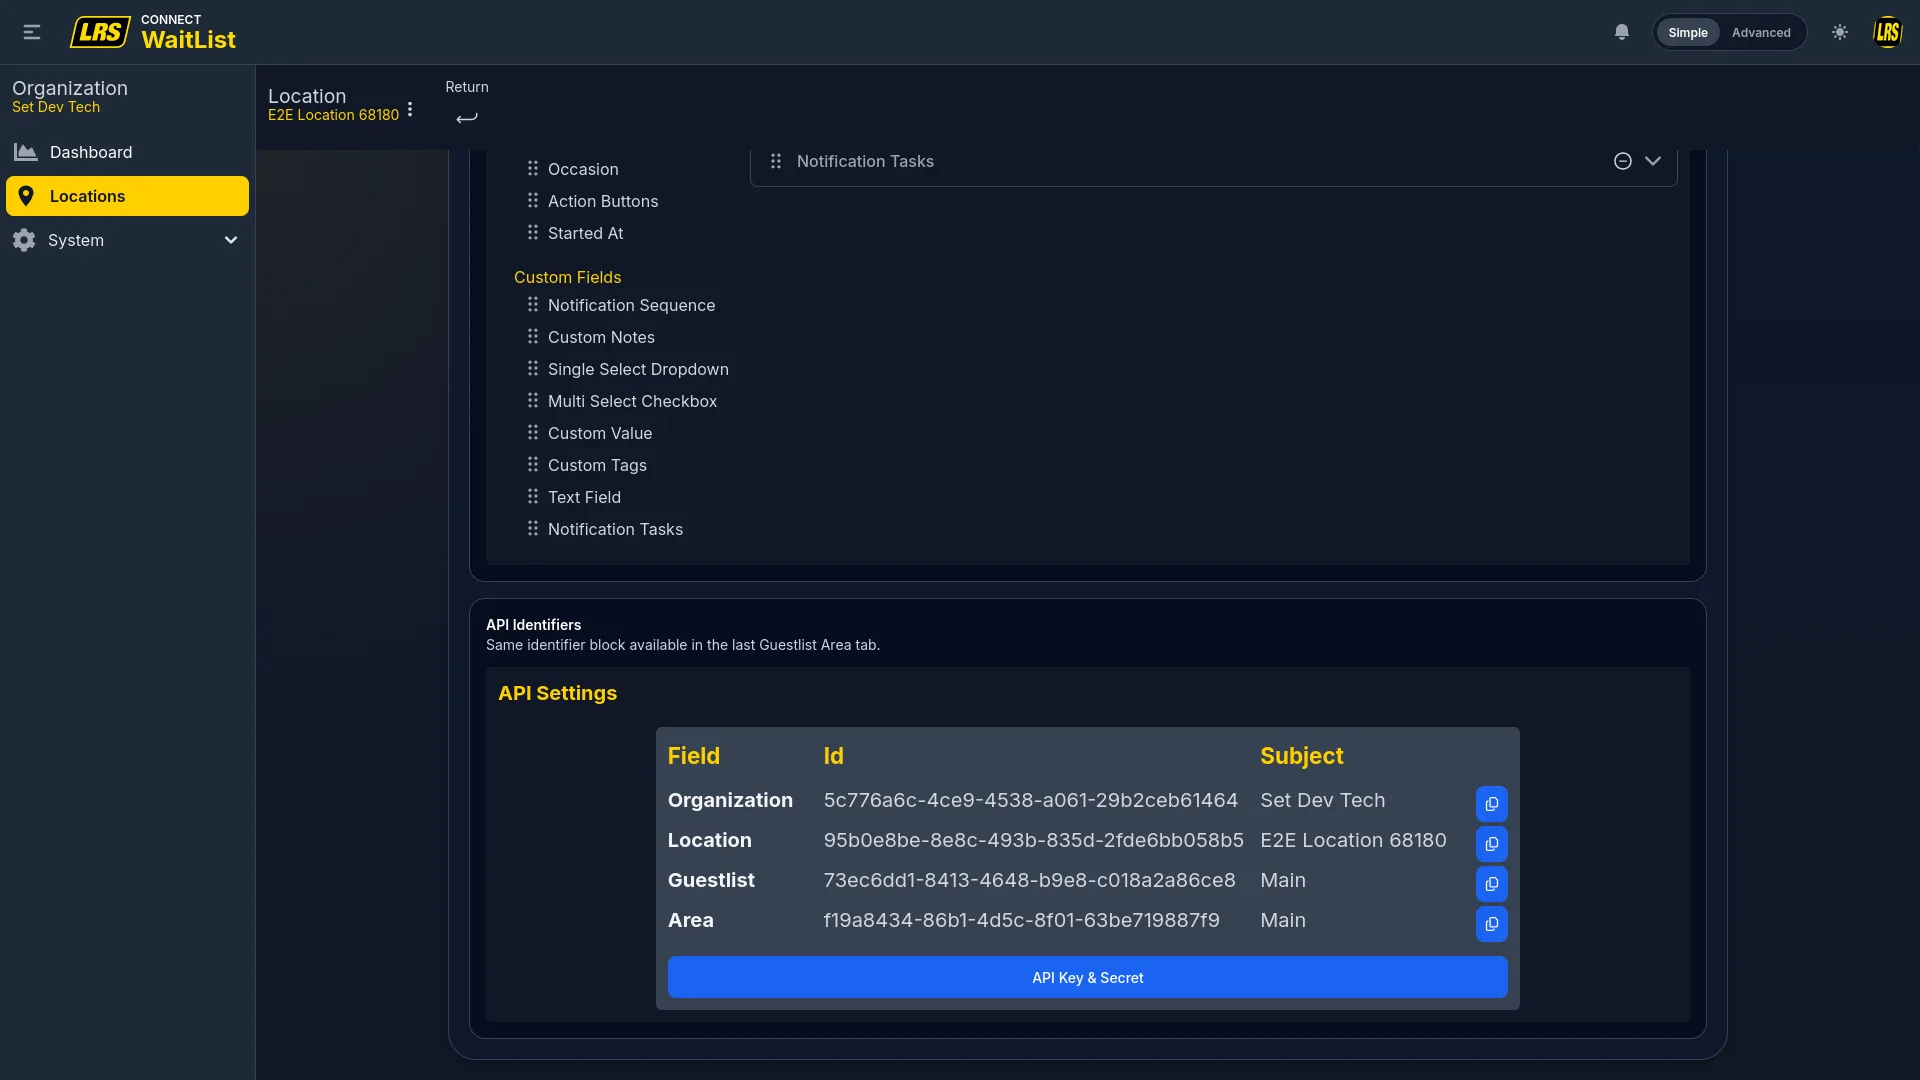
The API Settings tab exposes the four UUIDs that external integrations use to address this specific area: organization, location, guestlist, and area. The API Key & Secret button reveals the credentials tied to the location's API key — needed when configuring a third-party integration. This tab is only available when the area is accessed from within a location.
6. Form Designer
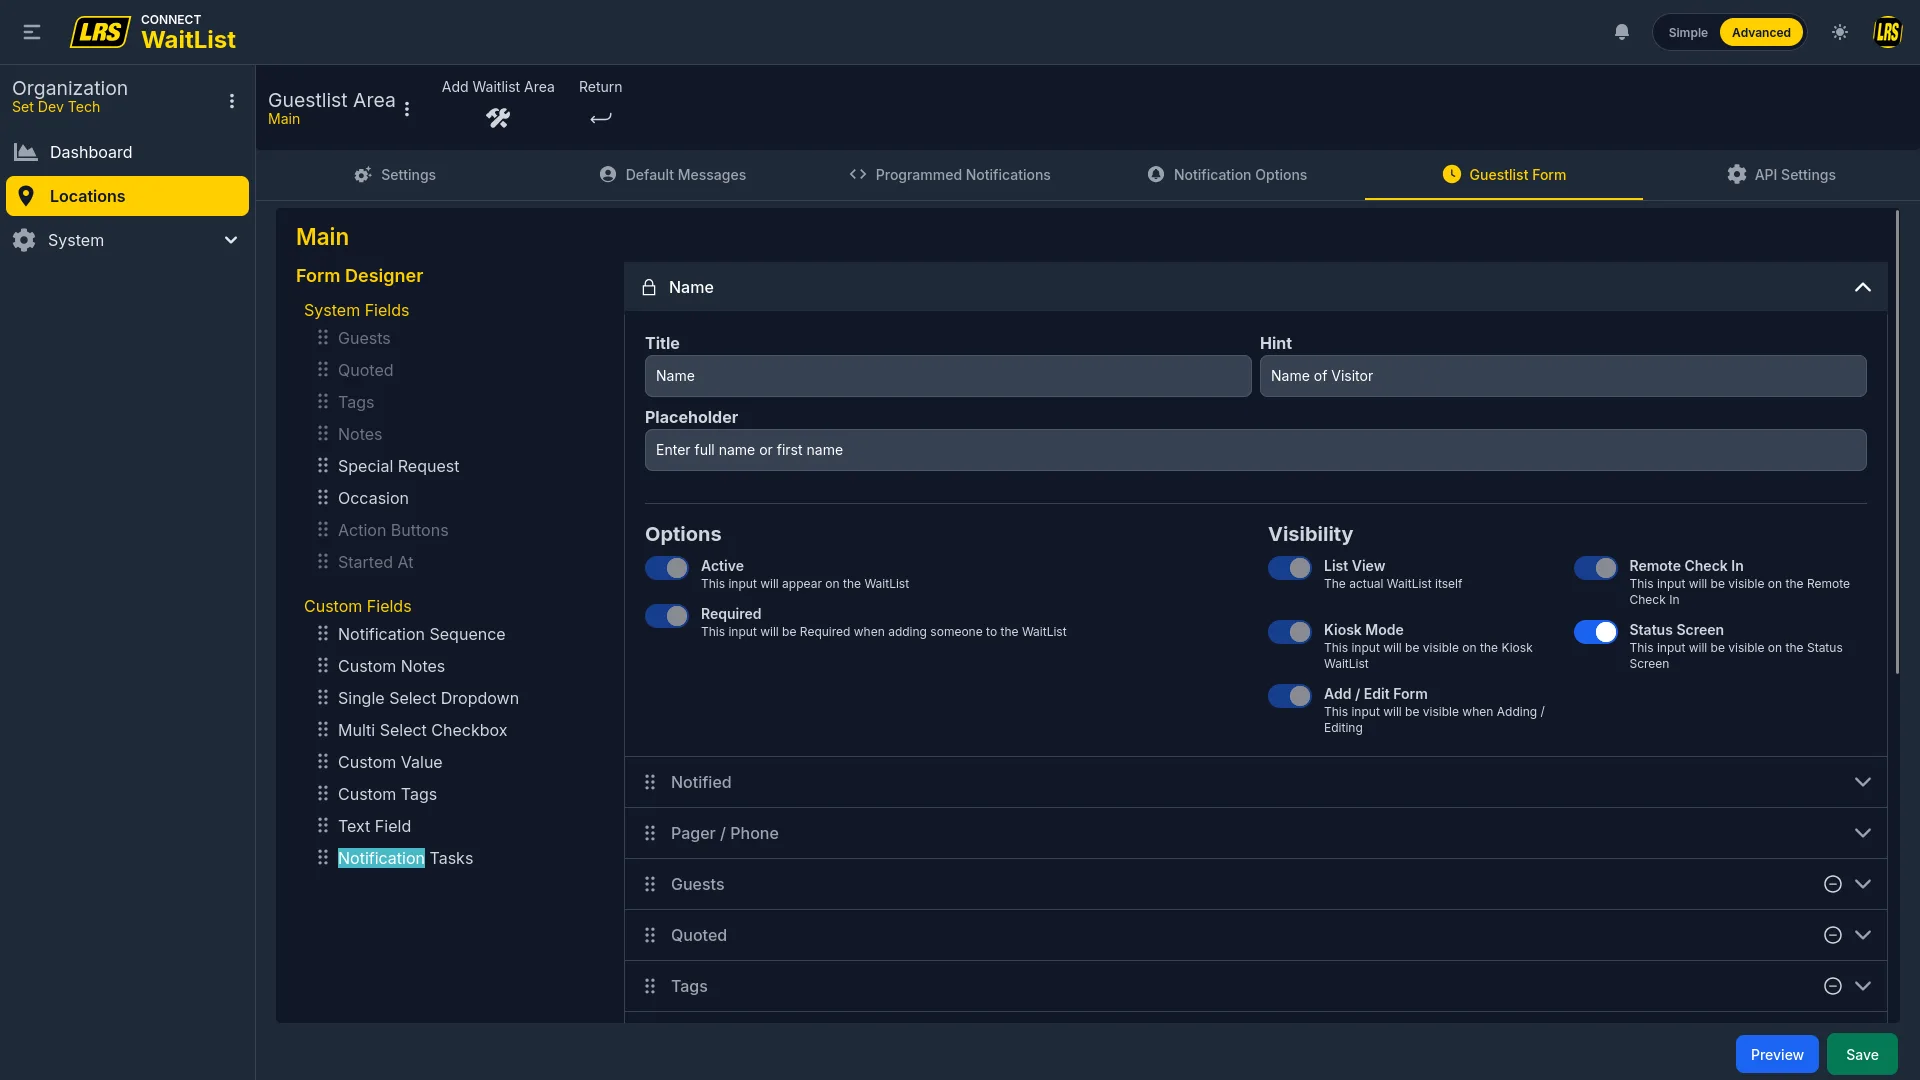
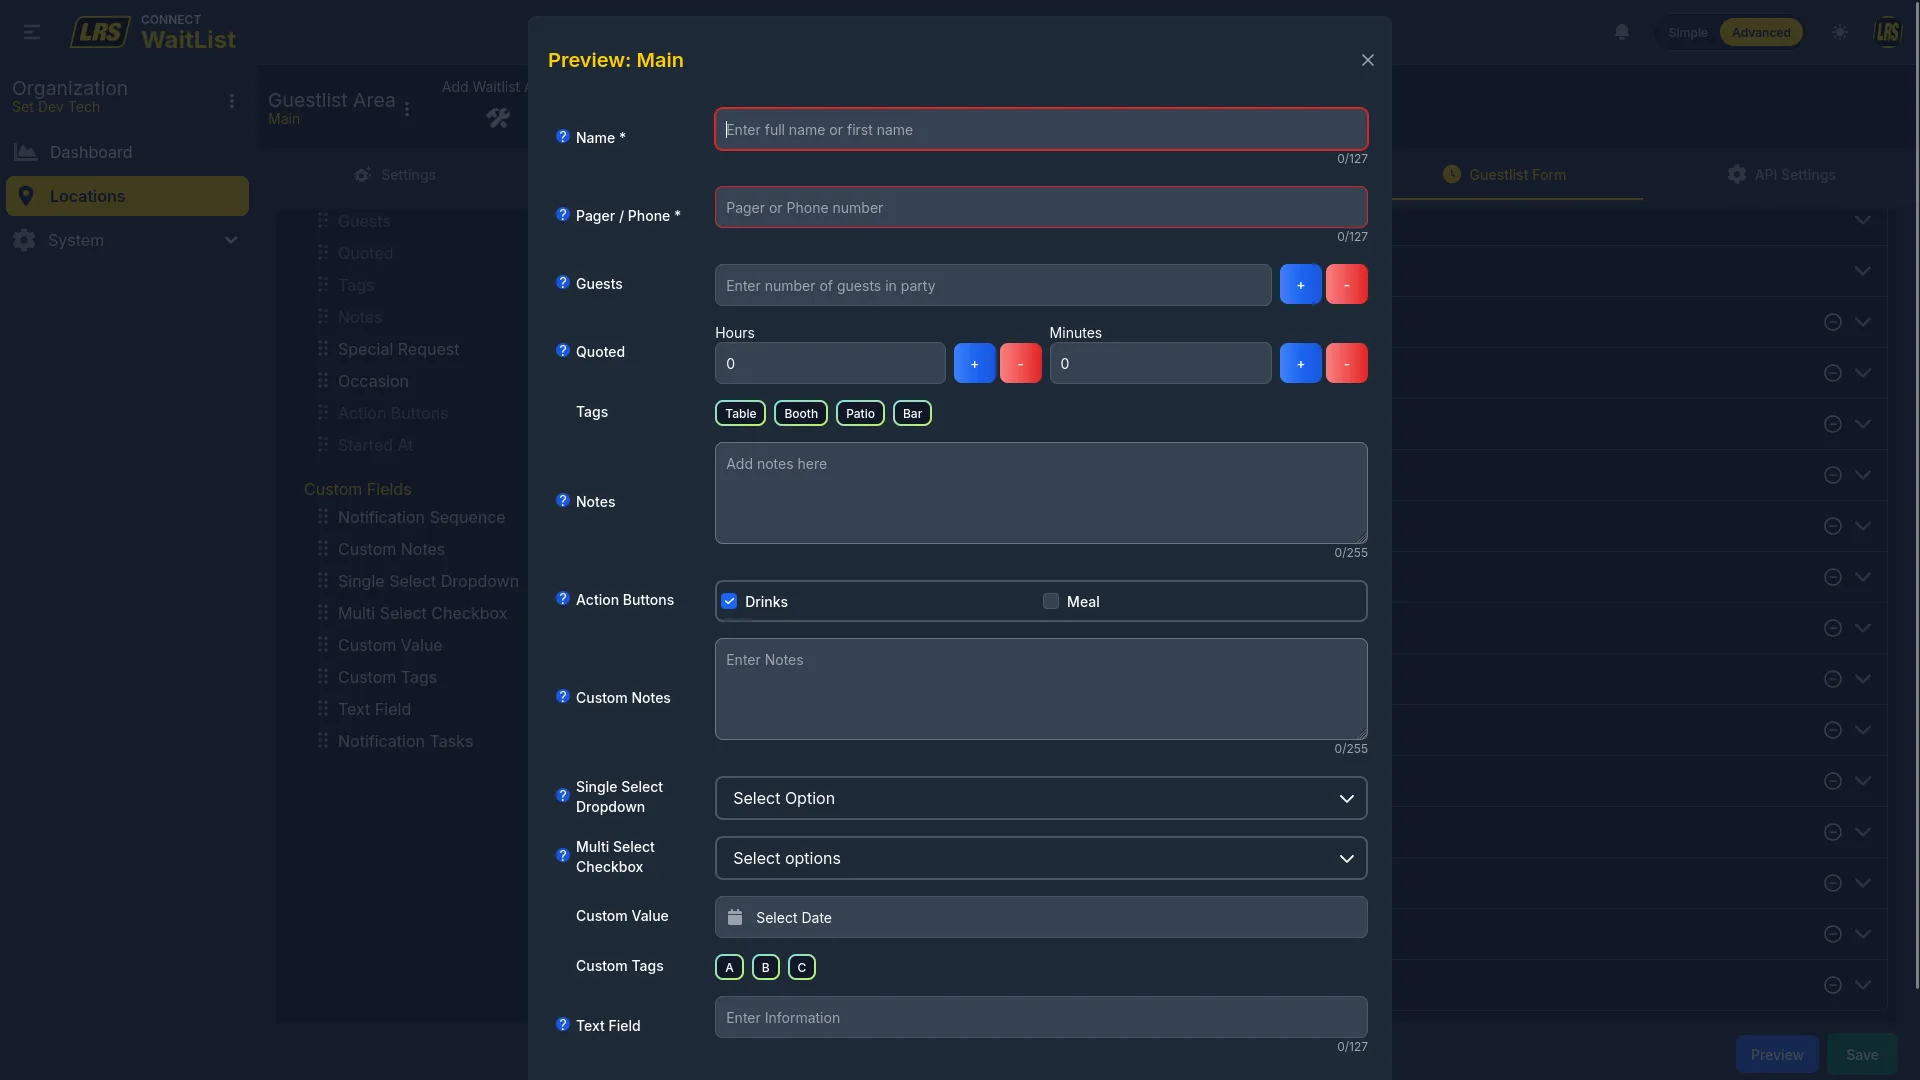
The Form Designer controls which fields appear in each context of the live Waitlist app: the live list column view, the staff add/edit form, the kiosk entry form, the remote self check-in form, and the visitor status screen. Every field is configured independently, so a phone number field can be required on the staff form and hidden from kiosk visitors at the same time.
The Form Designer is accessible from two places: directly from the Guestlist workspace via the Form Designer shortcut, or from the Guestlist Form tab inside the area's Customize view. Both open the same interface.
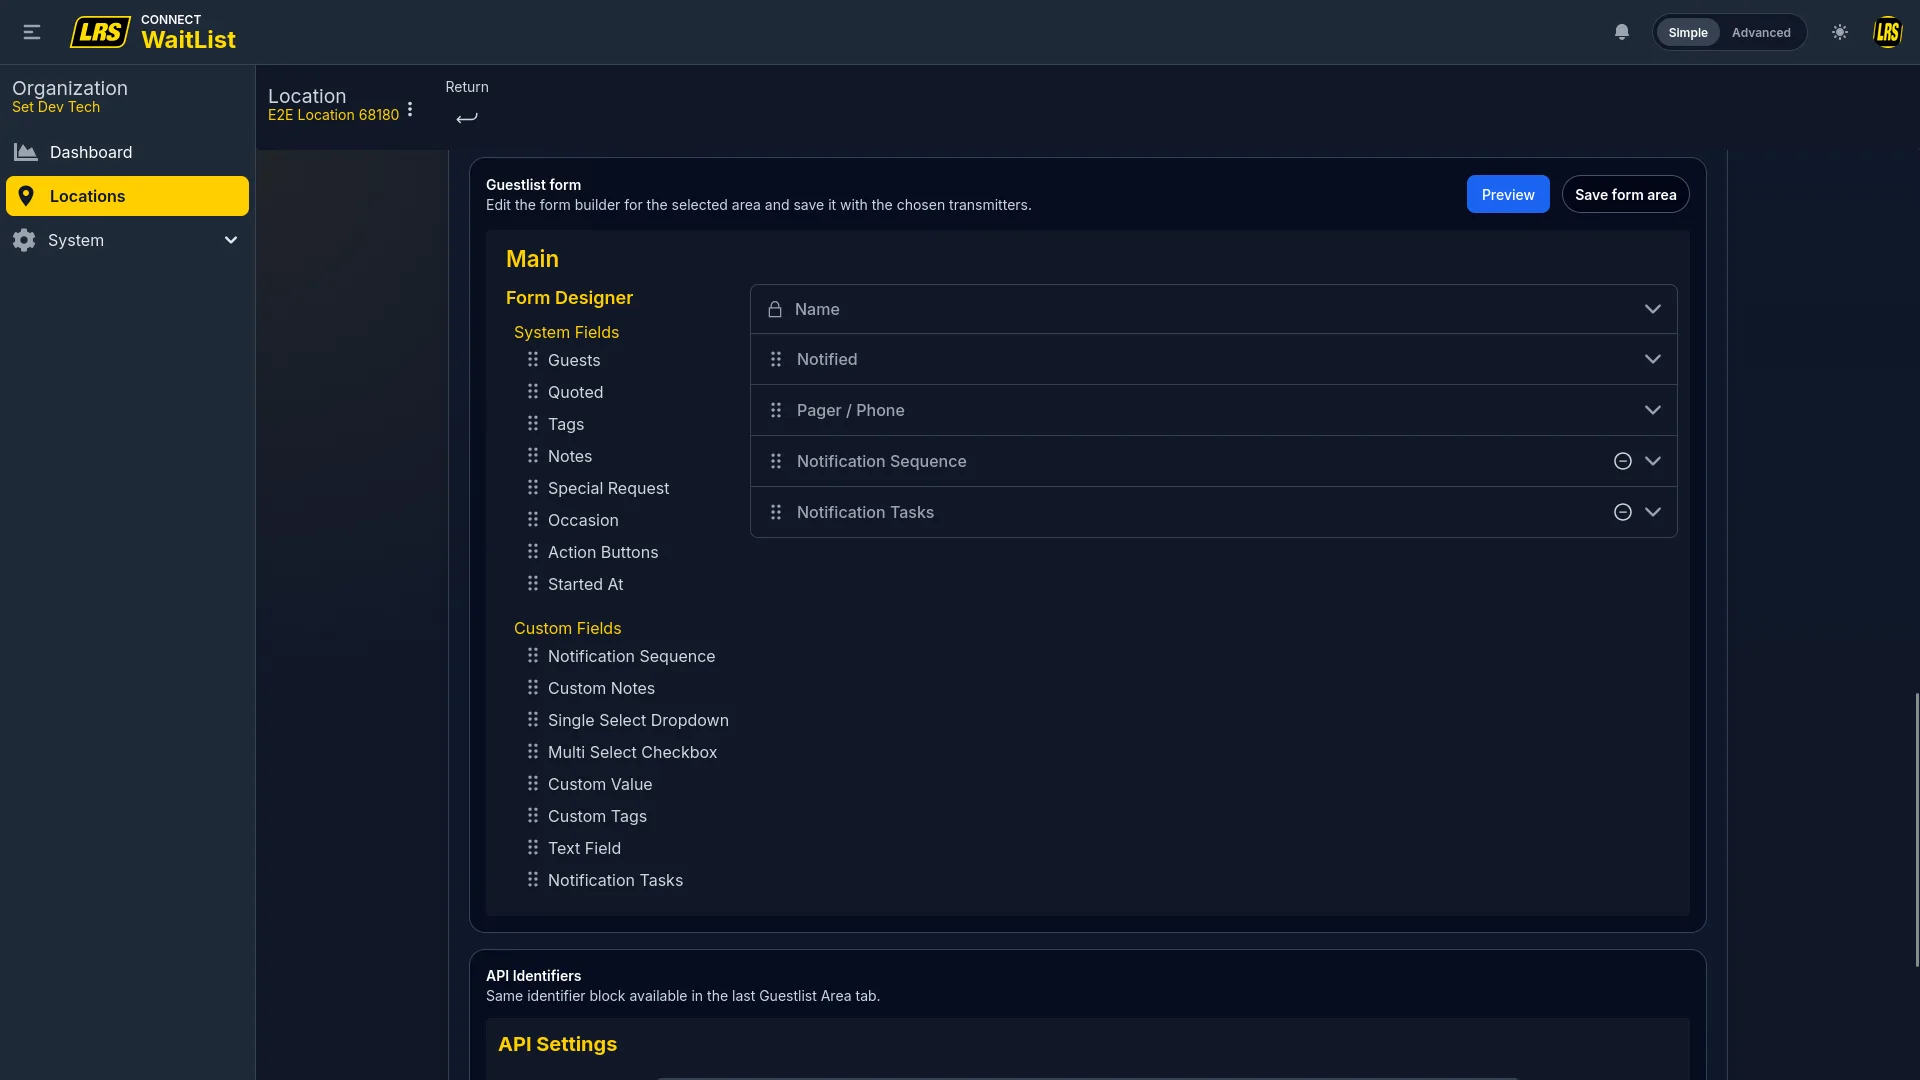
The field palette on the left contains all available fields. The right panel shows which fields are currently active. Drag a field from the palette to the right panel to activate it. Drag within the right panel to change the order — this order is what staff sees in the live entry form.
Below the Form Designer, the API Identifiers block lists the same UUIDs found in the API Settings tab. This is a shortcut for developers who are setting up the form and need the IDs at the same time.
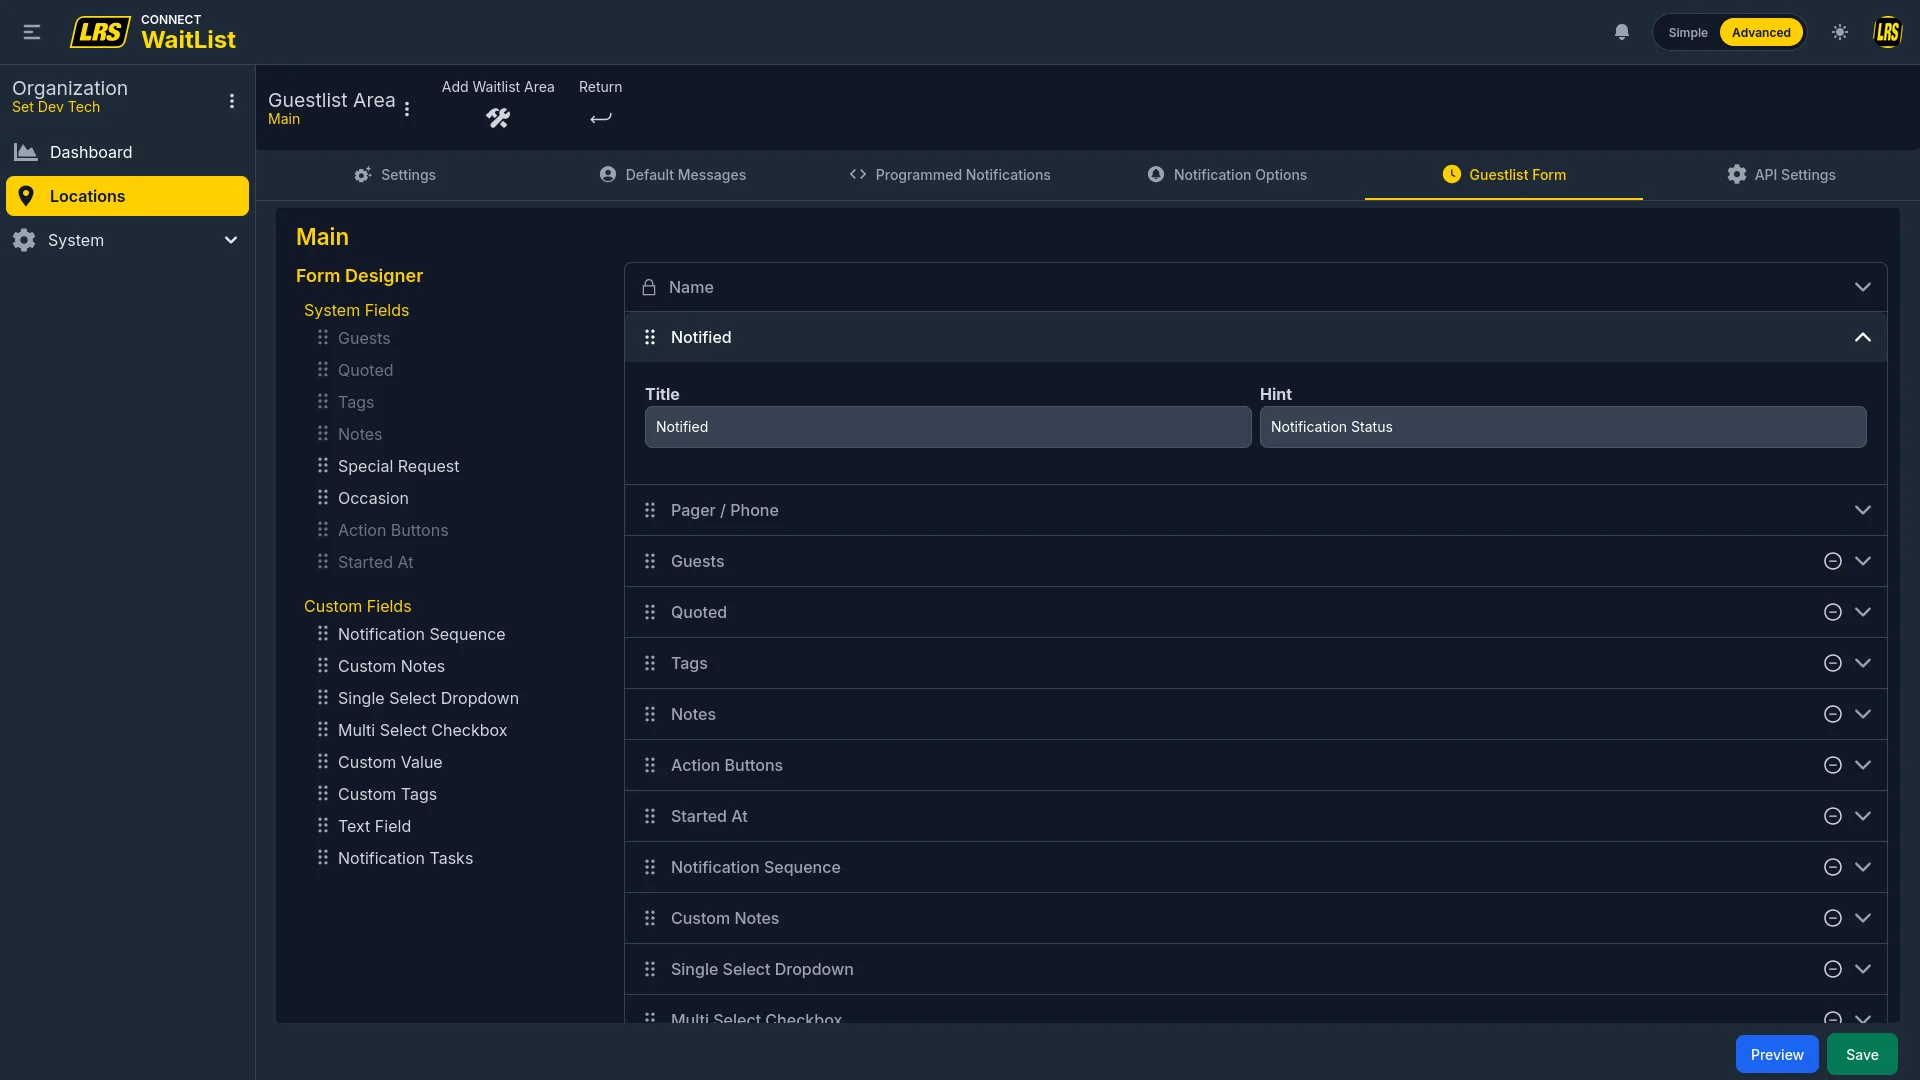
System fields cover the core data every waitlist entry needs. They are built into the system and cannot be renamed or removed from the palette, though most can be toggled off.
| Field | Description |
|---|---|
| Name | Guest name. Always required. Cannot be removed from the form. |
| Notified | Whether the guest has been paged or texted. Title and hint are customizable. |
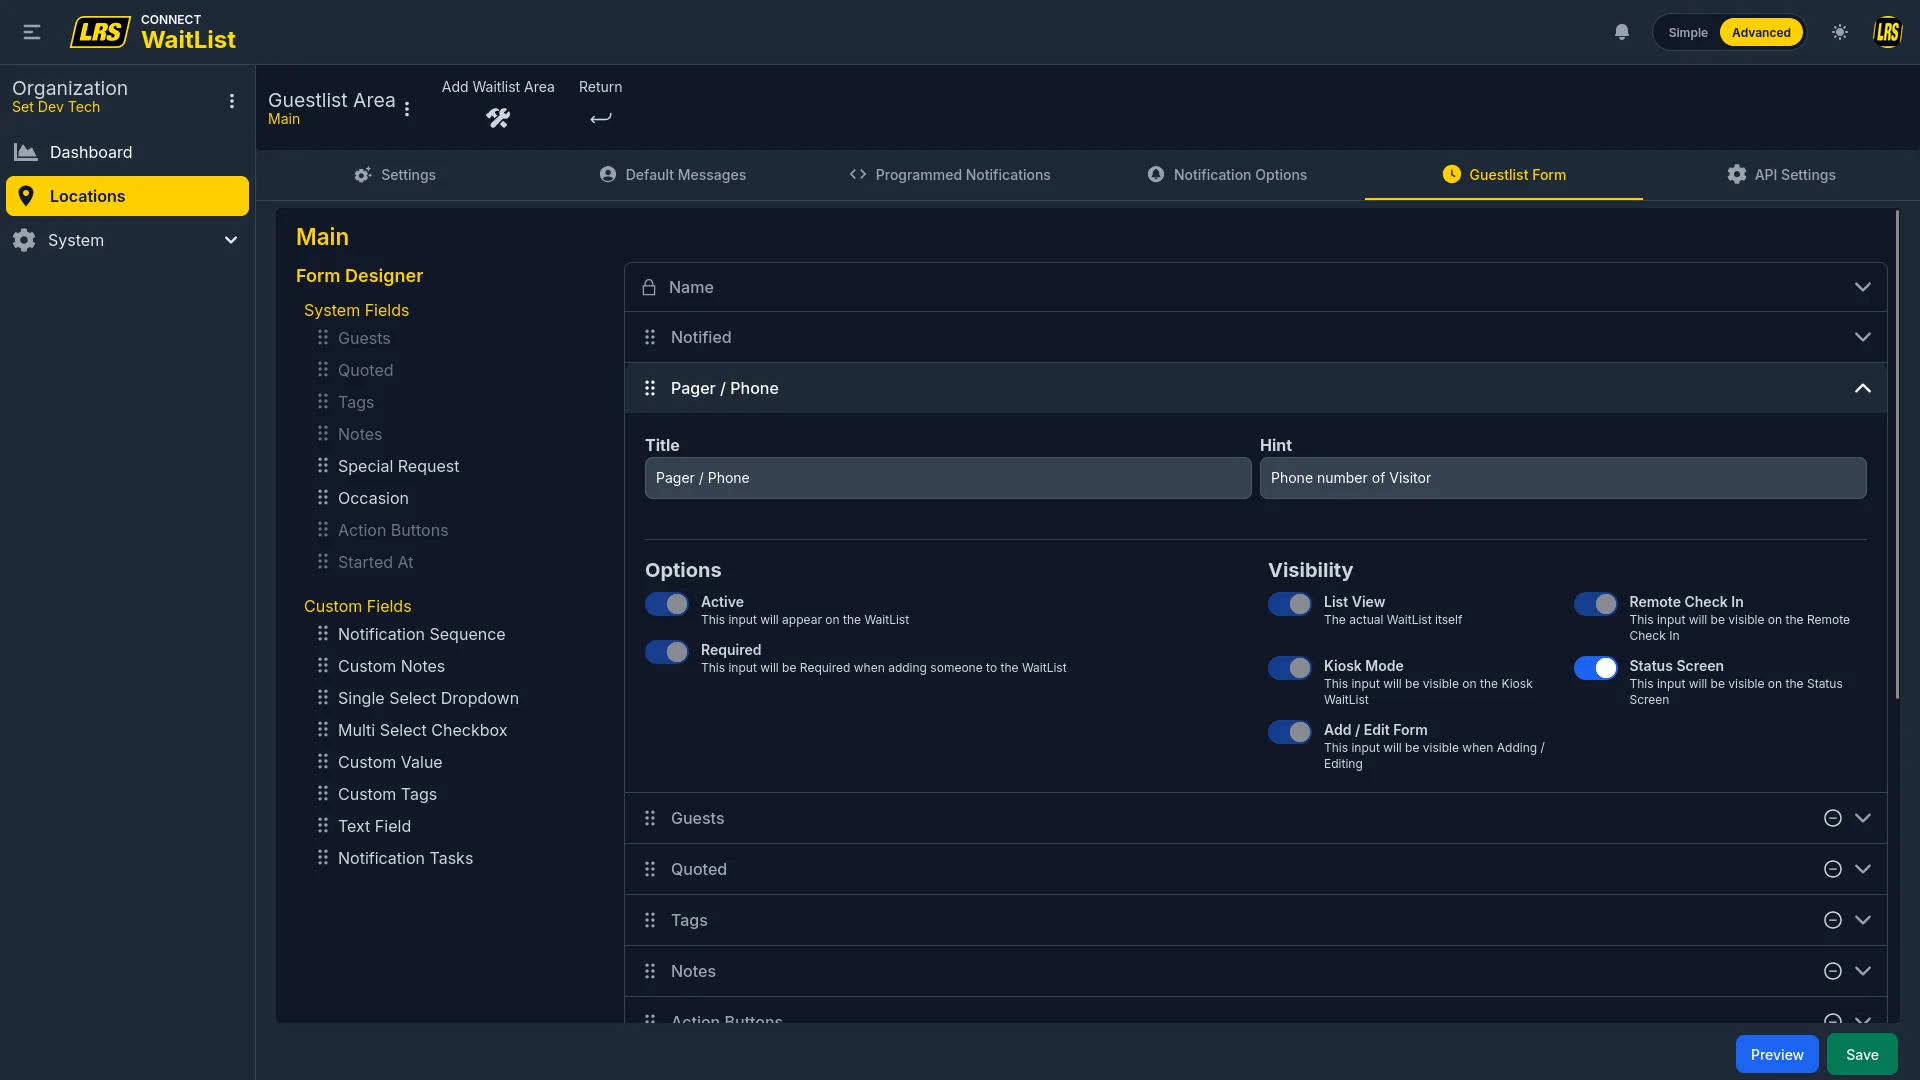
| Pager / Phone | Guest contact for SMS or pager notification. Required for notification workflows. |
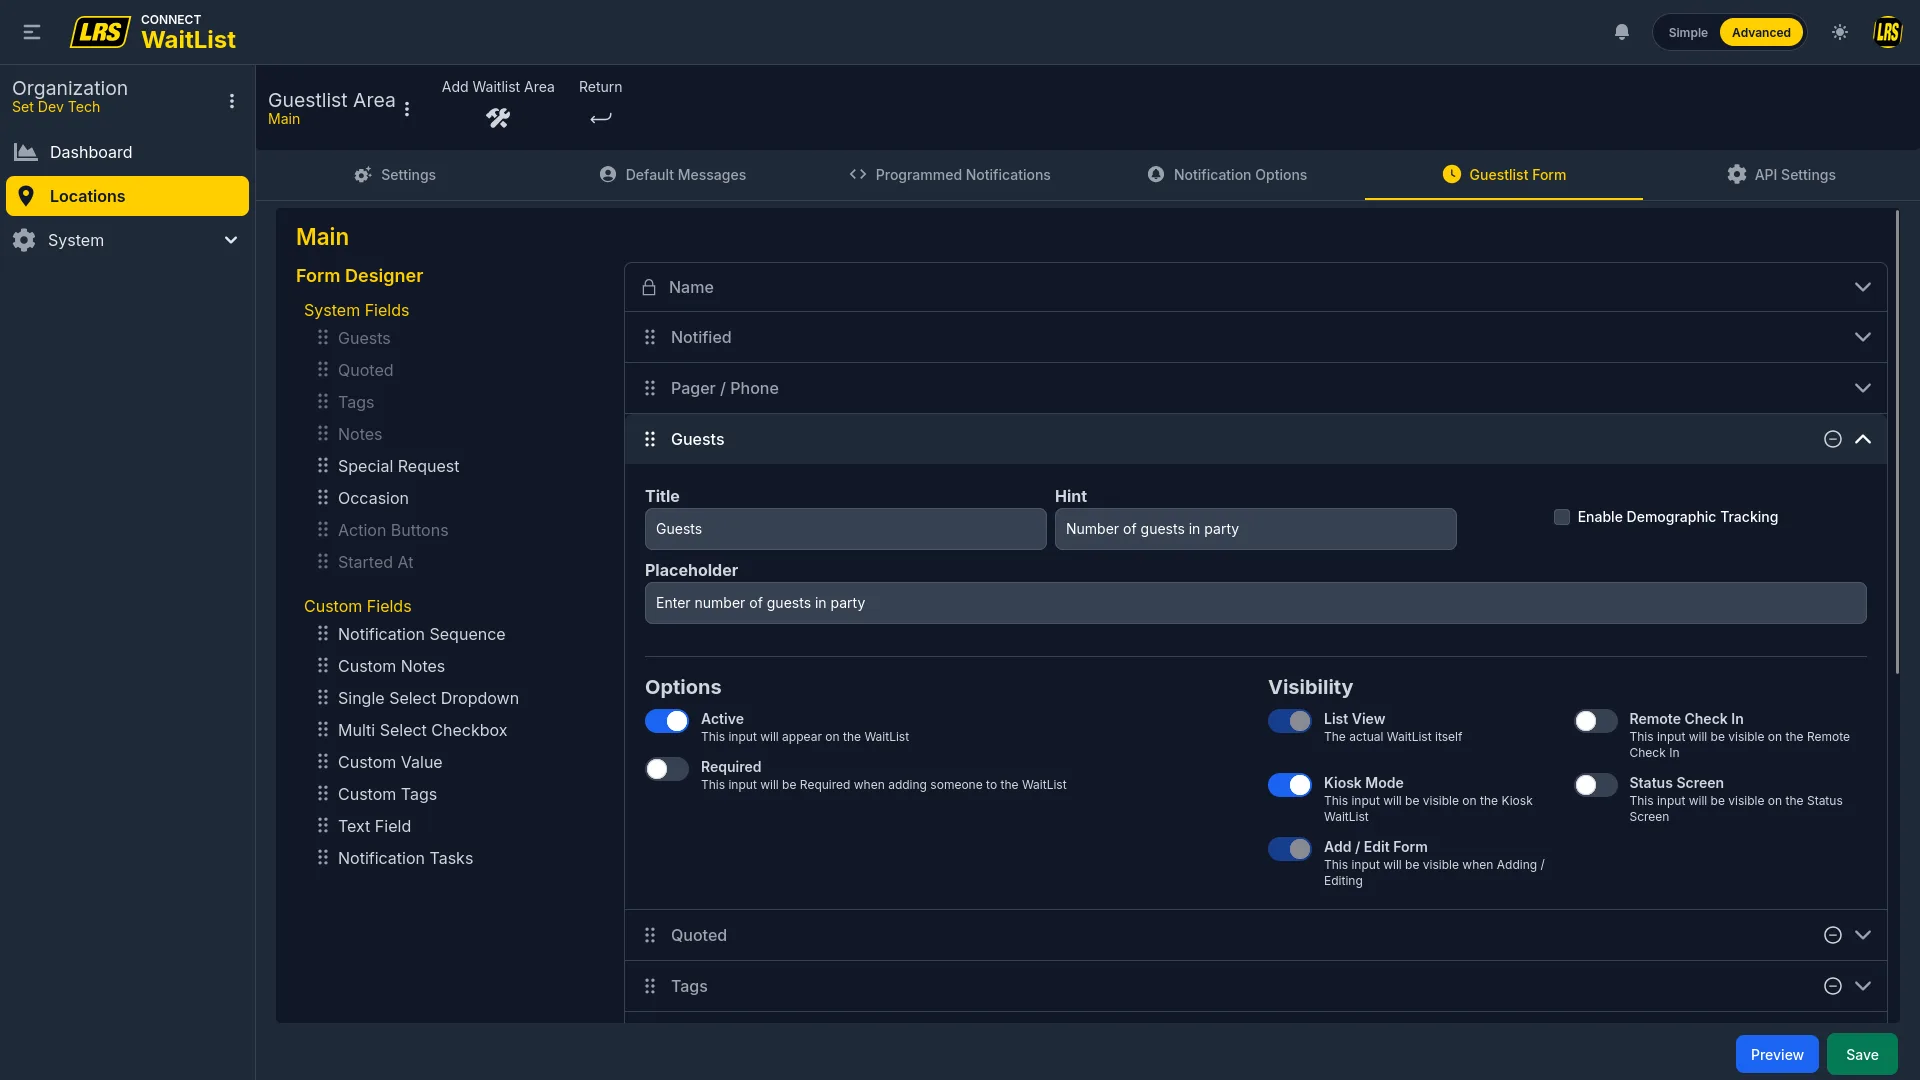
| Guests | Party size with optional Demographic Tracking for age and gender reporting. |
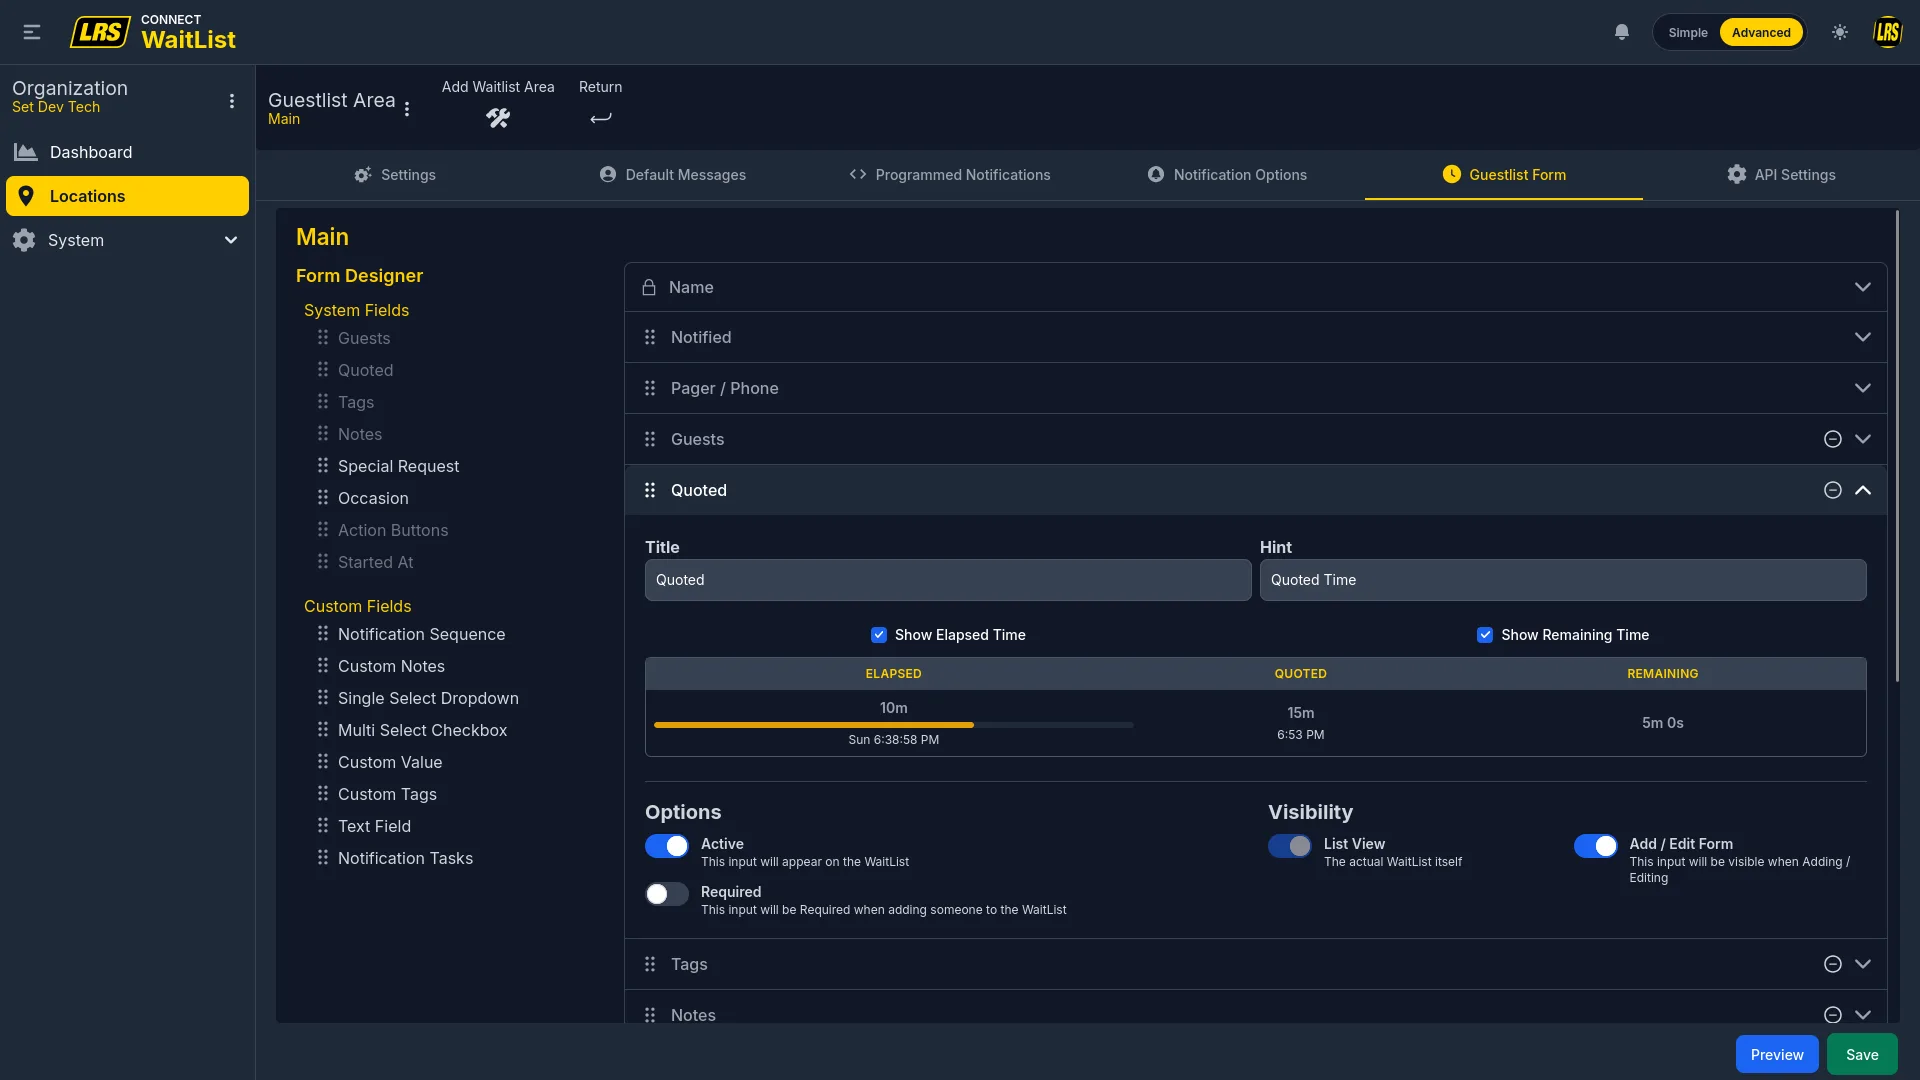
| Quoted | Estimated wait time set at entry. Shows elapsed and remaining time progress on the live list. |
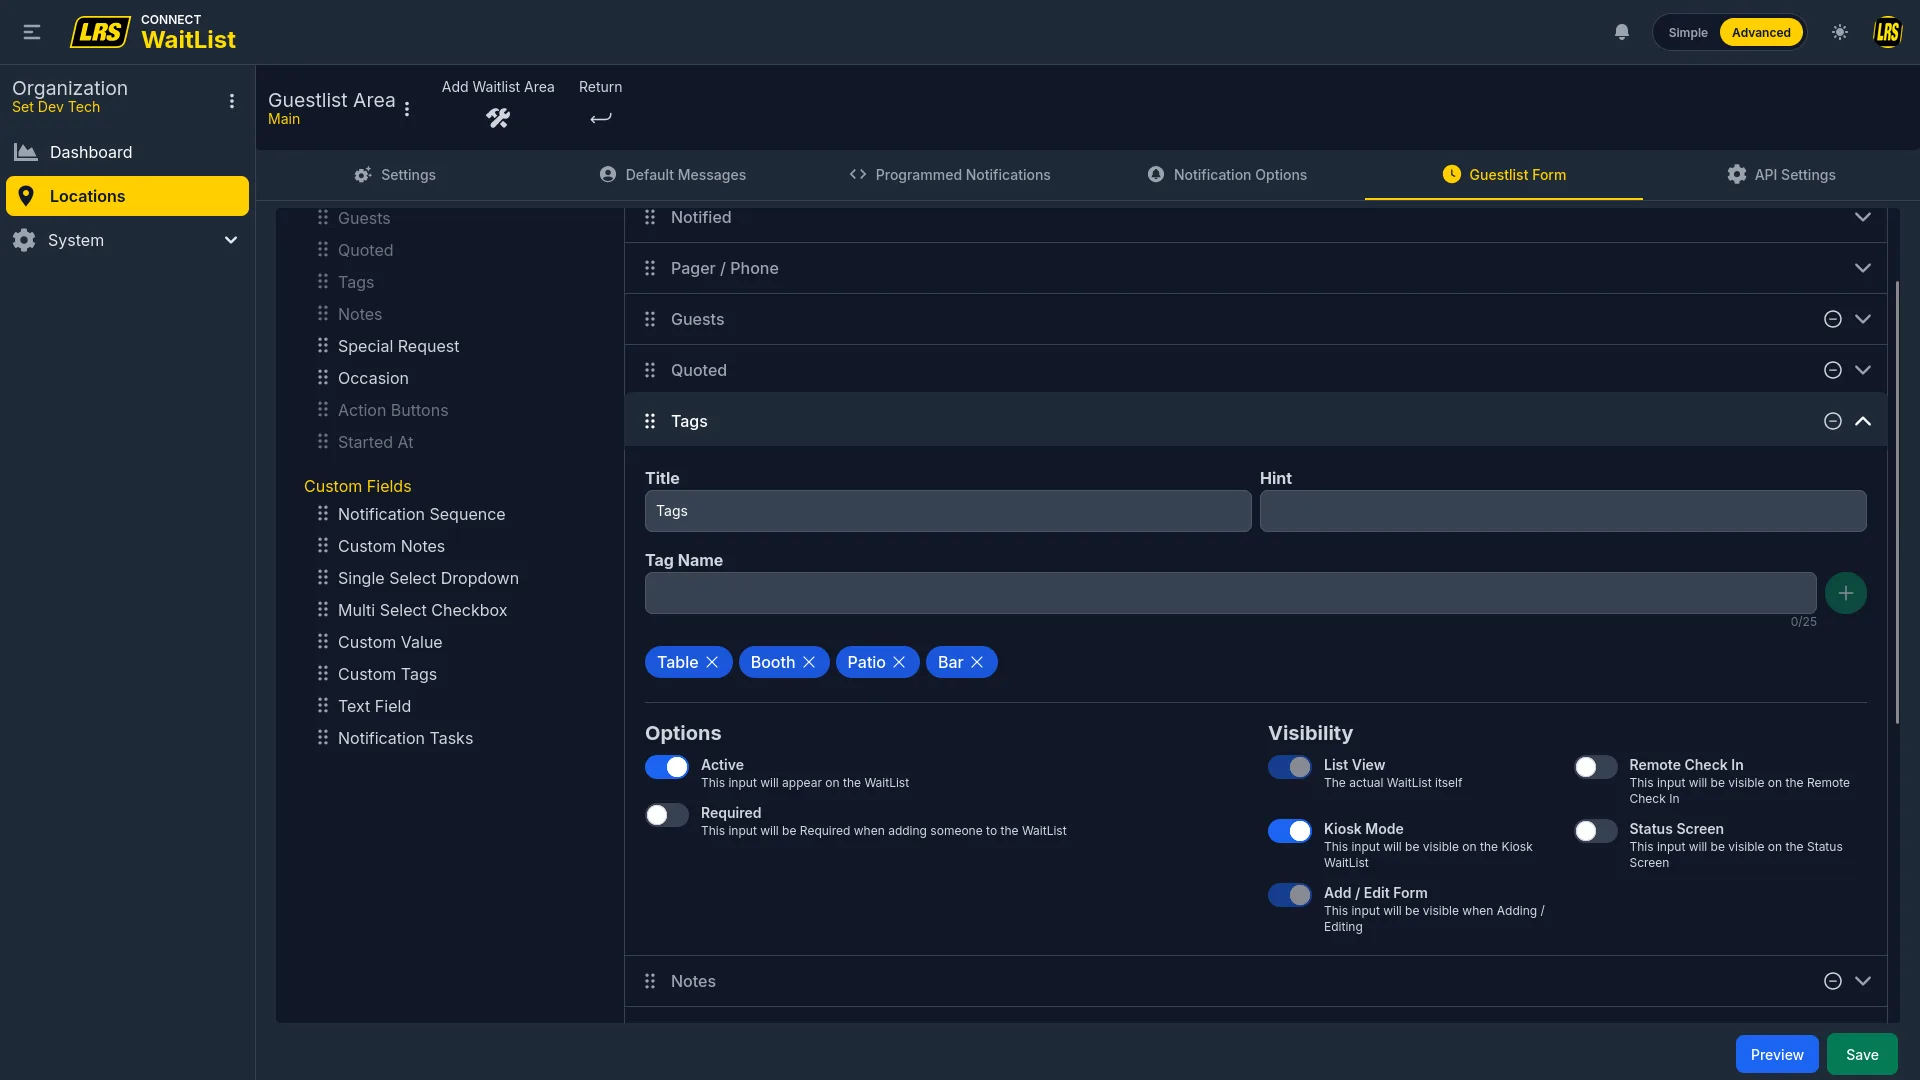
| Tags | Location-specific tag chips predefined in the field configuration. |
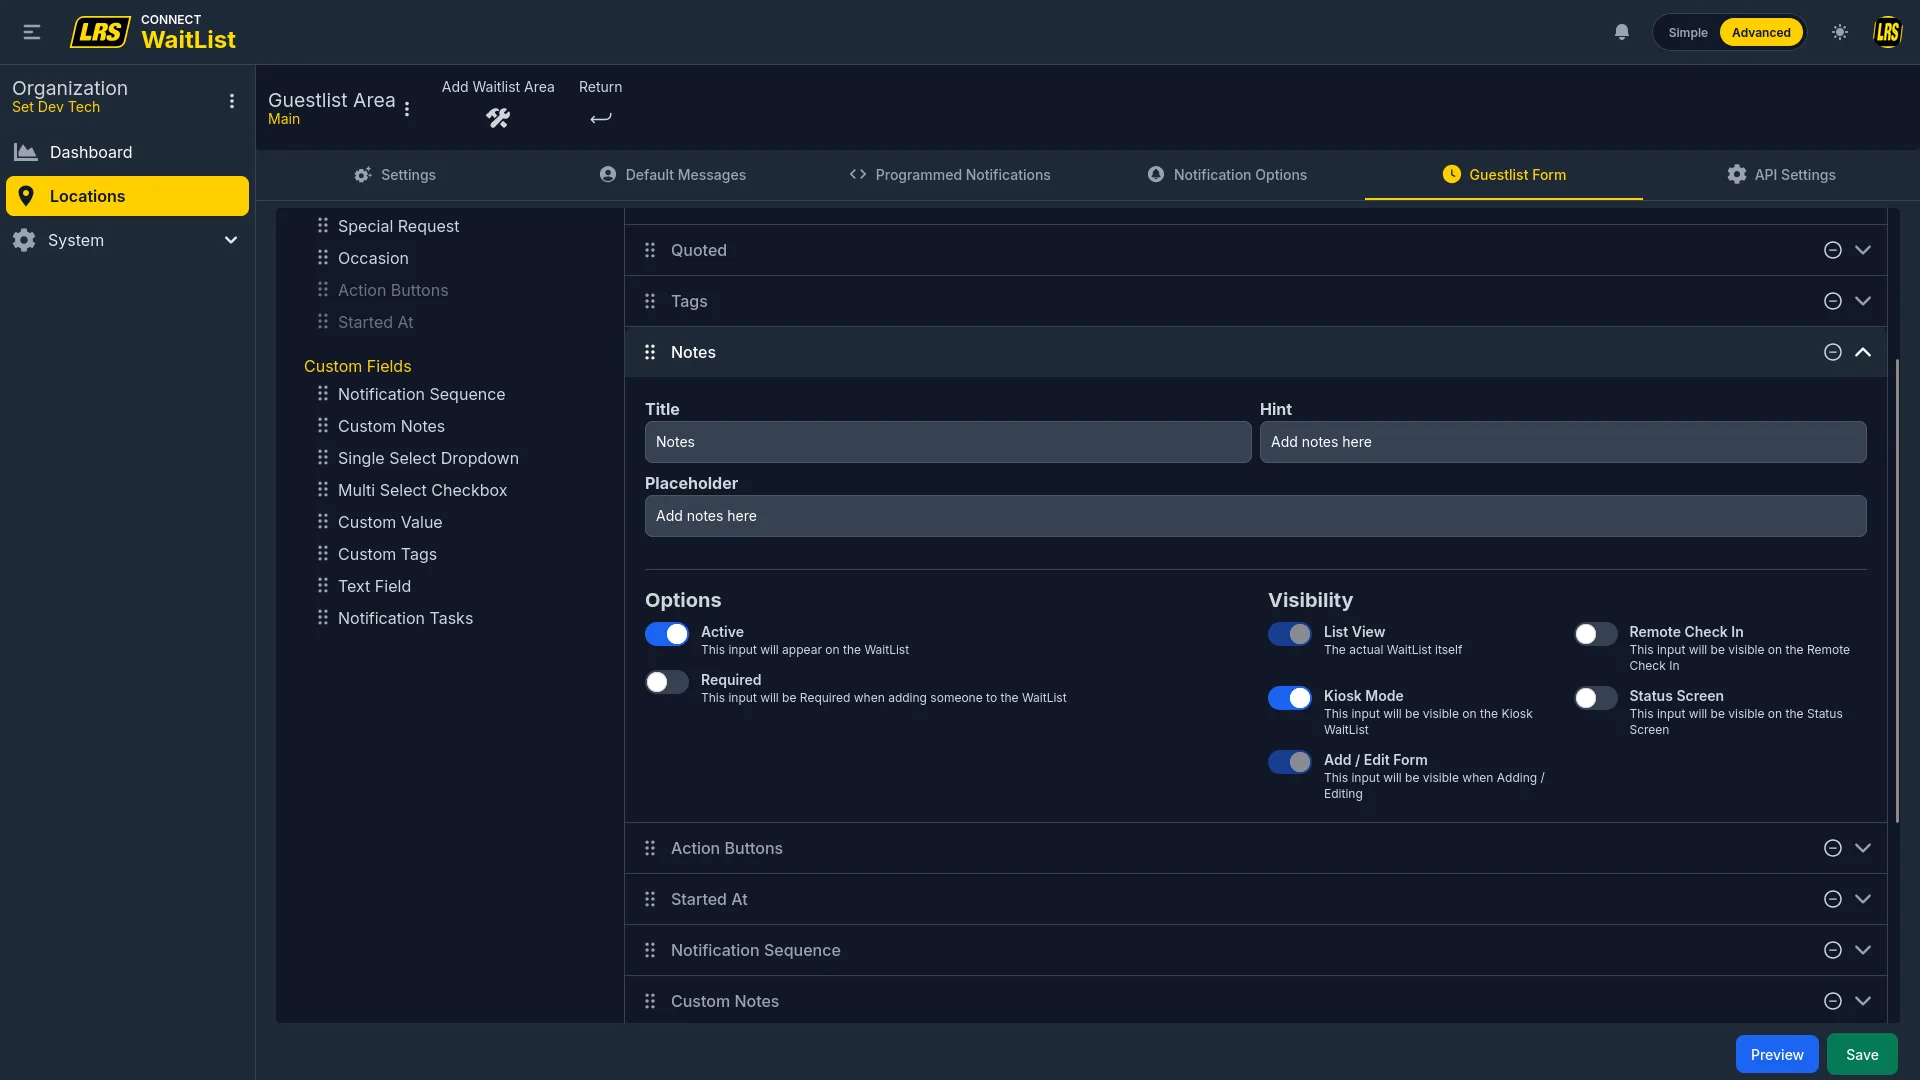
| Notes | Free-text staff annotation field with customizable title and placeholder. |
| Special Request | A distinct text area for dietary, accessibility, or event requests. |
| Occasion | Event type selector (Birthday, Anniversary, etc.). |
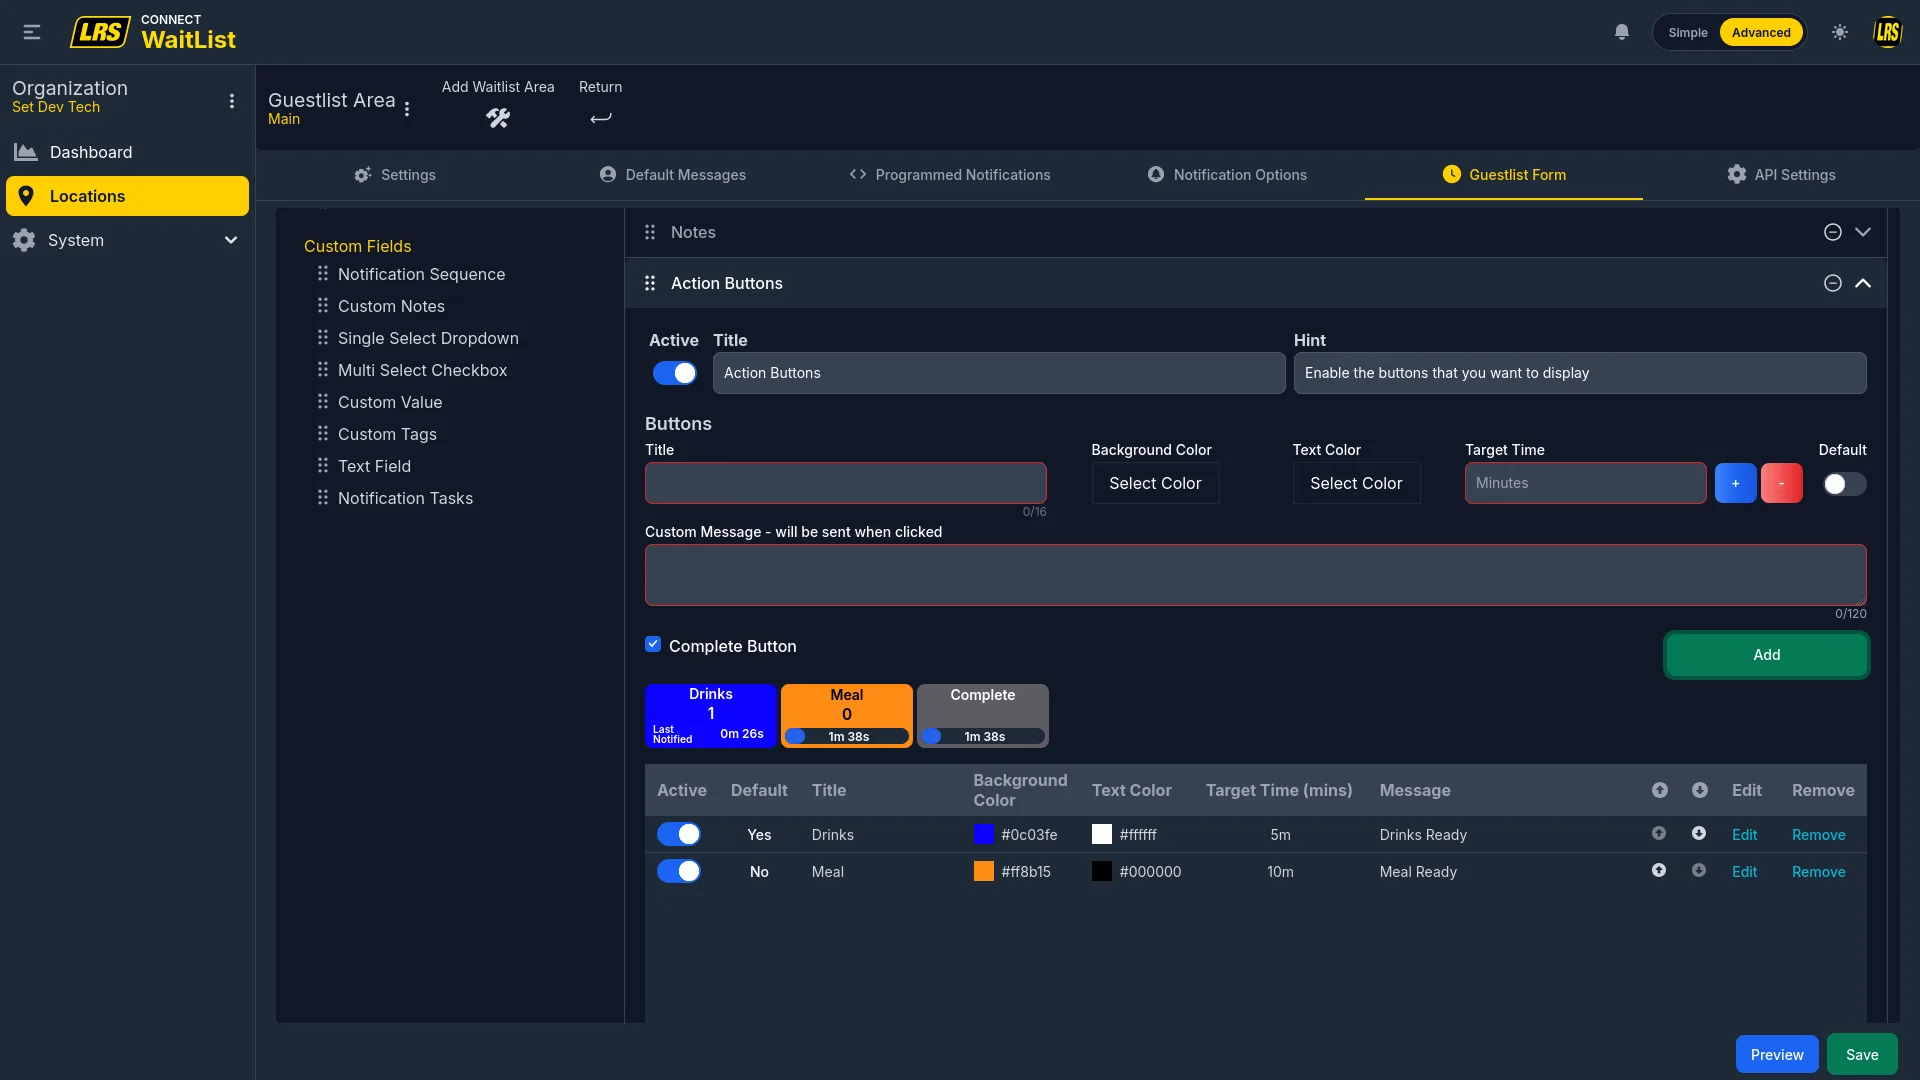
| Action Buttons | Timed colored buttons that send a message and start a countdown timer on the entry. |
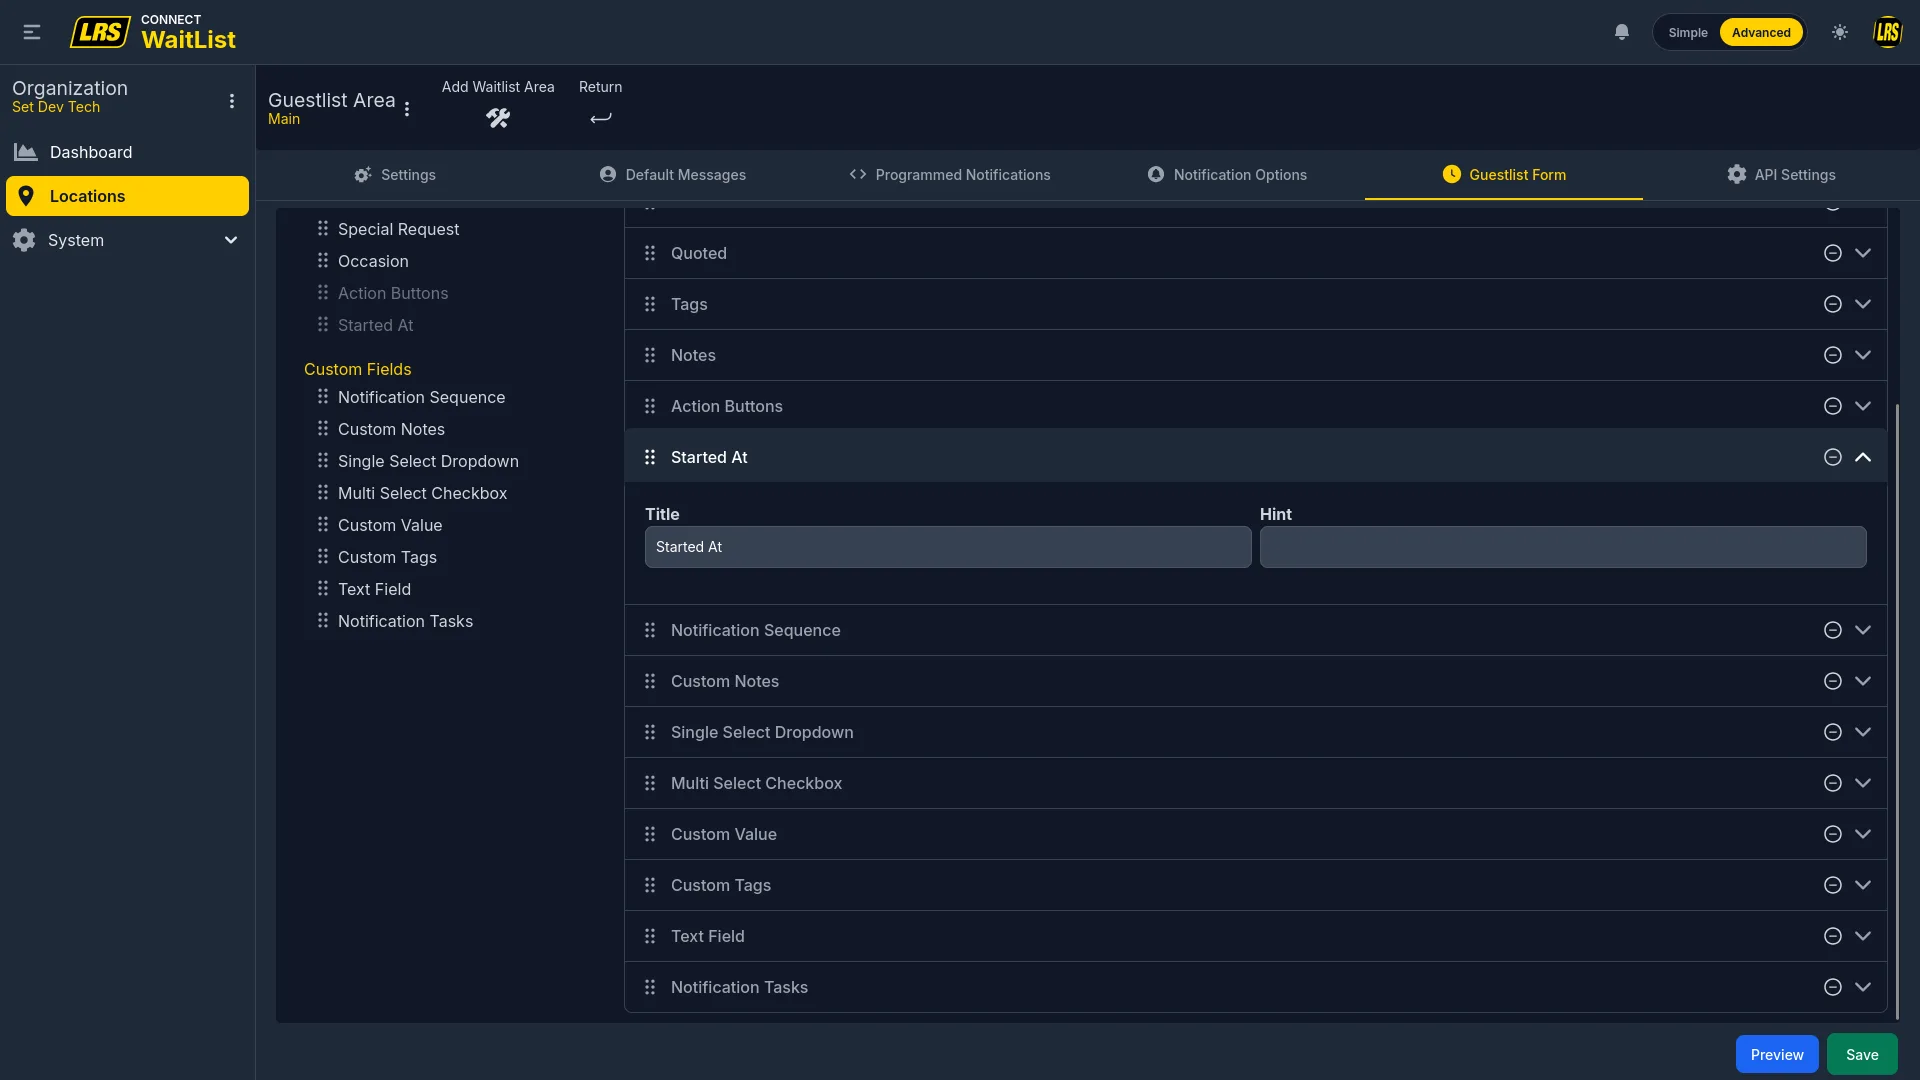
| Started At | Timestamp when the entry was created. Read-only. |
The Notified field tracks whether a guest has been paged. Its Title and Hint labels are the only two properties that can be customized on this field.
Every field has a Visibility section that controls where it appears across the five contexts. Visibility is configured independently per context, which means a field can be required for staff on the add/edit form, visible in the live list column, and completely hidden from kiosk visitors — all at once.
The Pager/Phone field collects the guest's contact for SMS or pager delivery. The Options section adds Active and Required flags that work independently from the Visibility switches.
The Guests field captures party size. Demographic Tracking adds an additional collection step that records age range and gender breakdowns alongside the count — useful for aggregate reporting.
The Quoted field stores the estimated wait time staff enter when adding the entry. The Show Elapsed Time and Show Remaining Time toggles control the progress bar visible to staff on the live waitlist below the Quoted value.
The Tags field lets staff label entries with predefined chips. Tags must be defined in the field configuration here; they appear as tappable chips in the live Waitlist app.
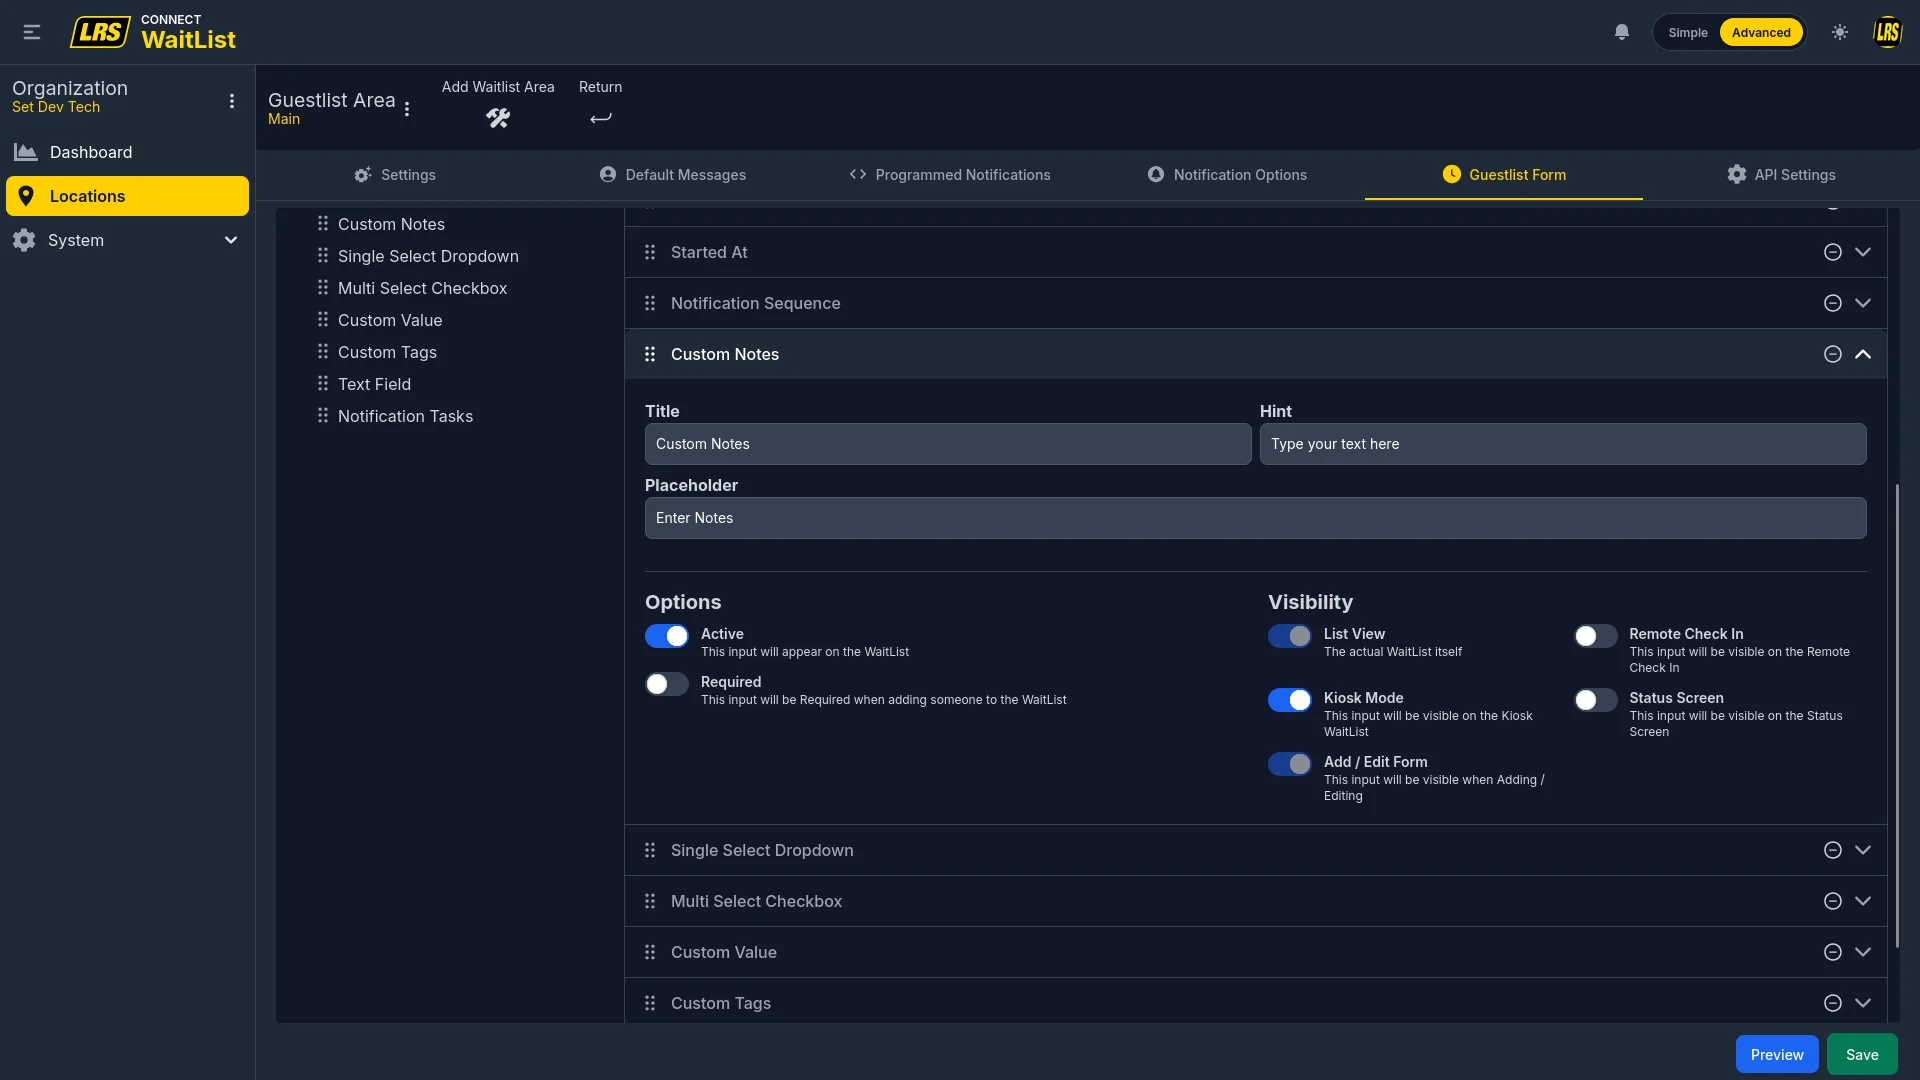
The Notes field provides a free-text annotation area. Title, Hint, and Placeholder are all customizable to prompt staff for the specific information most useful for the operation.
Action Buttons create timed workflow buttons directly on a waitlist entry. Each button sends a message to the guest and starts a countdown. When staff tap the Complete button, the sequence closes. This is useful for multi-step service flows like drink and meal delivery.
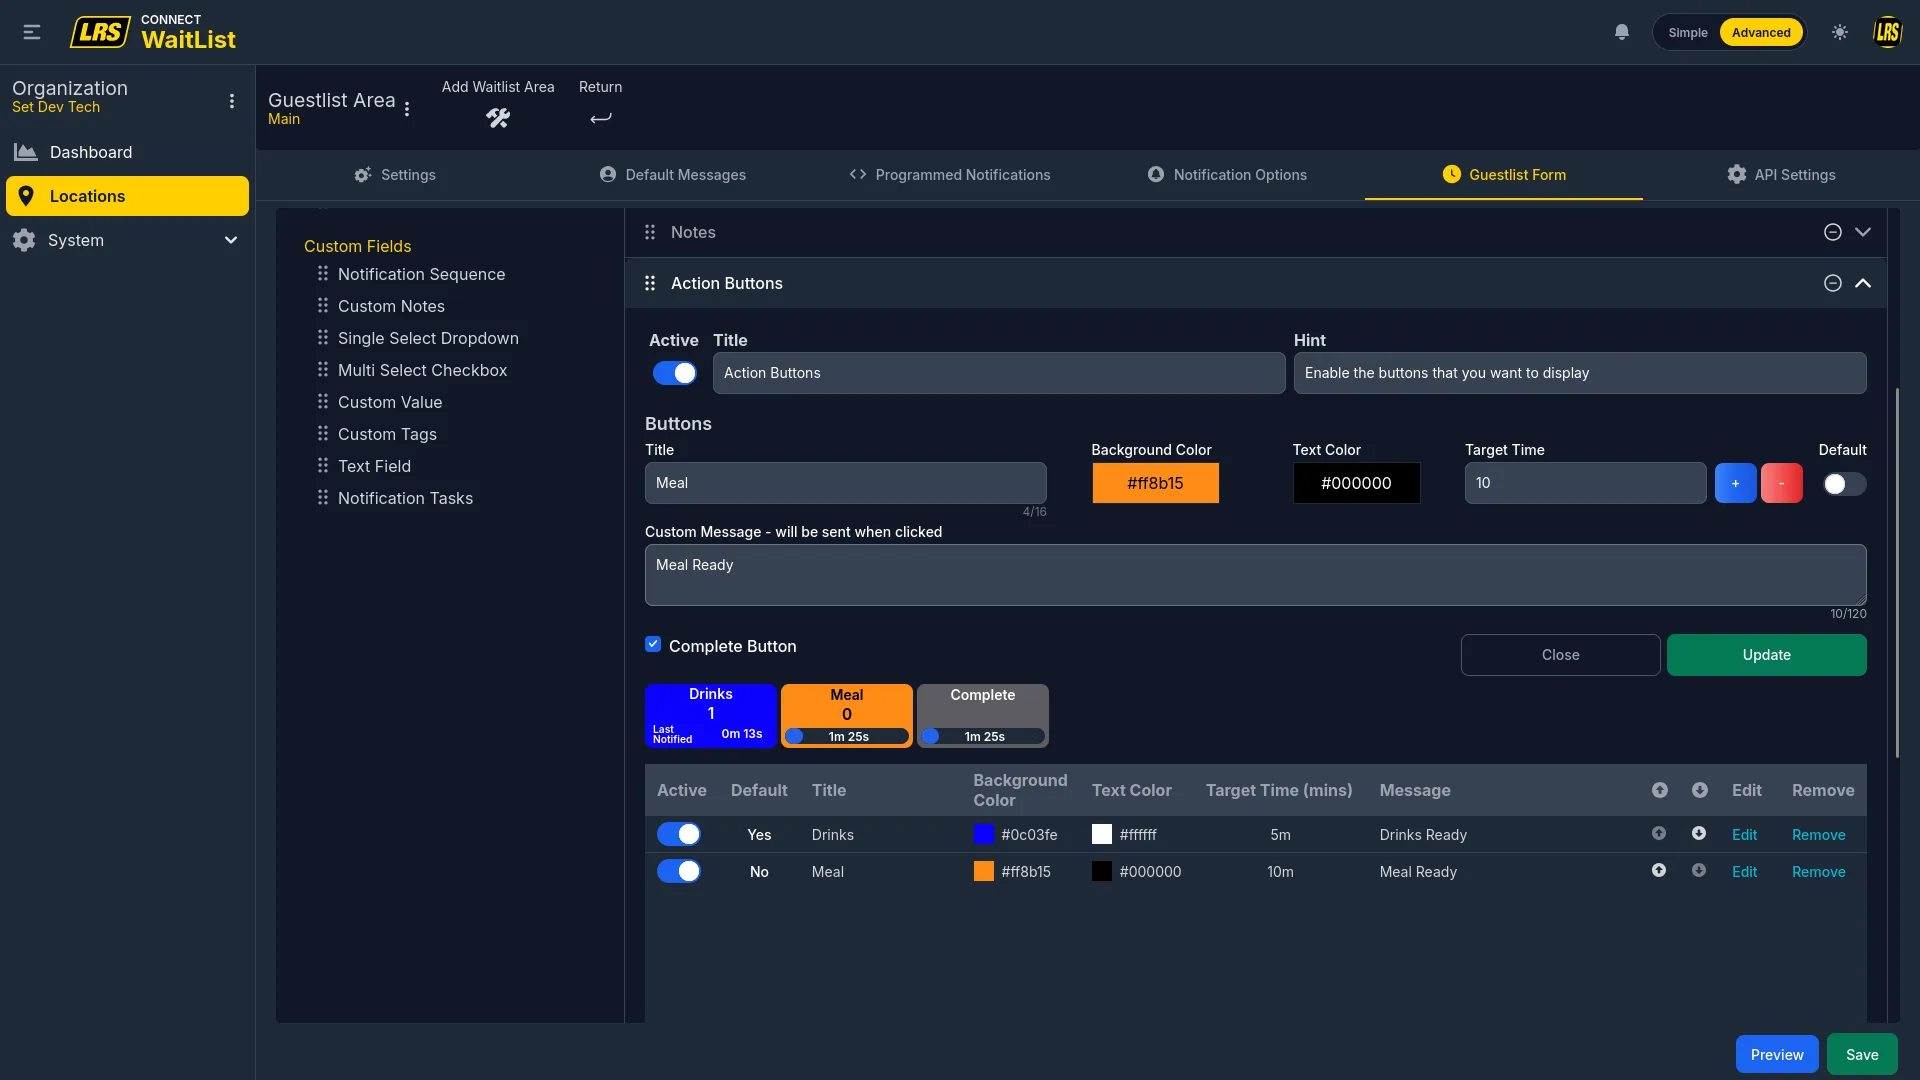
Adding a new Action Button requires a title, background color, text color, a target time in minutes, and the message sent to the guest when the button is tapped.
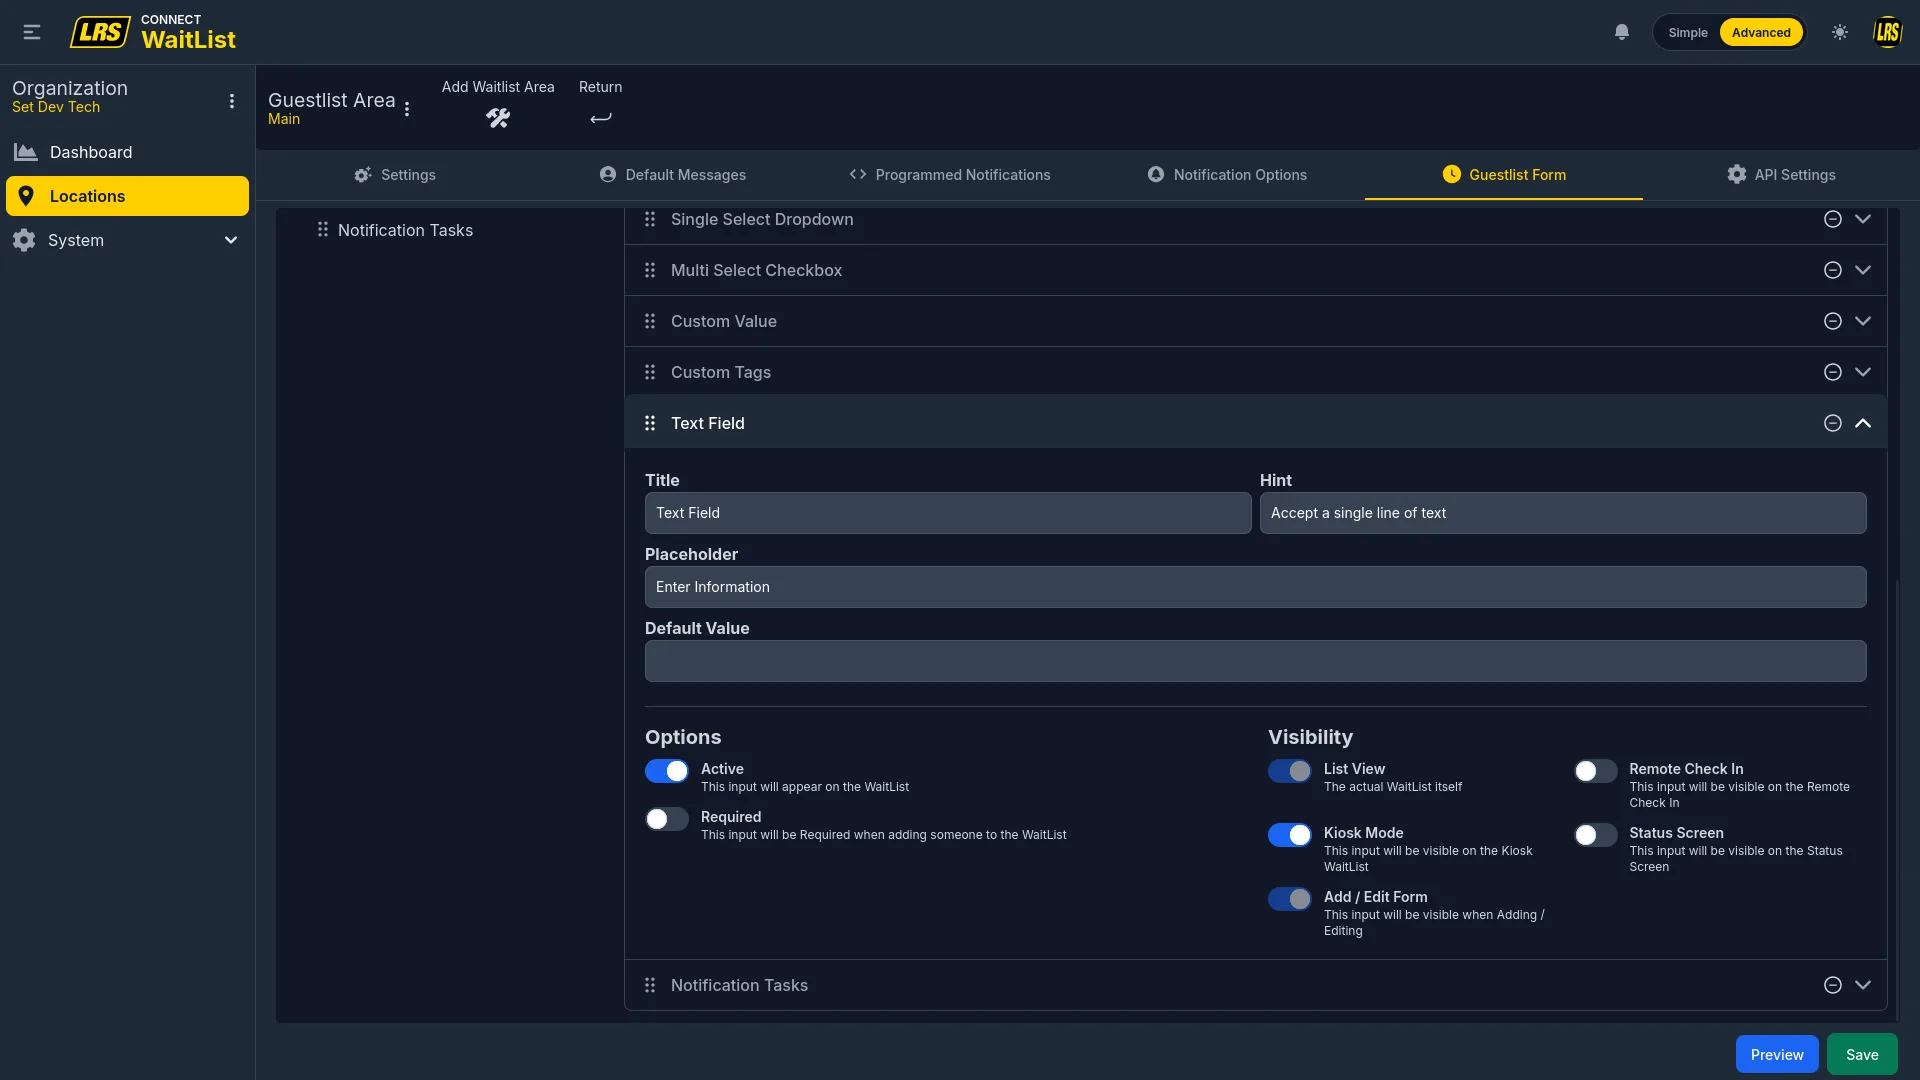
The Started At field is a read-only timestamp set when the entry is created. Below it in the palette sits the complete list of custom fields — all optional and all requiring an explicit drag to the active panel.
Custom fields extend the form with specialized input types for workflows, data capture, and staff coordination. All custom fields are optional and can be combined freely.
| Field | Description |
|---|---|
| Notification Sequence | Timed chain: staff tap once, messages fire at configured intervals automatically — no further action needed per step. |
| Custom Notes | A second labeled free-text field with its own title, hint, and placeholder. |
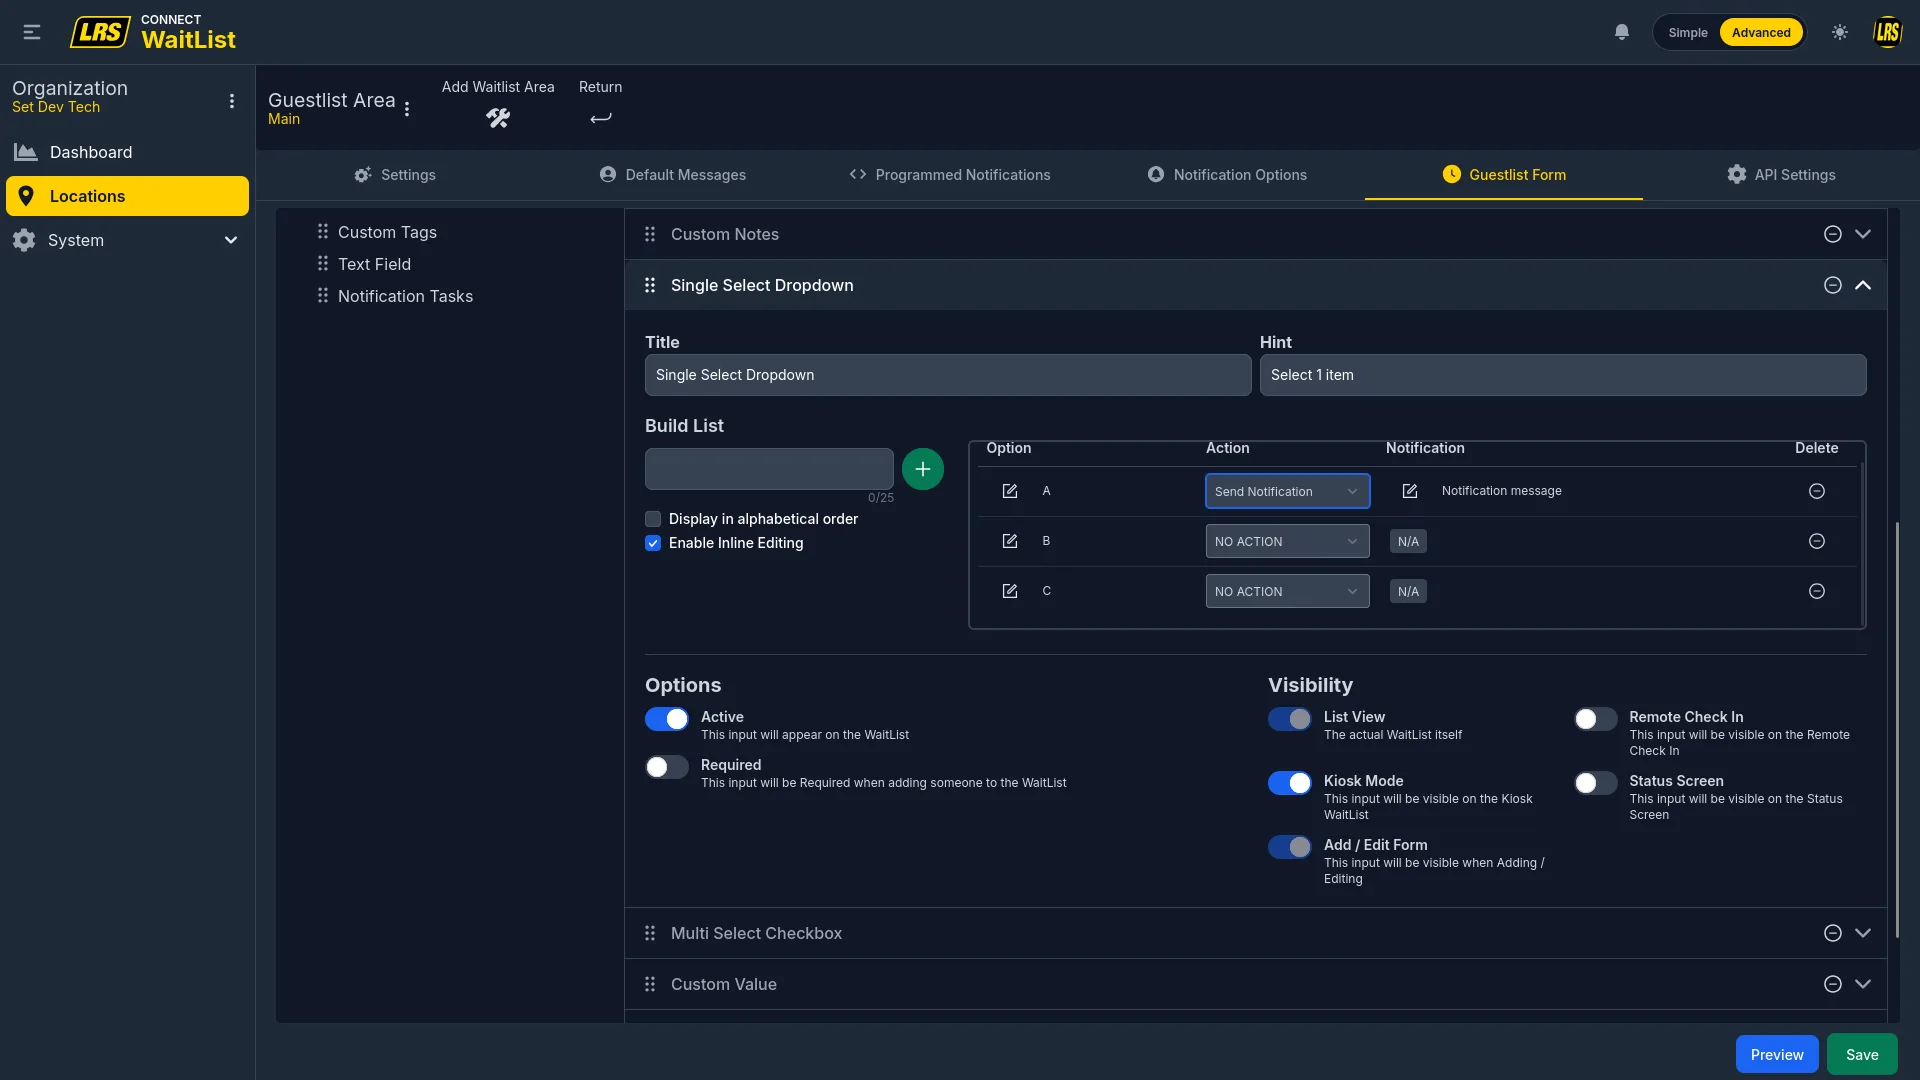
| Single Select Dropdown | One-choice selector from a predefined list. Each option can trigger a specific notification. |
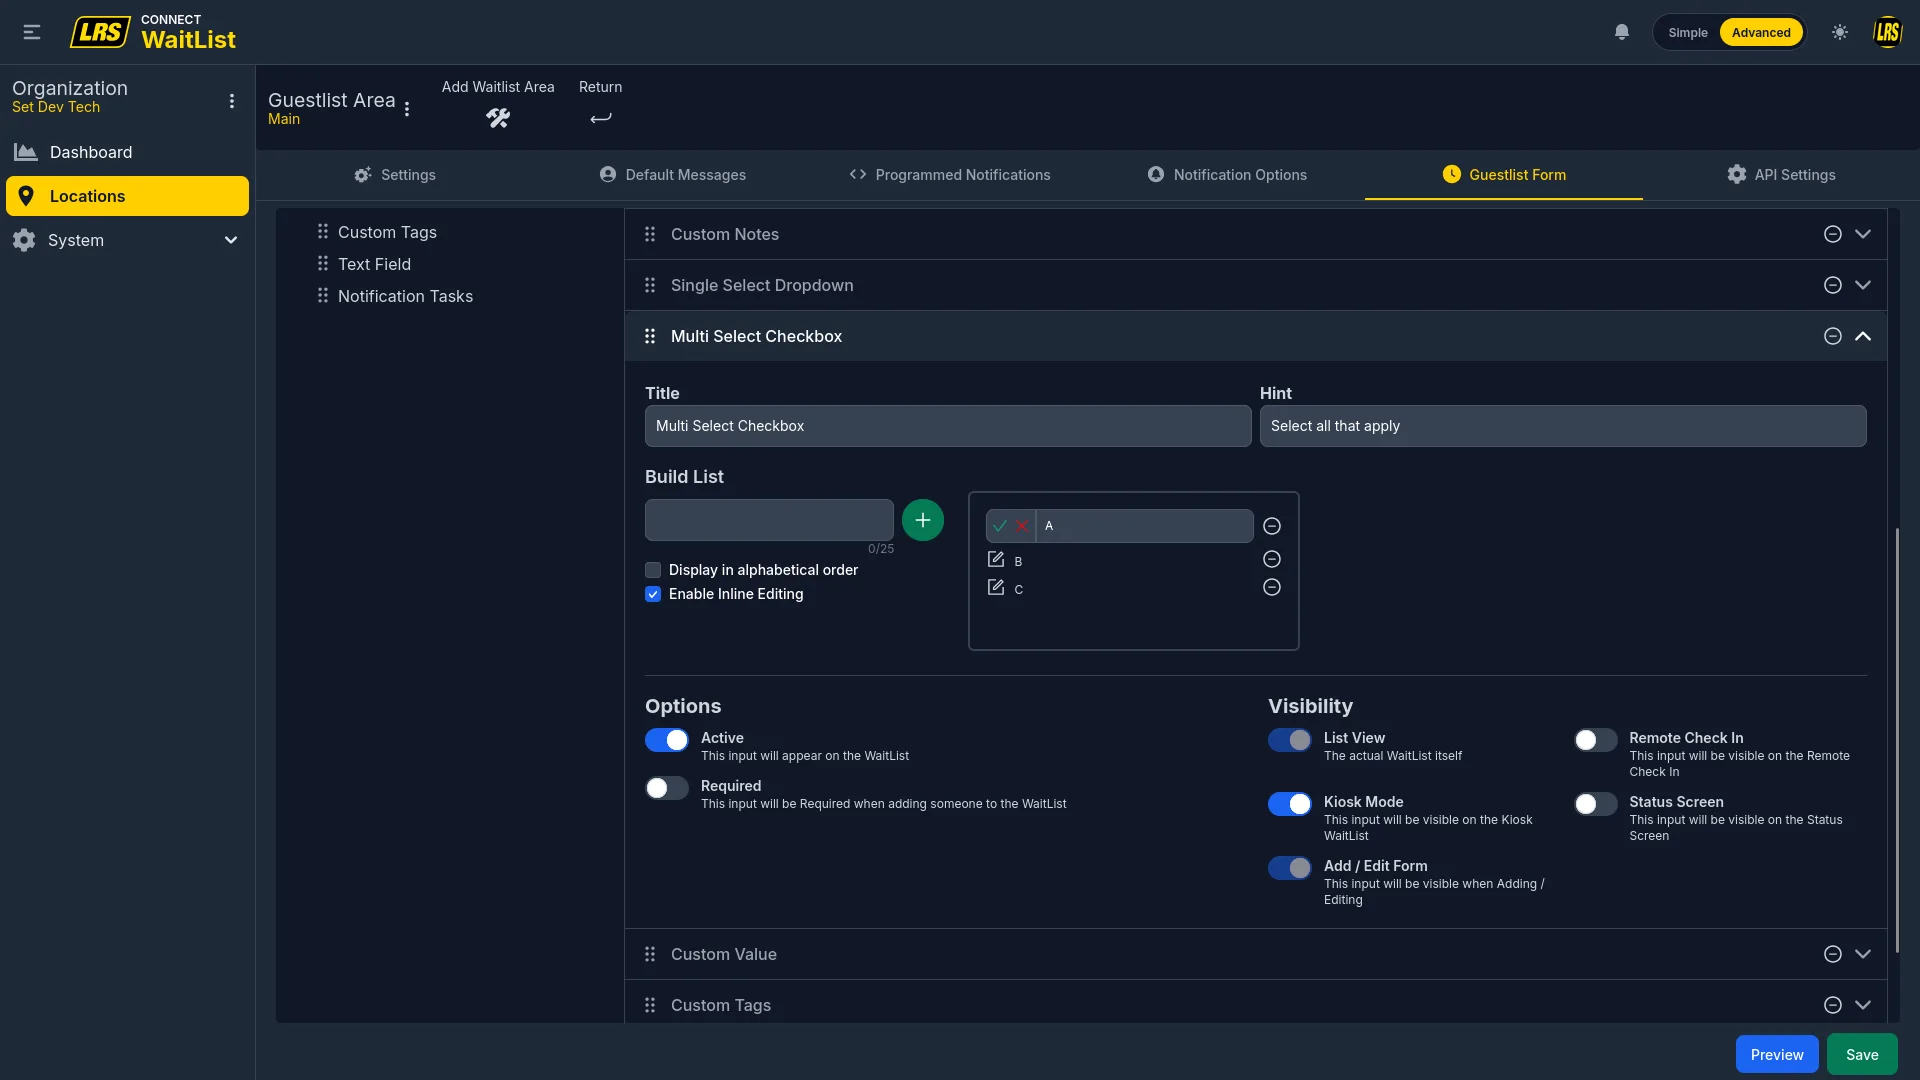
| Multi Select Checkbox | Multiple-choice selector — guests or staff check all that apply. |
| Custom Value | Labeled input with a pattern: Text, Phone #, Integer, Floating Point, Currency, or Date. |
| Custom Tags | Free-form tag field with predefined default options that staff can extend at entry time. |
| Text Field | Plain labeled text input with a custom placeholder and no format constraint. |
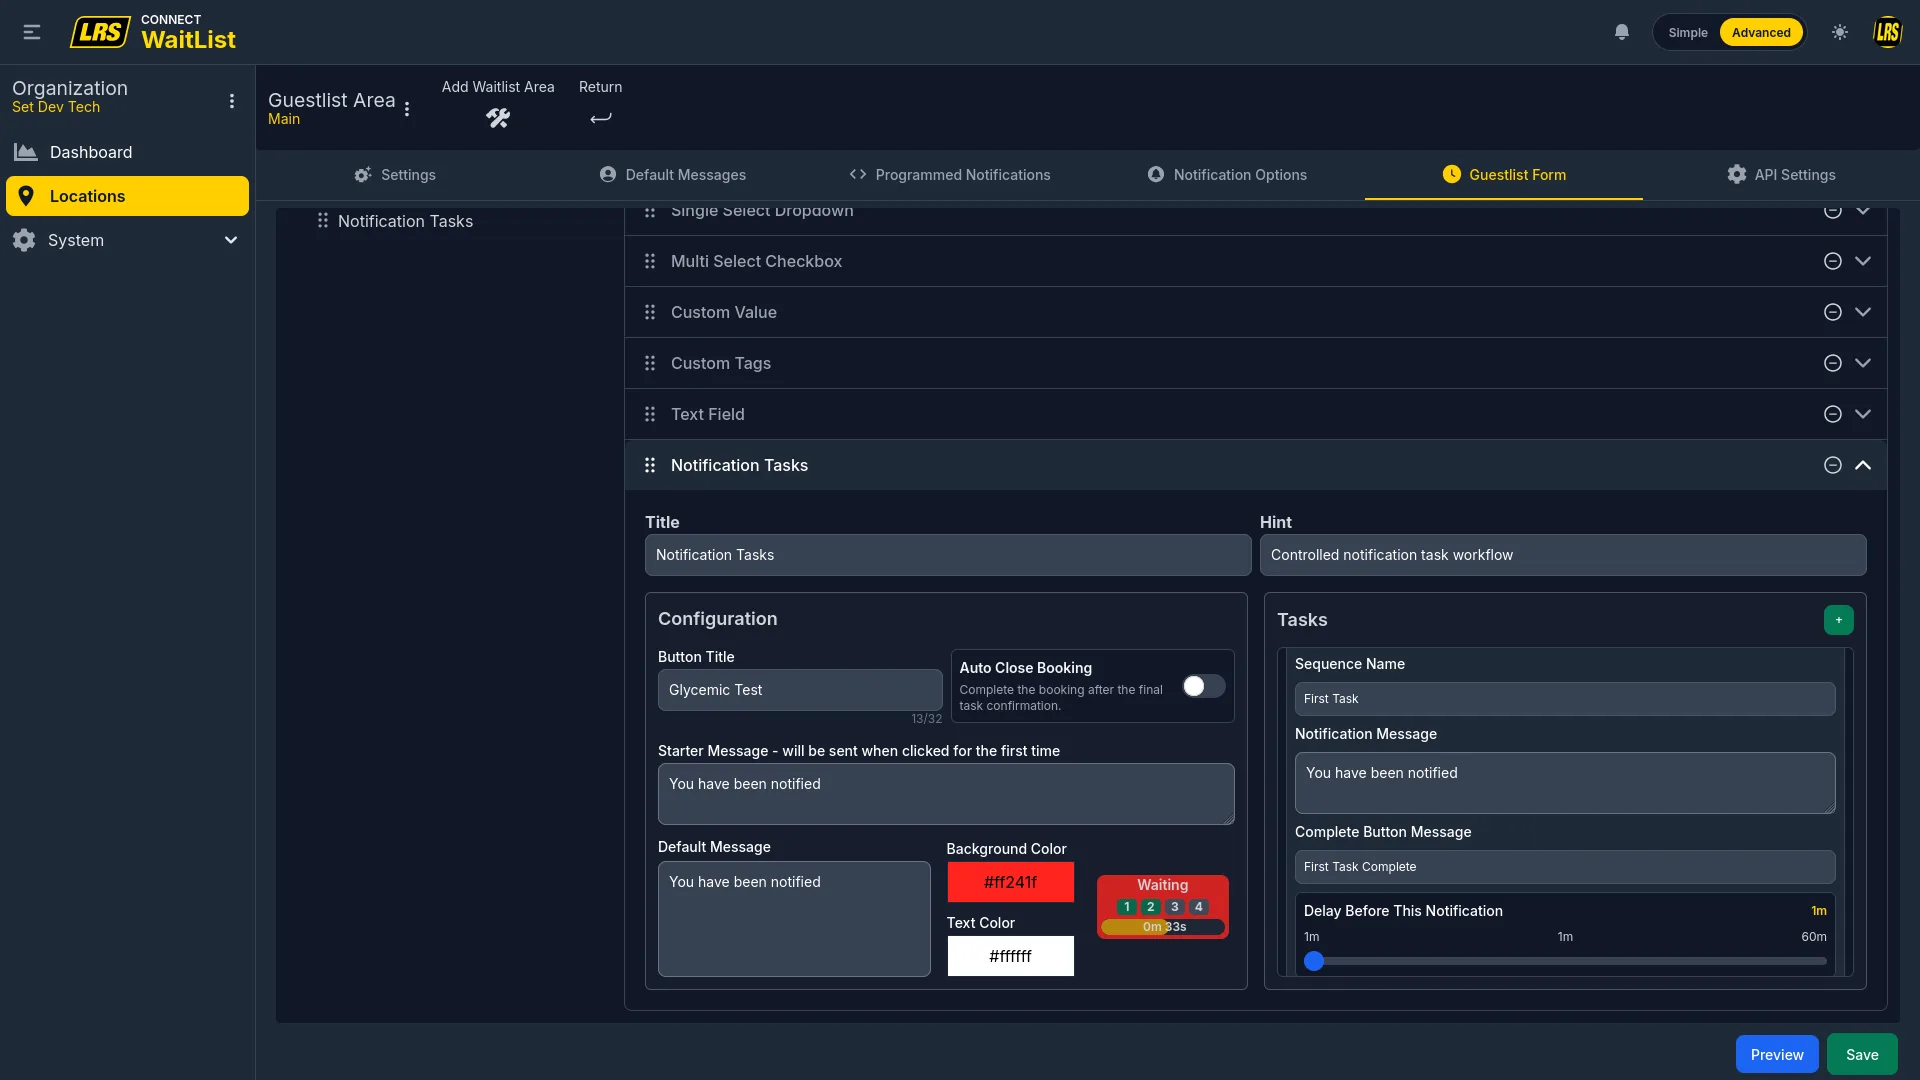
| Notification Tasks | Multi-step staff workflow with named tasks, delay-based notifications, and optional Auto Close. |
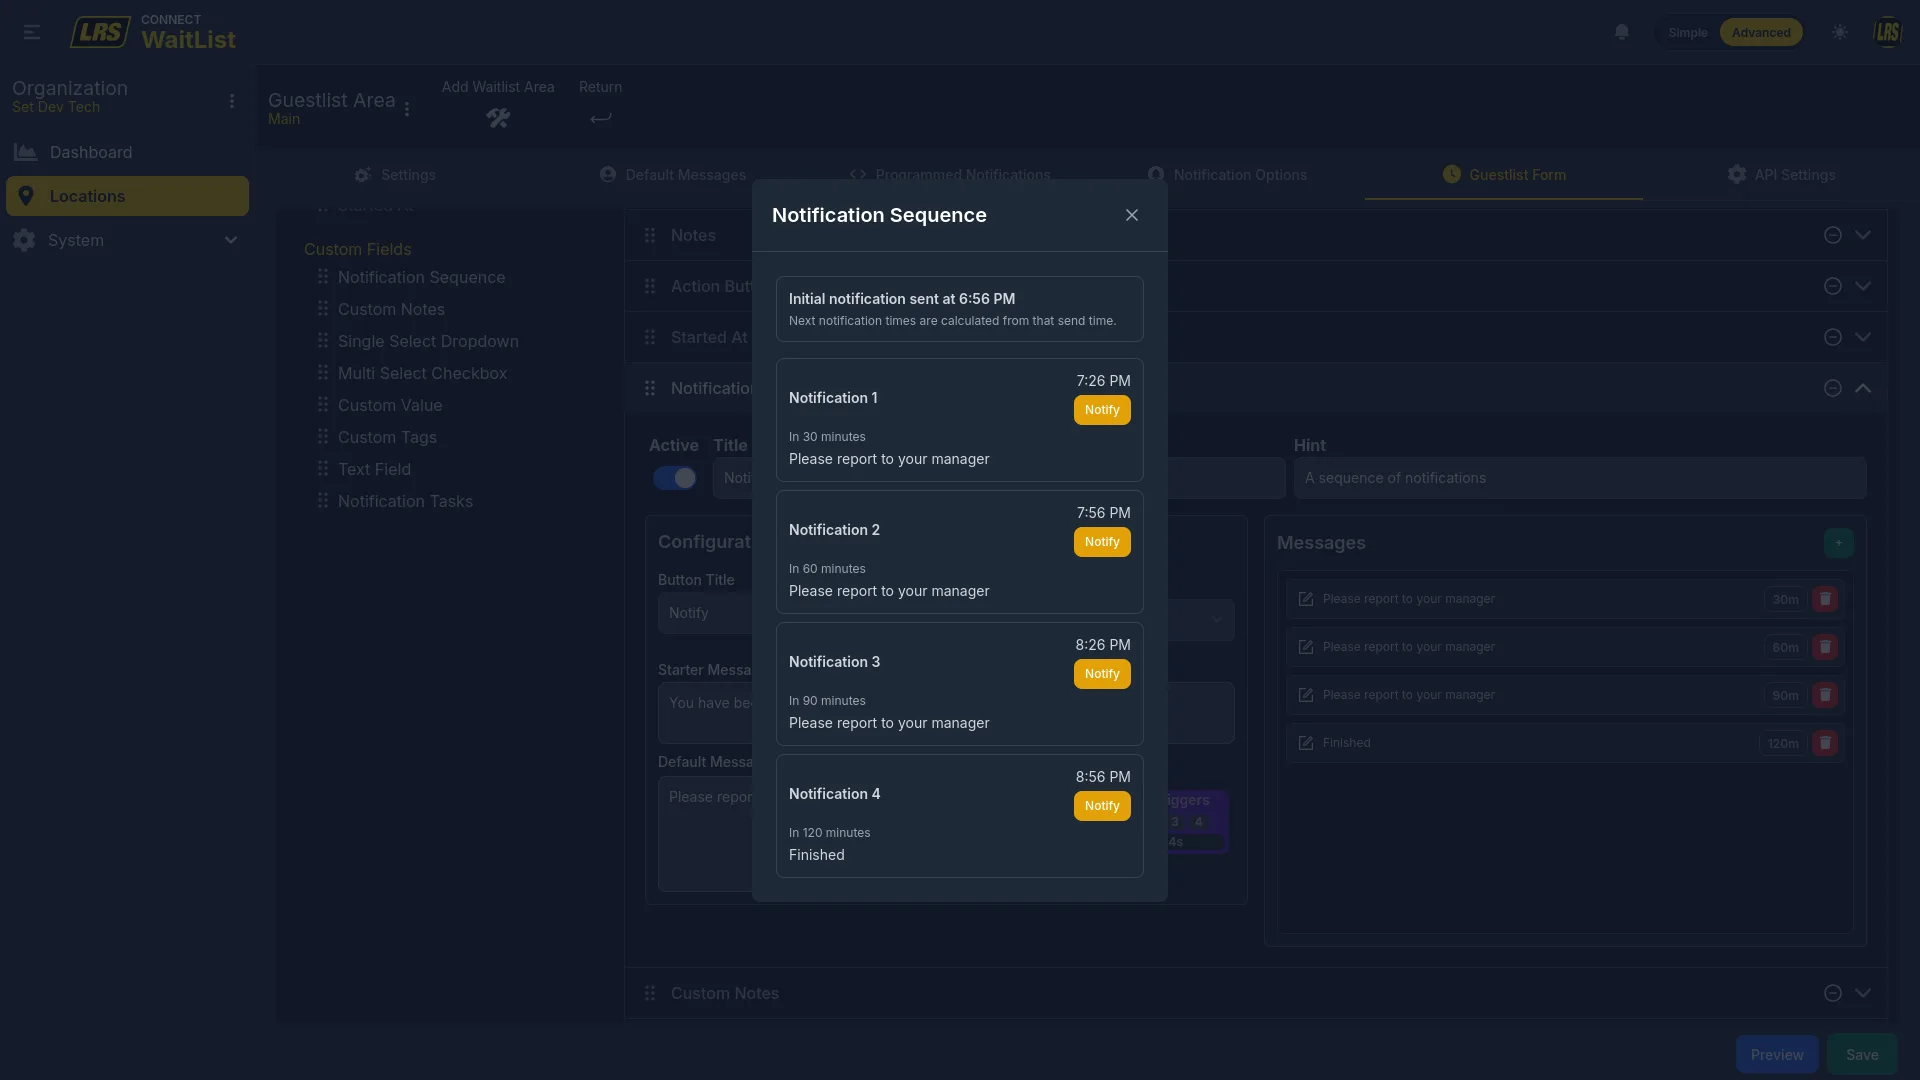
The Notification Sequence field creates a timed chain. Staff tap the button once to start it; messages fire automatically at the configured intervals without any further action. This is different from Programmed Notifications — the sequence is triggered manually per entry, whereas Programmed Notifications fire from the quoted wait time.
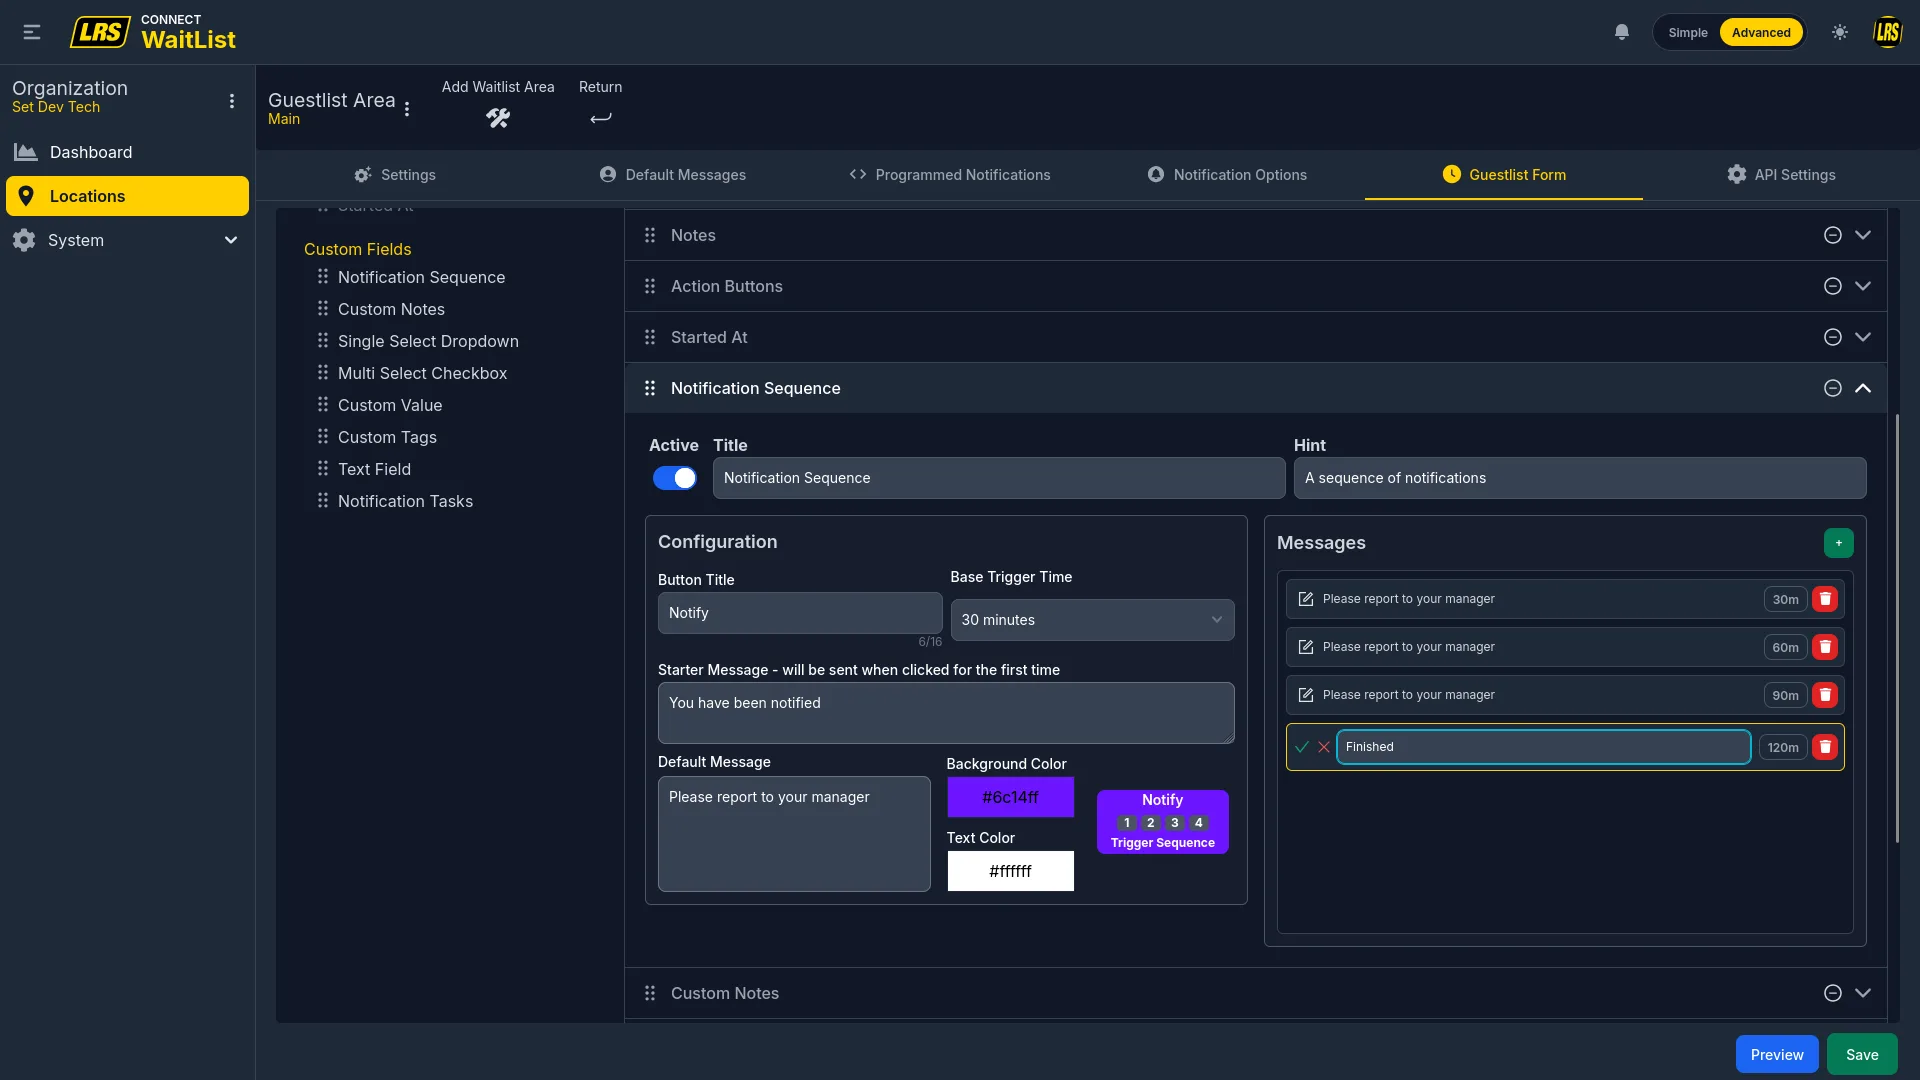
The preview modal for a Notification Sequence shows each step exactly as it will appear in the live Waitlist app, including the scheduled timestamps and individual Notify buttons that allow manual early firing if needed.
Custom Notes is a second free-text annotation field, independent of the system Notes field. Use it when two distinct note types are needed on the same entry form — for example, one for kitchen notes and one for front-of-house notes.
The Single Select Dropdown restricts the entry to one option from a predefined list. Each option can trigger a specific notification or take no action, making it suitable for routing entries by preference or service type.
The Multi Select Checkbox allows multiple simultaneous selections from the predefined list. Use it for capturing preferences where more than one answer applies.
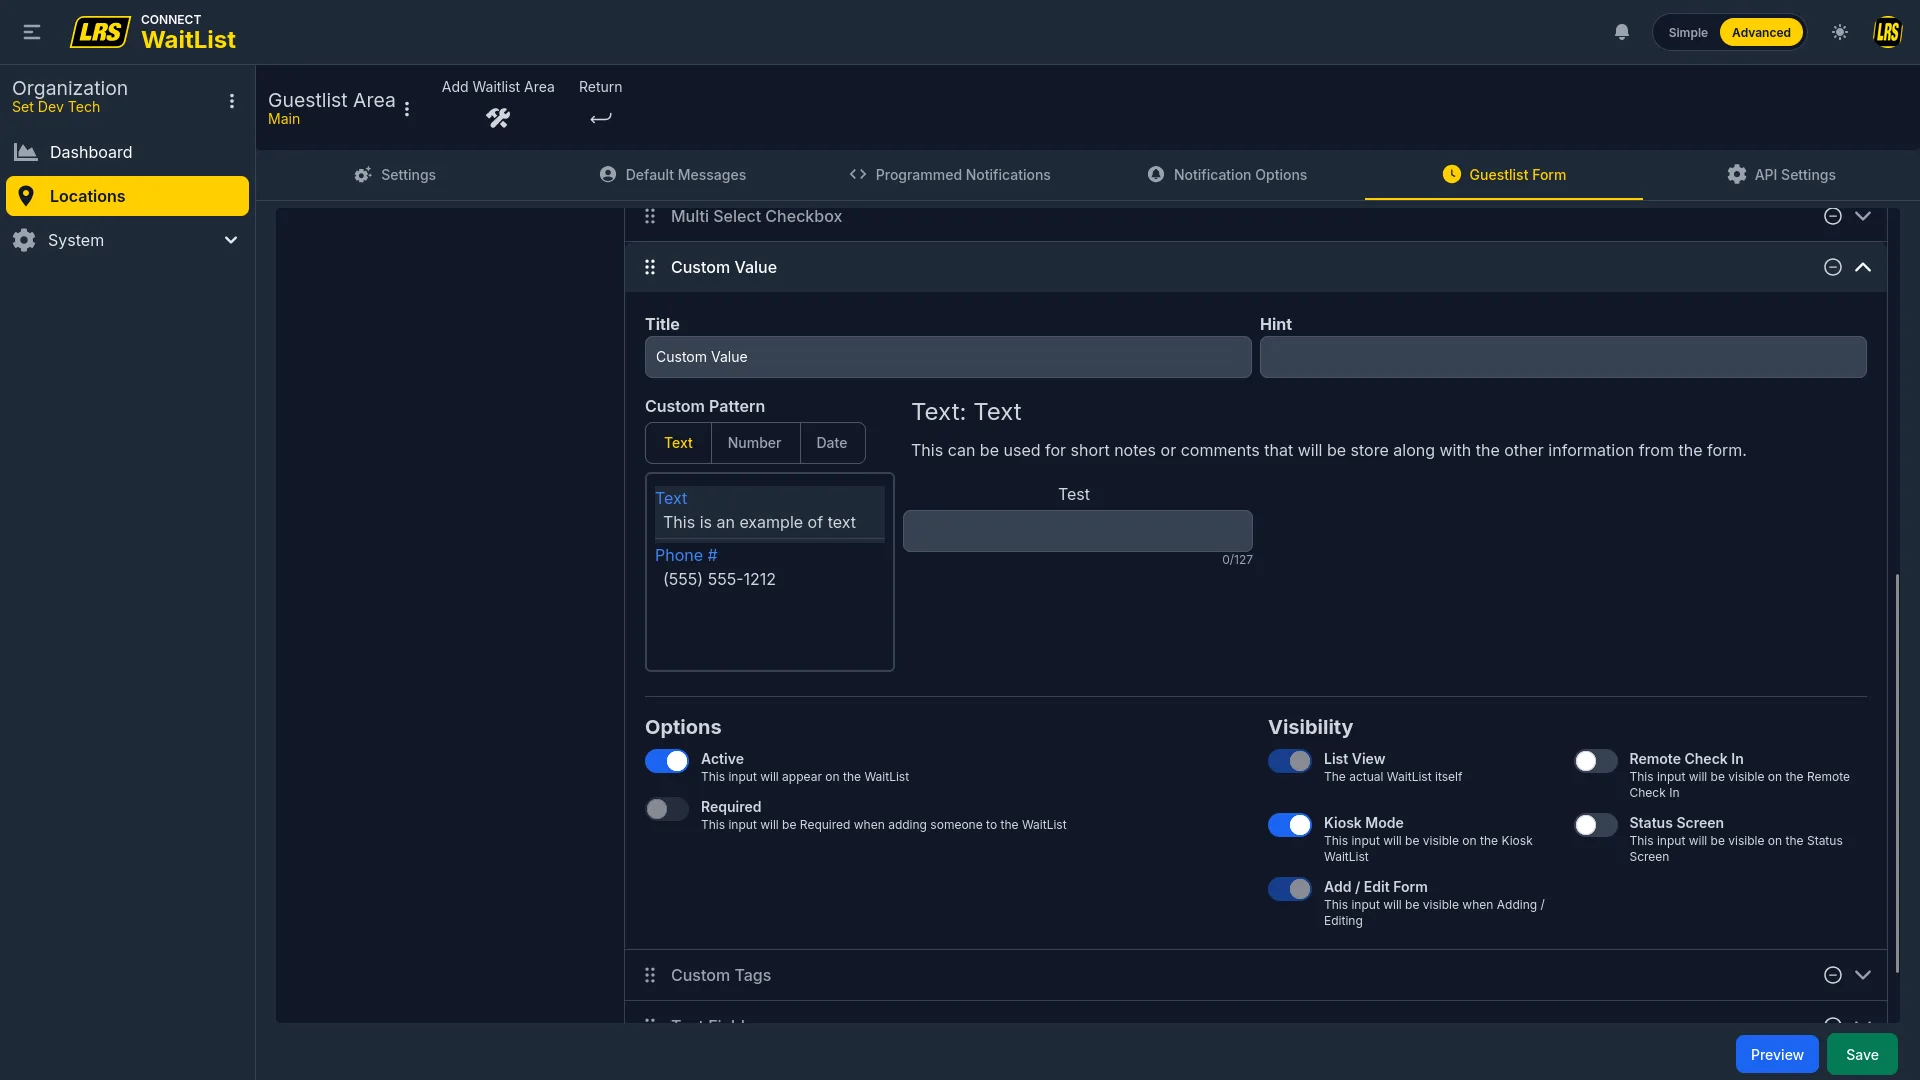
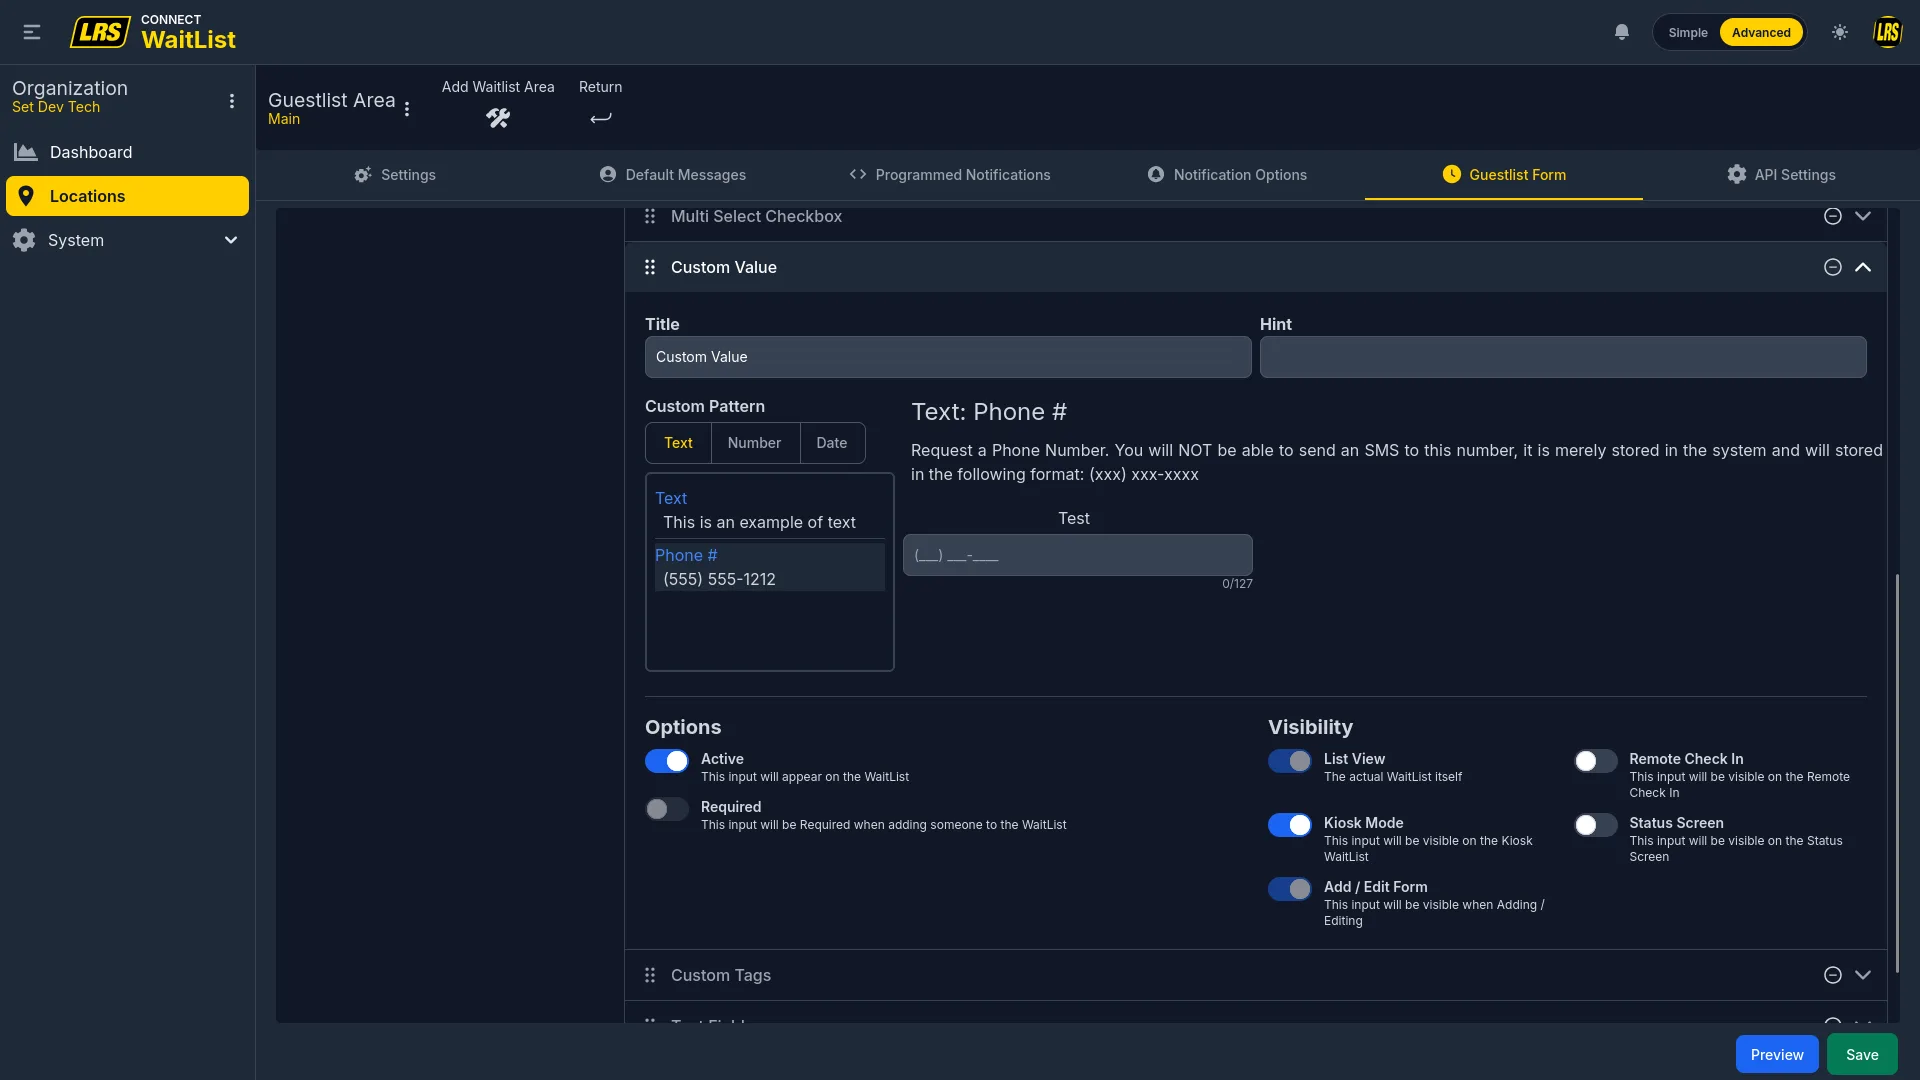
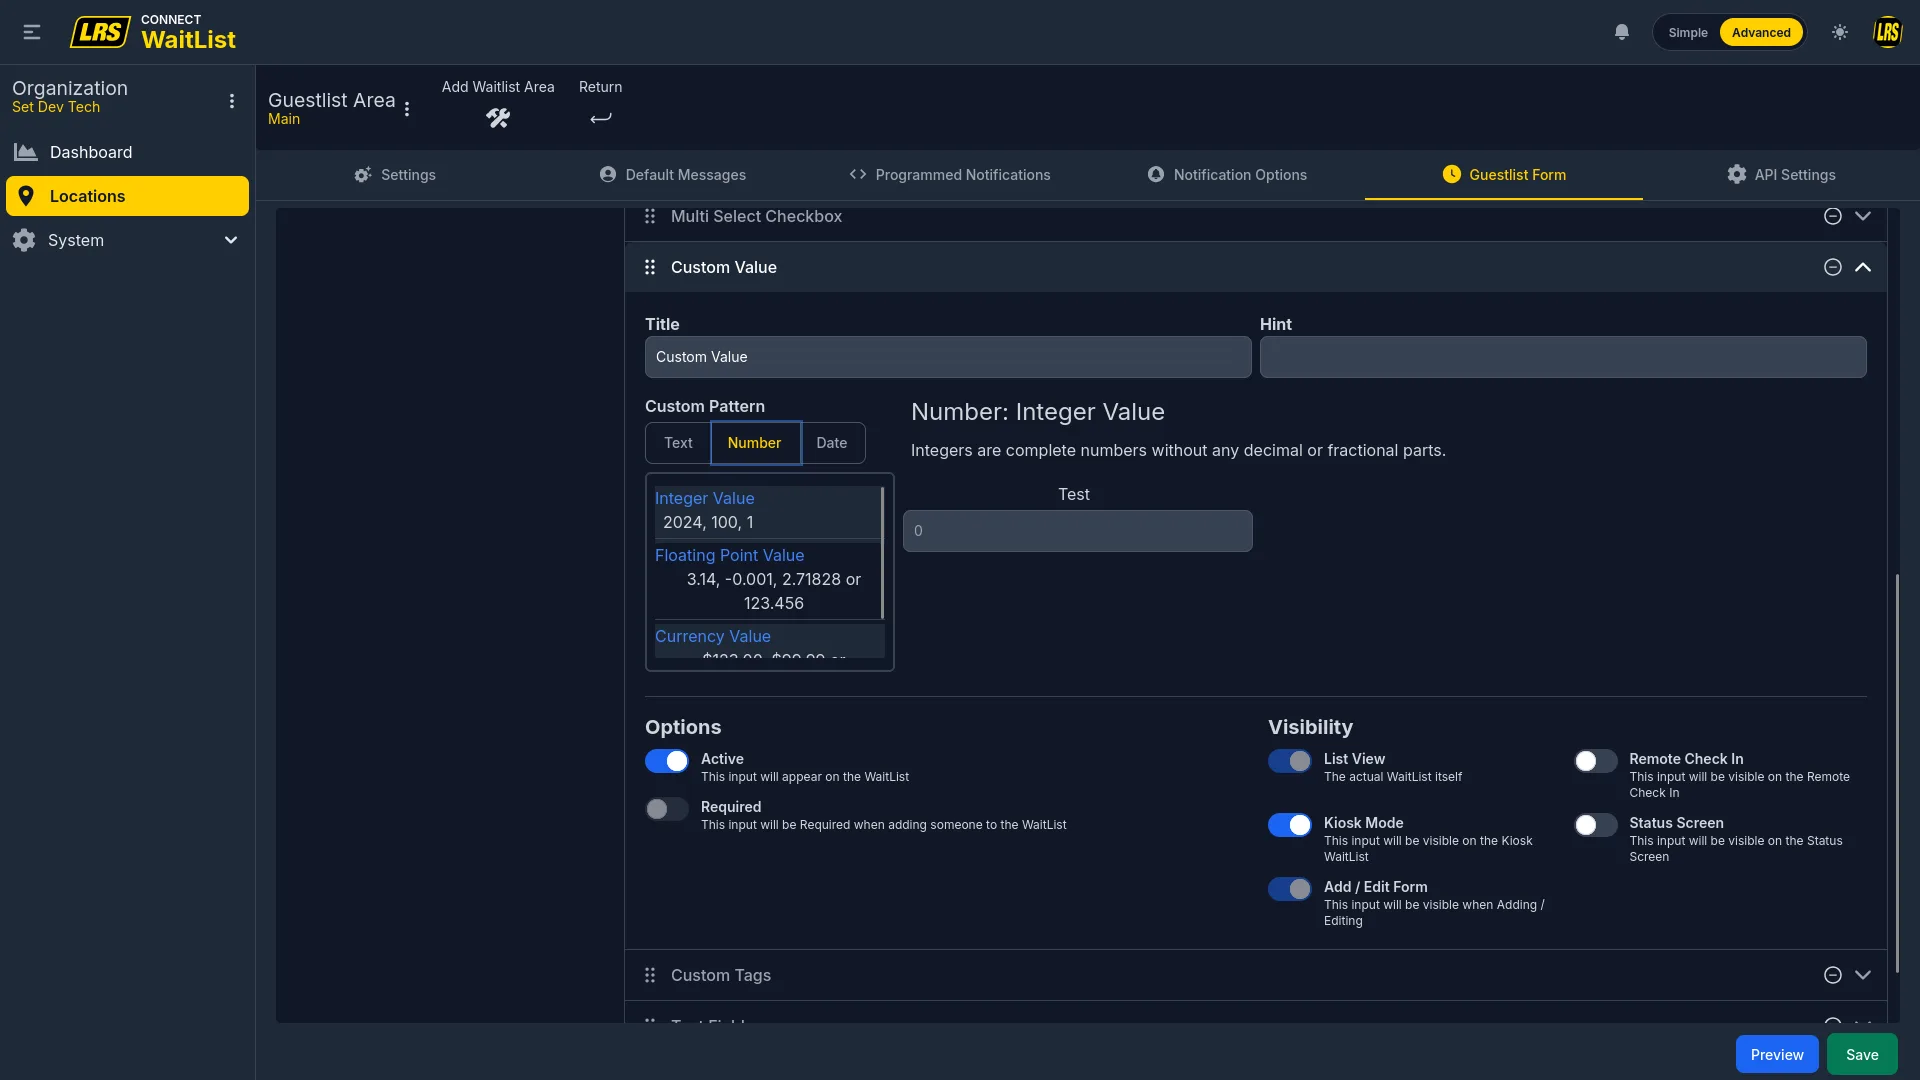
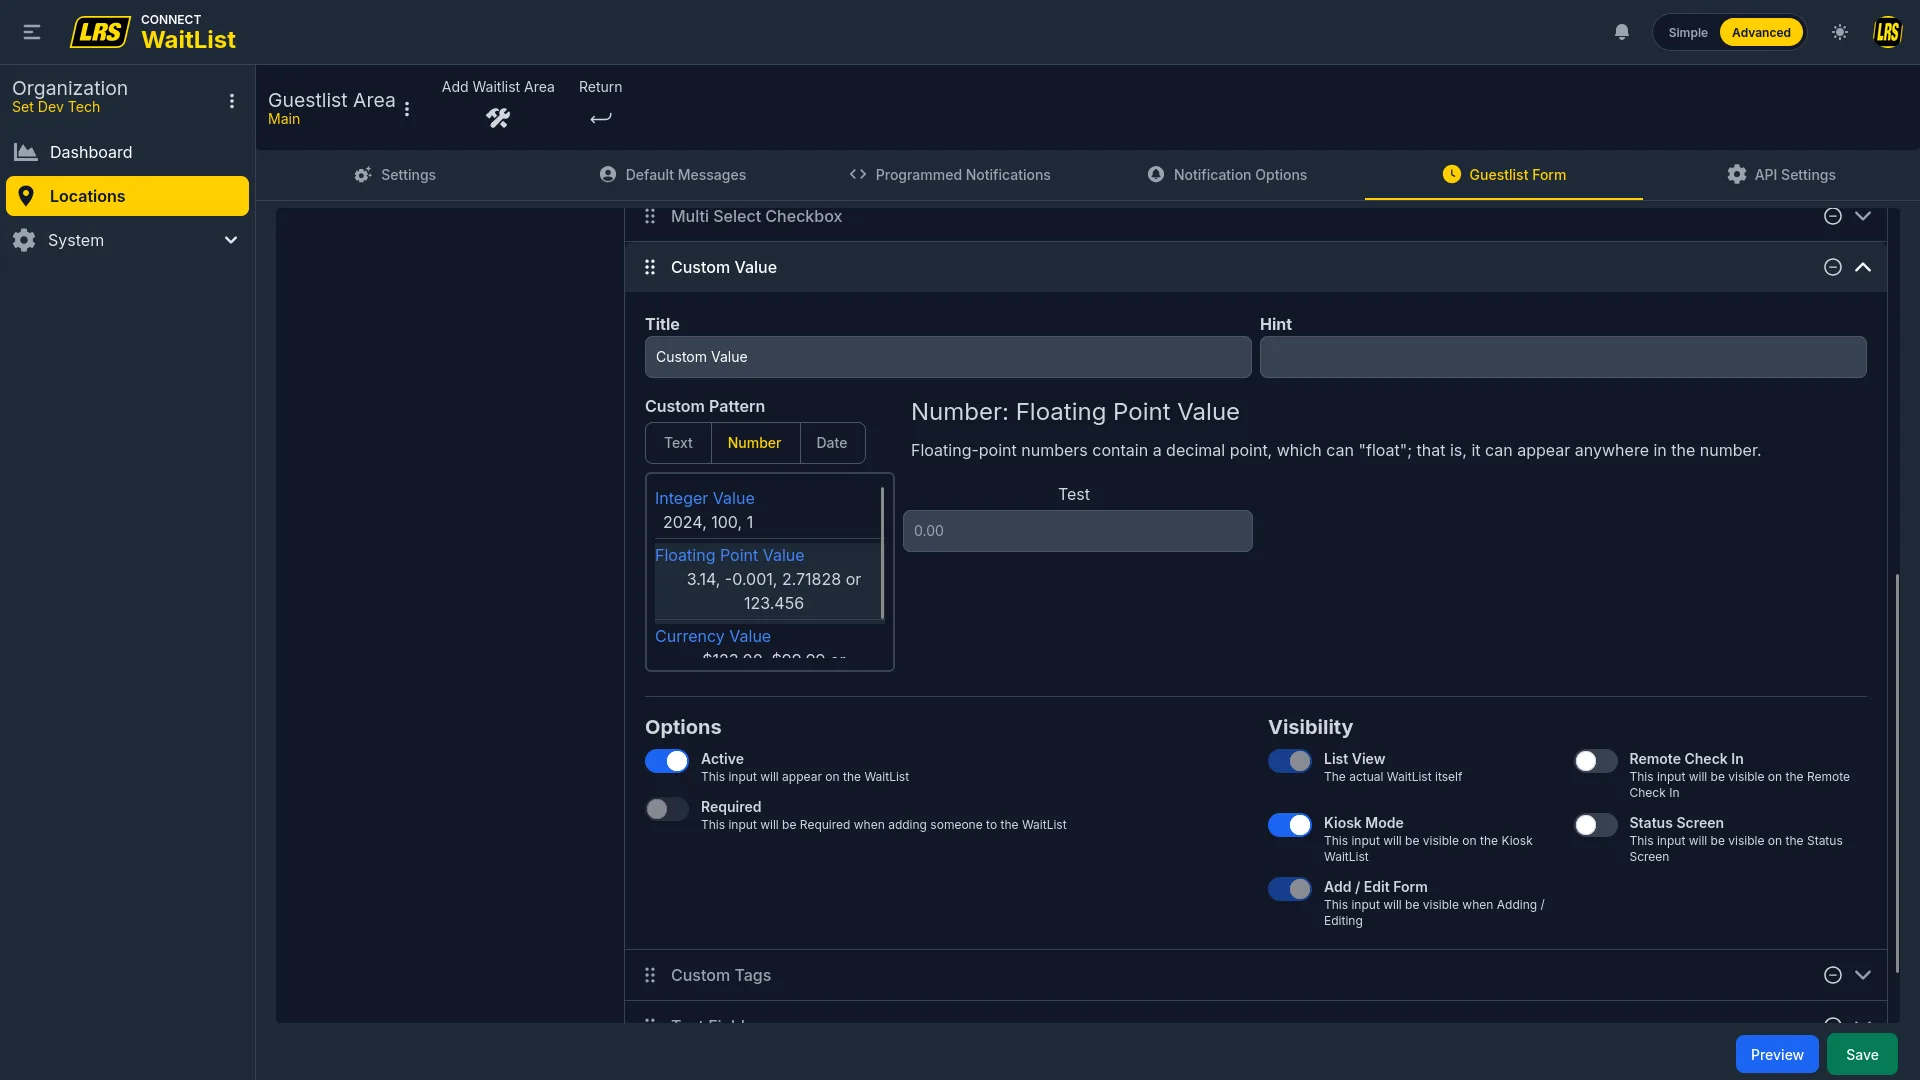
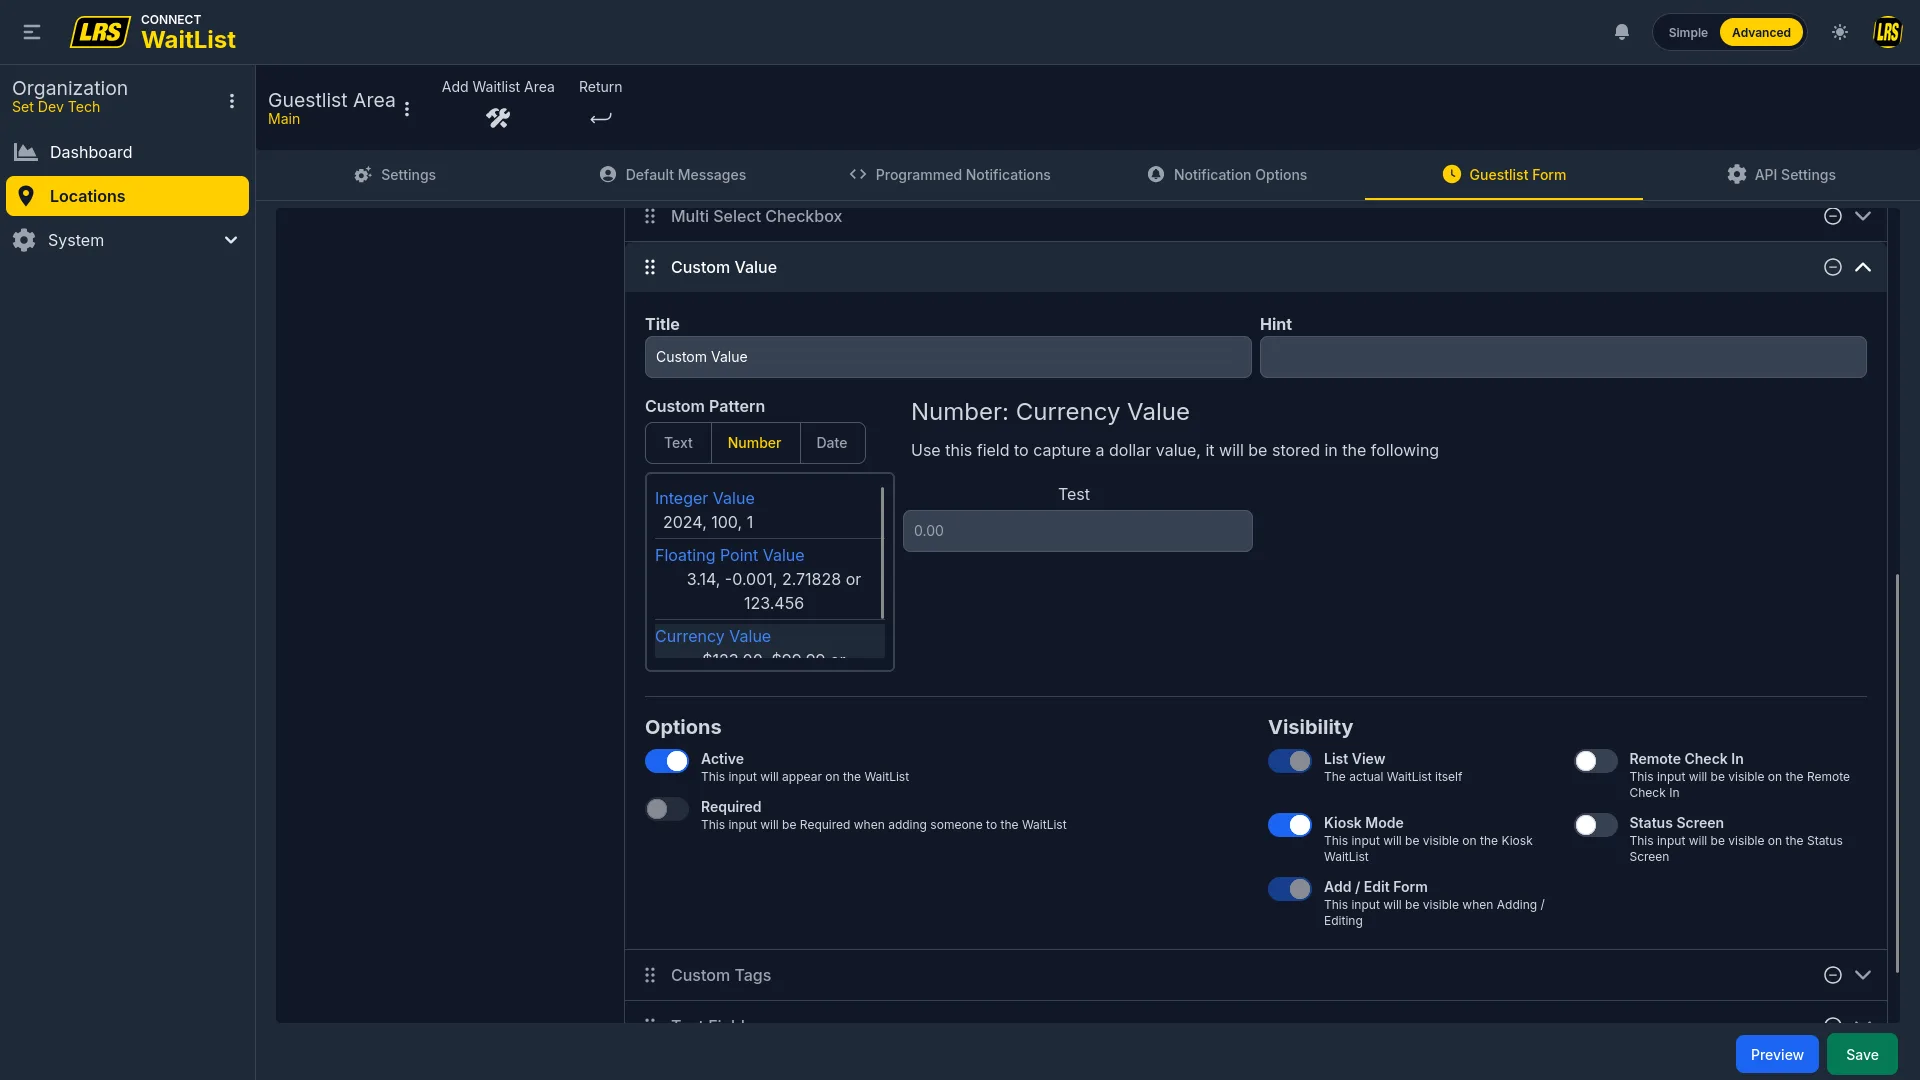
The Custom Value field is a single configurable field that supports six data input patterns. The pattern is selected when configuring the field and determines the input type, validation rules, and how the value is formatted for display.
The Phone # sub-pattern within Text enforces (xxx) xxx-xxxx display formatting. This captures a secondary contact number for data purposes only — it does not replace the Pager/Phone notification field.
The Integer pattern accepts whole numbers only. Use it for table numbers, reservation IDs, or any discrete numeric capture.
The Floating Point pattern accepts decimal numbers. Suitable for measurements or any fractional numeric capture.
The Currency pattern formats the input as a dollar value. Use it for deposits or estimated tabs.
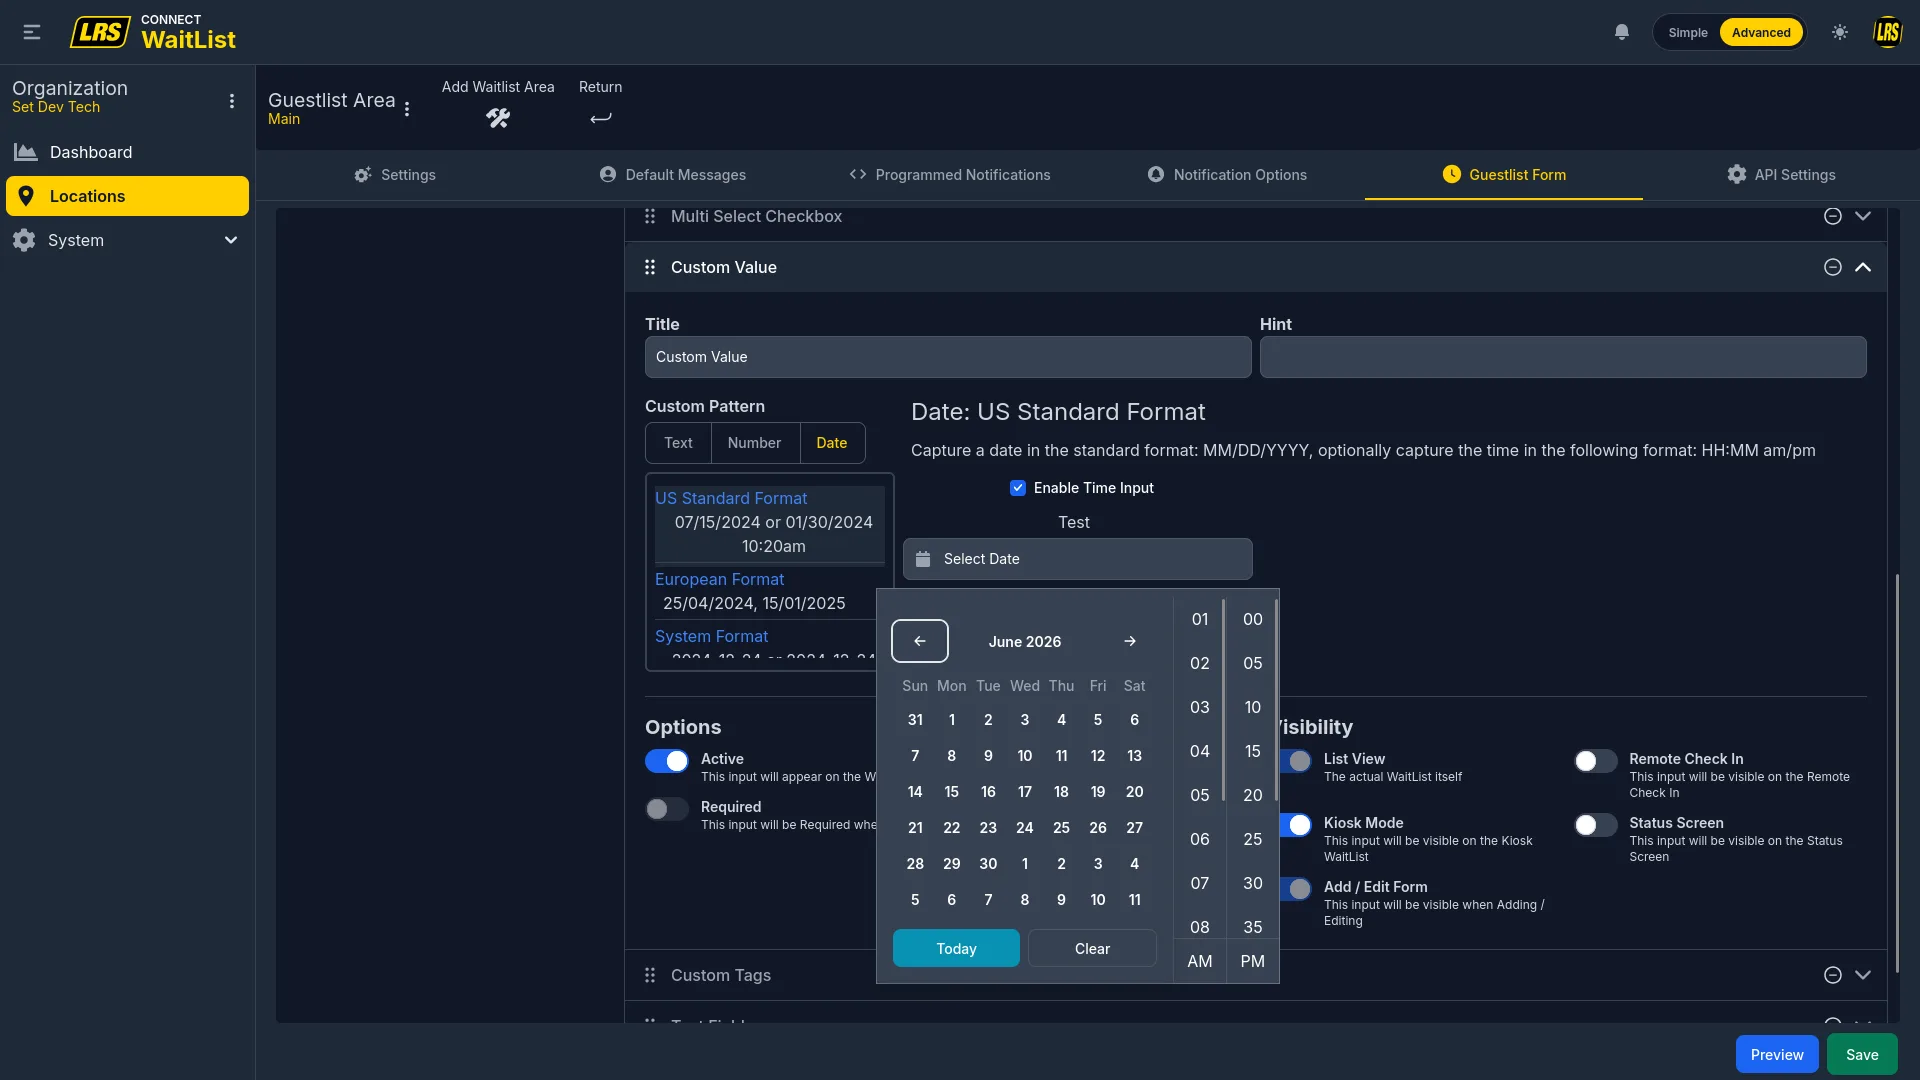
The Date pattern opens a calendar picker. Format options include US Standard (MM/DD/YYYY), European, and System Locale. An optional time component can be enabled alongside the date.
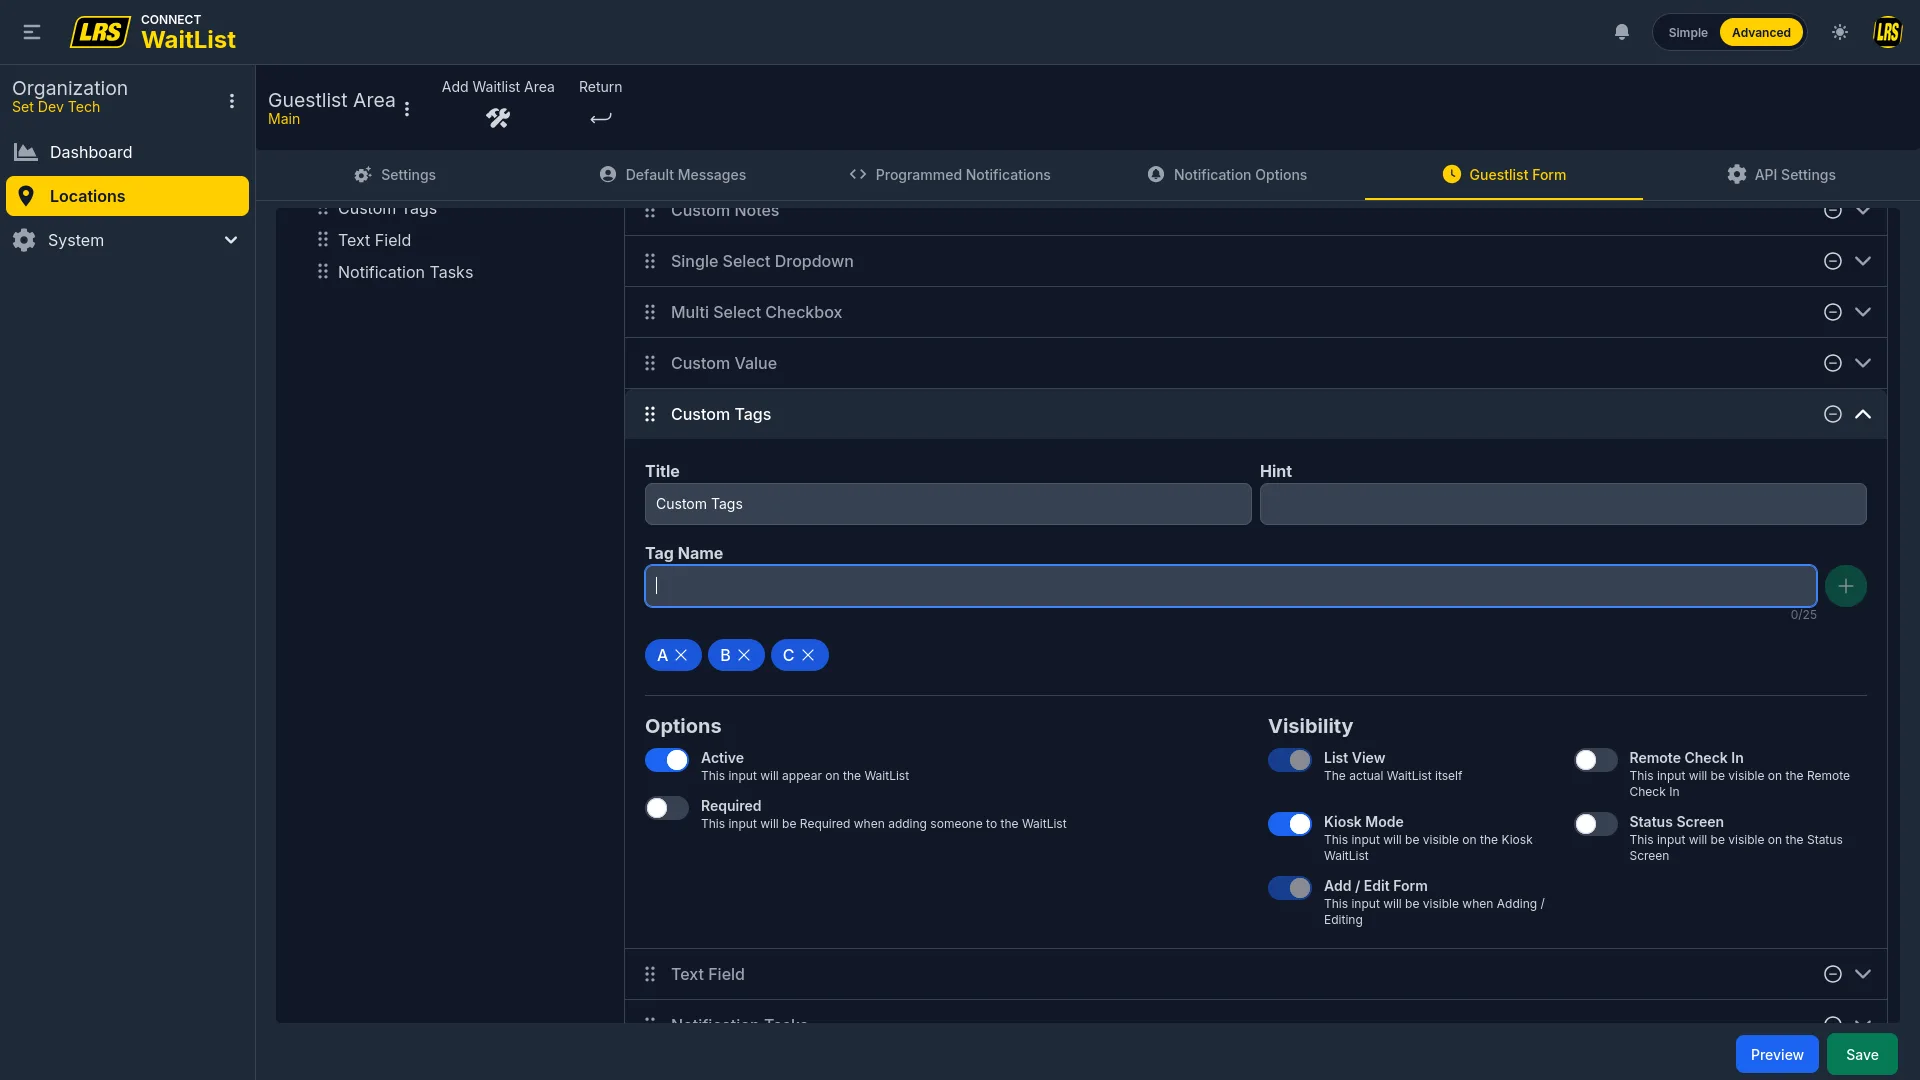
Custom Tags is a free-form tagging field independent of the system Tags field. Predefined options are configured here and appear as default chips; staff can also type new tags in the live app.
Notification Tasks creates a multi-step staff workflow. Each task has a name, a delay before its notification fires, and a completion message. When all tasks complete, the Auto Close Booking option can automatically mark the entry as finished without staff tapping Complete manually.
When multiple custom fields are active they stack in the right panel in the order they were added. Drag to reorder — the stack order is exactly what staff sees in the live entry form.
Before saving the form configuration, use the Preview button at the bottom-right of the Form Designer to render all active fields exactly as staff will see them when adding a new entry. Check field order, required markers, and placeholder text before the location goes live.
7. Org Manager
Organization managers oversee the organizations assigned to them. They configure the organization profile, handle billing accounts, monitor financial health, manage API access, manage org-level users, and build the waitlist structure that location managers later assign to their locations. Creating new organizations requires account admin or owner access — org managers can manage existing ones but cannot add new ones.
The Organizations section in the sidebar provides access to Add Organization (visible to admins and owners only) and Manage Organizations. Org managers see only the organizations they have been assigned to.
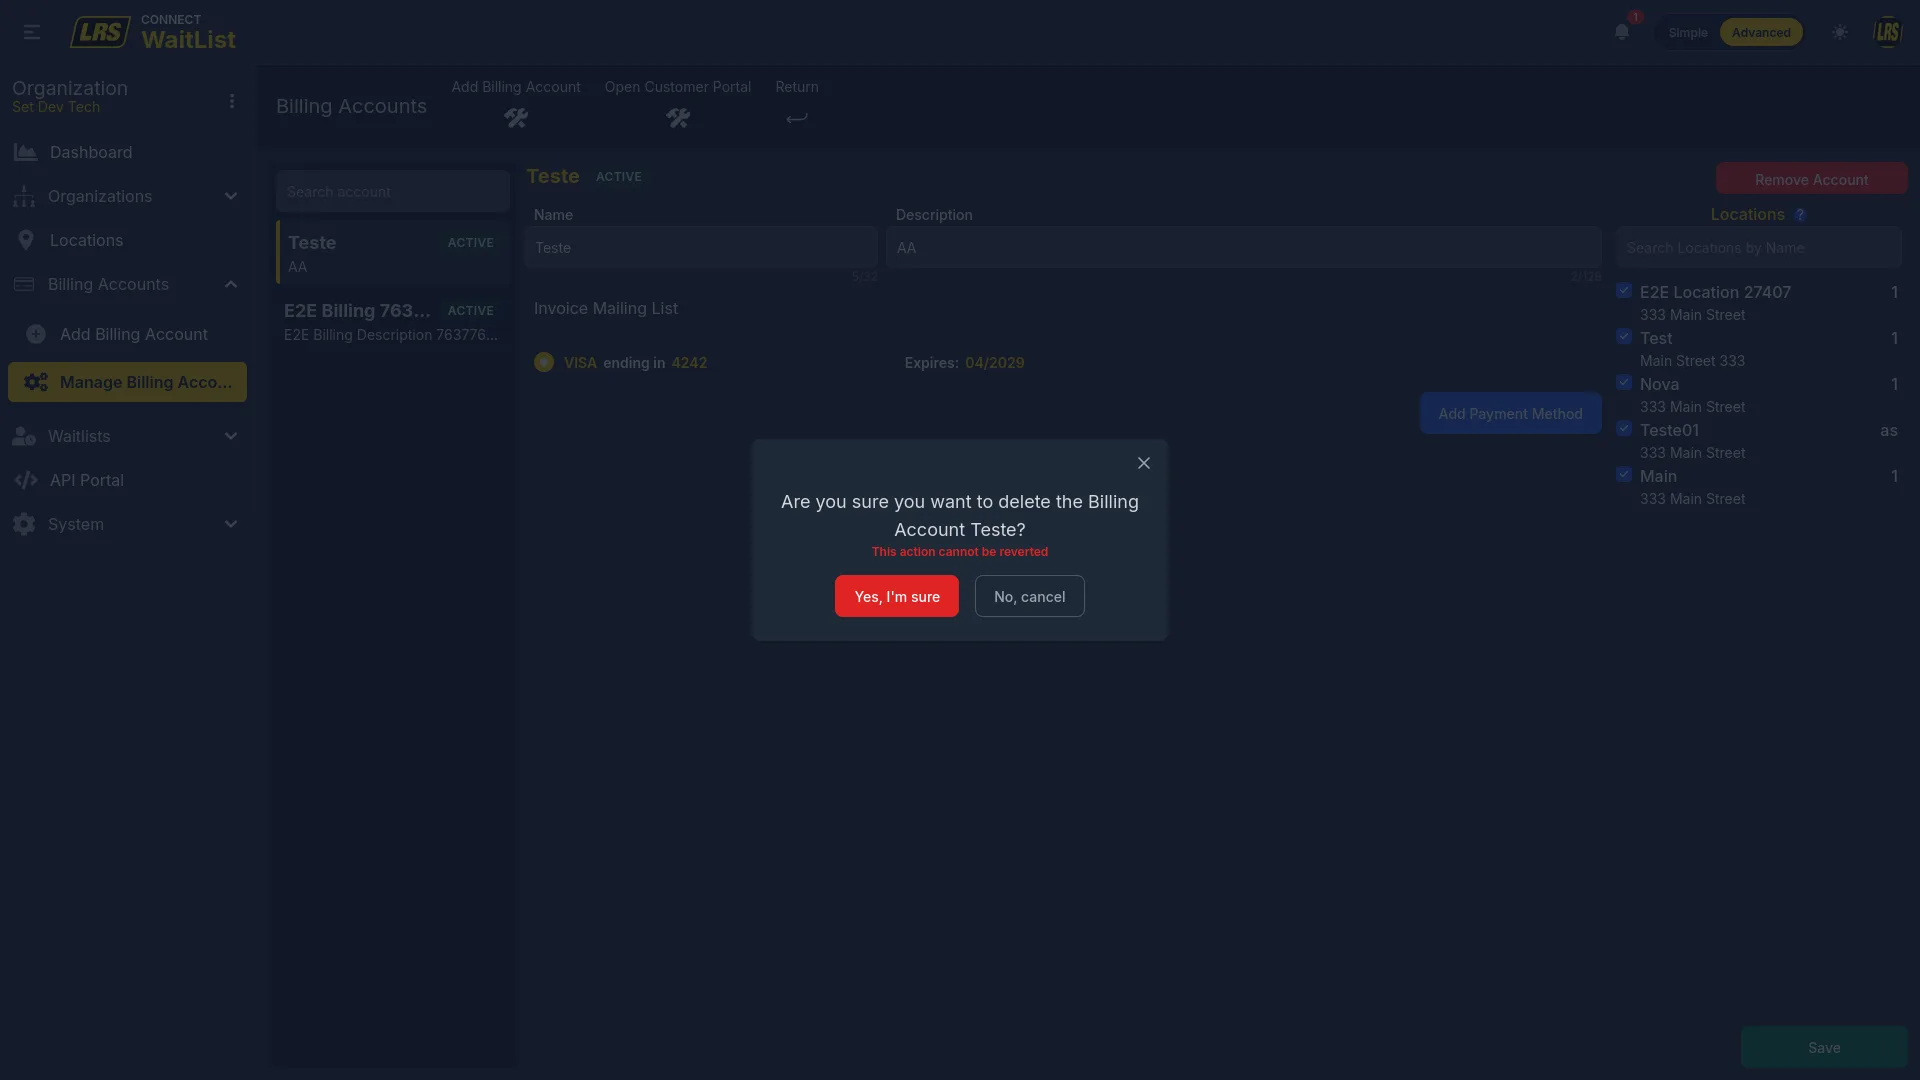
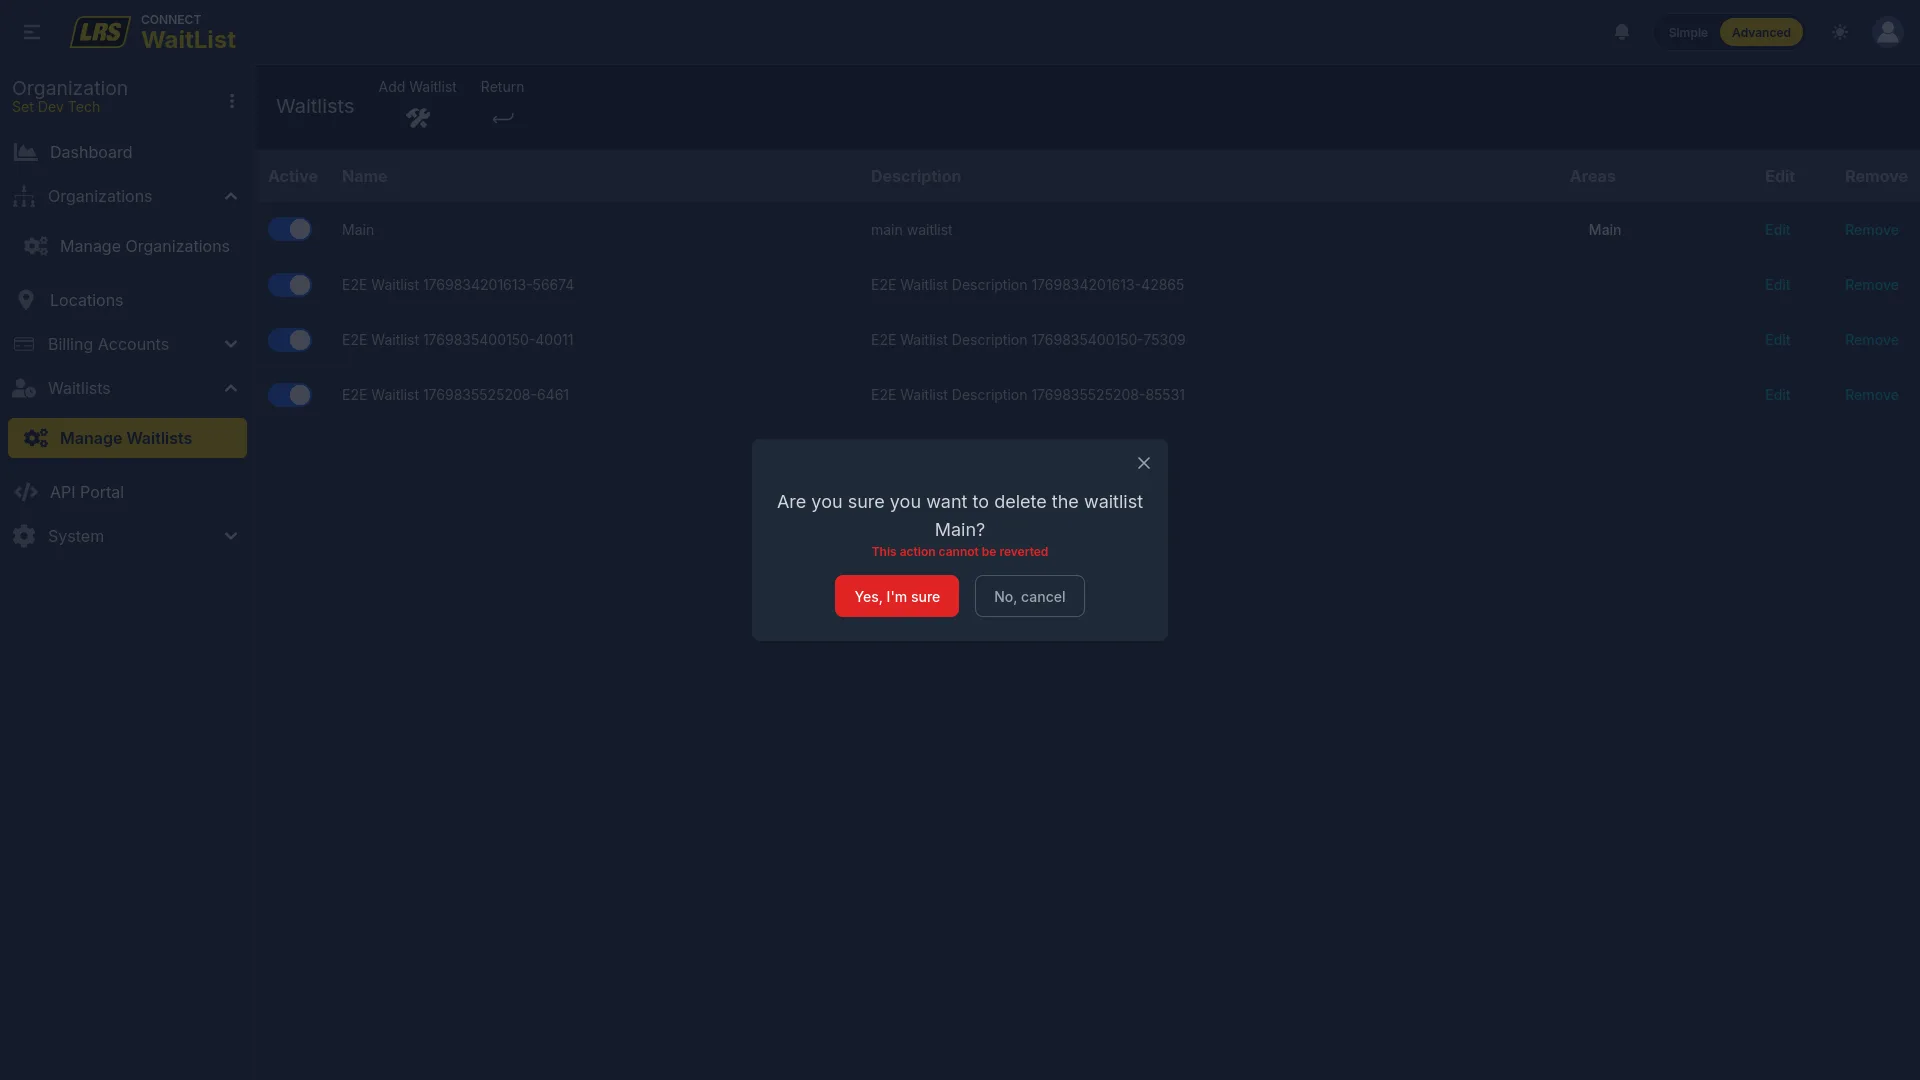
The Manage Organizations list shows all organizations in the account. Toggling Active off deactivates the organization without deleting it. Remove is only enabled when the organization is inactive.

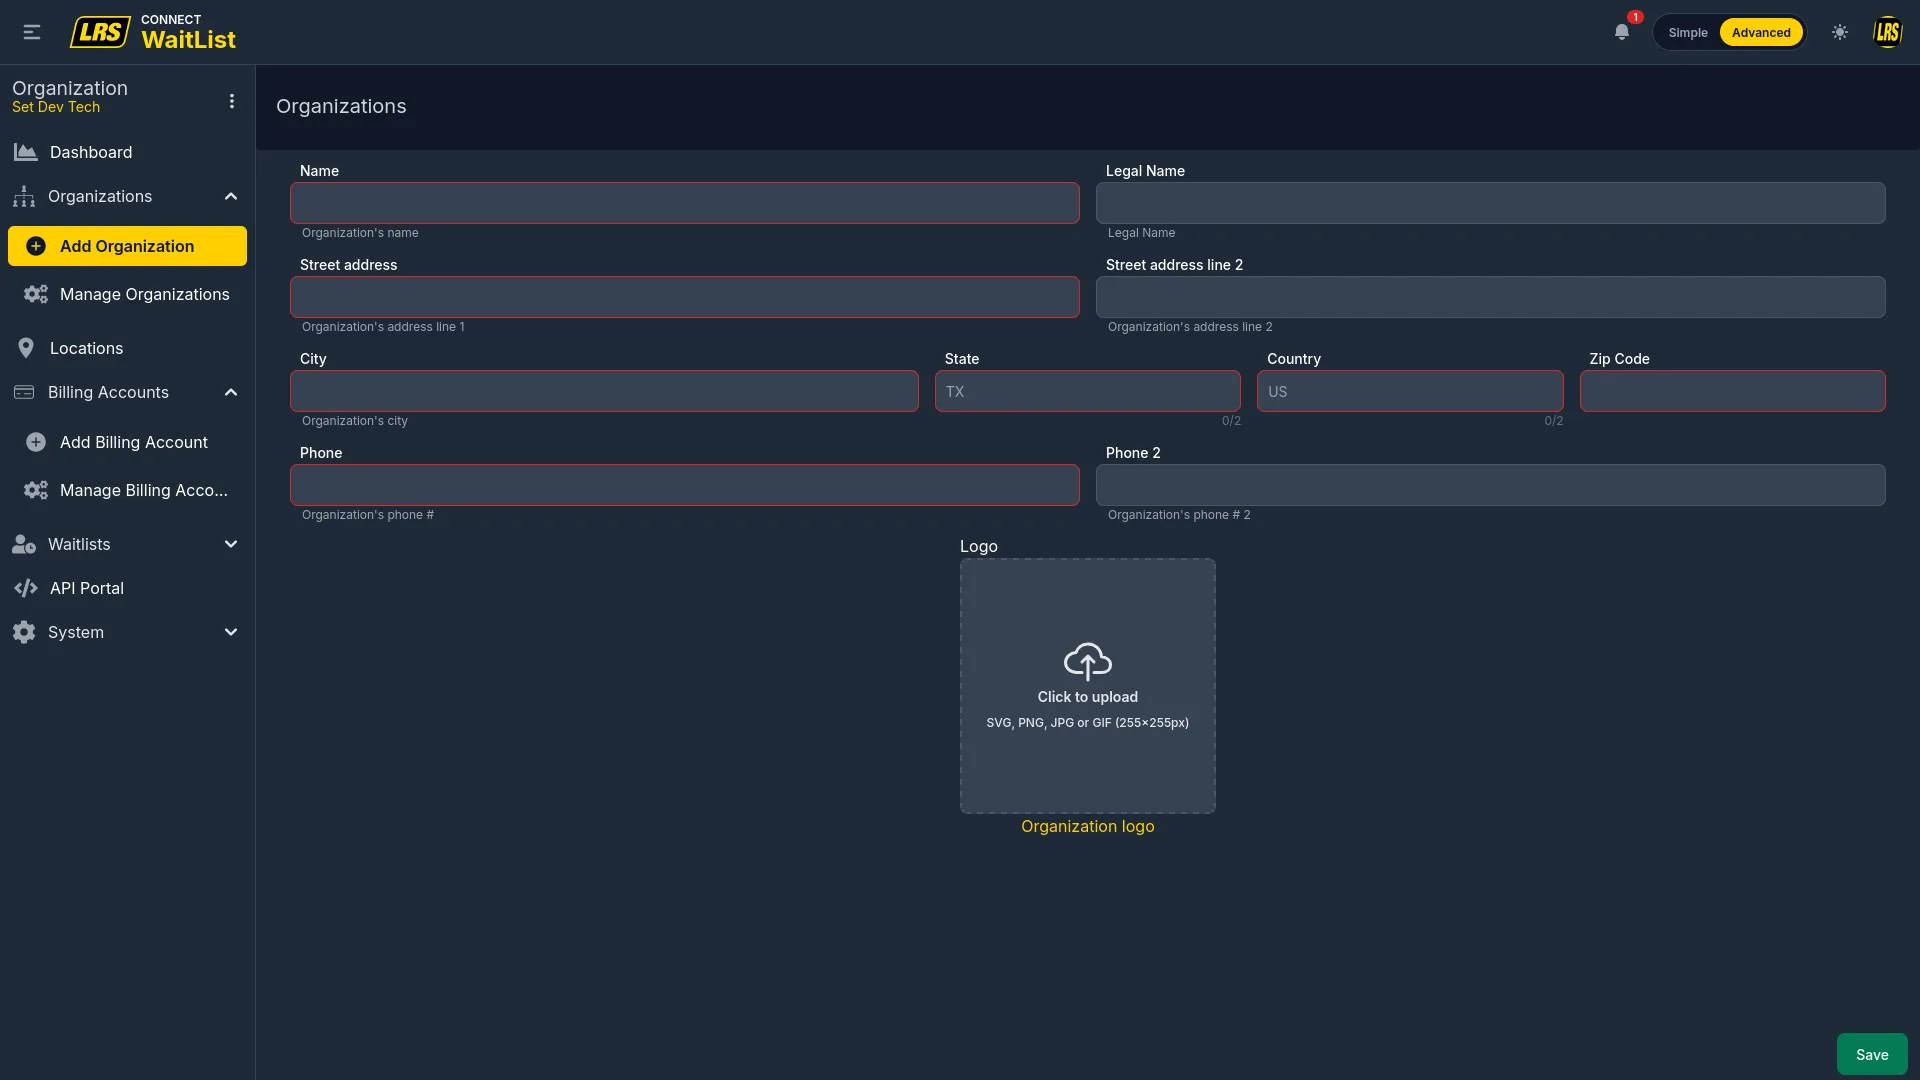
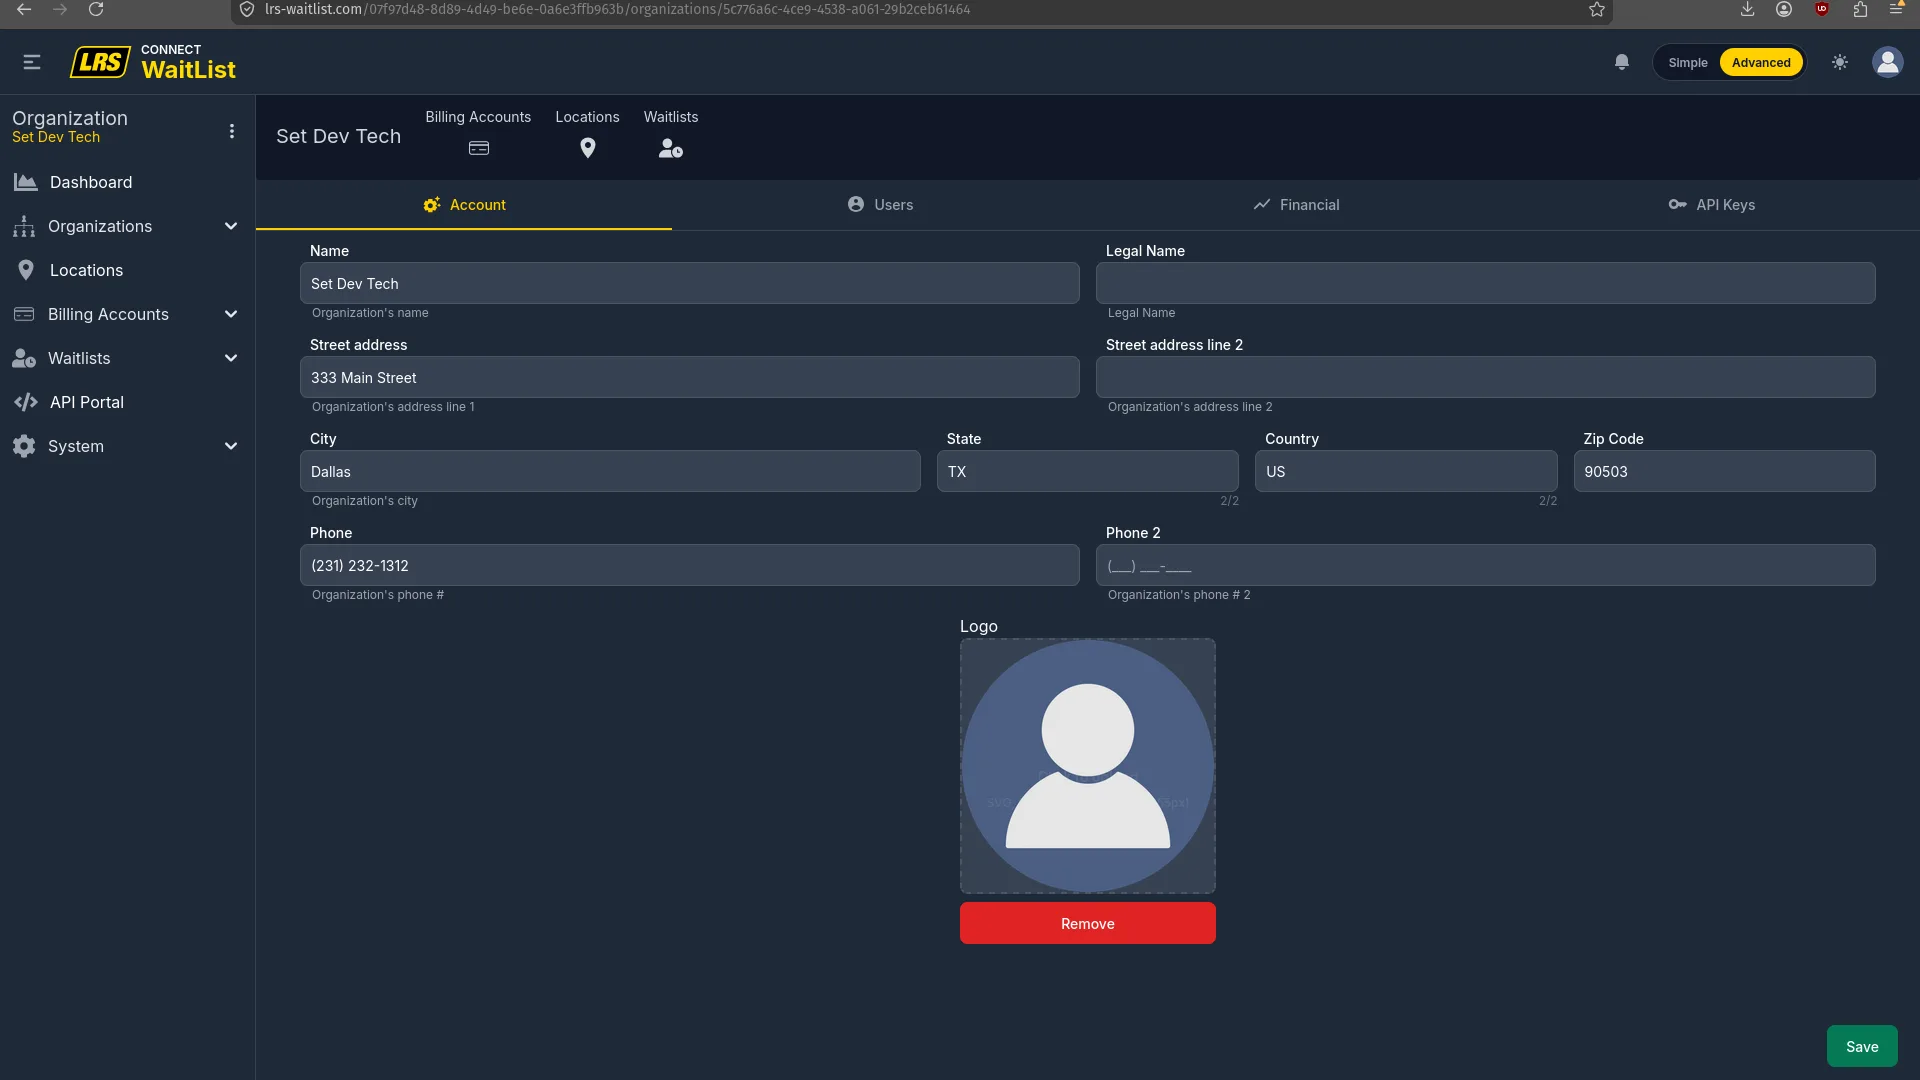
The Organization Account tab stores the profile and logo. The shortcut bar at the top of the edit view navigates directly to Billing Accounts, Locations, Waitlists, and the Add User flow without losing the organization context.
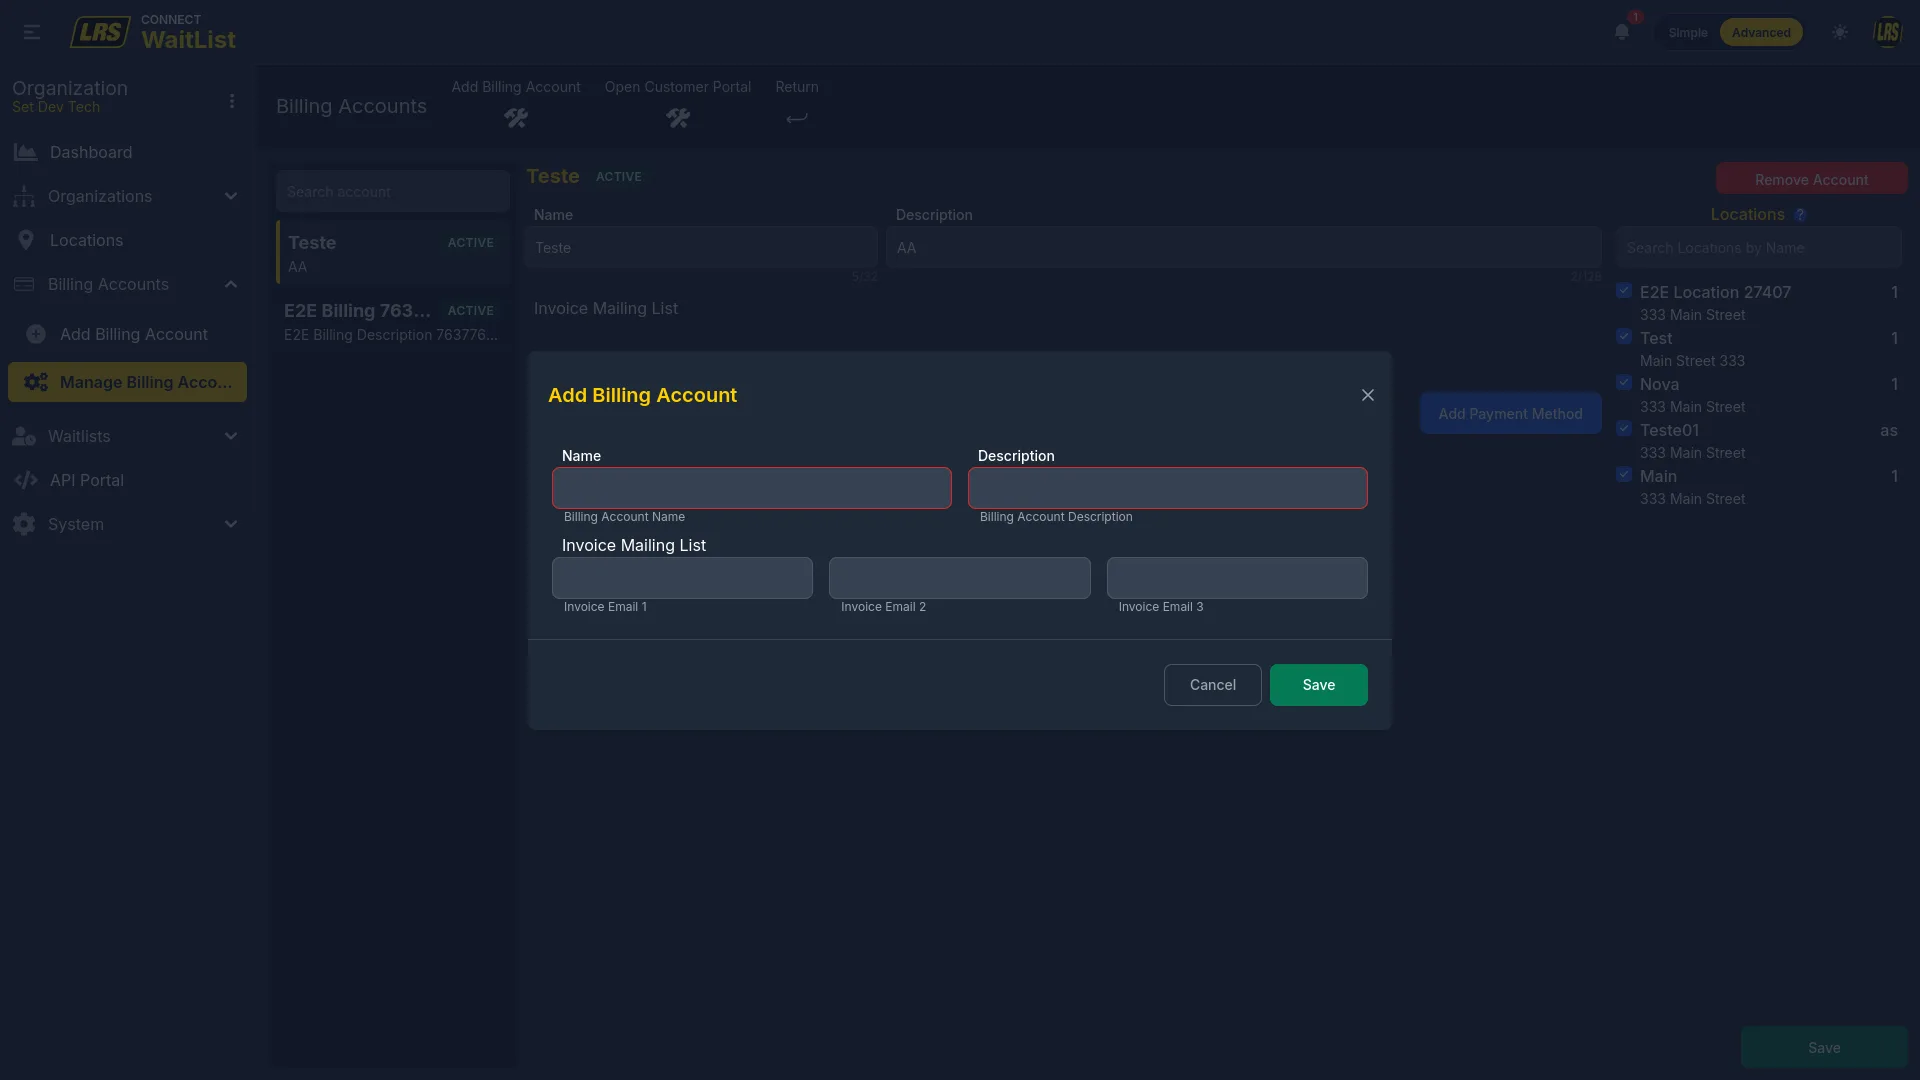
A billing account stores a payment method, invoice recipient emails, and the list of locations whose service plan charges are billed to it. Each location must be assigned to exactly one billing account. The left panel lists all billing accounts; the right panel shows the selected account's payment method, invoice recipients, and the location checkboxes.
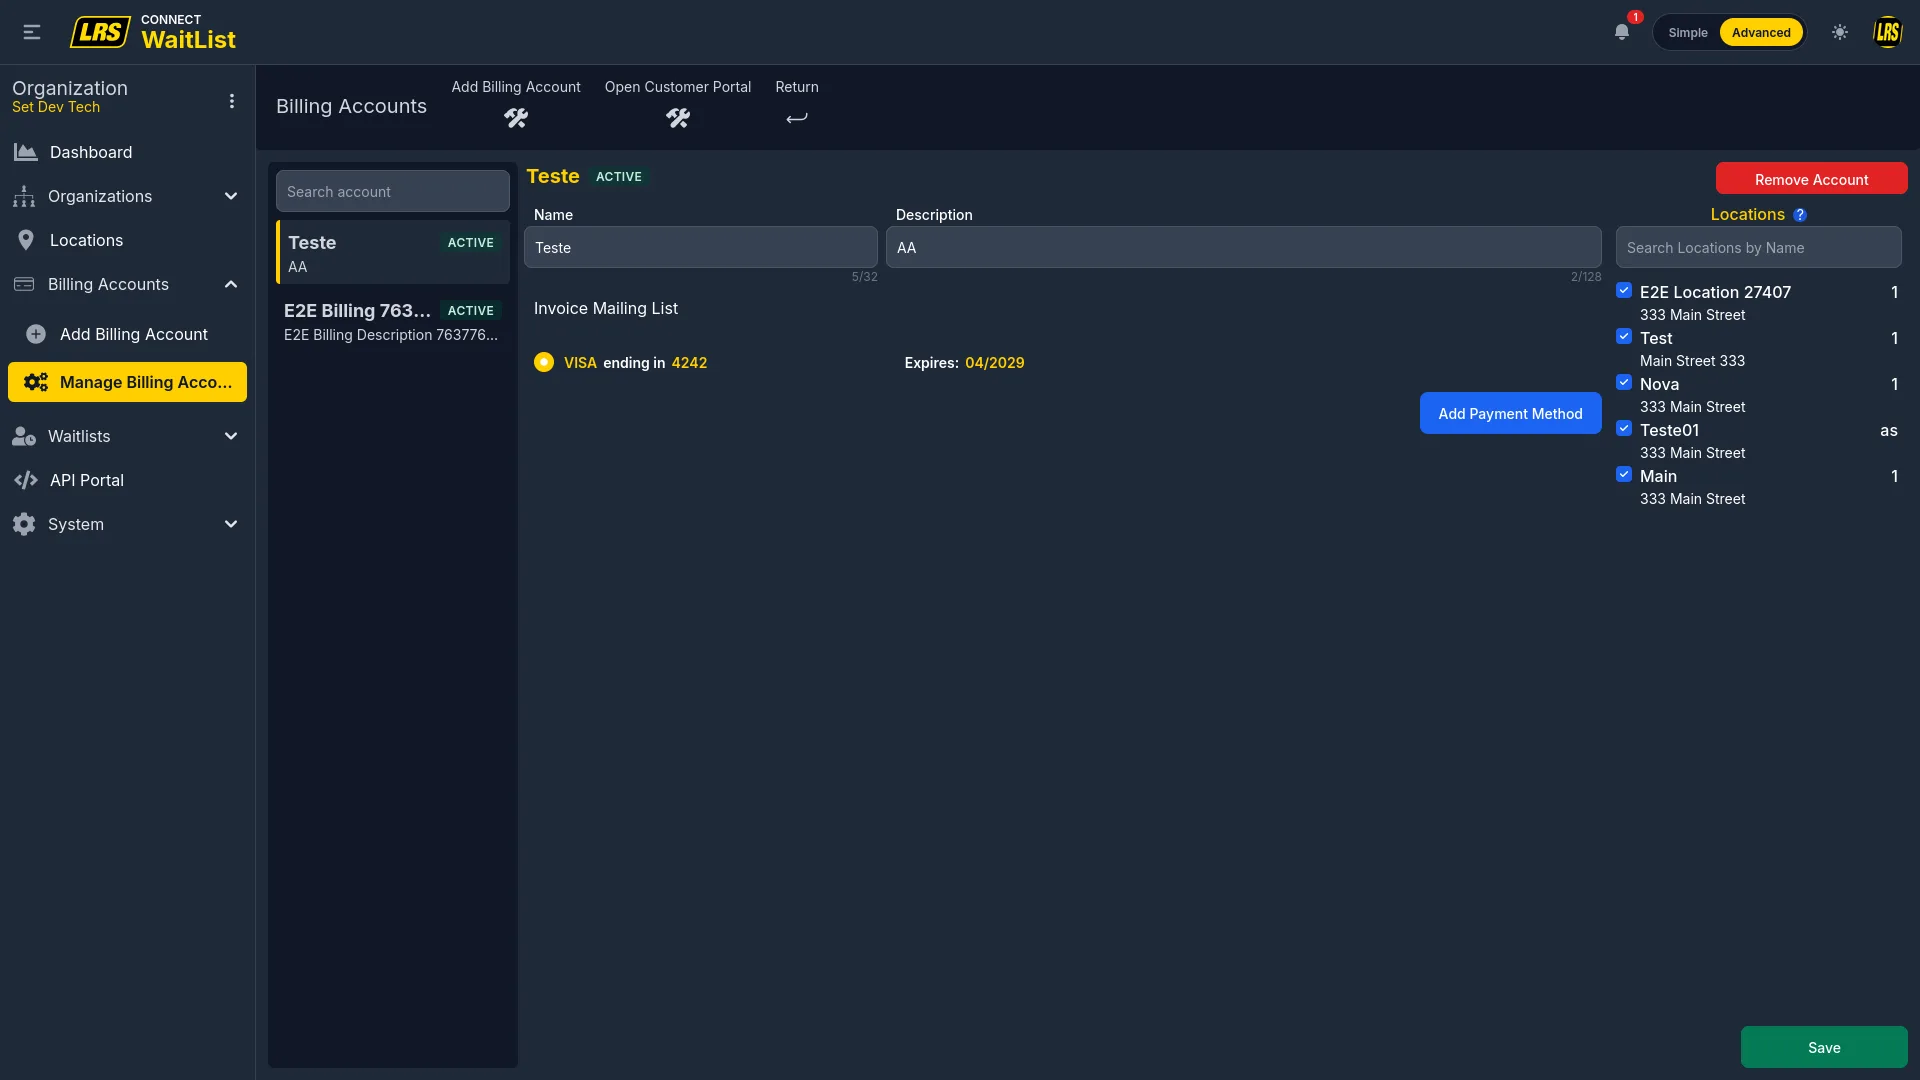
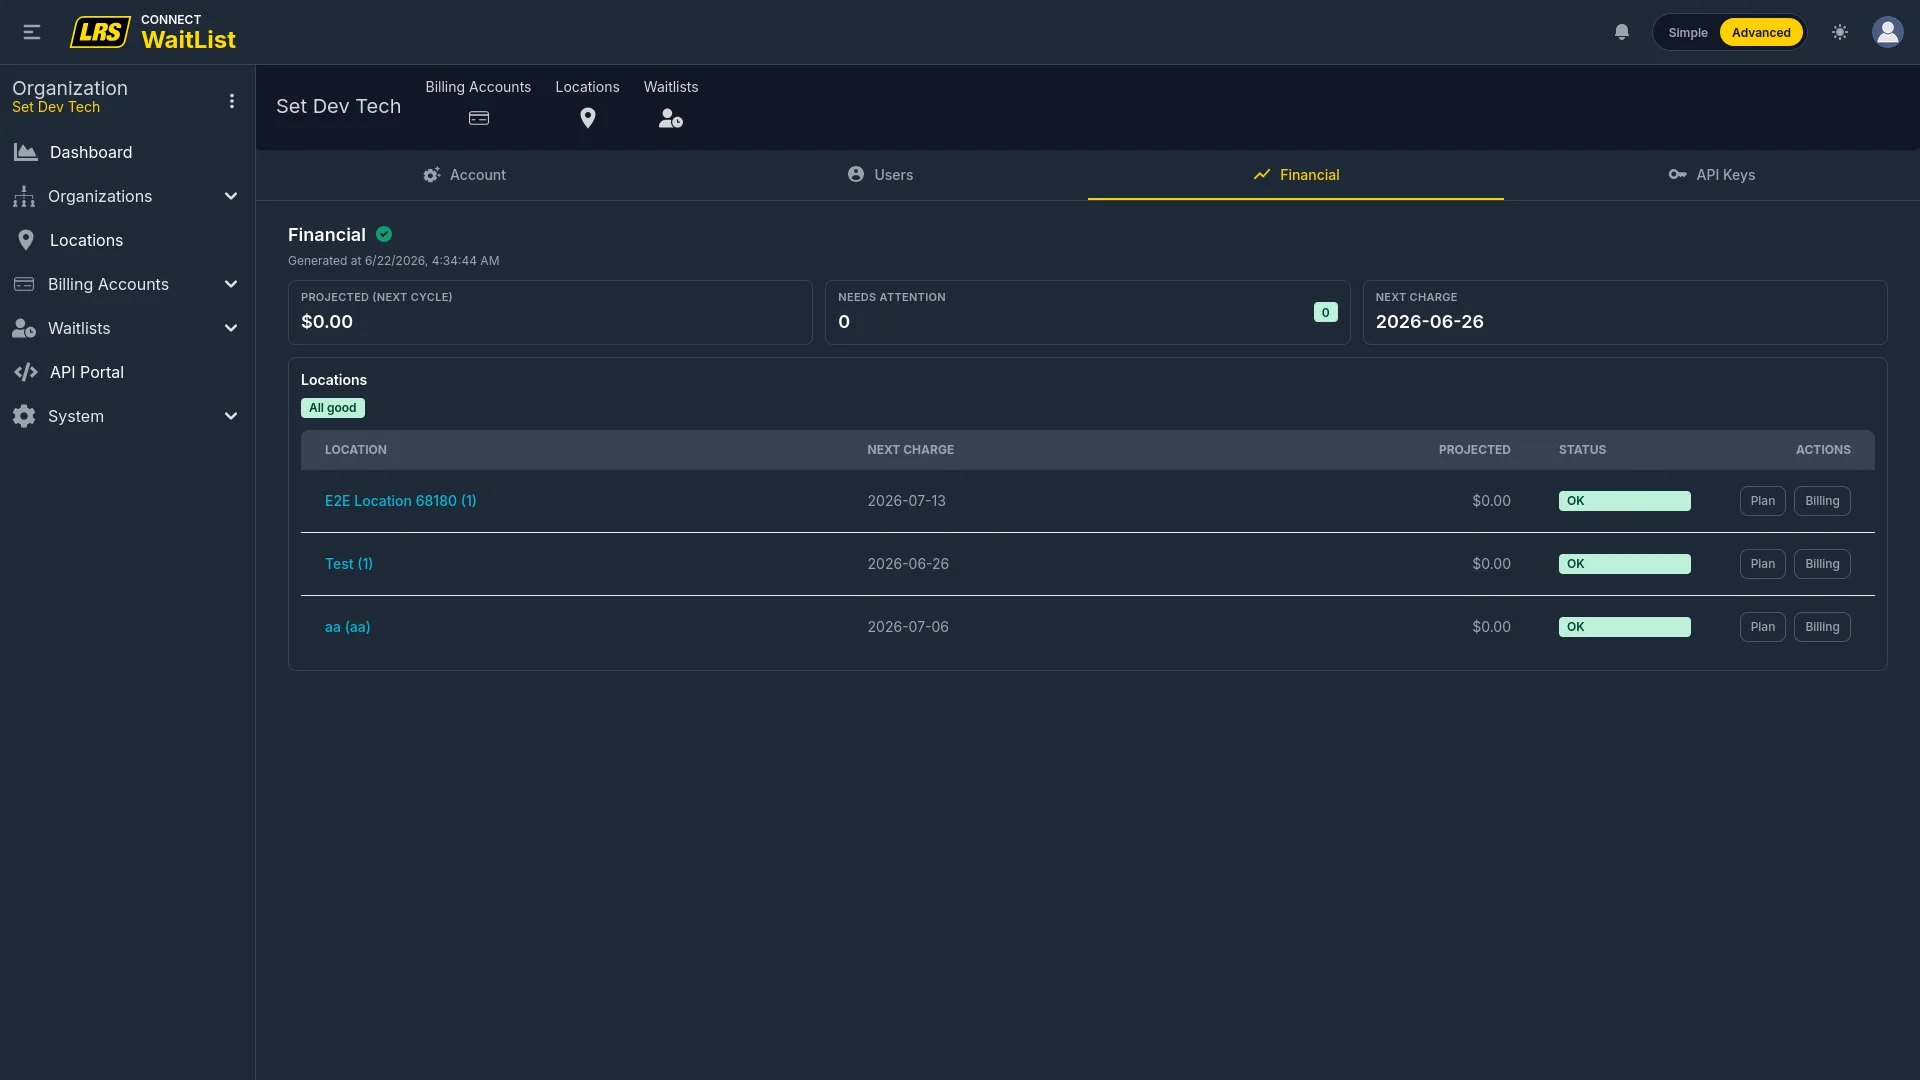
The Financial tab provides a billing health overview for the organization. Three stat pills summarize the picture: Projected (next cycle) shows the total expected charge for the next renewal, Needs attention counts locations with missing billing, expired plans, or payment issues, and Next charge shows the earliest upcoming renewal date. The per-location table lists each location with its next renewal date, projected amount, and a status badge — and includes Plan and Billing (or Issue) action buttons that link directly to the Service Plan tab or Billing Accounts for any location that needs fixing.
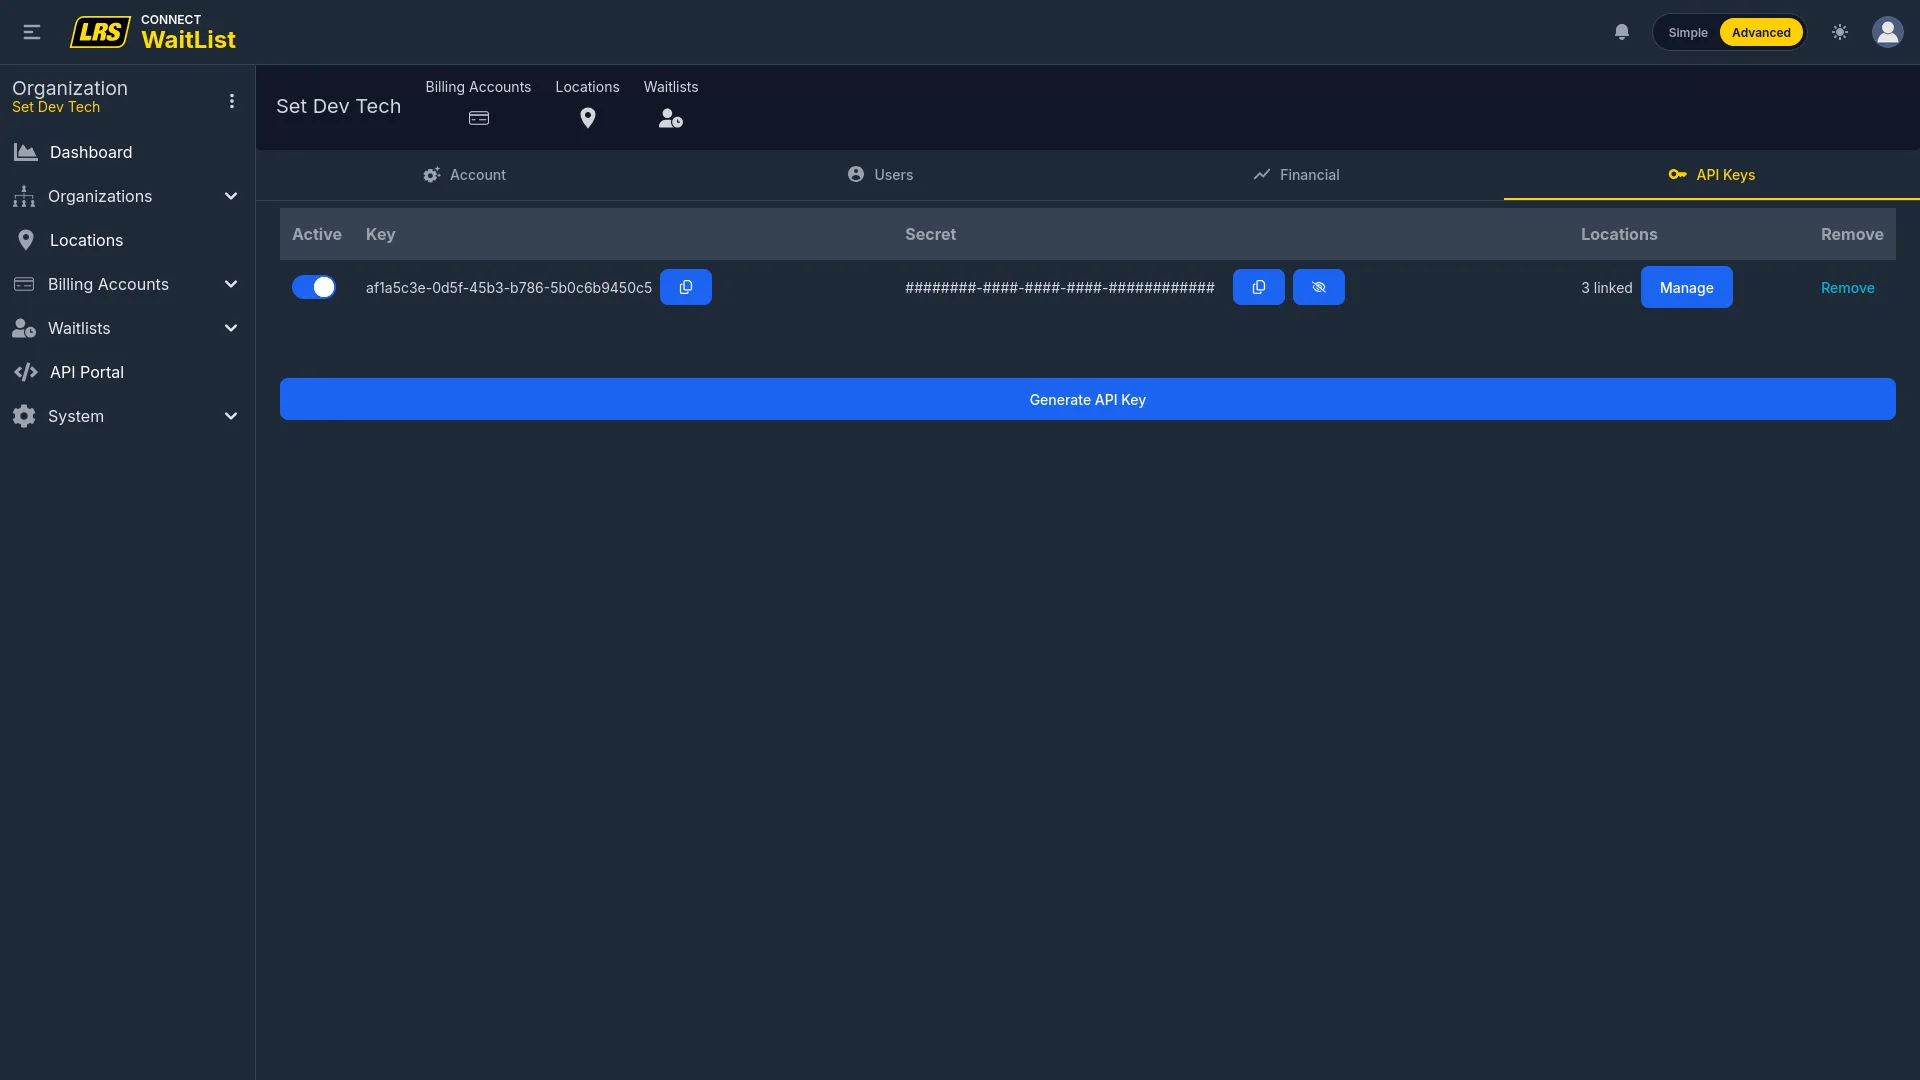
API keys are generated per organization and give external systems controlled access to the locations linked to the key. The table shows each key's Active toggle, Key ID (with a copy button), Secret (masked by default with reveal and copy buttons), and a Manage button. Clicking Manage opens a modal where you assign the specific locations this key can access.
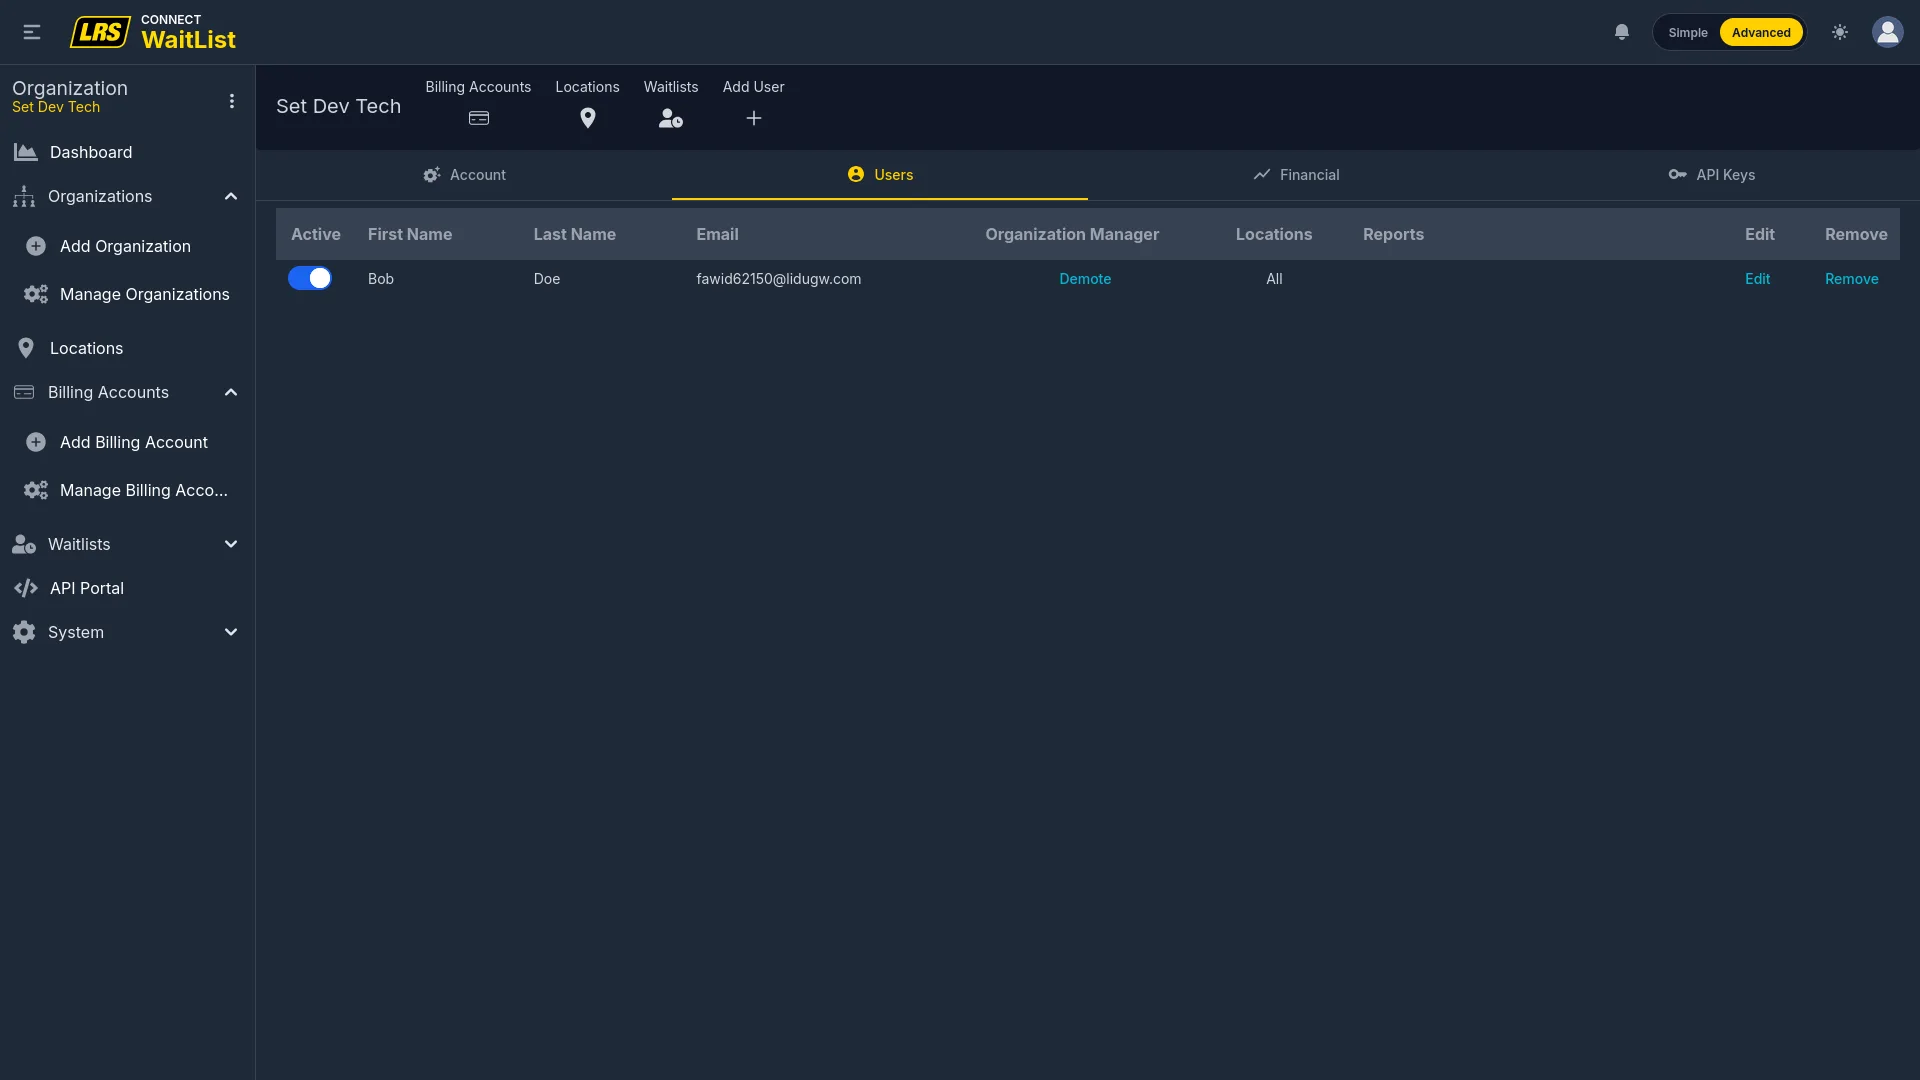
The Users tab inside an organization shows every user with access to it. The Organization Manager toggle on each row grants or revokes org-manager access to this specific organization. Toggling it off does not affect the user's access to other organizations or their location roles.

Waitlists are created at the organization level and assigned to specific locations from within each location's Guestlist tab. A single waitlist can be shared across multiple locations. The recommended workflow is to create the waitlist structure here — including all areas — before setting up individual locations.
Areas added at the org level create the base configuration that all locations using this waitlist inherit. Location managers can override individual settings from within their location's guestlist area tabs. At the org level, areas have four tabs: Settings, Default Messages, Notification Options, and Waitlist Form. The Programmed Notifications and API Settings tabs are only available when the area is accessed from within a location — they require the location context to function.
The Settings tab at the org level configures the area's Active state, name, description, Auto Clear timeout, and Target Wait Time. These values become the default for every location that uses this area. Individual locations can override them locally without affecting the org-level baseline.
Default Messages at the org level define the Confirmation, Notification, Check-in, and Cancel message templates that locations inherit. Location managers can customize the text for their specific location from within the location's guestlist area Default Messages tab without altering the org-level baseline.
Notification Options at the org level set the default pager hardware type (LRS Guest, Alpha Guest, or Both) and the default alert sound pattern. These defaults propagate to every location using this area and can be overridden per location.
The Waitlist Form tab at the org level opens the same Form Designer interface available at the location level. Fields added and configured here define the baseline form for all locations. Location managers can adjust field visibility and ordering for their specific location without changing the org-level form.
8. Admin / Account Owner
Account admins and owners have access to System in the sidebar, which contains global user management and the auditing log. These features are not visible to org managers or location managers.
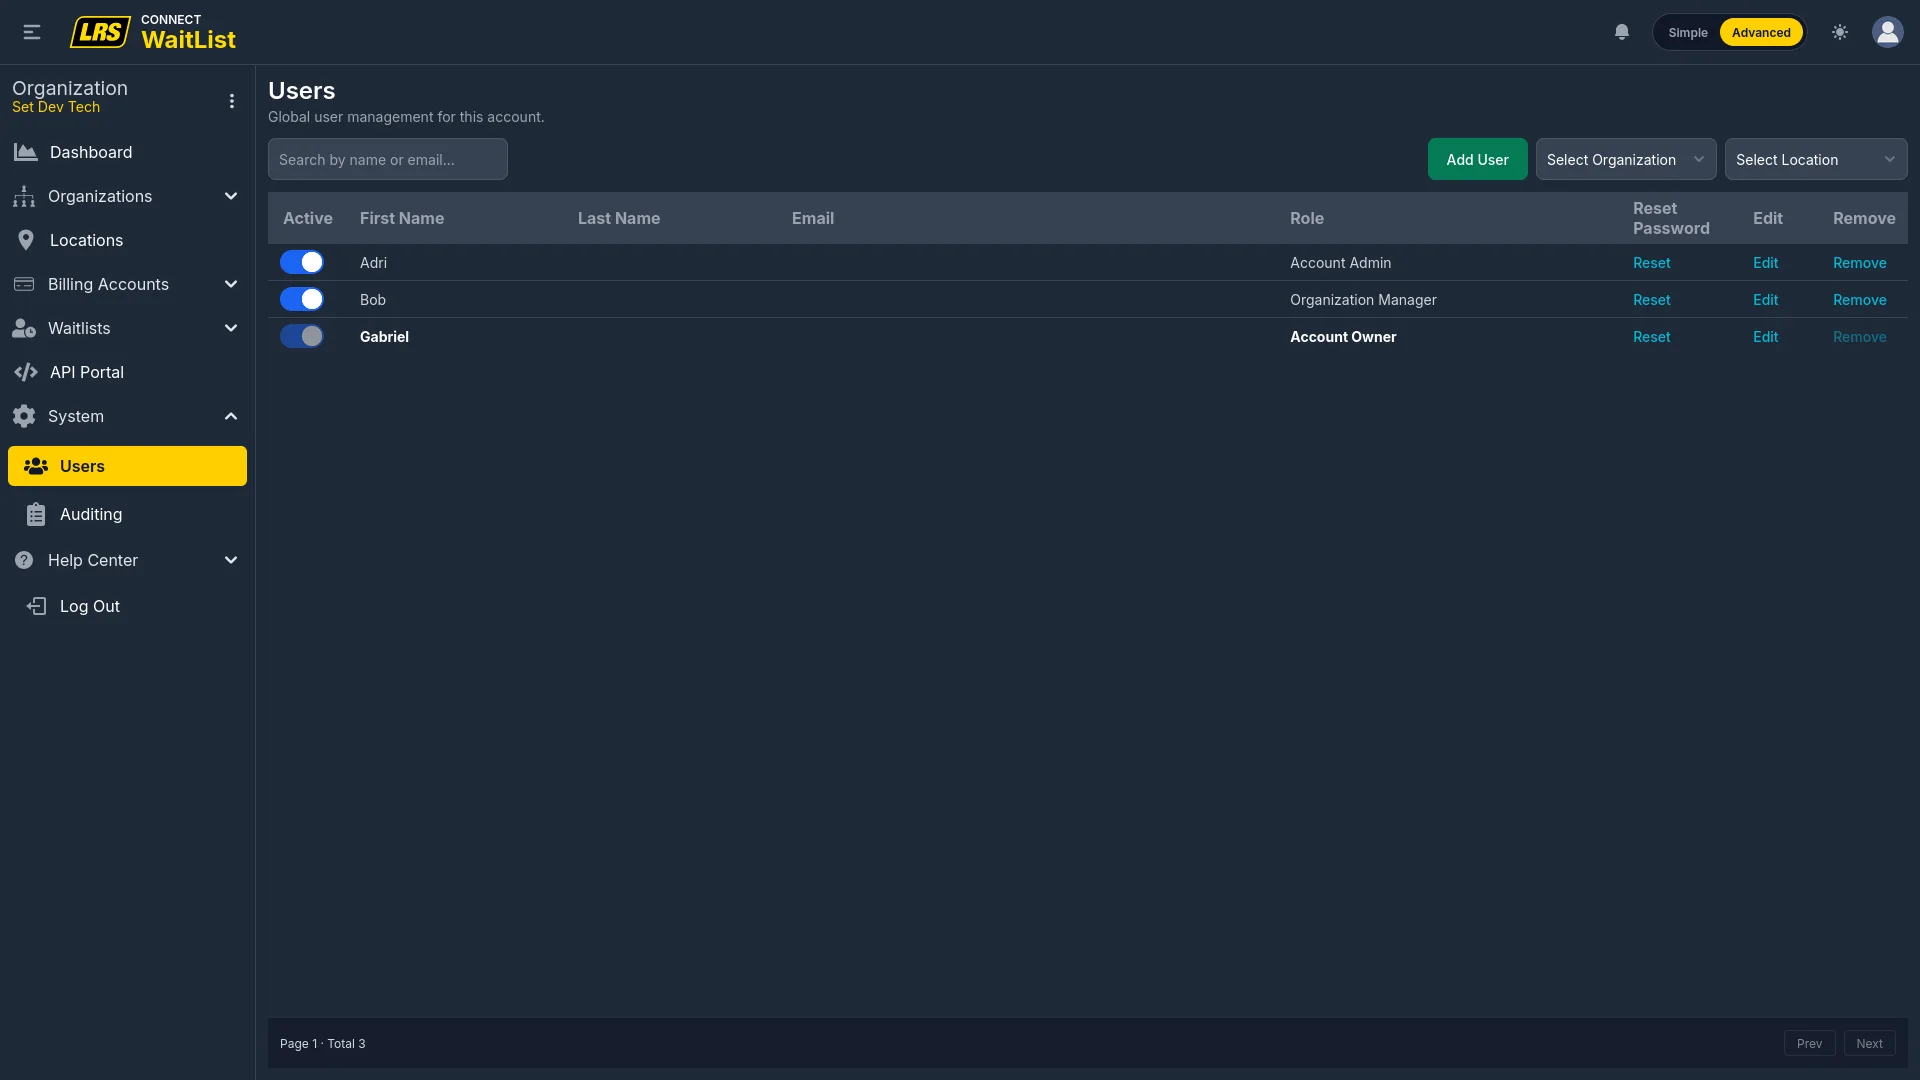
The Users page lists every user in the account in one place. The Select Organization and Select Location dropdowns filter the list by access scope — useful in large accounts. The Role column shows each user's highest role: Account Admin, Organization Manager, or Account Owner. Account admins can reset passwords directly from the list without opening the edit form. The Account Owner's Remove action is permanently disabled.
Clicking Edit on a user opens a single form with two areas. The top User Profile section edits the user's name, email, and lock password. Below it, the Account Admin toggle and per-organization sections let admins control every permission in one place: org-manager access per organization, and location roles with report subscriptions — all without switching context.
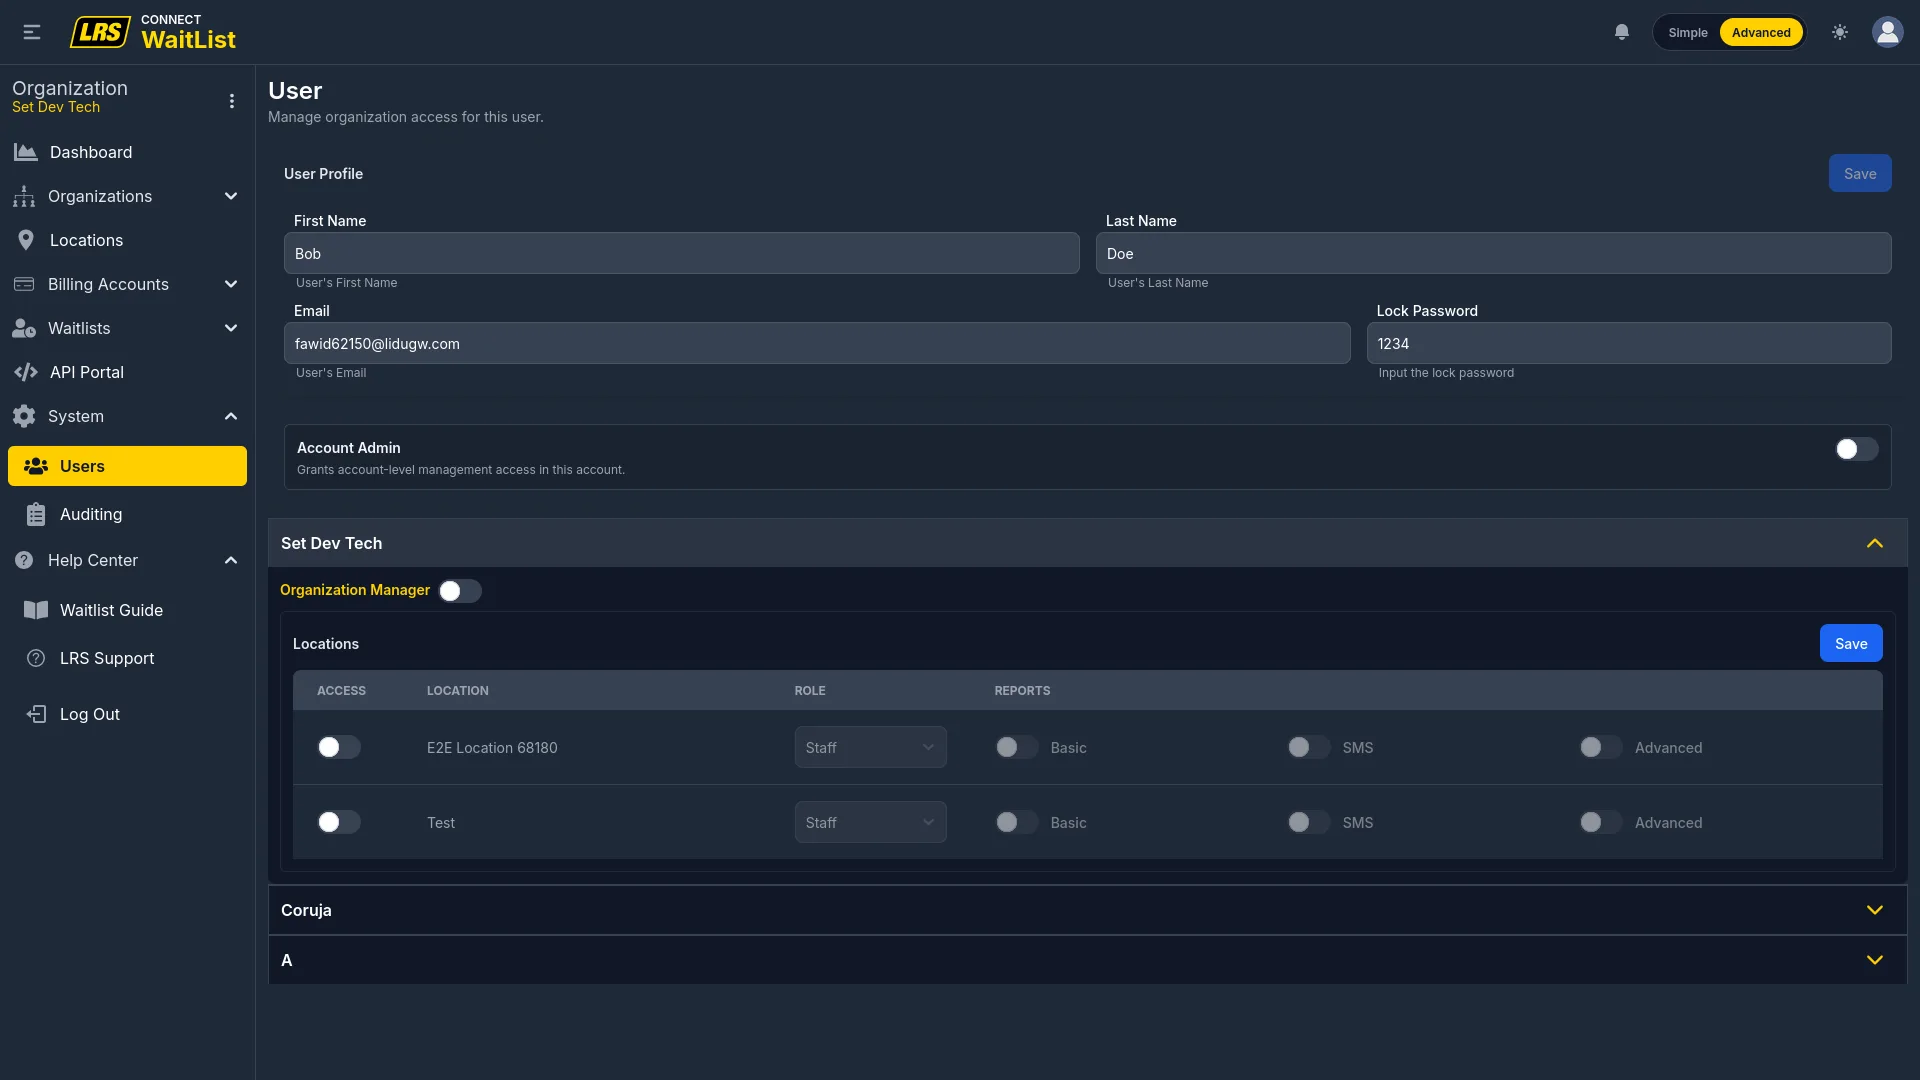
| Control | What it does |
|---|---|
| User Profile (top section) | Edits the user's first name, last name, email, and lock password — the PIN used when the Waitlist screen lock is enabled at their locations. |
| Account Admin toggle | Grants full account-level access equivalent to the owner for this user. |
| Organization Manager (per org) | Toggles org-manager access independently for each organization. |
| Location access row | Sets access, role (Staff or Location Manager), and report subscriptions per location. |
| Reset Password (list) | Sends a password reset email directly from the list without opening the edit form. |
The Auditing tab logs every configuration change made across Dashboard, the Waitlist app, and the API — showing who made it, when, and what changed. Use the keyword search, application filter, and date range to narrow the list. Click Refresh to pull in changes since the page last loaded.

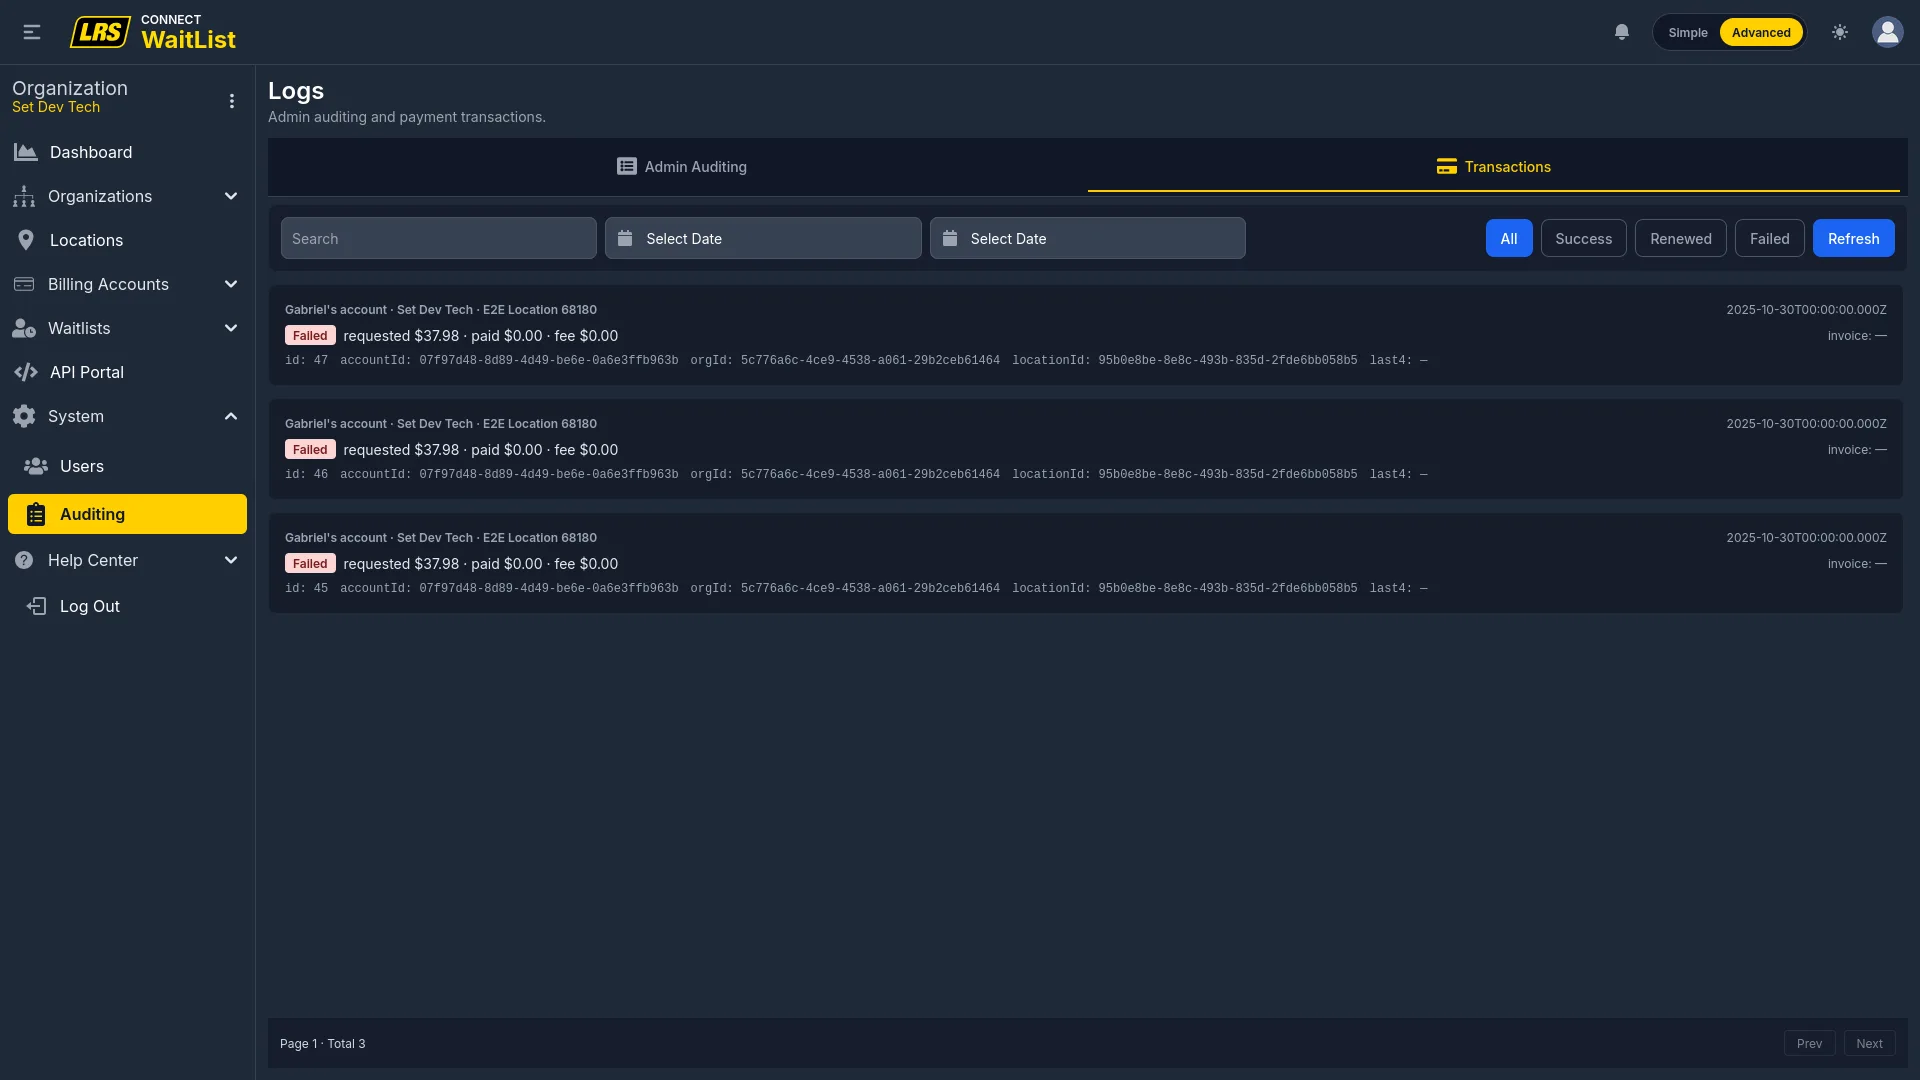
The Transactions tab shows the billing history for the account. Each entry shows which location was charged, the date, the amount, and the outcome — Success, Renewed, or Failed. Where available, a link to the invoice is included for follow-up.
9. Troubleshooting
Confirm the user has a location manager or org manager assignment. Staff without a manager role cannot see Dashboard configuration menus.
Only account owners and account admins can create organizations. Org managers can manage existing organizations but cannot add new ones.
Check that the location has an active service plan, a billing account with a valid payment method, and at least one active guestlist with one active area.
In the Guestlist workspace, confirm a Kiosk Area is selected and that the selected area has at least one field set to visible in Kiosk Mode in the Form Designer. Use the View button next to the Kiosk Area dropdown to launch — opening a direct URL bypasses the required session token and will not initialize kiosk mode.
Confirm the area has the remote check-in link generated, that Hours of Operation has Remote Check-in hours set for today, and that those hours are currently active.
Use the Test button on the Transmitters tab to send a live signal. Verify that the POCSAG, system ID, and station ID on the record match what is printed on the transmitter hardware.
Check the SMS Usage tab for remaining allowance. Verify the entry has a Pager/Phone number and that the service plan includes SMS messaging.
Verify the key is Active, the target location is listed in the key's Manage view, and the correct Key ID and Secret are in the request headers.
Uncheck all location assignments in the billing account detail first. A billing account with active location assignments cannot be removed.
Confirm the Quoted field is active on the form and a quoted wait time is set on the entry. Programmed Notifications use the quoted or target time as their reference.